Sony HCD-E300 Operating Instructions - Page 42
Adjusting pictures for videos, Adjusting the delay between the picture and sound
 |
View all Sony HCD-E300 manuals
Add to My Manuals
Save this manual to your list of manuals |
Page 42 highlights
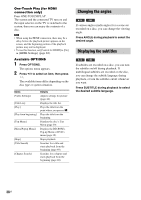
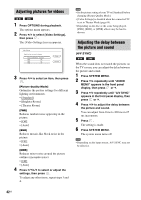
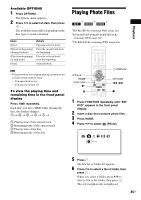
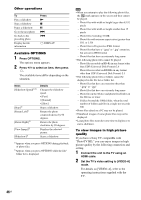
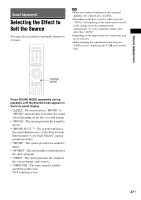
Adjusting pictures for videos 1 Press OPTIONS during playback. The options menu appears. 2 Press X/x to select [Video Settings], then press . The [Video Settings] screen appears. Video Settings Select the item you want to change. Picture Quality Mode Standard FNR BNR MNR Close Standard 3 Press X/x to select an item, then press . [Picture Quality Mode] Optimizes the picture settings for different lighting environments. • [Standard] • [Brighter Room] • [Theater Room] [FNR] Reduces random noise appearing in the picture. • [Off] • [Auto] [BNR] Reduces mosaic-like block noise in the picture. • [Off] • [Auto] [MNR] Reduces minor noise around the picture outlines (mosquito noise). • [Off] • [Auto] 4 Press C/X/x/c to select or adjust the settings, then press . To adjust any other items, repeat steps 3 and 4. Note • Set the picture setting of your TV to [Standard] before changing [Picture Quality Mode]. • [Video Settings] is disabled when the connected TV is set to Theater Mode (page 64). • Depending on the disc or the scene being played, [FNR], [BNR], or [MNR] effects may be hard to discern. Adjusting the delay between the picture and sound (A/V SYNC) When the sound does not match the pictures on the TV screen, you can adjust the delay between the picture and sound. 1 Press SYSTEM MENU. 2 Press X/x repeatedly until "AUDIO MENU" appears in the front panel display, then press or c. 3 Press X/x repeatedly until "A/V SYNC" appears in the front panel display, then press or c. 4 Press X/x to adjust the delay between the picture and sound. You can adjust from 0 ms to 300 ms in 25 ms increments. 5 Press . The setting is made. 6 Press SYSTEM MENU. The system menu turns off. Note • Depending on the input stream, A/V SYNC may not be effective. 42US
-
 1
1 -
2
-
3
-
4
-
5
-
6
-
7
-
8
-
9
-
10
-
11
-
12
-
13
-
14
-
15
-
16
-
17
-
18
-
19
-
20
-
21
-
22
-
23
-
24
-
25
-
26
-
27
-
28
-
29
-
30
-
31
-
32
-
33
-
34
-
35
-
36
-
 37
37 -
 38
38 -
 39
39 -
 40
40 -
 41
41 -
 42
42 -
 43
43 -
 44
44 -
 45
45 -
 46
46 -
 47
47 -
48
-
49
-
50
-
51
-
52
-
53
-
54
-
55
-
56
-
57
-
58
-
59
-
60
-
61
-
62
-
63
-
64
-
65
-
66
-
67
-
68
-
69
-
70
-
71
-
72
-
73
-
74
-
75
-
76
-
77
-
78
-
79
-
80
-
81
-
82
-
83
-
84
-
85
-
86
-
87
-
88
-
89
-
90
-
91
-
92
-
93
-
94
-
95
-
96
-
97
-
98
-
99
-
100
-
101
-
102
-
103
-
104
-
105
-
106
-
107
-
108
-
109
-
110
-
111
-
112
-
113
-
114
-
115
-
116
-
117
-
118
-
119
 |
 |