Sony HCD-E300 Operating Instructions - Page 56
Using an S-AIR Product, Inserting the wireless transmitter/transceiver, Inserting the wireless
 |
View all Sony HCD-E300 manuals
Add to My Manuals
Save this manual to your list of manuals |
Page 56 highlights
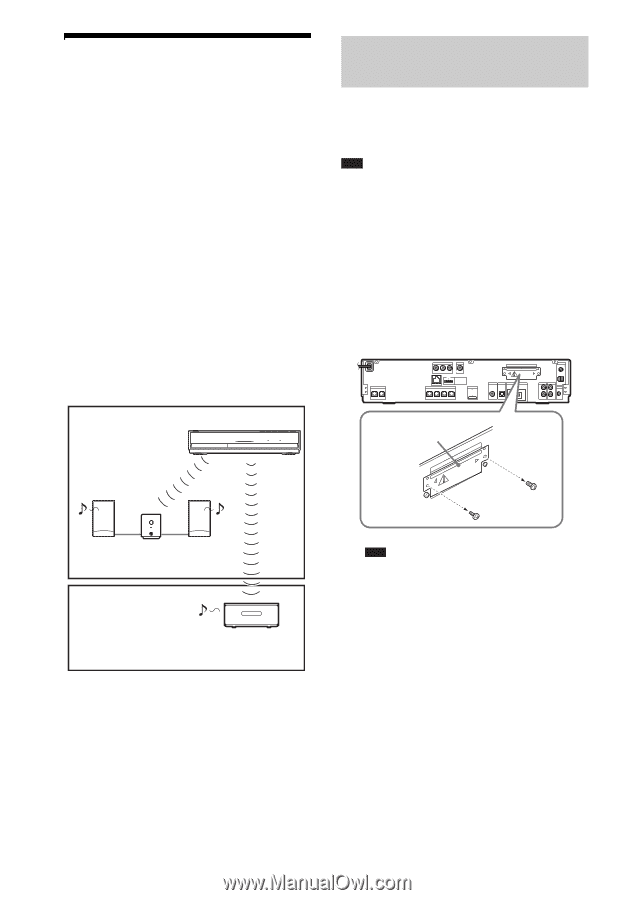
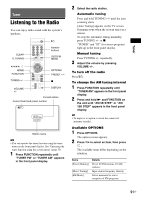
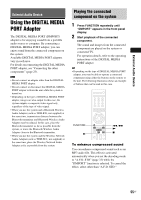
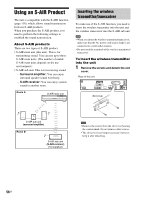
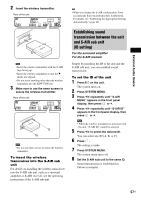
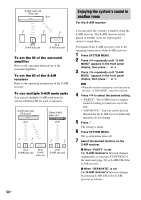
Using an S-AIR Product The unit is compatible with the S-AIR function (page 116), which allows sound transmission between S-AIR products. When you purchase the S-AIR product, you need to perform the following settings to establish the sound transmission. About S-AIR products There are two types of S-AIR product. • S-AIR main unit (this unit): This is for transmitting sound. You can use up to three S-AIR main units. (The number of usable S-AIR main units depends on the use environment.) • S-AIR sub unit: This is for receiving sound. - Surround amplifier: You can enjoy surround speaker sound wirelessly. - S-AIR receiver: You can enjoy system sound in another room. Room A S-AIR main unit Inserting the wireless transmitter/transceiver To make use of the S-AIR function, you need to insert the wireless transmitter into the unit and the wireless transceiver into the S-AIR sub unit. Note • When you insert the wireless transmitter/transceiver, make sure that the AC power cord (mains lead) is not connected to a wall outlet (mains). • Do not touch the terminals of the wireless transmitter/ transceiver. To insert the wireless transmitter into the unit 1 Remove the screws and detach the slot cover. Rear of the unit SPEAKER CENTER SUBWOOFER COMPONENT VIDEO OUT VIDEO OUT Y PB / CB PR / CR LAN(100) SPEAKER HDMI OUT DMPORT DC5V 700mA MAX FRONT R FRONT L SUR R SUR L EZW-T100 SAT/CABLE TV DIGITAL IN DIGITAL IN EXT DC5V 500mA MAX COAXIAL OPTICAL ANTENNA COAXIAL 75 FM TV L R AUDIO IN AUDIO AM L A. CAL MIC ECM-AC2 R AUDIO IN Slot cover EZW-T100 S-AIR sub unit (surround amplifier) Room B S-AIR sub unit (S-AIR receiver) (not supplied) Note • Remove the screws from the slot cover bearing the caution mark. Do not remove other screws. • The slot cover is no longer necessary; however, keep it after detaching. 56US
-
 1
1 -
2
-
3
-
4
-
5
-
6
-
7
-
8
-
9
-
10
-
11
-
12
-
13
-
14
-
15
-
16
-
17
-
18
-
19
-
20
-
21
-
22
-
23
-
24
-
25
-
26
-
27
-
28
-
29
-
30
-
31
-
32
-
33
-
34
-
35
-
36
-
37
-
38
-
39
-
40
-
41
-
42
-
43
-
44
-
45
-
46
-
47
-
48
-
49
-
50
-
 51
51 -
 52
52 -
 53
53 -
 54
54 -
 55
55 -
 56
56 -
 57
57 -
 58
58 -
 59
59 -
 60
60 -
 61
61 -
62
-
63
-
64
-
65
-
66
-
67
-
68
-
69
-
70
-
71
-
72
-
73
-
74
-
75
-
76
-
77
-
78
-
79
-
80
-
81
-
82
-
83
-
84
-
85
-
86
-
87
-
88
-
89
-
90
-
91
-
92
-
93
-
94
-
95
-
96
-
97
-
98
-
99
-
100
-
101
-
102
-
103
-
104
-
105
-
106
-
107
-
108
-
109
-
110
-
111
-
112
-
113
-
114
-
115
-
116
-
117
-
118
-
119
 |
 |