Sony HCD-E300 Operating Instructions - Page 76
Updating the system’s software using an update disc, [Video Settings], Updating the system's
 |
View all Sony HCD-E300 manuals
Add to My Manuals
Save this manual to your list of manuals |
Page 76 highlights
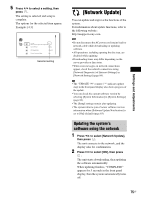
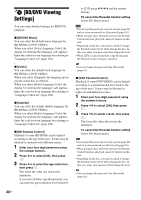
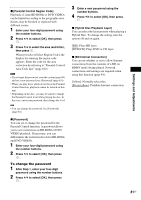
3 Press "/1 to turn the system on. The system starts up with the updated software. Updating the system's software using an update disc You can update and improve the functions of the system using an update disc provided by a Sony dealer or local authorized Sony service facility. 1 Insert the update disc. The display asks for confirmation. 2 Select [OK], and press . Software update starts. When updating finishes, "COMPLETE" appears for 5 seconds in the front panel display, then the system automatically turns off. 3 Press "/1 to turn the system on. The system starts up with the updated software. 4 Press Z to remove the disc. [Video Settings] You can make the video settings according to the type of connecting jacks. x [TV Type] You can select the aspect ratio of the connected TV. [16:9]: Select this when connecting to a widescreen TV or a TV with a wide-mode function. [4:3]: Select this when connecting to a 4:3 screen TV without a wide-mode function. x [Screen Format] You can select the display configuration for a 4:3 screen picture on a 16:9 wide-screen TV. [Original]: Select this when connecting to a TV with a wide-mode function. Displays a 4:3 screen picture in 16:9 aspect ratio even on a wide-screen TV. [Fixed Aspect Ratio]: Changes the picture size to fit the screen size with the original picture aspect ratio. x [DVD Aspect Ratio] You can select the display configuration for playback of 16:9 screen pictures on a 4:3 screen TV (selectable when [TV Type] is set to [4:3] and [Screen Format] is set to [Fixed Aspect Ratio]). [Letter Box]: Displays a wide picture with black bands on the top and bottom. [Pan & Scan]: Displays a full-height picture on the entire screen, with trimmed sides. 76US
-
 1
1 -
2
-
3
-
4
-
5
-
6
-
7
-
8
-
9
-
10
-
11
-
12
-
13
-
14
-
15
-
16
-
17
-
18
-
19
-
20
-
21
-
22
-
23
-
24
-
25
-
26
-
27
-
28
-
29
-
30
-
31
-
32
-
33
-
34
-
35
-
36
-
37
-
38
-
39
-
40
-
41
-
42
-
43
-
44
-
45
-
46
-
47
-
48
-
49
-
50
-
51
-
52
-
53
-
54
-
55
-
56
-
57
-
58
-
59
-
60
-
61
-
62
-
63
-
64
-
65
-
66
-
67
-
68
-
69
-
70
-
 71
71 -
 72
72 -
 73
73 -
 74
74 -
 75
75 -
 76
76 -
 77
77 -
 78
78 -
 79
79 -
 80
80 -
 81
81 -
82
-
83
-
84
-
85
-
86
-
87
-
88
-
89
-
90
-
91
-
92
-
93
-
94
-
95
-
96
-
97
-
98
-
99
-
100
-
101
-
102
-
103
-
104
-
105
-
106
-
107
-
108
-
109
-
110
-
111
-
112
-
113
-
114
-
115
-
116
-
117
-
118
-
119
 |
 |