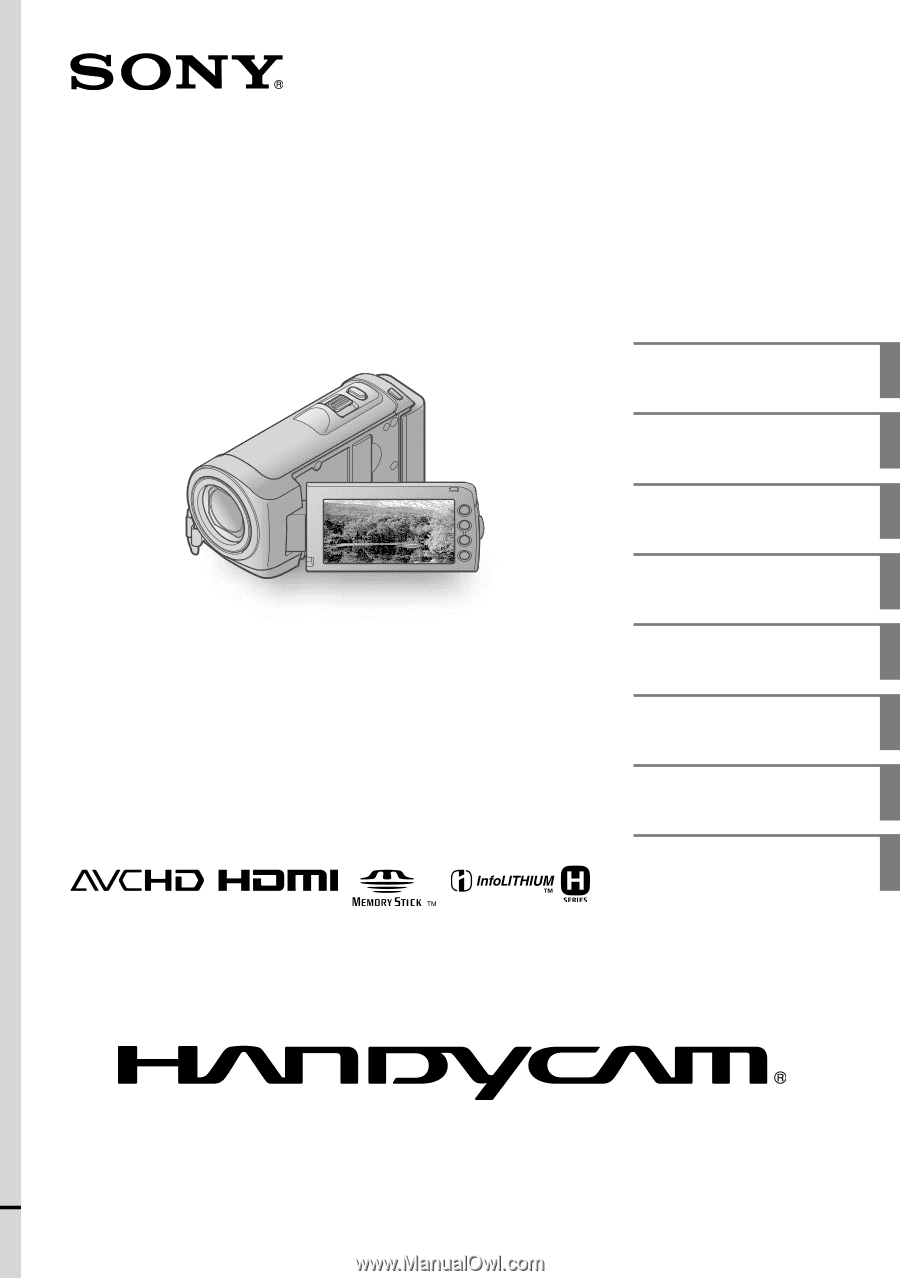
Sony HDR-CX100E Operation Guide
Sony HDR-CX100E - Pal High Definition Handycam Camcorder Manual
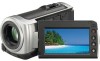 |
UPC - 411378078841
View all Sony HDR-CX100E manuals
Add to My Manuals
Save this manual to your list of manuals |
Sony HDR-CX100E manual content summary:
- Sony HDR-CX100E | Operation Guide - Page 1
Getting started 10 Recording 14 HDR-CX100E/CX105E/CX106E Digital HD Video Camera Recorder Operating Guide Playback 18 Saving movies and photos 23 with a computer Saving images with a DVD 35 writer, recorder Making good use of your 39 camcorder Additional information 49 2009 Sony Corporation - Sony HDR-CX100E | Operation Guide - Page 2
Sony battery charger or a device that can charge the battery pack. Keep the battery pack out of the reach of small children. Keep the battery pack dry. Replace only with the same or equivalent type recommended by Sony. Dispose of used battery packs promptly as described in the instructions - Sony HDR-CX100E | Operation Guide - Page 3
service or guarantee documents. ATTENTION The electromagnetic fields at the specific frequencies may influence the picture and sound of this unit. This product has been tested handling of the battery. The recycling of the materials will help to conserve natural resources. In case of products that - Sony HDR-CX100E | Operation Guide - Page 4
(1) USB cable (1) Rechargeable battery pack NP-FH50 (1) CD-ROM "Handycam Application Software" (1) (p. 23) "PMB" (software, including "PMB Guide") "Handycam Handbook" (PDF) "Operating Guide" (This manual) (1) See page 41 for the "Memory Stick" media you can use with this camcorder. - Sony HDR-CX100E | Operation Guide - Page 5
Memory Stick PRO Duo" media removing the battery pack or AC Adaptor from the camcorder Do not apply shock or vibration to the camcorder. The camcorder or recorded. In such a case, save your images on test the recording function to make sure the image and sound are recorded without any problems - Sony HDR-CX100E | Operation Guide - Page 6
Guide, the internal memory of the camcorder and "Memory Stick PRO Duo" media are called "recording media." In this Operating Guide, both "Memory Stick PRO Duo" media and "Memory Stick PRO-HG Duo" media are referred as "Memory Stick PRO Duo" media. You will find the "Handycam Handbook" (PDF - Sony HDR-CX100E | Operation Guide - Page 7
photos are recorded with high definition image quality (HD) on the internal memory. You can change the recording media selected, and the image quality 45). Playing movies and photos (p. 18) Playing movies and photos on your camcorder (p. 18) Playing movies and photos on a connected TV (p. 21) - Sony HDR-CX100E | Operation Guide - Page 8
pack 10 Charging the battery pack abroad 11 Step 2: Turning the power on, and setting the date and time 12 Changing the language setting 13 Recording Recording 14 Recording and playing movies and photos easily (Easy Handycam operation 17 Playback Playback on the camcorder 18 Playing images on - Sony HDR-CX100E | Operation Guide - Page 9
photos from the internal memory to "Memory Stick PRO Duo" media 41 Customizing your camcorder with menus 42 Using the HELP function 42 Getting detailed information from the "Handycam Handbook 48 Additional information Troubleshooting 49 Precautions 51 Specifications 53 Screen indicators 57 - Sony HDR-CX100E | Operation Guide - Page 10
) You can charge the "InfoLITHIUM" battery pack (H series) after attaching it to your camcorder. You cannot attach any "InfoLITHIUM" battery pack other than the H series to your camcorder. 1 Turn off your camcorder by closing the LCD screen. 2 Attach the battery pack by sliding it in the - Sony HDR-CX100E | Operation Guide - Page 11
. In the default setting, the power turns off automatically if you leave your camcorder without any operation for about 5 minutes, to save battery power ([A.SHUT OFF]). Charging the battery pack abroad You can charge the battery pack in any countries/regions using the AC Adaptor supplied with your - Sony HDR-CX100E | Operation Guide - Page 12
Step 2: Turning the power on, and setting the date and time 1 Open the LCD screen of your camcorder. Your camcorder is turned on. To turn on your camcorder when the LCD screen is already open, press POWER. POWER button (Movie): To record movies (Photo): To record photos 2 Select the desired - Sony HDR-CX100E | Operation Guide - Page 13
) lamp flashes for a few seconds and the power is turned POWER button You can turn off your camcorder also by pressing POWER. When [POWER ON BY LCD] is set to [OFF], turn off your camcorder by pressing POWER (p. 46). Changing the language setting You can change the on-screen displays to show - Sony HDR-CX100E | Operation Guide - Page 14
are recorded with high definition image quality (HD) on the internal memory (p. 40, 45). Fasten the grip belt. Open the lens cover. Open the LCD screen of your camcorder. Your camcorder is turned on. To turn on your camcorder when the LCD screen is already open, press POWER (p. 12 - Sony HDR-CX100E | Operation Guide - Page 15
angle of the LCD panel, first open the LCD panel 90 degrees to the camcorder (), and then adjust the angle (). If you rotate the LCD panel 180 degrees . 90 degrees (max.) 180 degrees (max.) 90 degrees to the camcorder When you open or close the LCD screen, or adjust the angle, be careful - Sony HDR-CX100E | Operation Guide - Page 16
the movies. Refer to the instruction manuals of the TV. Shooting photos In the default setting, photos are recorded on the internal memory (p. 40). Open the lens cover. Open the LCD screen of your camcorder. Your camcorder is turned on. To turn on your camcorder when the LCD screen is - Sony HDR-CX100E | Operation Guide - Page 17
Recording Press PHOTO lightly to adjust the focus, then press it fully. Power zoom lever Wide among the setting and adjustment items. Other items are set automatically. When Easy Handycam operation is started, nearly all menu settings are reset to the default settings automatically - Sony HDR-CX100E | Operation Guide - Page 18
movies and photos on the internal memory are played (p. 40, 45). Playing movies Open the LCD screen of your camcorder. Your camcorder is turned on. To turn on your camcorder when the LCD screen is already previous time. ( appears on the photo recorded on the "Memory Stick PRO Duo" media.) 18 - Sony HDR-CX100E | Operation Guide - Page 19
Your camcorder starts playing the selected movie. Previous Volume adjustment To stop To fast-reverse Next OPTION MENU To fast-forward To pause/play When playback from - Sony HDR-CX100E | Operation Guide - Page 20
Your camcorder displays the selected photo. Previous To the VISUAL INDEX screen To start/stop slide show Next OPTION MENU in the PB ZOOM frame, the point comes to the center in the frame. When viewing photos recorded on "Memory Stick PRO Duo" media, (playback folder) appears on the screen. 20 - Sony HDR-CX100E | Operation Guide - Page 21
the connected jack. Refer to the instruction manuals of the TV. Turn on your camcorder, and touch (HOME) CONNECT Guide] on the LCD screen. (OTHERS) your camcorder (p. 18). Make the required output settings on your camcorder. To connect a high definition TV via component video jacks: - Sony HDR-CX100E | Operation Guide - Page 22
To connect a non-high-definition TV via component video jacks: (HOME) (SETTINGS) [OUTPUT SETTINGS] default setting On "Photo TV HD" This camcorder is compatible with the "Photo TV HD" colors. By connecting Sony's Photo TV HD- instruction manual of your Photo TV HD- compatible TV for details. 22 - Sony HDR-CX100E | Operation Guide - Page 23
memory of your camcorder from a computer. Your camcorder may not operate correctly. This camcorder captures high definition footage in the AVCHD format. Using the enclosed PC software format disc/DVD-video (Intel Pentium 4, 2.8 GHz or faster, is required when creating a DVD video by converting high - Sony HDR-CX100E | Operation Guide - Page 24
camcorder, see the following website. http://guide.d-imaging.sony.co.jp/mac/ ms/us/ Step 2 Installing the supplied software "PMB" Install "PMB" before connecting your camcorder . See page 48 on the "Handycam Handbook". Confirm that your camcorder is not connected to the computer. - Sony HDR-CX100E | Operation Guide - Page 25
instructions to install the required software. Restart the computer if required to complete the installation. When the installation is completed, following icons will appear. Remove the CD-ROM from your computer. To disconnect your camcorder ] on the camcorder screen. -on Software for - Sony HDR-CX100E | Operation Guide - Page 26
HD) movies or photos recorded on your camcorder are described here. Select the method PLAYSTATION3, etc.) AVCHD format playback devices (a Sony Blu-ray disc player, PLAYSTATION3, etc.) To create a Blu-ray disc, the BD Add-on Software for "PMB" must be installed (p. 32). Characteristics of each - Sony HDR-CX100E | Operation Guide - Page 27
." For Blu-ray disc, see page 32. Disc type DVD-R/DVD+R/DVD+R DL Features Unrewritable DVD-RW/DVD+RW Rewritable Always maintain your PLAYSTATION3 to use the latest version of the PLAYSTATION3 system software. The PLAYSTATION3 may not be available in some countries/regions. Saving movies - Sony HDR-CX100E | Operation Guide - Page 28
BURN) on your camcorder, you can save movies and photos recorded on the internal memory only. 1 Turn software than "PMB" starts automatically, shut it down. 2 Turn on your camcorder, and connect it to the computer using the USB cable (supplied). 3 Press (DISC BURN). 4 Follow the instructions - Sony HDR-CX100E | Operation Guide - Page 29
high definition image quality (HD) movies from your computer to your camcorder (HDR-CX100E). On the "PMB" screen, click [Manipulate] [Export to] [Handycam (Internal Memory)] or [Handycam (Memory Stick)]. See "PMB Guide" for details (p. 30). Changing the destination drive or folder for movies - Sony HDR-CX100E | Operation Guide - Page 30
on how to use "PMB," read the "PMB Guide." Double-click the "PMB Guide" short-cut icon on the computer screen to open the "PMB Guide." If the icon is not displayed on the computer screen, click [Start] [All Programs] [Sony Picture Utility] [Help] [PMB Guide]. You can also open the "PMB - Sony HDR-CX100E | Operation Guide - Page 31
disc on AVCHD format playback devices, such as a Sony Blu-ray disc player and a PLAYSTATION3. You cannot play of discs you can use. If any other software than "PMB" starts automatically, shut it down. the window for selecting movies. 5 Follow the instructions on the screen to create a disc. - Sony HDR-CX100E | Operation Guide - Page 32
plug-in according to the on-screen instructions. Connect your computer to the internet when you install [BD Add-on Software]. Place an empty Blu-ray disc creating a high definition image quality (HD) disc. Your computer must support the creation of Blu-ray discs. BD-R (unrewritable) and BD-RE - Sony HDR-CX100E | Operation Guide - Page 33
and drag and drop onto the window for selecting movies and photos. 5 Follow the instructions on the screen to create a disc. It may take a long time to [Start] [All Programs] [Sony Picture Utility] [Video Disc Copier] to start the software. See "Video Disc Copier" help on the operation. - Sony HDR-CX100E | Operation Guide - Page 34
movie and save it as another file. Using "PMB," select the movie you want to edit, then click [Manipulate] [Video Trimming] on the menu to display the Video Trimming window. See "PMB Guide" on the operation (p. 30). Capturing photos from a movie You can save a frame of a movie as a photo file. On - Sony HDR-CX100E | Operation Guide - Page 35
quality (HD) movies or photos recorded on your camcorder are described here. Select the method that suits Blu-ray disc. Player AVCHD format playback devices (a Sony Blu-ray disc player, PLAYSTATION3, etc.) Choosing a latest version of the PLAYSTATION3 system software. The PLAYSTATION3 may not - Sony HDR-CX100E | Operation Guide - Page 36
to eject the disc. Sony DVD writer may not be available in some countries/regions. The [USB SELECT] screen appears on the camcorder screen. 2 Touch [ USB CONNECT] when movies are recorded on the internal memory, or [ USB CONNECT] when movies are recorded on a "Memory Stick PRO Duo" media on the - Sony HDR-CX100E | Operation Guide - Page 37
dub images played back on your camcorder on a disc or video cassette, by connecting your camcorder to a disc recorder or a Sony DVD writer, etc. with the A/V connecting cable. Connect the device in either way of or . Refer also to the instruction manuals supplied with the devices to be connected - Sony HDR-CX100E | Operation Guide - Page 38
instruction manuals supplied with your recording device for details. 4 When dubbing is finished, stop the recording device, and then your camcorder To record the date/time or camera settings data, touch (HOME) ( of the A/V connecting cable to the video input jack, and the white (left channel - Sony HDR-CX100E | Operation Guide - Page 39
[YES] . While [Executing...] is displayed, do not close the LCD screen, oprate the buttons on the camcorder, disconnect the AC Adaptor, or eject the "Memory Stick PRO Duo" media from your camcorder. (The access lamp is lit or flashing while formatting the medium.) To delete all movies at - Sony HDR-CX100E | Operation Guide - Page 40
and photos are recorded on the internal memory. Movies Internal memory "Memory Stick" media Photos You can do recording, playback, and editing operations on the selected medium. See page 54 for the recordable time of movies. See the "Handycam Handbook" (p. 48) for number of recordable - Sony HDR-CX100E | Operation Guide - Page 41
of up to 16 GB are confirmed to work with this camcorder. Open the "Memory Stick Duo" media cover, and insert the "Memory Stick PRO Duo" media into the "Memory Stick Duo" media slot until it clicks. If you force the "Memory Stick PRO Duo" media into the slot in the wrong direction, the - Sony HDR-CX100E | Operation Guide - Page 42
Handycam Handbook" (p. 48). Using the HOME MENU When you press the (HOME) button, the HOME MENU appears. You can change the settings of your camcorder you can change in the context appear. (OPTION) Category Follow the instruction on the screen. After completing the setting, touch . When - Sony HDR-CX100E | Operation Guide - Page 43
You cannot use the OPTION MENU during Easy Handycam operation. 43 Making good use of your camcorder - Sony HDR-CX100E | Operation Guide - Page 44
List of the HOME MENU (CAMERA) category MOVIE p. 14 PHOTO p. 16 SMTH SLW REC Records fast moving subjects in slow-motion. (VIEW IMAGES a playlist. USB CONNECT USB CONNECT........... Connects the internal hard disk via USB. USB CONNECT.......... Connects the "Memory Stick PRO Duo" media via USB. 44 - Sony HDR-CX100E | Operation Guide - Page 45
DISC BURN p. 28 TV CONNECT Guide p. 21 BATTERY INFO Displays the battery information. (MANAGE MEDIA) category MOVIE to be displayed. CONVERSION LENS....... Optimizes the Steadyshot function and focus according to the attached lens. AUTO BACK LIGHT......... Adjusts the good use of your camcorder - Sony HDR-CX100E | Operation Guide - Page 46
whether the on-screen displays appears on the TV screen or not. COMPONENT p. 21 HDMI RESOLUTION....... Sets the output image resolution when connecting your camcoder to a TV with an HDMI cable. CLOCK/ LANG CLOCK SET [SOUND/DISP SET] is changed to [SOUND SETTINGS] during Easy Handycam operation. 46 - Sony HDR-CX100E | Operation Guide - Page 47
screen. TELE MACRO Shoots a subject in focus with, the background out of focus. EXPOSURE Adjusts the brightness of movies and photos. FOCUS Focuses manually. SCENE SELECTION......... Selects an appropriate recording repetition option for the slide show. 47 Making good use of your camcorder - Sony HDR-CX100E | Operation Guide - Page 48
on your computer, you can download it from the Adobe Systems web page: http://www.adobe.com/ Refer to "PMB Guide" for details on the supplied software "PMB" (p. 30). 3 Select the desired language and the model name of your camcorder, then click [Handycam Handbook (PDF)]. The model name of - Sony HDR-CX100E | Operation Guide - Page 49
data stored on the internal memory in order to investigate the problem. However, your Sony dealer will neither copy nor retain your data. See the "Handycam Handbook" (p. 48) for details on the symptoms of your camcorder, and "PMB Guide" (p. 30) on connecting your camcorder to a computer. The power - Sony HDR-CX100E | Operation Guide - Page 50
Memory Stick PRO Duo" media with your camcorder (p. 39). Incompatible "Memory Stick Duo" media is inserted (p. 41). Access to the "Memory Stick PRO Duo" media was restricted on another device. The camcorder is unsteady. Hold the camcorder steady with both hands. However, note that the camera - Sony HDR-CX100E | Operation Guide - Page 51
. This damages the inside of the LCD screen. Operate your camcorder on DC 6.8 V/7.2 V (battery pack) or DC 8.4 V (AC Adaptor). For DC or AC operation, use the accessories recommended in these operating instructions. Do not let your camcorder get wet, for example, from rain or sea water. If - Sony HDR-CX100E | Operation Guide - Page 52
format the "Memory Stick PRO Duo" media on your camcorder or a computer, you may not delete data from the "Memory Stick PRO Duo" media completely. When you give the "Memory Stick PRO Duo" media to somebody, it is recommended that you delete data completely using data deletion software on a computer - Sony HDR-CX100E | Operation Guide - Page 53
pixels Lens: Carl Zeiss Vario-Tessar Optical: 10 Digital: 20 :120 (HDR-CX100E/CX105E) :150 (HDR-CX106E) Filter diameter: 30 mm (1 3/16 in.) F1.8 ~ 2.2 Focal length f=3.2 ~ 32 mm (5/32 ~ 1 5/16 in.) When converted to a 35 mm still camera For movies**: 42 ~ 497 mm (1 11/16 ~ 19 5/8 in.) (16:9) For - Sony HDR-CX100E | Operation Guide - Page 54
specifications of your camcorder and accessories are subject to change without notice. Manufactured under license from Dolby Laboratories. Expected charging and running time for the supplied battery ( ) is the minimum recordable time. A Sony "Memory Stick PRO Duo" media is used. The recordable - Sony HDR-CX100E | Operation Guide - Page 55
Measured when using the camcorder at 25 C (77 ˚F) (10 C to 30 C (50 ˚F to 86 ˚F) is recommended). The recording and playback time will be shorter in low temperatures, or depending on the conditions under which you use your camcorder. 55 Additional information - Sony HDR-CX100E | Operation Guide - Page 56
"Handycam" and are registered trademarks of Sony Corporation. "AVCHD" and "AVCHD" logotype are trademarks of Panasonic Corporation and Sony Corporation. "Memory Stick," " ," "Memory Stick Duo," " ," "Memory Stick PRO Duo," " ," "Memory Stick PRO-HG Duo," " ," "Memory Stick Micro - Sony HDR-CX100E | Operation Guide - Page 57
BLT-IN ZOOM MIC MICREF LEVEL low WIDE SELECT Remaining battery Return button Center Indicator [STBY]/[REC] Meaning Recording Bottom Indicator Meaning FACE DETECTION DETECTION SET Manual focus SCENE SELECTION White balance SteadyShot off camcorder models. 57 Additional information - Sony HDR-CX100E | Operation Guide - Page 58
OUT (mini) jack (21) (USB) jack (24, 28, 29, 36) (HDR-CX105E/CX106E: output only) (VIEW IMAGES) button (18) Access lamp ("Internal memory", "Memory Stick PRO Duo" media) (41) While the lamp is lit or flashing, the camcorder is reading or writing data. RESET button Press RESET to initialize - Sony HDR-CX100E | Operation Guide - Page 59
Power zoom lever (15, 17, 20) PHOTO button (17) MODE button (16) (Movie)/ (Photo) lamps (12) Battery pack (10) CHG (Charge) lamp (10) Speaker DC IN jack (10) A/V Remote Connector (21, 37) START/STOP button (15) Grip belt (14) Hook for a shoulder - Sony HDR-CX100E | Operation Guide - Page 60
58 S Screen indicators 57 Self-diagnosis display 50 Setting the date and time...........12 Software 24 Specifications 53 Supplied items 4 T Troubleshooting 49 Turning the power on 12 TV 21 TV CONNECT Guide 21 U USB 23, 36 Using a wall outlet (wall socket) as a power source 11 V VISUAL - Sony HDR-CX100E | Operation Guide - Page 61
- Sony HDR-CX100E | Operation Guide - Page 62
- Sony HDR-CX100E | Operation Guide - Page 63
- Sony HDR-CX100E | Operation Guide - Page 64
GB Additional information on this product and answers to frequently asked questions can be found at our Customer Support Website. http://www.sony.net/ Printed in China
-
 1
1 -
 2
2 -
 3
3 -
 4
4 -
 5
5 -
 6
6 -
 7
7 -
8
-
9
-
10
-
11
-
12
-
13
-
14
-
15
-
16
-
17
-
18
-
19
-
20
-
21
-
22
-
23
-
24
-
25
-
26
-
27
-
28
-
29
-
30
-
31
-
32
-
33
-
34
-
35
-
36
-
37
-
38
-
39
-
40
-
41
-
42
-
43
-
44
-
45
-
46
-
47
-
48
-
49
-
50
-
51
-
52
-
53
-
54
-
55
-
56
-
57
-
58
-
59
-
60
-
61
-
62
-
63
-
64
 |
 |
4-147-043-
11
(1)
Digital HD Video Camera Recorder
Operating Guide
2009 Sony Corporation
HDR-CX100E/CX105E/CX106E
Table of contents
8
Getting started
10
Recording
14
Playback
18
Saving movies and photos
with a computer
23
Saving images with a DVD
writer, recorder
35
Making good use of your
camcorder
39
Additional information
49