Sony HDR-CX190 Operating Guide - Page 44
Move the power zoom lever to, select the image you want - battery life
 |
View all Sony HDR-CX190 manuals
Add to My Manuals
Save this manual to your list of manuals |
Page 44 highlights
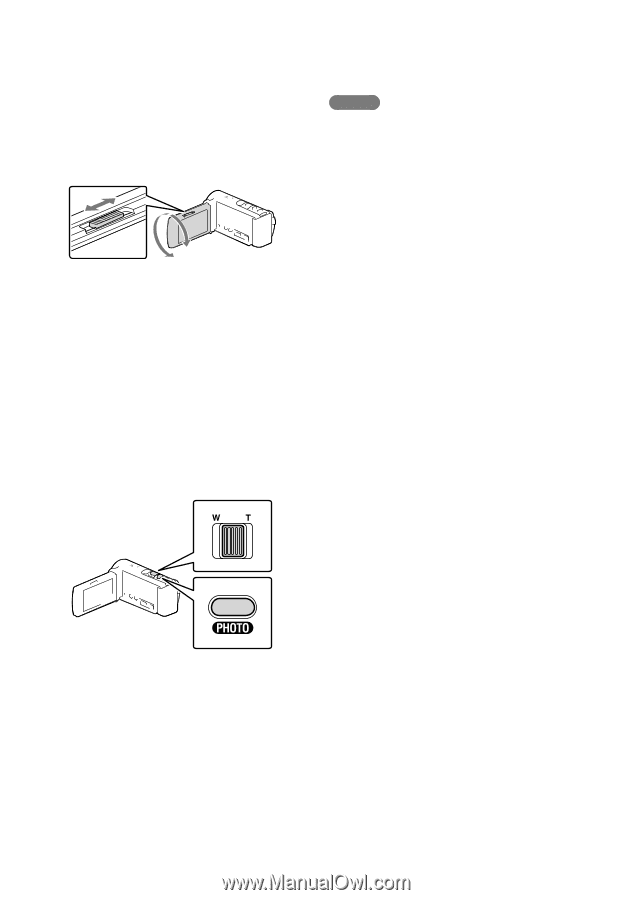
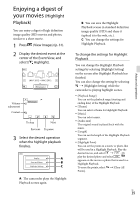
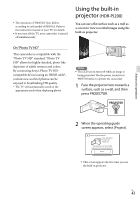
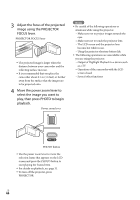
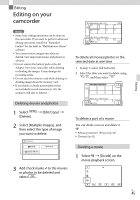
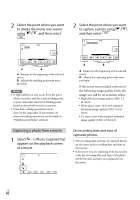
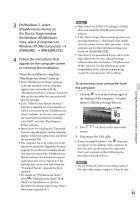
3 Adjust the focus of the projected image using the PROJECTOR FOCUS lever. PROJECTOR FOCUS lever The projected image is larger when the distance between your camcorder and the reflecting surface increase. It is recommended that you place the camcorder about 0.5 m (1.6 feet) or further away from the surface that the images are to be projected onto. 4 Move the power zoom lever to select the image you want to play, then press PHOTO to begin playback. Power zoom lever Notes Be careful of the following operations or situations while using the projector. Make sure not to project images towards the eyes. Make sure not to touch the projector lens. The LCD screen and the projector lens become hot while in use. Using the projector shortens battery life. The following operations are unavailable while you are using the projector. Output of Highlight Playback to a device such as a TV Operation of the camcorder with the LCD screen closed Several other functions PHOTO button Use the power zoom lever to move the selection frame that appears on the LCD screen and press the PHOTO button to start playing the framed item. For details on playback, see page 31. To turn off the projector, press PROJECTOR. US 44
-
 1
1 -
2
-
3
-
4
-
5
-
6
-
7
-
8
-
9
-
10
-
11
-
12
-
13
-
14
-
15
-
16
-
17
-
18
-
19
-
20
-
21
-
22
-
23
-
24
-
25
-
26
-
27
-
28
-
29
-
30
-
31
-
32
-
33
-
34
-
35
-
36
-
37
-
38
-
 39
39 -
 40
40 -
 41
41 -
 42
42 -
 43
43 -
 44
44 -
 45
45 -
 46
46 -
 47
47 -
 48
48 -
 49
49 -
50
-
51
-
52
-
53
-
54
-
55
-
56
-
57
-
58
-
59
-
60
-
61
-
62
-
63
-
64
-
65
-
66
-
67
-
68
-
69
-
70
-
71
-
72
-
73
-
74
-
75
-
76
-
77
-
78
-
79
-
80
-
81
-
82
-
83
-
84
-
85
-
86
-
87
-
88
-
89
-
90
-
91
-
92
-
93
-
94
-
95
-
96
-
97
-
98
-
99
-
100
-
101
-
102
-
103
-
104
-
105
-
106
-
107
-
108
-
109
-
110
-
111
-
112
-
113
-
114
-
115
-
116
-
117
-
118
-
119
-
120
-
121
-
122
-
123
-
124
-
125
-
126
-
127
-
128
-
129
-
130
-
131
-
132
-
133
-
134
-
135
-
136
-
137
-
138
-
139
-
140
-
141
-
142
-
143
-
144
-
145
-
146
-
147
-
148
-
149
-
150
-
151
-
152
-
153
-
154
-
155
 |
 |