Sony HDR-CX230 Operating Guide - Page 28
Playing images on a TV - instructions
 |
View all Sony HDR-CX230 manuals
Add to My Manuals
Save this manual to your list of manuals |
Page 28 highlights
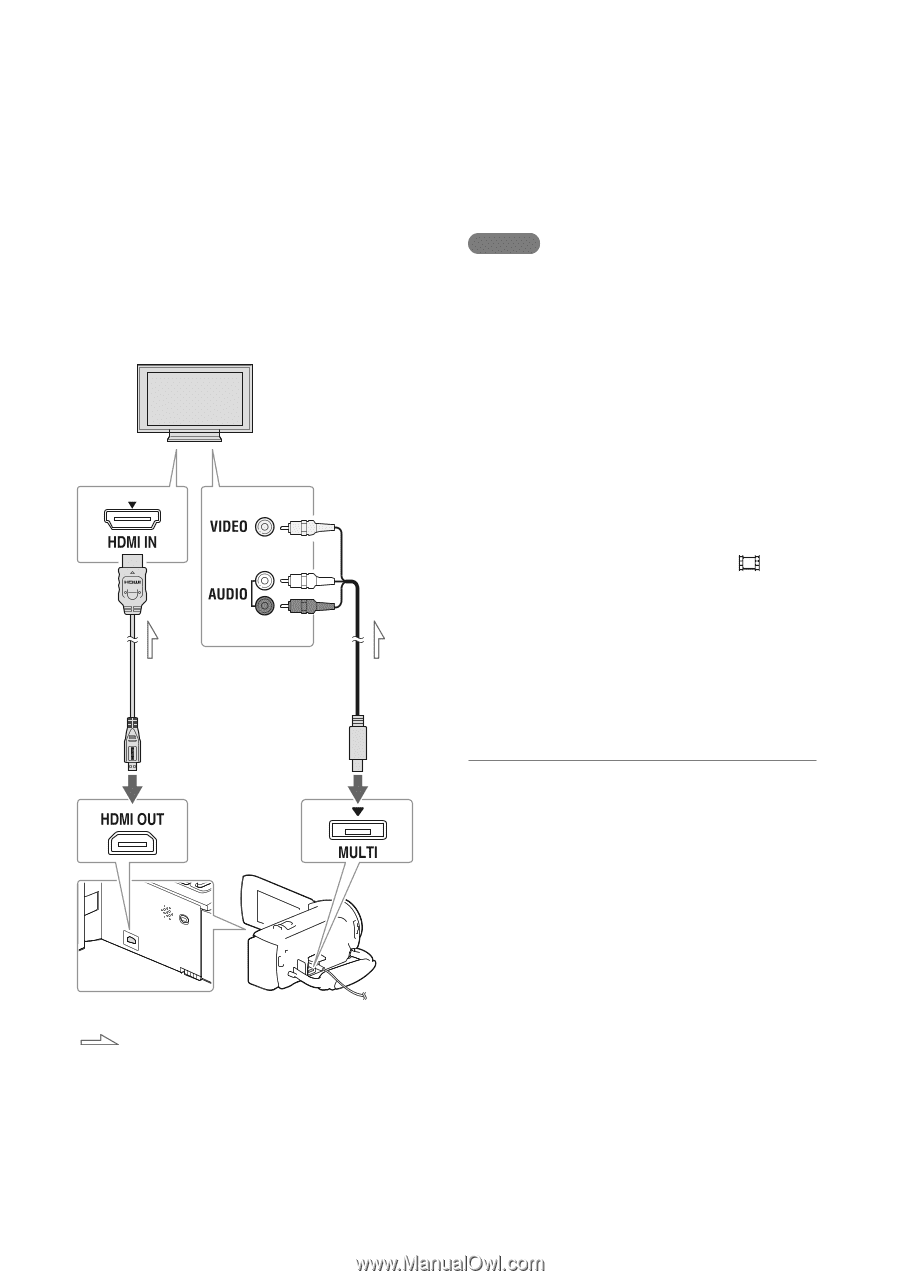
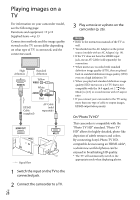
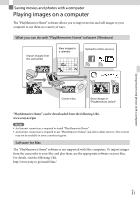
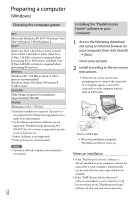
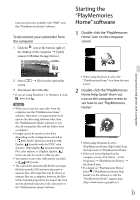
Playing images on a TV For information on your camcorder model, see the following page: Functions and equipment p.12 Supplied items p.13 Connection methods and the image quality viewed on the TV screen differ depending on what type of TV is connected, and the connectors used. High definition Standard definition Yellow White HDMI Cable (supplied) Red AV Cable (sold separately) Signal flow 1 Switch the input on the TV to the connected jack. 2 Connect the camcorder to a TV. GB 28 3 Play a movie or a photo on the camcorder (p. 26). Notes Refer to the instruction manuals of the TV as well. You should use the AC Adaptor as the power source (models with an AC Adaptor) (p. 19). If the TV does not have the HDMI input jack, use an AV Cable (sold separately) for connection. When movies are recorded with standard definition image quality (STD), they are played back in standard definition image quality (STD) even on a high definition TV. When you play back standard definition image quality (STD) movies on a 4:3 TV that is not compatible with the 16:9 signal, set [ Wide Mode] to [4:3] to record movies with 4:3 aspect ratio. If you connect your camcorder to the TV using more than one type of cable to output images, HDMI output takes priority. On "Photo TV HD" This camcorder is compatible with the "Photo TV HD" standard. "Photo TV HD" allows for highly-detailed, photo-like depiction of subtle textures and colors. By connecting Sony's Photo TV HDcompatible devices using an HDMI cable*, a whole new world of photos can be enjoyed in breathtaking HD quality. * The TV will automatically switch to the appropriate mode when displaying photos.
-
 1
1 -
2
-
3
-
4
-
5
-
6
-
7
-
8
-
9
-
10
-
11
-
12
-
13
-
14
-
15
-
16
-
17
-
18
-
19
-
20
-
21
-
22
-
 23
23 -
 24
24 -
 25
25 -
 26
26 -
 27
27 -
 28
28 -
 29
29 -
 30
30 -
 31
31 -
 32
32 -
 33
33 -
34
-
35
-
36
-
37
-
38
-
39
-
40
-
41
-
42
-
43
-
44
-
45
-
46
-
47
-
48
-
49
-
50
-
51
-
52
 |
 |