Sony HDR-PJ260V Operating Guide - Page 49
Using the built-in projector (HDR-PJ260/PJ260V/PJ580/PJ580V/PJ600/PJ600V), HDR-PJ260 - model
 |
View all Sony HDR-PJ260V manuals
Add to My Manuals
Save this manual to your list of manuals |
Page 49 highlights
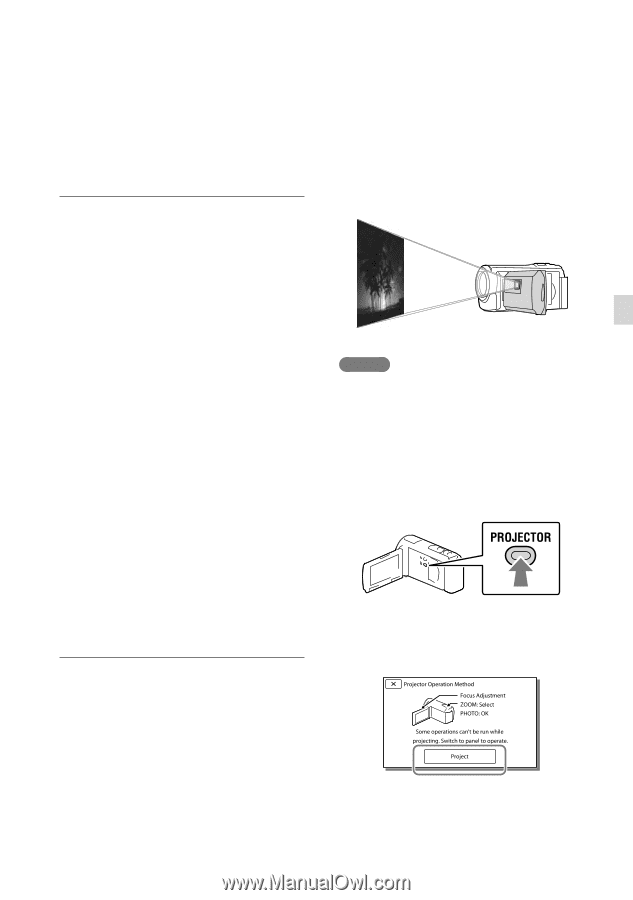
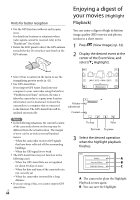
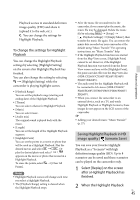
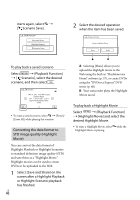
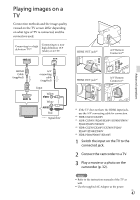
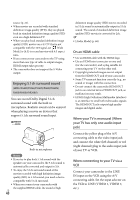
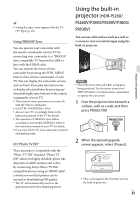
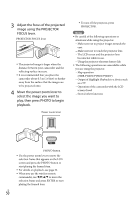
Setting the aspect ratio supported by the TV: [TV Type] (p. 69) Using "BRAVIA" Sync You can operate your camcorder with the remote commander of your TV by connecting your camcorder to a "BRAVIA" Sync compatible TV launched in 2008 or later with the HDMI cable. You can operate the menu of your camcorder by pressing the SYNC MENU button of the remote commander of your TV. You can display the camcorder screens such as Event View, play selected movies or display selected photos by pressing up/ down/left/right/enter buttons of the remote commander of your TV. There may be some operations you cannot do with the remote commander. Set [CTRL FOR HDMI] to [On]. Also set your TV accordingly. Refer to the instruction manual of the TV for details. The operation of "BRAVIA" Sync differs according to each model of BRAVIA. Refer to the instruction manual of your TV for details. If you turn off the TV, your camcorder is turned off simultaneously. On "Photo TV HD" This camcorder is compatible with the "Photo TV HD" standard. "Photo TV HD" allows for highly-detailed, photo-like depiction of subtle textures and colors. By connecting Sony's Photo TV HDcompatible devices using an HDMI cable*, a whole new world of photos can be enjoyed in breathtaking HD quality. * The TV will automatically switch to the appropriate mode when displaying photos. Using the built-in projector (HDR-PJ260/ PJ260V/PJ580/PJ580V/PJ600/ PJ600V) You can use a flat surface such as a wall as a screen to view recorded images using the built-in projector. Notes The LCD screen turns off while an image is being projected. Use the power zoom lever/ PHOTO button or wireless remote commander to operate the camcorder. 1 Face the projector lens towards a surface, such as a wall, and then press PROJECTOR. 2 When the operating guide screen appears, select [Project]. This screen appears the first time you use the built-in projector. US 49 Advanced operations
-
 1
1 -
2
-
3
-
4
-
5
-
6
-
7
-
8
-
9
-
10
-
11
-
12
-
13
-
14
-
15
-
16
-
17
-
18
-
19
-
20
-
21
-
22
-
23
-
24
-
25
-
26
-
27
-
28
-
29
-
30
-
31
-
32
-
33
-
34
-
35
-
36
-
37
-
38
-
39
-
40
-
41
-
42
-
43
-
 44
44 -
 45
45 -
 46
46 -
 47
47 -
 48
48 -
 49
49 -
 50
50 -
 51
51 -
 52
52 -
 53
53 -
 54
54 -
55
-
56
-
57
-
58
-
59
-
60
-
61
-
62
-
63
-
64
-
65
-
66
-
67
-
68
-
69
-
70
-
71
-
72
-
73
-
74
-
75
-
76
-
77
-
78
-
79
-
80
-
81
-
82
-
83
-
84
-
85
-
86
-
87
-
88
-
89
-
90
-
91
-
92
-
93
-
94
-
95
-
96
-
97
-
98
-
99
-
100
-
101
-
102
-
103
-
104
-
105
-
106
-
107
-
108
-
109
-
110
-
111
-
112
-
113
-
114
-
115
-
116
-
117
-
118
-
119
-
120
-
121
-
122
-
123
-
124
-
125
-
126
-
127
-
128
-
129
-
130
-
131
-
132
-
133
-
134
-
135
-
136
-
137
-
138
-
139
-
140
-
141
-
142
-
143
-
144
-
145
-
146
-
147
-
148
-
149
-
150
-
151
-
152
-
153
-
154
-
155
-
156
-
157
-
158
-
159
-
160
-
161
-
162
-
163
-
164
-
165
-
166
-
167
-
168
-
169
-
170
-
171
-
172
-
173
-
174
-
175
-
176
-
177
-
178
-
179
-
180
-
181
-
182
-
183
-
184
-
185
-
186
-
187
-
188
-
189
-
190
-
191
 |
 |