Sony HDR SR8 Operating Guide
Sony HDR SR8 - Handycam Camcorder - 1080i Manual
 |
UPC - 027242719705
View all Sony HDR SR8 manuals
Add to My Manuals
Save this manual to your list of manuals |
Sony HDR SR8 manual content summary:
- Sony HDR SR8 | Operating Guide - Page 1
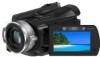
Digital HD Video Camera Recorder Operating Guide HDR-SR5/SR7/SR8 3-210-378-11(1) For details on the advanced operations, please refer to "Handycam Handbook" (PDF). © 2007 Sony Corporation - Sony HDR SR8 | Operating Guide - Page 2
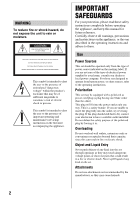
servicing) instructions in the literature accompanying the appliance. IMPORTANT SAFEGUARDS For your protection, please read these safety instructions completely before operating the appliance, and keep this manual battery power, or other sources, refer to the operating instructions out parts that - Sony HDR SR8 | Operating Guide - Page 3
exits from the appliance. Accessories Do not place the instructions. Adjust only those controls that are specified in the operating instructions servicing to qualified service personnel. Replacement parts When replacement parts are required, be sure the service technician has used replacement parts - Sony HDR SR8 | Operating Guide - Page 4
No.: HDR-SR5 Responsible Party: Sony Electronics Inc. Address: 16530 Via Esprillo, San Diego, CA 92127 U.S.A Telephone number: 858-942-2230 This device complies with Part 15 of the FCC Rules. Operation is subject to the following two conditions: (1) This device may not cause harmful interference - Sony HDR SR8 | Operating Guide - Page 5
, and (2) this device must accept any interference received, including interference that may cause undesired operation. Notes HDR-SR5, HDR-SR7 and HDR-SR8 are to be used with the Handycam Station Model DCRAC181 and AC Adaptor Model AC-L200/L200B. CAUTION You are cautioned that any changes or - Sony HDR SR8 | Operating Guide - Page 6
in this manual are based on HDRSR7. • Design and specifications of recording media and other accessories are subject to change without notice. • The screenshots are from Windows XP. The scenes may vary depending on the operating system of the computer. * Refer also to "Handycam Handbook" (PDF - Sony HDR SR8 | Operating Guide - Page 7
the camcorder 17 Indicators displayed during recording/playback 20 Performing various functions - " HOME" and " OPTION 22 Saving images 25 Deleting images 25 Enjoying with a computer Viewing "Handycam Handbook" (PDF 26 What you can do with a Windows computer 27 Troubleshooting Troubleshooting - Sony HDR SR8 | Operating Guide - Page 8
9) Handycam Station (1) (p. 9) Rechargeable battery pack NP-FH60 (1) (p. 9) Component video cable (1) (p. 16) A/V connecting cable (1) (p. 16) USB cable (1) (p. 30) CD-ROM "Handycam Application Software" (1) (p. 26) - Picture Motion Browser (Software) - Picture Motion Browser Guide - Handycam - Sony HDR SR8 | Operating Guide - Page 9
the wall outlet. 5 Set the camcorder onto the Handycam Station securely. The /CHG (charge) lamp lights up and charging starts. The /CHG (charge) lamp turns off when the battery pack is fully charged. Remove the camcorder from the Handycam Station. To remove the battery pack Slide the POWER switch - Sony HDR SR8 | Operating Guide - Page 10
: Approximate time (min.) available when you use a fully charged battery pack. "HD" stands for high definition image quality, and "SD" stands for standard image quality. NP-FH60: HDR-SR5 HD SD (Unit:min.) HDR-SR7/ SR8 HD SD Charging time 135 Recording time*1 Continuous recording time 100 - Sony HDR SR8 | Operating Guide - Page 11
Step 3: Turning the power on, and setting the date and time 1 Touch the button on the LCD screen. POWER switch When using the camcorder for the up. (Movie): To record movies (Still): To record still images • When you turn on (Still) lamp, the screen aspect ratio is changed to 4:3 automatically. 2 - Sony HDR SR8 | Operating Guide - Page 12
LCD panel Open the LCD panel 90 degrees to the camcorder (1), then rotate it to the best angle to record or play (2). 290 degrees (max.) 190 degrees to the camcorder Fastening the grip belt Fasten the grip belt and hold your camcorder correctly. DISP/BATT INFO 2180 degrees (max.) Adjusting the - Sony HDR SR8 | Operating Guide - Page 13
movies on a "Memory Stick Duo." • See "Handycam Handbook" (PDF) for changing the image quality to SD (standard definition) image quality. Press data is still being written onto the hard disk or "Memory Stick Duo." Do not apply shock or vibration to your camcorder, and do not remove the battery - Sony HDR SR8 | Operating Guide - Page 14
or knock your camcorder, turn the power off, eject the "Memory Stick Duo," or remove the battery pack. Otherwise, image data may be damaged. • If you insert the "Memory Stick Duo" into the slot in the wrong direction, the "Memory Stick Duo," the Memory Stick Duo slot, or image data may be damaged - Sony HDR SR8 | Operating Guide - Page 15
movies with HD (high definition) image quality* 6 Displays still images on the hard disk 7 Displays still images on a "Memory Stick Duo" 8 Searches for images by date 9 (OPTION) * appears for movies with SD (standard definition) image quality. 1 Slide the POWER switch D to turn on your camcorder - Sony HDR SR8 | Operating Guide - Page 16
(standard definition) image quality. • The Handycam Station and your camcorder are both equipped with A/V OUT jacks and COMPONENT OUT jacks (p. 17). Connect the A/V connecting cable or component video cable either to the Handycam Station or to your camcorder. If you connect A/V connecting cables or - Sony HDR SR8 | Operating Guide - Page 17
Parts and functions used for the camcorder The numbers in ( ) are reference pages. Recording/Playback Handycam Station 1 Power zoom lever To use the zoom, move the power zoom lever. the center of the displayed frame. 2 PHOTO button (13) 3 Eyecup (HDR-SR7/SR8) 4 Viewfinder (12) (HDR-SR7/SR8) 17 - Sony HDR SR8 | Operating Guide - Page 18
with the A/V connecting cable. qh Grip belt (12) qj Active Interface Shoe The Active Interface Shoe supplies power to optional accessories such as a video light, a flash, or a microphone. The accessory can be turned on or off as you operate the POWER switch on your camcorder. qk JACK COVER OPEN - Sony HDR SR8 | Operating Guide - Page 19
NIGHTSHOT switch To record in dark places, set the NIGHTSHOT switch to ON ( appears). ra CAM CTRL dial (HDR-SR7/SR8) You can assign one menu item you often use to the CAM CTRL dial. rs MANUAL button (HDR the camcorder to a computer. For details, see "Picture Motion Browser Guide." rj Interface connector - Sony HDR SR8 | Operating Guide - Page 20
Recording quality (HD/SD) and Recording mode (XP/HQ/SP/LP) B HOME button C Remaining battery (approx.) is a "Memory Stick Duo." z Tips • As the number of still images recorded on a "Memory Stick Duo" total recorded movies R Previous/Next button S Video operation buttons T Playing back image quality - Sony HDR SR8 | Operating Guide - Page 21
camcorder. Digital effect Manual focus SCENE SELECTION . n Backlight White balance SteadyShot off EXPOSURE/ SPOT METER AE SHIFT* WB SHIFT* TELE MACRO ZEBRA X.V.COLOR Face Index set * HDR-SR7/SR8 b Notes • The recording date and time is recorded automatically on the hard disk and "Memory Stick - Sony HDR SR8 | Operating Guide - Page 22
see "Handycam Handbook" (PDF). 1 Turn on your camcorder, then press guide on the screen for further operation. z Tips • If the item is not on the screen, touch v/V to change the page. • To hide the HOME MENU screen, touch . Using the OPTION MENU The (OPTION) MENU appears just like the pop-up window - Sony HDR SR8 | Operating Guide - Page 23
[ COMPUTER], [DISC BURN] TV CONNECT Guide*1 (MANAGE HDD/MEMORY) category FORMAT*1 FORMAT*1 INFO REPAIR IMG.DB F. (SETTINGS) category MOVIE SETTINGS [ / REC SET]*1, [ REC MODE], [ REC MODE], [AE SHIFT]*3, [WB SHIFT]*3, [NIGHTSHOT LIGHT], [WIDE SELECT], [DIGITAL ZOOM], [STEADYSHOT], [AUTO SLW SHUTTR - Sony HDR SR8 | Operating Guide - Page 24
SETTINGS] during Easy Handycam operation. *3 HDR-SR7/SR8 Items of the OPTION MENU Items you can set only on the OPTION MENU will be described below. tab [FOCUS], [SPOT FOCUS], [TELE MACRO], [EXPOSURE], [SPOT METER], [SCENE SELECTION], [WHITE BAL.], [COLOR SLOW SHTR], [SUPER NIGHTSHOT] tab [FADER - Sony HDR SR8 | Operating Guide - Page 25
Guide." Creating a disc with One Touch (One Touch Disc Burn) You can save images recorded on the camcorder camcorder to other devices You can dub images to VCR or DVD/HDD devices. For details, see "Handycam ] t . To delete the still images in the "Memory Stick Duo" 1 In step 2, touch [ DELETE]. 2 - Sony HDR SR8 | Operating Guide - Page 26
Handbook" (PDF) For details on using your camcorder, see "Handycam Handbook" (PDF). To view "Handycam Handbook" (PDF), you need to install Adobe Reader on your computer. For Windows users 1 Turn on the computer. 2 Place the CD-ROM (supplied) in the disc drive of your computer. The select screen - Sony HDR SR8 | Operating Guide - Page 27
software "Picture Motion Browser" is not supported by Macintosh computers. To use a Macintosh computer connected to your camcorder, see the following website for details. http://guide.d-imaging.sony.co.jp/mac/ ms/us/ System requirements x When using "Picture Motion Browser" OS: Microsoft Windows - Sony HDR SR8 | Operating Guide - Page 28
view or edit movies recorded in HD (high definition) format. Otherwise, the software will not work properly due to the power saving function of the PC. Installing software You need to install the software to your Windows computer before connecting your camcorder to the computer. The installation is - Sony HDR SR8 | Operating Guide - Page 29
(USB) jack of the Handycam Station to the (USB) jack of the computer using the supplied USB cable. 4 Touch [ COMPUTER] on the LCD screen of your camcorder. 9 Click [Next] on the connection confirmation screen of the computer. 10Follow the on-screen instructions to install the software. One of the - Sony HDR SR8 | Operating Guide - Page 30
steps. 1 Connect the AC Adaptor to the Handycam Station and a wall outlet. 2 Set the camcorder onto the Handycam Station, then slide the POWER switch to turn on. 3 Connect the (USB) jack of the Handycam Station to a computer using the supplied USB cable (p. 28). The [USB SELECT] screen appears on - Sony HDR SR8 | Operating Guide - Page 31
]. 3 Click [OK] (Windows 2000 only). 4 Touch [END] on the screen of your camcorder. 5 Touch [YES] on the screen of your camcorder. 6 Disconnect the USB cable from the Handycam Station and the computer. b Notes • Do not disconnect the USB cable while the ACCESS lamp is lit. • Before turning off your - Sony HDR SR8 | Operating Guide - Page 32
the hard disk in order to investigate the problem. However, your Sony dealer will neither copy nor retain your data. • For the symptoms of your camcorder, see "Handycam Handbook" (PDF) and for connecting to the computer, see "Picture Motion Browser Guide." Menu items are grayed out. • There are some - Sony HDR SR8 | Operating Guide - Page 33
Sony service facility. C:04:00 C:(or E:) ss:ss (Self-diagnosis display) C:04:ss • The battery pack is not an "InfoLITHIUM" battery pack (H series). Use an "InfoLITHIUM" battery pack (H series) (p. 9). • Connect the DC plug of the AC Adaptor to the DC IN jack of the Handycam Station or your camcorder - Sony HDR SR8 | Operating Guide - Page 34
of your camcorder is extremely high. Turn off your camcorder and leave it for a while in a cool place. (Low temperature warning)* Fast flashing • The temperature of your camcorder is extremely low. Make the camcorder warm. (Warning indicator pertaining to "Memory Stick Duo") • No "Memory Stick Duo - Sony HDR SR8 | Operating Guide - Page 35
damages the inside of the viewfinder (HDR-SR7/SR8) or the LCD screen. • Operate your camcorder on DC 6.8 V/7.2 V (battery pack) or DC 8.4 V (AC Adaptor). • For DC or AC operation, use the accessories recommended in these operating instructions. • Do not let your camcorder get wet, for example, from - Sony HDR SR8 | Operating Guide - Page 36
battery Your camcorder has a pre-installed rechargeable battery to battery becomes weak, the operating distance of the Remote Commander may shorten, or the Remote Commander may not function properly. In this case, replace the battery with a Sony CR2025 lithium battery. Use of another battery - Sony HDR SR8 | Operating Guide - Page 37
2/5.1ch Dolby Digital 5.1 Creator Video signal NTSC color, EIA standards 1080/60i specification Hard disk HDR-SR5: 40 GB HDR-SR7: 60 GB HDR-SR8: 100 GB When measuring media capacity, 1 GB equals 1 billion bytes, a portion of which is used for data management. Recording format Movie (HD): AVCHD 1080 - Sony HDR SR8 | Operating Guide - Page 38
the NP-FH60 rechargeable battery pack HDR-SR7/SR8: 530 g (1 lb 2 oz) main unit only 610 g (1 lb 5 oz) including the NP-FH60 rechargeable battery pack Supplied accessories See page 8. Handycam Station DCRA-C181 Input/Output connectors Audio/Video output 10-pin connector Video signal: 1 Vp-p, 75 - Sony HDR SR8 | Operating Guide - Page 39
camcorder is produced under the license of Dolby Laboratories. On trademarks • "Handycam" and are registered trademarks of Sony Corporation. • "AVCHD" and "AVCHD" logotype are trademarks of Matsushita Electric Industrial Co., Ltd. and Sony Corporation. • "Memory Stick," " ," "Memory Stick - Sony HDR SR8 | Operating Guide - Page 40
US Additional information on this product and answers to frequently asked questions can be found at our Customer Support Website. Printed on 70% or more recycled paper using VOC (Volatile Organic Compound)free vegetable oil based ink. Printed in Japan
-
 1
1 -
 2
2 -
 3
3 -
 4
4 -
 5
5 -
 6
6 -
 7
7 -
8
-
9
-
10
-
11
-
12
-
13
-
14
-
15
-
16
-
17
-
18
-
19
-
20
-
21
-
22
-
23
-
24
-
25
-
26
-
27
-
28
-
29
-
30
-
31
-
32
-
33
-
34
-
35
-
36
-
37
-
38
-
39
-
40
 |
 |
3-210-378-
11
(1)
© 2007 Sony Corporation
Digital HD Video Camera Recorder
Operating Guide
HDR-SR5/SR7/SR8
For details on the advanced operations, please refer to
“Handycam Handbook” (PDF).