Sony HT-7100DH Operating Instructions
Sony HT-7100DH - Component Home Theater System Manual
 |
View all Sony HT-7100DH manuals
Add to My Manuals
Save this manual to your list of manuals |
Sony HT-7100DH manual content summary:
- Sony HT-7100DH | Operating Instructions - Page 1
DVD Home Theatre System Operating Instructions Owner's Record The model and serial numbers are located on the rear of the unit. Record the serial number in the space provided below. Refer to them whenever you call upon your Sony dealer regarding this product. Model No. Serial No. HT-7100DH - Sony HT-7100DH | Operating Instructions - Page 2
to which the receiver is connected. - Consult the dealer or an experienced radio/TV technician for help. CAUTION You are cautioned that any changes or modification not expressly approved in this manual could void your authority to operate this equipment. Note to CATV system installer: This reminder - Sony HT-7100DH | Operating Instructions - Page 3
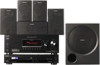
HT-7100DH. The HT-7100DH consists of: • Receiver STR-K7100 • DVD player DVP-NC85H • Speaker system - Front speaker SS-MSP7000 - Center speaker SS-CNP900 - Surround speaker SS-SRP7000 - Sub woofer SA-WP780 • The instructions in this manual describe the controls on the supplied remote - Sony HT-7100DH | Operating Instructions - Page 4
of parts 5 1: Installing speakers 14 2: Connecting speakers 16 3a: Connecting the audio components ........17 3b: Connecting the video components ........18 4: Connecting the antennas 26 5: Preparing the receiver and the remote.....27 6: Selecting the speaker system 28 7: Calibrating the - Sony HT-7100DH | Operating Instructions - Page 5
, 37, 52, 81). Press to select the speaker system (page 28). The current status of the selected component or a list of selectable items appears here (page 7). Lights up when multi channel audio is decoded (page 37). Receives signals from remote commander. Name F DISPLAY G INPUT MODE H MASTER VOLUME - Sony HT-7100DH | Operating Instructions - Page 6
Name Function K INPUT SELECTOR Turn to select the input source to playback (page 34, 36, 37, 53, 55, 63, 65, 69). L MOVIE, MUSIC Press to select sound fields (MOVIE, MUSIC) (page 49). M A.F.D. Press to select A.F.D. mode (page 47). N 2CH Press to select 2CH STEREO mode (page 51, 52). O - Sony HT-7100DH | Operating Instructions - Page 7
speaker system used. However, these indicators do not light up if the speaker output is turned off or if a headphone is connected. Lights up when the receiver RANGE Function Lights up when VIDEO 2 input is selected. However, "UNLOCK" appears on the display if no digital signal is input through the - Sony HT-7100DH | Operating Instructions - Page 8
back. The boxes around the letters vary to show how the receiver downmixes the source sound. Front Left Front Right Center (monaural) Surround Left Surround Right Surround (monaural or the surround components obtained by Pro Logic processing) Example: Recording format (Front/ Surround): 3/2.1 Sound - Sony HT-7100DH | Operating Instructions - Page 9
IN quality of loud jack sound (page 20, 24). HDMI IN/ OUT jacka) Connects to a DVD player, or a Blu-ray disc player. The image and the sound are output to a TV or a projector (page 22). Connect to a DIGITAL MEDIA PORT adapter (page 64). B COMPONENT VIDEO INPUT/ OUTPUT section Green Blue Red - Sony HT-7100DH | Operating Instructions - Page 10
can also program the remote to control non-Sony audio/video components. For details, see "Programming the remote" (page 70). RM-AAP016 wj wh TV RM SET UP AV ?/1 ? / 1 SYSTEM STANDBY VIDEO 1 VIDEO 2 VIDEO 3 DVD SAT TV SA-CD/CD TUNER 1 2 3 AUX DMPORT RECEIVER 4 2CH A.F.D. MOVIE MUSIC 5 wg - Sony HT-7100DH | Operating Instructions - Page 11
to control Sony components as follows. You can program the remote to control non-Sony components following the steps in "Programming the remote" on page 70. D RECEIVER Button Assigned Sony component VIDEO 1 VCR (VTR mode 3) VIDEO 2 VCR (VTR mode 2) VIDEO 3 VCR (VTR mode 1) DVD DVD player - Sony HT-7100DH | Operating Instructions - Page 12
select items from the option menus for DVD player or DVD/VHS COMBO. To display the options of Sony TV, press TV (Z) and then press OPTIONS TOOLS. Press to display the menus of the receiver, VCR, DVD player, satellite tuner, Blu-ray disc recorder, PSX, DVD/VHS COMBO or DVD/HDD COMBO on the TV screen - Sony HT-7100DH | Operating Instructions - Page 13
menu or on-screen guide of the VCD player, LD player, DVD player, Blu-ray disc recorder, PSX, DVD/VHS COMBO, or satellite tuner is displayed on the TV screen. To return to the previous menu of Sony TV, press TV (Z) and then press RETURN/EXIT O. After pressing RECEIVER (D), then press MENU (L) for - Sony HT-7100DH | Operating Instructions - Page 14
To fully enjoy theater-like multi channel surround sound requires five speakers (two front speakers, a center speaker, and two surround speakers) and a sub woofer (5.1 channel). Example of a 5.1 channel speaker system configuration Installing the speakers on a flat surface Before you install - Sony HT-7100DH | Operating Instructions - Page 15
the screws securely to a beam and fasten them to the wall. Install the speakers on a vertical and flat wall where reinforcement is applied. • Contact a screw installer regarding the wall material or screws to be used. • Sony is not responsible for accident or damage caused by improper installation, - Sony HT-7100DH | Operating Instructions - Page 16
2: Connecting speakers F A D A B DVD IN VIDEO 2/BD IN OUT HDMI Y XM PB/CB PR/CR VIDEO IN VIDEO IN VIDEO OUT VIDEO IN VIDEO OUT SAT IN DVD IN VIDEO 1 IN MONITOR OUT L MONITOR COMPONENT VIDEO R L L L AUDIO OUT R AUDIO IN AUDIO IN SAT DVD R AUDIO OUT AUDIO IN VIDEO 1 SUB WOOFER - Sony HT-7100DH | Operating Instructions - Page 17
sub woofer do not have any character on the speaker label. For details on the speaker type, see page 3. Tip Use the supplied speakers to optimize the system's performance. 3a: Connecting the audio components Connecting a Super Audio CD/CD player/CD recorder The following illustration shows how to - Sony HT-7100DH | Operating Instructions - Page 18
" below for the pages which describe how to connect each component. After hooking up all your components, proceed to "4: Connecting the antennas" (page 26). Component to be connected Component Page TV 19 DVD player/DVD recorder 20 With HDMI jack 22 Satellite tuner/Set-top box 24 VCR 25 - Sony HT-7100DH | Operating Instructions - Page 19
FRONT B R FRONT A SPEAKERS L R SURROUND CENTER A Audio cord (not supplied) B Video cord (not supplied) C Component video cord (not supplied) Notes • Connect image display components such as a TV or a projector to the MONITOR OUT jack on the receiver. • Turn on the receiver when the video and - Sony HT-7100DH | Operating Instructions - Page 20
according to the jacks of your components. Connecting a DVD player Notes • To input multi channel digital audio from the DVD player, set the digital audio output setting on the DVD player. Refer to the operating instructions supplied with the DVD player. • When connecting optical digital cords - Sony HT-7100DH | Operating Instructions - Page 21
FRONT B R FRONT A SPEAKERS L R SURROUND CENTER A Audio cord (not supplied) B Video cord (not supplied) C Component video cord (not supplied) • Be sure to change the factory setting of the VIDEO 1 input button on the remote so that you can use the button to control your DVD recorder. For details - Sony HT-7100DH | Operating Instructions - Page 22
are connected via a HDMI jack. To output the sound from the supplied speakers and to take advantage of the multi channel surround sound, be sure to - connect the digital audio jacks on the playback component to the receiver. - turn off or mute the TV's volume. DVD player Audio signals Audio/video - Sony HT-7100DH | Operating Instructions - Page 23
use the button to control your bluray disc player. For details, see "Programming the remote" (page 70). • You can also rename the VIDEO 2 input so that it can be displayed on the receiver's display. For details, see "Naming inputs" (page 67). Notes on HDMI connections • This receiver may not be able - Sony HT-7100DH | Operating Instructions - Page 24
kHz sampling frequencies. Audio signals Satellite tuner/Set-top box Video signals COMPONENT VIDEO PB/CB PR/CR A B C D DIGITAL (ASSIGNABLE) OPTICAL SAT IN VIDEO 2/ BD IN COAXIAL DVD IN DMPORT ANTENNA AM DVD IN VIDEO 2/BD IN OUT HDMI Y XM PB/CB PR/CR VIDEO IN VIDEO IN VIDEO OUT VIDEO - Sony HT-7100DH | Operating Instructions - Page 25
(ASSIGNABLE) OPTICAL SAT IN VIDEO 2/ BD IN COAXIAL DVD IN DMPORT ANTENNA AM DVD IN VIDEO 2/BD IN OUT HDMI Y XM PB/CB PR/CR VIDEO IN VIDEO IN VIDEO OUT VIDEO IN VIDEO OUT SAT IN DVD IN VIDEO 1 IN MONITOR OUT L MONITOR COMPONENT VIDEO R L L L L L AUDIO OUT R R OUT IN IN SA-CD - Sony HT-7100DH | Operating Instructions - Page 26
IN SAT DVD R AUDIO OUT AUDIO IN VIDEO 1 SUB WOOFER FRONT B R FRONT A SPEAKERS L R SURROUND CENTER * The shape of the connector varies depending on the area code of this receiver. Notes • To prevent noise pickup, keep the AM loop antenna away from the receiver and other components. • Be sure - Sony HT-7100DH | Operating Instructions - Page 27
receiver and the remote Connecting the AC power cord Connect the AC power cord to a wall outlet. AC power cord Performing initial setup operations Before using the receiver for the first time, initialize the receiver receiver for this operation. 1,2 CENTER To the wall outlet ? / 1 SPEAKERS SYSTEM - Sony HT-7100DH | Operating Instructions - Page 28
(page 70). Tip Under normal conditions, the batteries should last for about 3 months. When the remote no longer operates the receiver, replace all the batteries with new ones. 6: Selecting the speaker system You can select the front speakers you want to drive. Be sure to use the buttons on the - Sony HT-7100DH | Operating Instructions - Page 29
: • Check the connection between each speaker and the receiver. • Adjust the speaker level. • Measure the distance of each speaker to your listening position. You can also adjust the speaker levels and balance manually. For details, see "8: Adjusting the speaker levels and balance (TEST TONE)" (page - Sony HT-7100DH | Operating Instructions - Page 30
SYSTEM STANDBY VIDEO 1 VIDEO 2 VIDEO 3 DVD SAT TV SA-CD/CD TUNER AUX DMPORT RECEIVER 2CH A.F.D. MOVIE MUSIC CATEGORY SLEEP MODE D.TUNING AUTO CAL 123 456 7 -/-- CLEAR >10 GUIDE Measurement for Environment noise level Speaker connection Speaker level Speaker distance Display NOISE.CHK MEASURE - Sony HT-7100DH | Operating Instructions - Page 31
receiver and perform Auto Calibration again (page 30). Error codes and remedies Error code Explanation Remedy ERROR 10 The environment Make sure the is too noisy. environment is quiet during Auto Calibration. ERROR 11 The speakers are Place your speakers the settings manually. continued 31US - Sony HT-7100DH | Operating Instructions - Page 32
the settings manually 1 Record down the warning code. 2 Press RECEIVER. The RECEIVER indicator lights up and receiver operation is activated. 3 Press . 4 Press ?/1 to turn off the receiver. 5 Follow the solution provided in the "Warning codes and solutions" below. 6 Turn on the receiver and perform - Sony HT-7100DH | Operating Instructions - Page 33
the speaker levels and balance while listening to the test tone from your listening position. Tip The receiver employs a test tone with a frequency centered at 800 Hz. AUX DMPORT RECEIVER 1 2CH A.F.D. MOVIE MUSIC CATEGORY SLEEP MODE D.TUNING AUTO CAL 3-6 123 456 7 -/-- CLEAR >10 GUIDE 89 - Sony HT-7100DH | Operating Instructions - Page 34
component SYSTEM STANDBY VIDEO 1 VIDEO 2 VIDEO 3 DVD 1 SAT TV SA-CD/CD TUNER AUX DMPORT RECEIVER 2CH A.F.D. MOVIE MUSIC CATEGORY SLEEP MODE D.TUNING AUTO CAL 123 456 7 -/-- CLEAR >10 GUIDE IN/PORTABLE AV IN jack DVD [DVD] DVD player, etc., connected to DVD jack SAT [SAT] Satellite - Sony HT-7100DH | Operating Instructions - Page 35
Playback To avoid damaging your speakers Before you turn off the receiver, be sure to turn down the volume level. To listen to the sub woofer Be sure to use the buttons on the rear panel of - Sony HT-7100DH | Operating Instructions - Page 36
Listening/Watching a component Listening to a Super Audio CD/CD TV RM SET UP AV ?/1 ? / 1 SYSTEM STANDBY VIDEO 1 VIDEO 2 VIDEO 3 DVD SAT TV SA-CD/CD TUNER AUX DMPORT RECEIVER 2CH A.F.D. MOVIE MUSIC CATEGORY SLEEP MODE D.TUNING AUTO CAL 123 4 7 -/-CLEAR >10 GUIDE 56 89 0/10 F ENTER MEMORY - Sony HT-7100DH | Operating Instructions - Page 37
on the TV and DVD player. 2 Turn on the receiver. 3 Press DVD. You can also use INPUT SELECTOR on this receiver to select "DVD". 4 Switch the input of the TV so that an image of the DVD is displayed. 5 Set up the DVD player. Refer to the "Quick Setup Guide" supplied with the receiver. 6 Playback the - Sony HT-7100DH | Operating Instructions - Page 38
By using the amplifier menus, you can make various adjustments to customize the receiver. AUX DMPORT RECEIVER 1 2CH A.F.D. MOVIE MUSIC CATEGORY SLEEP MODE D.TUNING AUTO CAL 3-7 123 4 7 -/-- CLEAR >10 GUIDE 56 89 0/10 F ENTER MEMORY DISPLAY G g f O RETURN/ EXIT MENU OPTIONS TOOLS - Sony HT-7100DH | Operating Instructions - Page 39
Sub woofer level [SW LVL] Dynamic range compressora) [D. RANGE] Front speaker bass level [BASS LVL] Front speaker treble level [TRE LVL] Sound field selectiona) [S.F. SELCT] Effect levela)b) [EFFECT] FM station receiving modea) [FM MODE] Naming preset stationsa) [NAME IN] Settings Initial setting - Sony HT-7100DH | Operating Instructions - Page 40
-DVD, VD2-TV, VD2-CD, DVD-VD1, DVD-VD2, DVD-VD3, DVD-DVD, DVD-TV, DVD-CD, SAT-VD1, SAT-VD3, SAT-DVD, SAT-SAT, SAT-TV, SAT-CD VIDEO (44) [6-VIDEO] SYSTEM (45) [7-SYSTEM] DIGITAL MEDIA PORT video -NONE, -VIDEO 1, -VIDEO 3, assigna) [DMPORT V.] -DVD, -SAT Naming inputsa) [NAME IN] Front speaker - Sony HT-7100DH | Operating Instructions - Page 41
Amplifier Operations Adjusting the level (LEVEL menu) You can use the LEVEL menu to adjust the balance and level of each speaker. These settings are applied to all sound fields. Select "1-LEVEL" in the amplifier menus. For details on adjusting the parameters, see "Navigating through menus" (page - Sony HT-7100DH | Operating Instructions - Page 42
(page 39). TONE menu parameters x BASS LVL (Front speaker bass level) x TRE LVL (Front speaker treble level) Settings for the surround sound (SUR menu) . For details, see "Enjoying Surround Sound" (page 47). Note The receiver lets you apply the last selected sound field to an input whenever it is - Sony HT-7100DH | Operating Instructions - Page 43
parameters, see "Navigating through menus" (page 38) and "Overview of the menus" (page 39). TUNER menu parameters x FM MODE (FM station receiving mode) • FM AUTO This receiver will decode the signal as stereo signal when the radio station is broadcast in stereo. • FM MONO This reciever will decode - Sony HT-7100DH | Operating Instructions - Page 44
will be output through the front left speaker and sound of the sub language will be output through the front right speaker simultaneously. • DUAL M (Main) the images on the TV screen. For details, see "Watching a connected component through DMPORT connection" (page 65). x NAME IN (Naming inputs) Lets - Sony HT-7100DH | Operating Instructions - Page 45
a distance 15 feet closer to your listening position (D). Tip The receiver lets you to input the speaker position in terms of distance. However, it is not possible to set the center speaker further than the front speakers. Also, the center speaker cannot be set more than 5 feet closer from the front - Sony HT-7100DH | Operating Instructions - Page 46
B and C. • BEHD/HI Select if the location of your surround speakers corresponds to sections B and D. Tip Surround speaker position is designed specifically for implementation of the Cinema Studio EX modes. For other sound fields, speaker position is not so critical. Those sound fields were designed - Sony HT-7100DH | Operating Instructions - Page 47
Calibrating the appropriate settings automatically (A. CAL menu) For details, see "7: Calibrating the appropriate settings automatically (AUTO CALIBRATION)" (page 29). Enjoying Surround Sound Enjoying Dolby Digital and DTS Surround sound (AUTO FORMAT DIRECT) The Auto Format Direct (A.F.D.) mode - Sony HT-7100DH | Operating Instructions - Page 48
Stereo) Effect Presents the sound as it was recorded/ encoded without adding any surround effects. However, this receiver will generate a low frequency signal for output to the sub woofer when there is no LFE signals. sources such as CDs. Outputs 2 channel left/right signals from all speakers. 48US - Sony HT-7100DH | Operating Instructions - Page 49
You can take advantage of surround sound simply by selecting one of the receiver's preprogrammed sound fields. They bring the exciting and powerful sound of movie theaters and concert halls into your home. 2CH A.F.D. 2CH A.F.D. MOVIE MUSIC CATEGORY SLEEP MODE D.TUNING AUTO CAL MUSIC MOVIE Press - Sony HT-7100DH | Operating Instructions - Page 50
mark use DCS technology. DCS is a unique sound reproduction technology for home theater developed by Sony, in cooperation with Sony Pictures Entertainment, for enjoying the exciting and powerful sound of movie theaters at home. With this "Digital Cinema Sound" developed by integrating a DSP (Digital - Sony HT-7100DH | Operating Instructions - Page 51
picture DVDs (etc.), with multi channel surround effects. You can reproduce the sound characteristics of Sony Pictures Entertainment's dubbing studio in your home. The CINEMA STUDIO EX modes consist of the following three elements. • Virtual Multi Dimension Creates 5 sets of virtual speakers from - Sony HT-7100DH | Operating Instructions - Page 52
settings Be sure to use the buttons on the receiver for this operation. 1,2 ? / 1 SPEAKERS (OFF/A/B/A+B) AUTO CAL MIC PHONES VIDEO 3 CD TUNER 1 AUX DMPORT RECEIVER CATEGORY MODE 2CH A.F.D. MOVIE MUSIC CATEGORY SLEEP MODE D.TUNING AUTO CAL 123 456 7 -/-- CLEAR >10 GUIDE 89 0/10 F ENTER - Sony HT-7100DH | Operating Instructions - Page 53
or TUNING -. Press TUNING + to scan from low to high; press TUNING - to scan from high to low. The receiver stops scanning whenever a station is received. Using the controls on the receiver 1 Turn INPUT SELECTOR to select the FM or AM band. 2 Press TUNING MODE repeatedly to select "AUTO T.". 3 Press - Sony HT-7100DH | Operating Instructions - Page 54
TUNER 1 AUX DMPORT RECEIVER 2CH A.F.D. MOVIE MUSIC CATEGORY SLEEP MODE D.TUNING AUTO CAL 123 4 456 7 -/-- CLEAR >10 GUIDE 89 0/10 ENTER TV CH MASTER VOL PRESET MUTING PRESET +/- 1 Press TUNER repeatedly to select the FM or AM band. You can also use INPUT SELECTOR on the receiver. 2 - Sony HT-7100DH | Operating Instructions - Page 55
GUIDE 89 0/10 F ENTER MEMORY DISPLAY 1 ENTER G g f O RETURN/ EXIT MENU OPTIONS TOOLS - CATEGORY + REPLAY ADVANCE . > TUNING - TUNING + m M DISC SKIP TV VOL TV CH , press ENTER to enter the selection. Using the controls on the receiver 1 Turn INPUT SELECTOR to select the FM or - Sony HT-7100DH | Operating Instructions - Page 56
channels and advertising-supported channels, visit owners. To Activate XM Satellite Radio Once you have installed the XM Mini-Tuner Dock, inserted the XM Mini-Tuner, connected the XM Dock to your XM Ready® home audio system, and installed the antenna, you are ready to subscribe and begin receiving - Sony HT-7100DH | Operating Instructions - Page 57
system, connect the XM Connect-and-Play antenna to the XM jack. XM jack DIGITAL (ASSIGNABLE) OPTICAL SAT IN VIDEO 2/ BD IN COAXIAL DVD IN DMPORT ANTENNA AM DVD IN VIDEO 2/BD IN OUT HDMI RECEIVER 2CH A.F.D. MOVIE MUSIC CATEGORY SLEEP MODE D.TUNING AUTO CAL 123 456 7 -/-- CLEAR >10 GUIDE 89 - Sony HT-7100DH | Operating Instructions - Page 58
XM Radio broadcasts SAT TV SA-CD/CD TUNER AUX DMPORT 1 RECEIVER 2CH A.F.D. MOVIE MUSIC CATEGORY SLEEP MODE D.TUNING AUTO CAL 123 4 7 -/-- CLEAR >10 GUIDE 56 89 0/10 F ENTER MEMORY DISPLAY G g f O RETURN/ EXIT MENU OPTIONS TOOLS - CATEGORY + REPLAY ADVANCE . > TUNING - m TUNING - Sony HT-7100DH | Operating Instructions - Page 59
the categories by changing the category mode. SAT TV SA-CD/CD TUNER 1 AUX DMPORT RECEIVER 2CH A.F.D. MOVIE MUSIC CATEGORY SLEEP MODE D.TUNING AUTO CAL 2 123 456 7 -/-- CLEAR >10 GUIDE 89 0/10 F ENTER MEMORY DISPLAY G g f O RETURN/ EXIT MENU OPTIONS TOOLS - CATEGORY + REPLAY ADVANCE - Sony HT-7100DH | Operating Instructions - Page 60
to enter the channel number. 4 Press ENTER. You can also use MEMORY/ENTER on the receiver. The selected channel is tune in. Displaying the XM-RADIO information on the front panel display DISPLAY ? / 1 SPEAKERS (OFF/A/B/A+B) AUTO CAL MIC PHONES VIDEO 3 IN/PORTABLE AV IN VIDEO L AUDIO R MULTI - Sony HT-7100DH | Operating Instructions - Page 61
DMPORT RECEIVER 2CH A.F.D. MOVIE MUSIC CATEGORY SLEEP MODE D.TUNING AUTO CAL 123 456 7 -/-- CLEAR >10 GUIDE 89 0/10 F ENTER MEMORY DISPLAY 1 ENTER G g f O RETURN/ EXIT MENU OPTIONS TOOLS - CATEGORY + REPLAY ADVANCE . > TUNING - TUNING + m M DISC SKIP TV VOL TV CH - Sony HT-7100DH | Operating Instructions - Page 62
on the service provided by the XM Satellite Radio Inc. that you have subscribed to. XM Radio messages list Message appears ANTENNA UPDATING NO SIGNL LOADING OFF AIR (space)---- -- ---CH Explanation Remedies The XM antenna is not connected or transmission is not being received properly. Make - Sony HT-7100DH | Operating Instructions - Page 63
you to enjoy sound from a network system such as a portable audio source or computer. By connecting a DIGITAL MEDIA PORT adapter (not supplied), you can enjoy sound from the connected component on the receiver. For details, see the operating instructions supplied with the DIGITAL MEDIA PORT adapter - Sony HT-7100DH | Operating Instructions - Page 64
to the receiver. To view the images, proceed to "Watching a connected component through DMPORT connection" on page 65. TV DIGITAL MEDIA PORT adapter A DIGITAL (ASSIGNABLE) OPTICAL SAT IN VIDEO 2/ BD IN COAXIAL DVD IN DMPORT ANTENNA AM DVD IN VIDEO 2/BD IN OUT HDMI - Sony HT-7100DH | Operating Instructions - Page 65
receiver to select "DMPORT". 2 Start playback of the connected component. The sound is played back on the receiver. For details, see the operating instructions MEDIA PORT adapter, you can operate the connected component by using the remote. For details on remote button operation, see page 10. • Be - Sony HT-7100DH | Operating Instructions - Page 66
source for the DVD player using the OPTICAL IN jack on the receiver: • Connect the optical output jack of the DVD player to the OPTICAL VIDEO 2/BD IN jack of the receiver. • Assign "VD2" to "DVD" in the "D.ASSIGN" setting. 1 Press RECEIVER. The RECEIVER indicator lights up and receiver operation is - Sony HT-7100DH | Operating Instructions - Page 67
DMPORT. Naming inputs You can enter a name of up to 8 characters for inputs and display it on the receiver's display. This is convenient for labeling the jacks with the names of the connected components. 1 Press the input button to select the input you want to create an index name for. You can - Sony HT-7100DH | Operating Instructions - Page 68
on the display. Be sure to use the buttons on the receiver for this operation. Press DISPLAY repeatedly. Each time you press the Timer is activated, the display dims. Note If you press any buttons on the remote or receiver after the display dims, the display brightens up. After a while, the display - Sony HT-7100DH | Operating Instructions - Page 69
can record from an video component using the receiver. See the operating instructions supplied with your recording component. 1 Press one of the input buttons to select the playback component. You can also use INPUT SELECTOR on the receiver. 2 Prepare the playback component for playing. For example - Sony HT-7100DH | Operating Instructions - Page 70
have been memorized, you can use those components as part of your system. Furthermore, you can also program the remote for Sony components that the remote is unable to control. Note that the remote can only control components that accept infrared wireless control signals. 1 Press RM SET UP. The RM - Sony HT-7100DH | Operating Instructions - Page 71
will not respond to some or all of the codes. • All of the input buttons on this remote may not be available when used with your particular component. To control a CD player Maker SONY DENON JVC KENWOOD MAGNAVOX MARANTZ ONKYO PANASONIC PHILIPS PIONEER TECHNICS YAMAHA Code(s) 101, 102, 103 104 - Sony HT-7100DH | Operating Instructions - Page 72
747, 756 754 * If an AIWA VCR does not work even though you enter the code for AIWA, enter the code for Sony instead. To control a DVD player Maker SONY RCA SAMSUNG ZENITH PANASONIC PHILIPS PIONEER TOSHIBA DENON BROKSONIC HITACHI JVC MITSUBISHI ORITRON Code(s) 401, 402, 403 414 416, 422 418, 420 - Sony HT-7100DH | Operating Instructions - Page 73
To control a TV Maker SONY AIWA AKAI AOC CENTURION CORONADO CURTIS-MATHES DAYTRON DAEWOO FISHER FUNAI FUJITSU GOLDSTAR/LG GRUNDIG HITACHI ITT/NOKIA J.C. PENNY JVC KMC MAGNAVOX , 541, 551 542, 543, 567 517, 518, 567 503, 517, 566 566 503, 509, 510, 544 515, 534, 556 continued 73US Using the Remote - Sony HT-7100DH | Operating Instructions - Page 74
818, 855 856, 857, 858, 859, 860, 864, 874 851, 853, 854, 864 866, 871 868 867 873 872 875 869, 870 To control a cable box Maker SONY HAMLIN/REGAL JERROLD/G.I./ MOTOROLA JERROLD OAK PANASONIC PHILIPS PIONEER RCA SCIENTIFIC ATLANTA TOCOM/PHILIPS ZENITH Code(s) 821, 822, 823 836, 837, 838, 839, 840 - Sony HT-7100DH | Operating Instructions - Page 75
to high definition video signals and multi-channel audio signals to audio video components, such as HDMI equipped TVs, in digital form without degradation. The HDMI specification supports HDCP (High-bandwidth Digital Contents Protection), a copy protection technology that incorporates coding - Sony HT-7100DH | Operating Instructions - Page 76
qualified service shop. On heat buildup Although the receiver heats up during operation, this is not a malfunction. If you continuously use this receiver at components, be sure to turn off and unplug the receiver. If you encounter color irregularity on a nearby TV screen The front and center speakers - Sony HT-7100DH | Operating Instructions - Page 77
the following difficulties while using the receiver, use this troubleshooting guide to help you remedy the problem. Audio There is no sound, no matter which component is selected, or only a very low-level sound is heard. • Check that the speakers and components are connected securely. • Check that - Sony HT-7100DH | Operating Instructions - Page 78
input to the HDMI jack on the receiver is not output from the TV speaker. • Check the HDMI connection. • You cannot listen to the Super Audio CD by connecting HDMI. • Depending on the playback component, you may need to set up the component. Refer to the operating instructions supplied with each - Sony HT-7100DH | Operating Instructions - Page 79
you are playing is recorded in Dolby Digital or DTS format. • When connecting the DVD player, etc., to the digital input jacks of this receiver, check the audio setting (the settings for the audio output) of the connected component. The MULTI CHANNNEL DECODING lamp does not light up in blue. • Check - Sony HT-7100DH | Operating Instructions - Page 80
will automatically turn off after a few seconds. Check the speaker connection and turn on the power again. If you are unable to remedy the problem using the troubleshooting guide Clearing the receiver's memory may remedy the problem (page 27). However, note that all memorized settings will be - Sony HT-7100DH | Operating Instructions - Page 81
SPECIFICATIONS ch CENTER: 140 W SURROUND: 140 W/ch 1)Measured under the following conditions: Area code Power requirements U 120 V AC, 60 Hz 2)Reference power output for front, center and surround speakers turn off the receiver. While holding : 1 Vp-p, 75 ohms COMPONENT VIDEO: Y: 1 Vp-p, - Sony HT-7100DH | Operating Instructions - Page 82
Speaker system Active subwoofer, magnetically shielded Speaker Speakers (20) • Sub woofer (4) Remote commander RM-AAP016 (1) R6 (size-AA) batteries (2) Optimizer microphone (ECM-AC2 or ECM-AC2a) (1) For details on the area code of the component you are using, see page 3. Design and specifications - Sony HT-7100DH | Operating Instructions - Page 83
CD-R 69 onto a recording media 69 Remote commander 10 S Satellite tuner connecting 18 Selecting component 34 sound field 49 speaker system 28 Sleep Timer 68 Sound fields resetting 52 selecting 49 Speakers connecting 16 installing 14 Super Audio CD player playback 36 T TEST TONE 33 Tuner connecting - Sony HT-7100DH | Operating Instructions - Page 84
Sony Corporation Printed in Malaysia
-
 1
1 -
 2
2 -
 3
3 -
 4
4 -
 5
5 -
 6
6 -
 7
7 -
8
-
9
-
10
-
11
-
12
-
13
-
14
-
15
-
16
-
17
-
18
-
19
-
20
-
21
-
22
-
23
-
24
-
25
-
26
-
27
-
28
-
29
-
30
-
31
-
32
-
33
-
34
-
35
-
36
-
37
-
38
-
39
-
40
-
41
-
42
-
43
-
44
-
45
-
46
-
47
-
48
-
49
-
50
-
51
-
52
-
53
-
54
-
55
-
56
-
57
-
58
-
59
-
60
-
61
-
62
-
63
-
64
-
65
-
66
-
67
-
68
-
69
-
70
-
71
-
72
-
73
-
74
-
75
-
76
-
77
-
78
-
79
-
80
-
81
-
82
-
83
-
84
 |
 |

©2007 Sony Corporation
3-093-550-
11
(1)
DVD Home
Theatre System
Operating Instructions
Owner’s Record
The model and serial numbers are located on the rear of the unit. Record the
serial number in the space provided below. Refer to them whenever you call
upon your Sony dealer regarding this product.
Model No.
Serial No.
HT-7100DH