Sony ICD-SX68 Operating Instructions - Page 14
Notes, insert batteries for the first time, or when
 |
UPC - 027242731752
View all Sony ICD-SX68 manuals
Add to My Manuals
Save this manual to your list of manuals |
Page 14 highlights
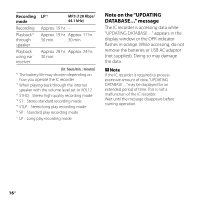
While the batteries are charging, "CONNECTING" and the charging indicator are displayed in an animation. When the charging indicator indicates " ," charging is completed. (Charging time: approx. 4 hours*) When you use the IC recorder for the first time, or after you have not used the IC recorder for a certain time, it is recommended that you charge the batteries repeatedly until " " is displayed. If the charging indicator is not displayed, charging has not been done properly. Proceed from step 1 again. * This is an approximation for the time it takes to charge from no remaining battery power to full battery power at room temperature. It varies depending on the remaining power and the condition of the batteries. It also takes more time if the temperature of the batteries is low, or if the batteries are changed while you are transferring data to the IC recorder. Tip You can charge the rechargeable batteries by connecting the IC recorder to an AC outlet using a USB AC adaptor (not supplied) (page 81). Notes While " " or " " is being displayed instead of the remaining battery/charging indicator, you cannot charge the batteries. Charge the batteries in an environment with a temperature of 5 °C - 35 °C (41 ˚F - 95 ˚F). If "USB CHARGE" in the menu "DETAIL MENU" is set to "OFF," you cannot charge the batteries using your computer. Set "USB CHARGE" to "ON" (page 56). Do not use manganese batteries for this IC recorder. Clock setting display appears when you insert batteries for the first time, or when you insert batteries after the IC recorder has been without batteries for a certain period of time. Please refer to step 4 in "Step 2: Setting the Clock" on page 18 to set the date and time. 14GB
-
 1
1 -
2
-
3
-
4
-
5
-
6
-
7
-
8
-
 9
9 -
 10
10 -
 11
11 -
 12
12 -
 13
13 -
 14
14 -
 15
15 -
 16
16 -
 17
17 -
 18
18 -
 19
19 -
20
-
21
-
22
-
23
-
24
-
25
-
26
-
27
-
28
-
29
-
30
-
31
-
32
-
33
-
34
-
35
-
36
-
37
-
38
-
39
-
40
-
41
-
42
-
43
-
44
-
45
-
46
-
47
-
48
-
49
-
50
-
51
-
52
-
53
-
54
-
55
-
56
-
57
-
58
-
59
-
60
-
61
-
62
-
63
-
64
-
65
-
66
-
67
-
68
-
69
-
70
-
71
-
72
-
73
-
74
-
75
-
76
-
77
-
78
-
79
-
80
-
81
-
82
-
83
-
84
-
85
-
86
-
87
-
88
 |
 |