Sony ICD-TX800 Operating Instructions
Sony ICD-TX800 Manual
 |
View all Sony ICD-TX800 manuals
Add to My Manuals
Save this manual to your list of manuals |
Sony ICD-TX800 manual content summary:
- Sony ICD-TX800 | Operating Instructions - Page 1
, which provides you with instructions on the basic operations of the IC recorder. The Help Guide is an online manual. Refer to the Help Guide when you would like to know further details, operations and possible solutions when a problem occurs. http://rd1.sony.net/help/icd/t80/h_uc/ Check the - Sony ICD-TX800 | Operating Instructions - Page 2
instructions affichées pour activer la fonction Bluetooth. Sur le smartphone, démarrez l'application REC Remote, puis sélectionnez « ICD-TX800 iPhone et Mac sont des marques commerciales d'Apple Inc., déposées aux États-Unis et dans d'autres pays. App Store est une marque de service d'Apple Inc
-
 1
1 -
 2
2
 |
 |

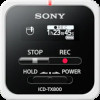
IC Recorder
ICD-TX800
Operating Instructions
GB
FR
© 2017 Sony Corporation
Printed in China
4-699-321-
42
(2)
Owner’s Record
The model number is located at the front panel and the
serial number is located at the side panel. Record these
numbers in the space provided below. Refer to these
numbers whenever you call upon your Sony dealer
regarding this product.
Model No. _________________________________
Serial No. __________________________________
You are cautioned that any changes or modifications not
expressly approved in this manual could void your authority
to operate this equipment.
Refer to the Help Guide
This is the Operating Instructions, which provides you with
instructions on the basic operations of the IC recorder.
The Help Guide is an online manual.
Refer to the Help Guide when you would like to know
further details, operations and possible solutions when a
problem occurs.
Check the supplied items
• IC Recorder (1)
• Remote control* (1)
• Stereo headphones (1)
• Dedicated headphone cable (1)
• USB cable (1)
• Carrying case (1)
• Operating Instructions (this sheet)
• Warranty card
• Application Software, Sound Organizer 2 (Installer file
stored in the built-in memory so that you can install it to
your computer.)
* A button type lithium battery is already installed.
Parts and controls
IC recorder
Remote control
Your IC recorder has a built-in
clip on its back.
You can hook it onto
something, such as the hem
of a pocket.
Built-in microphones
Operation indicator
Display window
Bluetooth indicator*¹
USB connector cover
USB/Headphone connector (inside the USB connector
cover)
STOP button
HOLD•POWER switch*²
REC button
/DPC (Digital Pitch Control) button
Built-in antenna*³
STOP button
Operation indicator
HOLD switch
(review/fast backward) button
BACK/
HOME button*⁴
(play/enter) button*⁵
REC button
(cue/fast forward) button
OPTION button
/
A-B (repeat A-B) button
VOL –/+ (volume –/+) button*⁵
T-MARK (track mark) button
RESET button*⁶
Strap hole (No strap is supplied with your IC recorder.)
Battery case*⁷
*¹ The indicator changes in color or flashes to indicate the status of the
Bluetooth function or the Bluetooth pairing (device registration).
*² Sliding the HOLD•POWER switch to “POWER” and holding it for 8
seconds or longer restarts your IC recorder. Before restarting the
IC recorder, make sure the operating indicator is unlit. For detailed
instructions, refer to the Help Guide.
*³ When using the remote control, do not cover the built-in antenna, for
example with your hand, so as not to disturb the wireless connection
with the IC recorder.
*⁴ Press this button once to display the previous screen. Press and hold it
to display the HOME menu screen.
*⁵ There is a tactile dot on the
(play/enter) button and next to “+” on
the VOL –/+ (volume –/+) button.
*⁶ Press this button when the remote control seems not working.
*⁷ A button type lithium battery is already installed.
¼
Your IC recorder is not equipped with built-in speakers.
Let’s try out your new IC recorder
Charge
Charge the IC recorder.
Using the supplied USB cable, connect the USB/
Headphone connector inside the USB connector cover to
a USB port of a running computer. Charging starts.
When the battery is fully charged, the battery indicator
will indicate “
.”
Disconnect the IC recorder.
Make sure that the message “Accessing” is no longer
on the display window. Then refer to the Help Guide to
remove the IC recorder safely.
Power on
IC recorder
Slide and hold the HOLD•POWER switch on the IC recorder
in the direction toward “POWER” until the window display
appears.
To power off, slide the HOLD•POWER switch on the IC
recorder to “POWER” and hold it until “Power Off” appears on
the display window.
Remote control
Operation indicator
Slide the HOLD switch away from “HOLD.”
To power on the remote control, press any one of the buttons
on the remote control. When the operation indicator on the
remote control stops flashing, operations with the remote
control are available.
The remote control is not equipped with the power button.
It automatically powers off in the following cases:
• if the wireless connection is not established with the IC
recorder and you leave the remote control unused for about
5 minutes
• if the wireless connection is established with the IC recorder
and
– you power off the IC recorder
–you leave the remote control unused for about 2 hours
To use the remote control for operations after it powers off,
follow the above procedure to power on the remote control,
and then press your desired button on the remote control
once again.
To prevent unintentional operations (HOLD)
The IC recorder and the remote control are each equipped
with the switch to hold the operation.
Slide the HOLD•POWER switch on the IC recorder or the HOLD
switch on the remote control in the direction of “HOLD.”
IC recorder
Remote control
¼
To release the IC recorder or the remote control from the Hold
status, slide the HOLD•POWER switch towards the center or the
HOLD switch away from “HOLD,” respectively.
Initial settings
Buttons to use (on the remote control)
Display window (on the IC recorder)
Select
(
/
/
/
)
Enter
When you power on your IC recorder for the first time, the
“Configure Initial Settings” screen appears on the display
window of the IC recorder. Use the remote control to make
initial settings, such as selecting the display language, setting
the clock, and turning on/off the beep sound.
Slide the HOLD switch away from “HOLD” to release
the remote control from the HOLD status.
Remove the yellow label from the back of the remote
control when you use it for the first time.
When “Configure Initial Settings” screen appears,
press any button on the remote control.
If the operation indicator on the remote control is
flashing, wait until it stops flashing before proceeding to
the next step.
Press
to start the initial settings.
Select the display language.
You can select from the following languages:
English*, Español (Spanish), Français (French)
* Default setting
Set the current year, month, day, hour, and minute.
¼
To go back to the previous clock setting item, press BACK/
HOME.
Select “Next.”
Select “Yes” or “No” to turn on or off the beep sound.
When the initial settings finish, the completion message
and then the HOME menu screen appears.
Notes
• You can hear the beep sound only through the headphones
connected to your IC recorder.
• You can change any of the initial settings at any time later. For
detailed instructions, refer to the Help Guide.
Using the HOME menu
You can use the HOME menu for a variety of operations,
including locating and playing a recorded file and changing
the settings of your IC recorder.
Buttons to use (on the remote control)
Display window (on the IC recorder)
Select (
/
)
Enter
BACK/HOME
¼
To use the HOME menu, you need to operate the remote
control.
Press and hold BACK/HOME.
The HOME menu screen appears on the display window
of the IC recorder.
The HOME menu items are aligned in the following
sequence.
Recorded
Files
Record
Settings
REC
Remote
Back
to XX*
Music
Select your desired function from the following:
Music
You can select and play one of the files
you have imported from a computer.
To locate a music file, select “All Songs,”
“Albums,” “Artists,” or “Folders.”
When importing files, be sure to import
them into the MUSIC folder.
Recorded
Files
You can select and play one of the
files you have recorded with your IC
recorder. To locate a recorded file,
select “Latest Recording,” “Search by
REC Date,” “Search by REC Scene,” or
“Folders.”
Record
You can display the record standby
screen, and then start recording.
REC Remote
You can display the menu screen for
REC Remote that uses the Bluetooth
function.
Additionally, you can turn on/off the
Bluetooth function or make device
registration (pairing) for using REC
Remote.
Settings
You can display the Settings menu
screen and change various settings on
the IC recorder.
Back to XX*
You can go back to the screen that
was displayed before the HOME menu
screen.
* The function you are currently using is displayed in “XX.”
¼
Press
STOP to return to the screen displayed before you
entered the HOME menu.
Using the OPTION menu
You can use the OPTION menu to perform a variety of
functions, including changing the settings of your IC
recorder.
The available items differ depending on the situation.
Buttons to use (on the remote control)
Display window (on the IC recorder)
Select (
/
)
Enter
OPTION
¼
To use the OPTION menu, you need to operate the remote
control.
Select your desired function from the HOME menu,
and then press OPTION.
Select the menu item for which you want to
change the setting.
Select your desired setting option.
Copying files from your
IC recorder to a computer
You can copy the files and folders from your IC recorder to a
computer to store them.
Follow the instructions in “Charge” to connect your
IC recorder to a computer.
Drag and drop the files or folders you want to
copy from “IC RECORDER” to the local disk on the
computer.
Disconnect your IC recorder from the computer.
Installing Sound Organizer 2
Install Sound Organizer on your computer.
Sound Organizer allows you to exchange files between your
IC recorder and your computer.
Songs imported from music CDs and other media, MP3 and
other audio files imported to a computer can also be played
and transferred to the IC recorder.
Notes
• Sound Organizer is compatible with Windows computers only.
It is not compatible with Mac.
• This IC recorder is compatible with Sound Organizer 2 only.
• If you format the built-in memory, all data stored there will be
deleted. (The Sound Organizer software installer will also be
deleted.)
¼
• When installing Sound Organizer, log in to an account with
administrator privileges.
• The installation procedure varies depending on the Windows
version. The following procedure uses Windows 7 as an
example.
Follow the instructions in “Charge” to connect your
IC recorder to a computer.
Make sure the IC recorder is successfully detected
by the computer.
“Connecting” appears and stays on the IC recorder's
display window while the IC recorder is connected to
the computer.
Go to the [Start] menu, click [Computer], and then
double-click [IC RECORDER] - [FOR WINDOWS].
Double-click [SoundOrganizer_V2001] (or
[SoundOrganizer_V2001.exe]).
Follow the computer's on-screen instructions.
Make sure that you accept the terms of the license
agreement, select [I accept the terms in the license
agreement], and then click [Next].
When the [Setup Type] window appears, select
[Standard] or [Custom], and then click [Next].
Follow the instructions on the screen and set the
installation settings when you select [Custom].
When the [Ready to Install the Program] window
appears, click [Install].
The installation starts.
When the [Sound Organizer has been installed
successfully.] window appears, check [Launch
Sound Organizer Now], and then click [Finish].
Note
You may need to restart your computer after installing
Sound Organizer.
Replacing the battery of the
remote control
When the indicator on the remote control lights in red,
the battery is running out of power. Follow these steps to
replace the battery. Be sure to use the button type lithium
battery, CR2032, for replacement.
Turn over the remote control to face it down.
Record
Buttons to use (on the IC recorder)
Built-in microphones
STOP
REC
Operation indicator
¼
• To start recording, you can operate either the IC recorder or the
remote control.
• Before you start recording, make sure that the HOLD status is
released.
• You can select a operation scene for each situation by selecting
“Scene Select” in the OPTION menu with the remote control.
Turn the IC recorder so that its built-in microphones
point in the direction of the recording source.
Press
REC.
Make sure that the operation indicator on the IC recorder
lights in red, indicating that recording has started.
Press
STOP to stop recording.
Recording stops and “Saving...” appears on the display
window.
Listen
Your IC recorder is not equipped with a built-in speaker. For
audio listening, you need to connect the stereo headphones
(supplied) to the IC recorder with the dedicated headphone
cable (supplied). For playback operations, use the remote
control.
Listening preparation
Connect the stereo headphones to the USB/Headphone
connector on the IC recorder with the dedicated headphone
cable.
To start playback
Buttons to use (on the remote control)
Display window (on the IC recorder)
Select
(
/
/
/
)
Enter
STOP
BACK/HOME
VOL –/+ button
While watching the display window on the IC
recorder, operate the remote control to select
“
Recorded Files” from the HOME menu.
Select “Latest Recording,” “Search by REC Date,”
“Search by REC Scene,” or “Folders.”
Select your desired file.
Playback starts.
Press VOL + or VOL - to adjust the volume.
Press
STOP to stop playback.
¼
Right after you stopped recording, you can press
to play the
file you have just recorded.
To add a track mark
You can add a track mark at a point at which you want to
divide a file later or locate during playback. You can add a
maximum of 98 track marks to each file.
You can also add track marks during recording.
Delete
Buttons to use (on the remote control)
Display window (on the IC recorder)
Enter
OPTION
Select
(
/
/
/
)
¼
To delete a file, you need to operate the remote control.
Note
Once a file is deleted, you cannot restore it.
While watching the display window on the IC
recorder, operate the remote control to select the file
you want to delete from the list of recorded files or
play back the file you want to delete.
Select “Delete a File” from the OPTION menu.
“Delete?” appears and the selected file starts playing for
your confirmation.
Select “Yes.”
“Please Wait” appears and stays until the selected file is
deleted.
Push and hold the tab (
) toward the groove (
),
insert your fingernail into the groove (
), and
then pull out the battery case.
Remove the battery.
Place the new battery with the + side facing up.
Insert the battery case back into the remote
control.
Press the RESET button on the back of the remote
control.
Press any button on the remote control (the
operation indicator on the remote control flashes
alternately in blue and red) to power it on, and
then power on the IC recorder.
When the operation indicator on the remote control
stops flashing, operations with the remote control are
available.
Precautions
On power
• IC Recorder
DC 3.7V : the built-in rechargeable lithium-ion battery
DC 5.0V : when charged using USB
Rated current consumption : 500mA
• Remote Control
DC 3V : CR2032 (Button type lithium battery)
On safety
Do not operate the unit while driving, cycling or operating
any motorized vehicle.
On handling
• Do not leave the unit in a location near heat sources, or
in a place subject to direct sunlight, excessive dust or
mechanical shock.
• Should any solid object or liquid fall into the unit, remove
the battery and have the unit checked by qualified
personnel before operating it any further.
• When using your IC recorder, remember to follow the
precautions below in order to avoid warping the cabinet
or causing the IC recorder to malfunction.
–Do not sit down with the IC recorder in your back pocket.
–Do not put your IC recorder into a bag with the
headphones/earphones cord wrapped around it and
subject the bag to strong impact.
• Be careful not to allow water to splash on the unit. The
unit is not waterproof. In particular, be careful in the
following situations.
– When you have the unit in your pocket and go to the
bathroom, etc.
When you bend down, the unit may drop into the water
and may get wet.
– When you use the unit in an environment where the unit
is exposed to rain, snow, or humidity.
–In circumstances where you get sweaty. If you touch the
unit with wet hands or if you put the unit in the pocket
of sweaty clothes, the unit may get wet.
• Listening with this unit at high volume may affect your
hearing.
• For traffic safety, do not use this unit while driving or
cycling.
• Do not use this unit at a place where the inability to hear
surrounding sounds may present a danger.
• You may feel pain in your ears if you use the headphones
when the ambient air is very dry.
This is not because of a malfunction of the headphones,
but because of static electricity accumulated in your body.
You can reduce static electricity by wearing non-synthetic
clothes that prevent the emergence of static electricity.
On noise
• Noise may be heard when the unit is placed near an AC
power source, a fluorescent lamp or a mobile phone
during recording or playback.
• Noise may be recorded when an object, such as your
finger, etc., rubs or scratches the unit during recording.
On maintenance
To clean the exterior, use a soft cloth slightly moistened in
water. Then use a soft dry cloth to wipe the exterior. Do not
use alcohol, benzine or thinner.
If you have any questions or problems concerning your unit,
please consult your nearest Sony dealer.
Notes on the Bluetooth function
• Bluetooth wireless technology allows connection at a
distance of up to about 10 m (33 feet). However, the
effective range may vary depending on obstructions
(people, metals, walls, etc.) or signal status.
• Because Bluetooth and wireless LAN (IEEE802.11b/g)
devices use the same frequency (2.4 GHz), signal
interference may occur, resulting in communication
speed decrease, noise, or inability to connect, if Bluetooth
communications are used near a wireless LAN device. In
such cases, take the following measures.
– Perform Bluetooth communications at least 10 m (33 feet)
away from the wireless LAN device when connecting
your IC recorder and a Bluetooth device.
–Place your IC recorder and the Bluetooth device as close
together as possible.
–Turn off the wireless LAN device when performing
Bluetooth communications within about 10 m (33 feet) of
a wireless LAN device.
• Radio waves emitted from a Bluetooth device may affect
the operation of equipment such as electronic medical
devices. Turn off your IC recorder and other Bluetooth
devices in the following locations as failure to do so may
cause an accident.
–In hospitals, near priority seats on trains, in airplanes, in
places such as gasoline stations where flammable gases
are present, near automatic doors or fire alarms.
• If the operation indicator on the remote control keeps
flashing and the remote control seems not working, you
may be able to solve this by having your IC recorder and
the remote control registered with each other once again.
For detailed instructions on the device registration, refer to
the Help Guide.
WARNING
• Do not expose the batteries (battery pack or batteries
installed) to excessive heat such as sunshine, fire or the
like for a long time.
• Do not dismantle, open or shred secondary cells or batteries.
• Do not expose cells or batteries to heat or fire. Avoid
storage in direct sunlight.
• In the event of a cell leaking, do not allow the liquid to
come in contact with the skin or eyes. If contact has been
made, wash the affected area with copious amounts of
water and seek medical advice.
• Secondary cells and batteries need to be charged before
use. Always
refer to the manufacturer’s instructions or
equipment manual for proper charging instructions.
• After extended periods of storage, it may be necessary to
charge and discharge the cells or batteries several times
to obtain maximum performance.
• Dispose of properly.
• Do not ingest battery, Chemical Burn Hazard. The remote
control supplied with this product contains a coin/button
cell battery. If the coin/button cell battery is swallowed,
it can cause severe internal burns in just 2 hours and can
lead to death.
Keep new and used batteries away from children. If the
battery compartment does not close securely, stop using
the product and keep it away from children.
If you think batteries might have been swallowed or placed
inside any part of the body, seek immediate medical attention.
CAUTION
Danger of explosion if battery is incorrectly replaced.
Replace only with the same or equivalent type.
Risk of explosion if battery is replaced by an incorrect type.
Dispose of used batteries according to the instructions.
Notes on the operations
• When the button operations of the remote control do not
work, check if:
–the IC recorder is powered.
By default, the IC recorder will automatically power off
if you leave it unused for 30 minutes.
–the remote control is released from the HOLD status.
–the wireless connection process with the IC recorder is
in progress.
The operation indicator on the remote control flashes
while the wireless connection is being established.
• You can check the indication of the operation indicator
on the remote control for the status of the remote
control.
Indication of the
operation indicator
Status of the remote
control
Flashes twice in blue*.
Powered on.
Lights in blue for 2
seconds.
Powered off.
Flashes four times in blue*.
Resetting of the remote
control is complete.
Stays lit in red.
Not operable due to
battery shortage.
Flashes alternately in blue
and red.
Device registration process
is in progress.
Flashes twice in blue*
repeatedly.
Wireless connection
process is in progress.
Flashes once in blue*.
Wireless connection is
established and button
operations are available.
* When the battery is running out of power, the operation indicator on
the remote control lights in red.
Operations with the
smartphone (REC Remote)
Buttons to use (on the remote control)
Display window (on the IC recorder)
Select
(
/
/
/
)
Enter
With the BLUETOOTH® function of your IC recorder, you can
operate your IC recorder (recording, changing the recording
settings, etc.) using a smartphone.
To operate your IC recorder using a smartphone
You need to install REC Remote on the smartphone and make
a pairing between the smartphone and your IC recorder.
Pairing means having Bluetooth devices registered with each
other to establish a wireless connection for the first time.
To make a pairing with the IC recorder using REC Remote, you
need the latest version of REC Remote. If your smartphone
has REC Remote already installed, be sure to upgrade it to the
latest version.
Search Google Play or App Store for REC Remote and
install it on the smartphone.
On the IC recorder, select “REC Remote”- “Add Device
(Pairing)” from the HOME menu with the remote
control and follow the on-screen instruction to turn
on the Bluetooth function.
On the smartphone, start REC Remote and select
“ICD-TX800” (your IC recorder) from the available
device list. For detailed instructions, refer to the help
of REC Remote and the manual supplied with the
smartphone.
Now you can use the smartphone for IC recorder
operations.
Note
The device registration (pairing) information is cleared in the
following cases. You need to pair the devices once again.
- The settings on the IC recorder, the smartphone, or both devices
are reset to the default settings, for example, due to initialization.
- The device registration (pairing) information is deleted, for
example, during the course of a repair service.
To turn on or off the Bluetooth function of your
IC recorder
Select “REC Remote” - “Bluetooth ON/OFF” from the
HOME menu.
To turn on the Bluetooth function, select “ON.” To
turn it off, select “OFF.”
¼
Turning off the Bluetooth function conserves battery power.
For IC recorder:
The available scientific evidence does not show that any
health problems are associated with using low power
wireless devices. There is no proof, however, that these
low power wireless devices are absolutely safe. Low power
Wireless devices emit low levels of radio frequency energy
(RF) in the microwave range while being used. Whereas
high levels of RF can produce health effects (by heating
tissue), exposure of low-level RF that does not produce
heating effects causes no known adverse health effects.
Many studies of low-level RF exposures have not found any
biological effects. Some studies have suggested that some
biological effects might occur, but such findings have not
been confirmed by additional research. The model has been
tested and found to comply with FCC/IC radiation exposure
limits set forth for an uncontrolled environment and meets
the FCC radio frequency (RF) Exposure Guidelines and RSS-
102 of the IC radio frequency (RF) Exposure rules.
For Remote control:
This equipment complies with FCC/IC radiation exposure
limits set forth for an uncontrolled environment and meets
the FCC radio frequency (RF) Exposure Guidelines and
RSS-102 of the IC radio frequency (RF) Exposure rules. This
equipment has very low levels of RF energy that is deemed
to comply without testing of specific absorption rate (SAR).
For the customer in Canada
This device complies with Industry Canada's licence-exempt
RSSs. Operation is subject to the following two conditions:
(1) This device may not cause interference; and
(2) This device must accept any interference, including
interference that may cause undesired operation of the
device.
Listening for a Lifetime
Selecting fine audio equipment such as the unit you’ve just
purchased is only the start of your musical enjoyment. Now
it’s time to consider how you can maximize the fun and
excitement your equipment offers.
This manufacturer, the Consumer Electronics Association
(CEA)® and the American Speech-Language-Hearing
Association (ASHA) want you to get the most out of your
equipment by playing it at a safe level; a level that lets the
sound come through clearly without annoying blaring or
distortion and, most importantly, without damaging your
sensitive hearing.
Sound can be deceiving. Over time your hearing “comfort
level” adapts to higher volumes of sound. So what sounds
“normal” can actually be loud and harmful to your hearing.
Guard against this by setting your equipment at a safe level
BEFORE your hearing adapts.
TO ESTABLISH A SAFE LEVEL:
• Set your volume control to the lowest level where you
can hear the music comfortably and clearly. Prolonged
exposure to anything over 85 decibels can cause gradual
hearing loss.
• Once you have established a sound level where you can
hear the audio comfortably, clearly and without distortion,
set the dial and leave it there.
• See if your music player has a volume limiter that allows
you to set a safe listening level by establishing a maximum
volume level on your player. This is a great solution for
parents to ensure their children listen at a safe level.
• Limit listening time to give your hearing “quiet breaks.”
BE SURE TO OBSERVE THE FOLLOWING GUIDELINES
WHEN WEARING YOUR HEADPHONES OR EARBUDS:
• Do not turn up the volume so high that you can’t hear
sounds around you.
• Do not use headphones or earbuds while operating a
motorized vehicle; it may create a traffic hazard and is
illegal in many areas.
Used wisely, your new sound equipment will provide years
of fun and enjoyment.
Since hearing damage from loud noise is often
undetectable until it is too late, this manufacturer, CEA
and ASHA recommend that you avoid prolonged exposure
to excessive noise. The following list of sound levels is
included for your information so that you can better protect
your hearing.
DECIBEL LEVEL EXAMPLES:
30 Whisper
40 Quiet room
50 Moderate rainfall
60 Normal conversation
70 Busy traffic, vacuum cleaner
80 Alarm clock
CONSTANT EXPOSURE TO THESE NOISES CAN BE
DANGEROUS:
90 Lawn mower, motorcycle
100 Chain saw
110 Rock concert
120 Jet plane takeoff
130 Jackhammer
140 Firecrackers
This information courtesy of the American Speech-
Language-Hearing Association (ASHA), the national
professional, scientific and credentialing association
for more than 135,000 audiologists, speech-language
pathologists, and speech, language and hearing scientists.
For information on protection against noise-induced hearing
loss, call the ASHA Action Center (800-638-8255), Monday
through Friday, 8:30 a.m. to 5 p.m. To find an audiologist
in your area, visit www.asha.org/findpro. Parents can find
helpful information about how to protect their children’s
hearing and how to teach them about safe listening at
www.listentoyourbuds.org, an ASHA award-winning public
education campaign sponsored in part by CEA.
A safety tip from the Consumer Electronics Association, 1919
South Eads Street, Arlington, VA 22202 and the American
Speech-Language-Hearing Association, 2200 Research
Boulevard, Rockville, MD 20850.
FOR UNITED STATES CUSTOMERS. NOT APPLICABLE IN
CANADA, INCLUDING IN THE PROVINCE OF QUEBEC.
POUR LES CONSOMMATEURS AUX ÉTATS-UNIS. NON
APPLICABLE AU CANADA, Y COMPRIS LA PROVINCE DE
QUÉBEC.
If you have any questions about this product, you may
call: Sony Customer Information Service Center 1-800-
222-7669 or http://www.sony.com/
Declaration of Conformity
Trade Name : SONY
Model : ICD-TX800
Responsible Party : Sony Electronics Inc.
Address : 16535 Via Esprillo, San Diego, CA 92127 USA
Telephone Number : 858-942-2230
This device complies with part 15 of the FCC Rules.
Operation is subject to the following two conditions:
(1) This device may not cause harmful interference, and
(2) this device must accept any interference received,
including interference that may cause undesired
operation.
INFORMATION
This equipment has been tested and found to comply
with the limits for a Class B digital device, pursuant
to Part 15 of the FCC Rules. These limits are designed
to provide reasonable protection against harmful
interference in a residential installation.
This equipment generates, uses and can radiate radio
frequency energy and, if not installed and used in
accordance with the instructions, may cause harmful
interference to radio communications.
However, there is no guarantee that interference will
not occur in a particular installation. If this equipment
does cause harmful interference to radio or television
reception, which can be determined by turning the
equipment off and on, the user is encouraged to try to
correct the interference by one or more of the following
measures:
–Reorient or relocate the receiving antenna.
– Increase the separation between the equipment and
receiver.
– Connect the equipment into an outlet on a circuit
different from that to which the receiver is connected.
The display window turns off
automatically
The “Screen Off Timer” setting on your IC recorder is set
to “30sec” by default to save battery power. If you leave
both the IC recorder and the remote control unused for
30 seconds, the display window will turn off, but you
can still perform any button operations. To turn the
display window back on, press BACK/HOME or slide the
HOLD•POWER switch on the IC recorder to “HOLD” and
then slide it back to the original (center) position.
¼
You can keep the display window from turning off or
change the default setting to another timer interval. Press
and hold BACK/HOME and select “
Settings” -
“Common Settings” - “Screen Off Timer,” and then select
“No Auto Screen Off,” “15sec,” “30sec,” “1min,” “3min,” or
“5min.”
–Consult the dealer or an experienced radio/TV
technician for help.
This equipment must not be co-located or operated in
conjunction with any other antenna or transmitter.
For the state of California, USA only
Perchlorate Material -special handling may apply, See
www.dtsc.ca.gov/hazardouswaste/perchlorate
Specifications
Capacity (User available capacity*¹*²)
16 GB (approx. 12.80 GB = 13,743,895,347 Byte)
Maximum recording time*³ (Built-in memory)
The maximum recording time of all the folders is as follows.
LPCM 44.1 kHz/16 bit (STEREO)
21 hours 35 minutes
MP3 192 kbps (STEREO)
159 hours
MP3 128 kbps (STEREO)
238 hours
MP3 48 kbps (MONO)
636 hours
Battery Life
• IC recorder (a built-in rechargeable lithium-ion battery)
REC Mode
Recording
Playback with
the headphones
Recording with
REC Remote
LPCM
44.1kHz/16bit
Approx. 12
hours
Approx. 10
hours
Approx. 6
hours
MP3 192 kbps
Approx. 15
hours
Approx. 12
hours
Approx. 6
hours
MP3 128 kbps
Approx. 15
hours
Approx. 12
hours
Approx. 6
hours
MP3 48 kbps
Approx. 15
hours
Approx. 12
hours
Approx. 6
hours
• Remote control (an installed button type lithium battery)
Approx. 1 year*⁴
Dimensions (w/h/d) (not incl. projecting parts and
controls)
• IC recorder
Approx. 1.50 inches (38.0 mm) x 1.50 inches (38.0 mm) x
0.54 inches (13.7 mm)
• Remote control
Approx. 1.50 inches (38.0 mm) x 1.50 inches (38.0 mm) x
0.43 inches (10.8 mm)
Mass
• IC recorder
Approx. 0.78 oz (22 g)
• Remote control
Approx. 0.53 oz (15 g) (including a button type lithium battery)
Temperature/Humidity
Operating temperature
41 °F - 95 °F (5°C - 35°C)
Operating humidity
25% - 75%
Storage temperature
14 °F - 113 °F (-10°C - +45°C)
Storage humidity
25% - 75%
*¹ A small amount of the built-in memory is used for file management and
therefore not available for user storage.
*² When the built-in memory is formatted with the IC recorder.
*³ Default settings for the recording scenes.
*⁴ The battery life is given only for reference purposes. It also varies
depending on factors such as usage conditions and ambient
temperatures.
Bluetooth specification
• Communication system: Bluetooth specification version 4.0
• Maximum communication range: Line of sight approx. 10 m
(33 feet)*
• Frequency band: 2.4 GHz band (2.4000 GHz - 2.4835 GHz)
* The range may vary depending on the communication environment.
Trademarks and licenses
• Microsoft, Windows and Windows Media are registered
trademarks or trademarks of Microsoft Corporation in the
United States and/or other countries.
• MPEG Layer-3 audio coding technology and patents
licensed from Fraunhofer IIS and Thomson.
• Google Play and Android are trademarks of Google LLC.
• Apple, the Apple logo, iPhone and Mac are trademarks of
Apple Inc., registered in the U.S. and other countries.
App Store is a service mark of Apple Inc., registered in the
U.S. and other countries.
• Use of the Made for Apple badge means that an accessory
has been designed to connect specifically to the Apple
product(s) identified in the badge, and has been certified
by the developer to meet Apple performance standards.
Apple is not responsible for the operation of this device or
its compliance with safety and regulatory standards.
• Compatible iPhone models
iPhone 7, iPhone 7 Plus, iPhone SE, iPhone 6s,
iPhone 6s Plus, iPhone 6, iPhone 6 Plus, iPhone 5s,
iPhone 5c, iPhone 5
• The BLUETOOTH® word mark and logos are registered
trademarks owned by Bluetooth SIG, Inc. and any use of
such marks by Sony Corporation is under license. Other
trademarks and trade names are those of their respective
owners.
All other trademarks and registered trademarks are
trademarks or registered trademarks of their respective
holders. Furthermore, “™” and “®” are not mentioned in
each in this manual.
This product is protected by certain intellectual property
rights of Microsoft Corporation. Use or distribution of such
technology outside of this product is prohibited without a
license from Microsoft or an authorized Microsoft subsidiary.
The “Sound Organizer 2” uses software modules as shown
below:
Windows Media Format Runtime
Notes on the License
This IC recorder comes with software that are used based
on licensing agreements with the owners of that software.
Based on requests by the owners of copyright of these
software applications, we have an obligation to inform you
of the following. Please read the following sections.
Licenses (in English) are recorded in the built-in memory
of your IC recorder. Establish a Mass Storage connection
between the IC recorder and a computer to read licenses in
the “LICENSE” folder.
On GNU GPL/LGPL applied software
The software that is eligible for the following GNU General
Public License (hereinafter referred to as “GPL”) or GNU
Lesser General Public License (hereinafter referred to as
“LGPL”) are included in the IC recorder.
This informs you that you have a right to have access to,
modify, and redistribute source code for these software
programs under the conditions of the supplied GPL/LGPL.
Source code is provided on the web. Use the following URL
to download it.
We would prefer you do not contact us about the contents
of source code.
Licenses (in English) are recorded in the built-in memory
of your IC recorder. Establish a Mass Storage connection
between the IC recorder and a computer to read licenses in
the “LICENSE” folder.