Sony ILCE-7M3 Operating Instructions
Sony ILCE-7M3 Manual
 |
View all Sony ILCE-7M3 manuals
Add to My Manuals
Save this manual to your list of manuals |
Sony ILCE-7M3 manual content summary:
- Sony ILCE-7M3 | Operating Instructions - Page 1
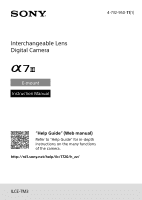
Interchangeable Lens Digital Camera E-mount Instruction Manual 4-732-950-11(1) "Help Guide" (Web manual) Refer to "Help Guide" for in-depth instructions on the many functions of the camera. http://rd1.sony.net/help/ilc/1720/h_zz/ ILCE-7M3 - Sony ILCE-7M3 | Operating Instructions - Page 2
the latest information on the camera. Scan here http://rd1.sony.net/help/ilc/1720/h_zz/ ILCE-7M3 Help Guide Instruction Manual (this book) This manual introduces some basic functions. For the quick start guide, see "Startup guide" (page 25). The "Startup guide" introduces the initial procedures - Sony ILCE-7M3 | Operating Instructions - Page 3
Check out the Help Guide 2 Notes on using your camera 6 Preparations for shooting Checking the camera and the supplied items 11 Identifying parts 12 Front side 12 Rear side 13 Top side/Side view 15 Bottom 18 Lens FE 28-70 mm F3.5-5.6 OSS (Supplied with ILCE-7M3K)c 19 Basic operations - Sony ILCE-7M3 | Operating Instructions - Page 4
Shooting Focusing 34 Focus Mode 34 Auto focus 36 Focus Area 36 Manual Focus 39 Direct manual focus (DMF 40 Continuous shooting 41 Using touch function 43 Touch Operation captured images 53 Transferring images to the FTP server 53 Connecting the camera to a wireless access point 54 GB 4 - Sony ILCE-7M3 | Operating Instructions - Page 5
computer 55 Disconnecting the camera from the computer 56 Introduction to computer software 57 Image management software (PlayMemories Home 57 RAW processing/remote camera control software...... 58 MENU items/List functions and NFC One-touch functions, refer to the "Help Guide" (page 2). GB 5 - Sony ILCE-7M3 | Operating Instructions - Page 6
Along with this section, also see "Precautions" in the Help Guide (page 2). Screen language You can select the language displayed on the screen using the menu (page 73). Notes on handling the product ••This camera is designed to be dustand moisture-resistant, but is not waterproof or dust-proof - Sony ILCE-7M3 | Operating Instructions - Page 7
all its details, you can also use the monitor. ••If you pan the camera while looking into the viewfinder or move your eyes around, the image in the of unwellness. If you experience uncomfortable symptoms, stop using the camera, and consult your doctor as necessary. Notes on recording for long - Sony ILCE-7M3 | Operating Instructions - Page 8
Shoe with a commercially available flash that applies voltages of 250 V or more or has the opposite polarity of the camera. It may cause a malfunction. Sony lenses/accessories Using this unit with products from other manufacturers may affect its performance, leading to accidents or malfunction. GB - Sony ILCE-7M3 | Operating Instructions - Page 9
in this manual: at an software. When discarding a memory card, we recommend that you physically destroy it. Notes on wireless LAN If your camera is lost or stolen, Sony problem arises because no security precautions are in place or due to any inevitable circumstances when using a wireless LAN, Sony - Sony ILCE-7M3 | Operating Instructions - Page 10
operation. Notes on this manual This manual covers several models supplied with different lenses. The model name varies depending on the supplied lens. The available model varies depending on the countries/regions. Model name Lens ILCE-7M3 Not supplied ILCE-7M3K FE28-70mmF3.5-5.6OSS GB 10 - Sony ILCE-7M3 | Operating Instructions - Page 11
See page 10. ••Rechargeable battery pack NP-FZ100 (1) ••Micro USB cable (1) ••Shoulder strap (1) ••Body cap (1) (Attached to the camera) ••Shoe cap (1) (Attached to the camera) ••Eyepiece cup (1) (Attached to the camera) ••Instruction Manual (1) (this manual) ••Reference Guide (1) ILCE-7M3K ••Zoom - Sony ILCE-7M3 | Operating Instructions - Page 12
Identifying parts See the pages in parentheses for details. Front side ON/OFF (Power) switch (31)/Shutter button (32) Front dial You can quickly adjust the settings for each shooting mode. Remote sensor Lens release button (30) Wi-Fi/Bluetooth antenna (built-in) (52) Microphone Do not - Sony ILCE-7M3 | Operating Instructions - Page 13
monitor to an easily viewable angle and shoot from any position. Remove the eyepiece cup when attaching an angle finder (sold separately). Also, select MENU (Camera Settings 2) [FINDER/MONITOR], and then switch to [Viewfinder (Manual)] or [Monitor (Manual)]. Viewfinder Eye sensor GB 13 - Sony ILCE-7M3 | Operating Instructions - Page 14
Diopter-adjustment dial Adjust the diopter-adjustment dial according to your eyesight until the display appears clearly in the viewfinder. If it is hard to operate the diopter-adjustment dial, remove the eyepiece cup before operating the dial. Access lamp For shooting: C4 button (Custom - Sony ILCE-7M3 | Operating Instructions - Page 15
sensor that converts light into an electric signal. The mark shows the location of the image sensor. When you measure the exact distance between the camera and the subject, refer to the position of the horizontal line. ••If the subject is closer than the minimum shooting distance of the lens, the - Sony ILCE-7M3 | Operating Instructions - Page 16
a plugin-power type, the power of the microphone is supplied by the camera. (Headphones) jack HDMI micro jack USB Type-C™ terminal (17, 55) Charge lamp Multi/Micro USB Terminal* (17, 55) This terminal supports Micro USB-compatible devices. Multi Interface Shoe* Some accessories may not - Sony ILCE-7M3 | Operating Instructions - Page 17
slot 2) (28) Supports SD cards (compatible with UHS-I) and Memory Stick PRO Duo media * For details on compatible accessories for the multi interface shoe and the Multi/Micro USB Terminal, visit the Sony website, or consult your Sony dealer or local authorized Sony service facility. Accessories for - Sony ILCE-7M3 | Operating Instructions - Page 18
Bottom Battery insertion slot (25) Battery cover (25) Tripod socket hole Use a tripod with a screw less than 5.5 mm (7/32 inches) long. Otherwise, you cannot firmly secure the camera, and damage to the camera may occur. Battery cover release lever GB 18 - Sony ILCE-7M3 | Operating Instructions - Page 19
Preparations for shooting Lens FE 28-70 mm F3.5-5.6 OSS (Supplied with ILCE-7M3K) Focusing ring Zoom ring Focal-length scale Focal-length index Lens contacts Do not touch this part directly. Mount index GB 19 - Sony ILCE-7M3 | Operating Instructions - Page 20
Basic operations Using the control wheel ••You can select setting items by turning or pressing the top/bottom/left/ right side of the control wheel. Your selection is determined when you press the center of the control wheel. ••The DISP (Display Setting), / (Drive Mode), and ISO (ISO) functions are - Sony ILCE-7M3 | Operating Instructions - Page 21
Preparations for shooting Using the multi-selector ••Put your finger right on top of the multi-selector to manipulate it more precisely. ••When [Focus Area] is set to [Zone], [Flexible Spot], or [Expand Flexible Spot], you can move the focus area by pressing the multi-selector up/down/left/right. - Sony ILCE-7M3 | Operating Instructions - Page 22
to adjust settings. Operation guide How to use the Quick Navi screen The Quick Navi screen is a function optimized for shooting with the viewfinder, that lets you control settings directly. 1 Select MENU (Camera Settings 2) [DISP Button] [Monitor]. 2 Place a mark on [For viewfinder] and then - Sony ILCE-7M3 | Operating Instructions - Page 23
Preparations for shooting 4 Press the Fn button to switch to the Quick Navi screen. •• The displayed contents and their positions in the illustrations are just guidelines, and may differ from the actual displays. Auto mode/Scene Selection mode P/A/S/M mode 5 Select a function to set by pressing the - Sony ILCE-7M3 | Operating Instructions - Page 24
in step 5, then press the center of the control wheel. The dedicated setting screen for the function will appear. Follow the operating guide to adjust settings. Operation guide Note ••Items that are gray on the Quick Navi screen are not adjustable. ••When using functions such as [Creative Style] or - Sony ILCE-7M3 | Operating Instructions - Page 25
Preparations for shooting Startup guide Step 1: Inserting the battery pack into the camera 1 Open the battery cover. 2 Insert the battery pack that the access lamp (page 14) is not lit, and turn off the camera. Then, slide the lock lever and remove the battery pack. Be careful not to drop the battery - Sony ILCE-7M3 | Operating Instructions - Page 26
the battery is charged. If this happens, remove the battery pack or disconnect the USB cable from the camera and then re-insert it to recharge. •• Be sure to use only genuine Sony brand battery packs and AC Adaptors (supplied). •• Use the USB cable (supplied) or a USB-standard cable. •• The charging - Sony ILCE-7M3 | Operating Instructions - Page 27
on memory cards that can be used with this camera, refer to page 84. 1 Open the memory card cover. 2 Insert the SD card into the slot 1. Slot 1 (lower): Supports SD cards (compatible with UHS-I and UHS-II) Slot 2 (upper): Supports SD cards (compatible with UHS-I) and Slot 2 Slot 1 Memory - Sony ILCE-7M3 | Operating Instructions - Page 28
the first time, it is recommended that you format the card on the camera for more stable performance of the memory card (page 74). Note ••Do not insert a Memory Stick media into the slot 1. It may cause a malfunction. To - Sony ILCE-7M3 | Operating Instructions - Page 29
from the rear of the lens. •• When changing the lens, work quickly in a dust-free environment to keep dust or debris from getting inside the camera. •• It is recommended that you attach the front lens cap when you have done shooting. 2 Mount the lens by aligning the two white index marks - Sony ILCE-7M3 | Operating Instructions - Page 30
an A-mount lens (sold separately). For details, refer to the operating manual supplied with the Mount Adaptor. ••If you want to shoot full-frame use a full-frame size compatible lens. ••When carrying the camera with a lens attached, hold both the camera and the lens firmly. ••Do not hold the part - Sony ILCE-7M3 | Operating Instructions - Page 31
Step 5: Setting the language and the clock 1 Set the ON/OFF (Power) switch to "ON" to turn on the camera. ON/OFF (Power) switch Preparations for shooting 2 Select the desired language and then press the center of the control wheel. Control wheel 3 Make sure that [ - Sony ILCE-7M3 | Operating Instructions - Page 32
To reset the date and time setting, use MENU (page 74). Note ••This camera does not have a function for inserting the date into images. You can insert . (Intelligent Auto). 2 Look into the viewfinder or the monitor and hold the camera. 3 Set the size of the subject by rotating the zoom ring of the - Sony ILCE-7M3 | Operating Instructions - Page 33
Preparations for shooting To shoot movies Press the MOVIE button to start/stop recording. To play back images Press the (Playback) button to play back images. You can select the desired image using the control wheel. To delete displayed image Press the (Delete) button while an image is displayed to - Sony ILCE-7M3 | Operating Instructions - Page 34
button is pressed and held halfway down. Use this when the subject is in motion. In [Continuous AF] mode, there is no beep when the camera focuses. (DMF): You can make fine adjustments manually after performing auto focusing, letting you focus on a subject more quickly than when using the - Sony ILCE-7M3 | Operating Instructions - Page 35
when you are using a lens that supports phase detection AF. ••When [Continuous AF] or [Automatic AF] is set, the angle of view may change little by little while focusing. This does not affect the actual recorded images. ••Only [Continuous AF] and [Manual Focus] are available when shooting movies or - Sony ILCE-7M3 | Operating Instructions - Page 36
focus Focus Area Selects the focusing area. Use this function when it is difficult to focus properly in the auto focus mode. MENU (Camera Settings 1) [Focus Area] desired setting. Wide: Focuses on a subject covering the whole range of the screen automatically. When you press the shutter button - Sony ILCE-7M3 | Operating Instructions - Page 37
depending on the subject or situation. ••When you attach an A-mount lens with a Mount Adaptor (LA-EA1 or LA-EA3) (sold separately) and [ AF System] is set to [Phase Detection AF], the focusing frame for "When focusing on a smaller area" may be displayed. When focus is achieved automatically based on - Sony ILCE-7M3 | Operating Instructions - Page 38
To move the focus area ••You can move the focus area in [Flexible Spot], [Expand Flexible Spot], or [Zone] by operating the multi-selector. If you assign [Focus Standard] to the center of the multi-selector beforehand, you can move the focusing frame back to the center of the monitor by pressing the - Sony ILCE-7M3 | Operating Instructions - Page 39
Focus When it is difficult to focus properly in the autofocus mode, you can adjust the focus manually. 1 MENU (Camera Settings 1) [Focus Mode] [Manual Focus]. 2 Rotate the focusing ring to achieve sharp focus. ••When you rotate the focusing ring, the focus distance is displayed on the screen - Sony ILCE-7M3 | Operating Instructions - Page 40
performing auto focusing, letting you focus on a subject more quickly than when using the manual focus from the beginning. This is convenient in situations such as macro shooting. 1 MENU (Camera Settings 1) [Focus Mode] [DMF]. 2 Press the shutter button halfway down to focus automatically - Sony ILCE-7M3 | Operating Instructions - Page 41
down the shutter button. 1 Select / (Drive Mode) on the control wheel [Cont. Shooting]. ••You can also set the drive mode by selecting MENU (Camera Settings 1) [Drive Mode]. 2 Select the desired mode using the right/left side of the control wheel. Continuous Shooting: Hi+: Images are shot - Sony ILCE-7M3 | Operating Instructions - Page 42
whether to display an indicator of the remaining time for which continuous shooting can be performed at the same shooting speed. MENU (Camera Settings 2) [Cont. Shoot. Length] desired setting. Always Display: Always displays the indicator when the drive mode is set to [Cont. Shooting]. Shoot - Sony ILCE-7M3 | Operating Instructions - Page 43
Shooting Using touch function Touch Operation Sets whether to activate or not the touch operation of the monitor. Touch operations when shooting with the monitor are referred to as "touch panel operations," and touch operations when shooting with the viewfinder are referred to as "touch pad - Sony ILCE-7M3 | Operating Instructions - Page 44
of the focus by touching and dragging on the monitor while looking through the viewfinder. ••When the shutter button is pressed halfway down, the camera focuses on the focusing frame. Press the shutter button all the way down to shoot images. ••To cancel focusing with touch operations, touch or - Sony ILCE-7M3 | Operating Instructions - Page 45
other than [Flexible Spot] or [Expand Flexible Spot]. MENU [Off]. (Camera Settings 1) [Center Lock-on AF] Touch the subject on which recording. ••When you touch the subject, the focus mode temporarily switches to manual focus and the focus can be adjusted using the focus ring. ••To - Sony ILCE-7M3 | Operating Instructions - Page 46
will be reproduced when the image is printed on large-format paper. The smaller the image size, the more images can be recorded. MENU (Camera Settings 1) [ JPEG Image Size] desired setting. When [ L: 24M M: 10M S: 6.0M Aspect Ratio] is set to 3:2 6000×4000 pixels 3936×2624 pixels 3008×2000 - Sony ILCE-7M3 | Operating Instructions - Page 47
files to be recorded on one memory card, but the image quality is lower. File Format Sets the file format for still images. MENU (Camera Settings 1) [ File Format] desired setting. RAW: Digital processing is not performed on this file format. Select this format to process images on a computer - Sony ILCE-7M3 | Operating Instructions - Page 48
File Format Selects the movie file format. MENU (Camera Settings 2) [ File Format] desired setting software. You can save movies on a computer using the PlayMemories Home software. You can save movies on a computer or create a disc that supports this format using the PlayMemories Home software - Sony ILCE-7M3 | Operating Instructions - Page 49
reaches approx. 2 GB during recording, a new movie file will be created automatically. ••Images will not appear on the monitor of the camera if you record movies while the camera is connected to an HDMI device with [ File Format] set to [XAVC S 4K]. Record Setting Selects the frame rate and bit - Sony ILCE-7M3 | Operating Instructions - Page 50
When [ File Format] is set to [XAVC S HD] Record Setting Bit-rate Description 60p 50M/50p 50M Approx. 50 Mbps Records movies in 1920×1080 (60p/50p). 60p 25M/50p 25M Approx. 25 Mbps Records movies in 1920×1080 (60p/50p). 30p 50M/25p 50M Approx. 50 Mbps Records movies in 1920×1080 (30p/25p). - Sony ILCE-7M3 | Operating Instructions - Page 51
Shooting movies Note ••Creating an AVCHD recording disc from movies that were recorded with [60i 24M (FX)]/[50i 24M (FX)] as the [ Record Setting] takes a long time because the image quality of movies is converted. If you want to store movies without converting them, use a Blu-ray Disc. ••[120p]/[ - Sony ILCE-7M3 | Operating Instructions - Page 52
the "Help Guide" (page 2). Installing PlayMemories Mobile PlayMemories Mobile is required to connect the camera and a smartphone. If PlayMemories Mobile is already installed on your smartphone, be sure to update it to the latest version. For details on PlayMemories Mobile, refer to the support page - Sony ILCE-7M3 | Operating Instructions - Page 53
introduced in this manual are not guaranteed to operate on all smartphones or tablets. ••The Wi-Fi functions of this camera are not available can use the camera's Wi-Fi function to transfer images to the FTP server. For details, refer to the "FTP Help Guide." http://rd1.sony.net/help/di/ftp/h_zz/ - Sony ILCE-7M3 | Operating Instructions - Page 54
to a wireless access point Connect the camera to your wireless access point. Before starting the procedure, [OK]. Note ••If a connection is not established, see the wireless access point operating instructions or contact the administrator of the access point. To save images to a computer, install - Sony ILCE-7M3 | Operating Instructions - Page 55
may start automatically on the computer. Wait until the procedure is finished. ••If you connect the camera to your computer using the USB cable when [USB Power Supply] is set to [On], power is supplied from your computer. (Default setting: [On]) ••Use a - Sony ILCE-7M3 | Operating Instructions - Page 56
. 2 Click the displayed message. Note ••On Mac computers, drag and drop the memory card icon or the drive icon into the "Trash" icon. The camera will be disconnected from the computer. ••On Windows 7/Windows 8 computers, the disconnection icon may not appear. In that case, you can skip the steps - Sony ILCE-7M3 | Operating Instructions - Page 57
your Internet browser and then download the software by following the onscreen instructions. If one of these software is already installed on your computer, update it to the latest version before use. Windows: http://www.sony.co.jp/imsoft/Win/ Mac: http://www.sony.co.jp/imsoft/Mac/ You can check - Sony ILCE-7M3 | Operating Instructions - Page 58
various adjustment functions like tone curve and sharpness. ••With the software, you can change the camera settings or release the shutter from a computer connected via a USB cable. To control the camera using the software, first select MENU (Setup) [USB Connection] [PC Remote], then connect - Sony ILCE-7M3 | Operating Instructions - Page 59
MENU items/List of icons Using MENU items You can change settings related to all the camera operations including shooting, playback, and operating method. You can also execute camera functions from the MENU. 1 Press the MENU button to display the menu screen. MENU button MENU items/List of - Sony ILCE-7M3 | Operating Instructions - Page 60
List of MENU items For details on each MENU items, refer to the reference page in the last column or the Help Guide. (Camera Settings 1) Red tab Quality/Image Size File Format RAW File Type JPEG Quality JPEG Image Size Aspect Ratio APS-C/Super 35mm Long Exposure NR High - Sony ILCE-7M3 | Operating Instructions - Page 61
desired modes and camera settings. Selects the memory card slot from which settings are recalled or to which settings are registered for M1 through M4. Assign functions to the custom key to recall when shooting. 41, Help Guide Help Guide Help Guide Help Guide Help Guide Help Guide Selects the - Sony ILCE-7M3 | Operating Instructions - Page 62
AF AF Track Sens AF System AF w/ shutter Pre-AF the control wheel in the shooting screen. Sets whether the camera focuses based on detected faces. Sets the AF tracking Help Guide Help Guide Help Guide Help Guide Help Guide Help Guide Help Guide Help Guide Help Guide Help Guide Help Guide Help Guide - Sony ILCE-7M3 | Operating Instructions - Page 63
method for measuring brightness. ([Multi] / [Spot], etc.) Sets whether the camera measures brightness based on detected faces when [Metering Mode] is set to separately. Help Guide Help Guide Help Guide Help Guide Help Guide Help Guide Help Guide Help Guide Help Guide GB 63 MENU items/List - Sony ILCE-7M3 | Operating Instructions - Page 64
the desired image processing. You can also adjust contrast, saturation, and sharpness. ([Vivid] / [Portrait], etc.) Shoots images with a texture unique to the selected effect. ([Toy Camera] / [Rich-tone Mono.], etc.) Help Guide Help Guide Help Guide Help Guide Help Guide - Sony ILCE-7M3 | Operating Instructions - Page 65
. Sets the peaking function, which enhances the outline of in-focus areas when focusing manually. Help Guide Help Guide Help Guide Help Guide Help Guide Help Guide Detects flickering/blinking from artificial light sources such as fluorescent lighting and times the shooting of images to moments - Sony ILCE-7M3 | Operating Instructions - Page 66
(Camera Settings 2) Purple tab Movie Exposure Mode Exposure Mode File Format Record Setting to display markers on the monitor when recording movies. Help Guide Help Guide 48 49 Help Guide Help Guide Help Guide Help Guide Help Guide Help Guide Help Guide Help Guide Help Guide Help Guide Help Guide - Sony ILCE-7M3 | Operating Instructions - Page 67
Zoom Ring Rotate Display/Auto Review DISP Button Sets which markers to display on the monitor when recording movies. Sets the illumination setting for the HVL-LBPC LED light (sold separately). Records movies using the shutter button. Help Guide Help Guide Help Guide Shoots images without the - Sony ILCE-7M3 | Operating Instructions - Page 68
for which continuous shooting can be performed at the same shooting speed. Sets auto review to display the captured image after shooting. Help Guide Help Guide Help Guide Help Guide Help Guide 42 Help Guide Assigns functions to the various keys so that you can perform operations more quickly by - Sony ILCE-7M3 | Operating Instructions - Page 69
and rear dials temporarily when the Fn button is pressed and held down. Selects whether the camera beeps during auto focus and self-timer operations. Help Guide Help Guide Help Guide Help Guide Help Guide Help Guide Green tab Sets movies to be transferred to a smartphone, or transfers images to - Sony ILCE-7M3 | Operating Instructions - Page 70
the device name under Wi-Fi Direct, etc. Imports a root certificate to the camera. Resets all the network settings. Help Guide Help Guide Help Guide Help Guide Help Guide Help Guide Help Guide Blue tab Protects recorded images against accidental erasure. Rotates the image. Deletes images. Assigns - Sony ILCE-7M3 | Operating Instructions - Page 71
the playback orientation for images shot vertically. Sets which dial and method to use for jumping between images during playback. Help Guide Help Guide Help Guide Help Guide Help Guide Help Guide Help Guide Help Guide Help Guide Help Guide Help Guide Help Guide MENU items/List of icons GB 71 - Sony ILCE-7M3 | Operating Instructions - Page 72
intervals to automatically switch to power save mode. Sets the camera temperature at which the camera turns off automatically during shooting. When shooting in hand-held . Help Guide Help Guide Help Guide Help Guide Help Guide Help Guide Help Guide Help Guide Help Guide Help Guide Help Guide 43 - Sony ILCE-7M3 | Operating Instructions - Page 73
the camera is connected to an external recorder/ player that supports 4K. camera is connected to a computer or USB device. Controls the PC remote shooting settings. Selects the language. 43 Help Guide Help Guide Help Guide Help Guide Help Guide Help Guide Help Guide Help Guide Help Guide Help Guide - Sony ILCE-7M3 | Operating Instructions - Page 74
. Displays the camera software version. Restores settings to their defaults. Select [Initialize] to restore all settings to their default values. 31 Help Guide Help Guide Help Guide Help Guide Help Guide Help Guide Help Guide Help Guide Help Guide Help Guide Help Guide Help Guide Help Guide GB 74 - Sony ILCE-7M3 | Operating Instructions - Page 75
Page Deletes all the MENU items on a page Help in (My Menu). Guide Delete All Deletes all the MENU items added to (My Menu). Help Guide *1 If you change this item, you will need to format the memory card for compatibility with the PAL or NTSC system. Also, note that it may not be possible - Sony ILCE-7M3 | Operating Instructions - Page 76
mode Viewfinder mode Shooting mode/ Scene recognition PP ASM Shooting mode (32) Register number (61) Scene Recognition icons Scene Selection GB 76 Camera settings NO CARD Memory card status (27, 84) 100 Remaining number of recordable images (86) Writing data / Number of images left to write - Sony ILCE-7M3 | Operating Instructions - Page 77
35mm (60) Flash charge in progress Setting Effect OFF (68) AF Illuminator (62) Flicker Flickering detected (65) SteadyShot off/on, Camera shake warning (67) SteadyS. Focal Len./ Camera shake warning (67) Smart Zoom / Clear Image Zoom / Digital Zoom (67) -PC- PC remote (73) Bright Monitoring Silent - Sony ILCE-7M3 | Operating Instructions - Page 78
Copyright information writing on (74) Gamma Disp. Assist (72) Focus Cancel (44) Lock-on AF Cancel Spot Focus Performing [Spot Focus] (45) Battery Remaining battery (25) Remaining battery warning USB power supply (73) Shooting settings NFC active (52) Bluetooth connection available / Bluetooth - Sony ILCE-7M3 | Operating Instructions - Page 79
(65) Prioritize Rec. Media (74) Exposure compensation (63)/ Metered Manual ISO400 ISO AUTO ISO sensitivity (63) AE lock/ FEL lock Guides/other Lock-on AF Lock-on AF Cancel Guide display for Lock-on AF (62) Focus Cancel Guide display for canceling focusing (44) Bracket indicator Spot metering - Sony ILCE-7M3 | Operating Instructions - Page 80
Exposure Setting Guide (68) Shutter speed indicator Aperture indicator Histogram Digital level gauge STBY REC Movie recording standby/Movie recording in progress 1:00:12 Actual movie recording time ( - Sony ILCE-7M3 | Operating Instructions - Page 81
Rating (70) Protect (70) DPOF DPOF set (70) 3/7 File number/Number of images in the view mode NFC active (52) Proxy movie included (66) Camera settings Refer to "Icons on the shooting screen" (page 76). Shooting settings Picture Effect error Auto HDR error (64) 35mm Lens focal length HLG HDR - Sony ILCE-7M3 | Operating Instructions - Page 82
Image information Latitude/longitude information (70) 2018 - 1 - 1 10:37AM Date of recording (31) 100-0003 Folder number File number (74) Histogram (Luminance/R/G/B) GB 82 - Sony ILCE-7M3 | Operating Instructions - Page 83
the battery pack at an ambient temperature of 25°C (77°F). --Using a Sony SDXC memory card (U3) (sold separately) --Using a lens FE 28-70 based on the CIPA standard and shooting under the following conditions: (CIPA: Camera & Imaging Products Association) --One picture is taken every 30 seconds. -- - Sony ILCE-7M3 | Operating Instructions - Page 84
microSD memory cards or Memory Stick Micro media with this camera, be sure to use the appropriate adaptor. SD memory or U1 or faster) SDHC/SDXC card (Class 10, or U1 or faster) SDHC/SDXC card ( * HD 60 Mbps 4K 100 Mbps* HD 100 Mbps Supported memory card Memory Stick PRO Duo/ Memory Stick PRO-HG - Sony ILCE-7M3 | Operating Instructions - Page 85
cards in both the slot 1 and the slot 2 with following camera settings, insert two memory cards with the same file system. XAVC S movies cannot be recorded simultaneously when using a combination of the exFAT file system and FAT32 file system. --[ File Format] is set to [XAVC S 4K] or [XAVC S HD - Sony ILCE-7M3 | Operating Instructions - Page 86
a memory card The following table shows the approximate number of images that can be recorded on a memory card formatted with this camera. The values are defined using Sony standard memory cards for testing. The values may vary depending on the shooting conditions and the type of memory card used - Sony ILCE-7M3 | Operating Instructions - Page 87
than 9999 images, "9999" will appear. ••The numbers shown are when using a Sony memory card. Recordable movie times The table below shows the approximate total recording times using a memory card formatted with this camera. The values may vary depending on the shooting conditions and the type of - Sony ILCE-7M3 | Operating Instructions - Page 88
recording times. Note ••The recordable time of movies varies because the camera is equipped with VBR (Variable Bit-Rate), which automatically adjusts image size settings. ••The times shown are recordable times using a Sony memory card. Notes on continuous movie recording ••High-quality movie - Sony ILCE-7M3 | Operating Instructions - Page 89
fully. ••If you observe the following points, you will be able to record movies for longer periods of time. --Keep the camera out of direct sunlight. --Turn the camera off when it is not being used. ••When [ File Format] is set to [AVCHD], the file size of movies is limited to approx - Sony ILCE-7M3 | Operating Instructions - Page 90
Specifications Camera [System] Camera Type: Interchangeable Lens Digital Camera Lens: Sony E-mount lens [Image sensor] Image format: 35 mm full frame (35.6 mm × 23.8 mm), CMOS image sensor Effective pixel number of camera: Approx. 24 200 000 pixels Total pixel number of camera: Approx. 25 300 000 - Sony ILCE-7M3 | Operating Instructions - Page 91
Ver. 2.31, MPF Baseline) compliant, RAW (Sony ARW 2.3 format) Movie (XAVC S format): lb 7.0 oz) (including battery pack, SD card) [Wireless LAN] Supported format: IEEE 802.11 b/g/n Frequency band: 2.4 GHz Security: WEP/WPA- Wi-Fi Protected Setup™ (WPS)/ Manual Access method: Infrastructure mode [NFC] - Sony ILCE-7M3 | Operating Instructions - Page 92
Lens FE 28-70 mm F3.5-5.6 OSS (Supplied with ILCE-7M3K) Focal length: 28 mm - 70 mm Lens groups-elements: 8-9 10.5 oz.) SteadyShot: Available Design and specifications are subject to change without notice. On image data compatibility ••This camera conforms with DCF (Design rule for Camera File system - Sony ILCE-7M3 | Operating Instructions - Page 93
by the Bluetooth SIG, Inc. and any use of such marks by Sony Corporation is under license. ••QR code is a trademark of Denso Wave Inc. ••In addition, system and product names used in this manual are, in general, trademarks or registered trademarks of their respective developers or manufacturers - Sony ILCE-7M3 | Operating Instructions - Page 94
right to have access to, modify, and redistribute source code for these software programs under the conditions of the supplied GPL/LGPL. Source code is the web. Use the following URL to download it. http://oss.sony.net/Products/Linux/ We would prefer you do not contact us Support Website. GB 94 - Sony ILCE-7M3 | Operating Instructions - Page 95
Setup 31 Delete 33 Digital zoom 67 Diopter-adjustment 14 Direct manual focus 34, 40 DISP 67 DMF 34, 40 DRO 64 F Fn 14, 21 Focus 34 Focus indicator 35 Function button 14 H HDR 64 Help Guide 2 I In-Camera Guide 2 Intelligent Auto 32 L Language 6 Lens 29 List of icons 76 M Memory - Sony ILCE-7M3 | Operating Instructions - Page 96
XAVC S HD 48 Q Quick Navi 22 R RAW 47 Recordable number of images.........86 Recordable time of movies 87 S Sensitivity 63 Smart zoom 67 Software 57 Specifications 90 Still image 32 T Touch Focus 44 Touch function 43 Touch Operation 43 Touch Panel/Pad 43 V Volume 72 W WB 64 Wi - Sony ILCE-7M3 | Operating Instructions - Page 97
GB 97 Index - Sony ILCE-7M3 | Operating Instructions - Page 98
GB 98 - Sony ILCE-7M3 | Operating Instructions - Page 99
GB 99 Index - Sony ILCE-7M3 | Operating Instructions - Page 100
©2018 Sony Corporation Printed in China
-
 1
1 -
 2
2 -
 3
3 -
 4
4 -
 5
5 -
 6
6 -
 7
7 -
8
-
9
-
10
-
11
-
12
-
13
-
14
-
15
-
16
-
17
-
18
-
19
-
20
-
21
-
22
-
23
-
24
-
25
-
26
-
27
-
28
-
29
-
30
-
31
-
32
-
33
-
34
-
35
-
36
-
37
-
38
-
39
-
40
-
41
-
42
-
43
-
44
-
45
-
46
-
47
-
48
-
49
-
50
-
51
-
52
-
53
-
54
-
55
-
56
-
57
-
58
-
59
-
60
-
61
-
62
-
63
-
64
-
65
-
66
-
67
-
68
-
69
-
70
-
71
-
72
-
73
-
74
-
75
-
76
-
77
-
78
-
79
-
80
-
81
-
82
-
83
-
84
-
85
-
86
-
87
-
88
-
89
-
90
-
91
-
92
-
93
-
94
-
95
-
96
-
97
-
98
-
99
-
100
 |
 |

ILCE-7M3
4-732-950-
11
(1)
Interchangeable Lens
Digital Camera
“Help Guide” (Web manual)
Refer to “Help Guide” for in-depth
instructions on the many functions
of the camera.
Instruction Manual
E-mount