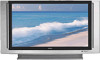
Sony KDS-R50XBR1 Operating Instructions
Sony KDS-R50XBR1 - 50" Grand Wega™ Sxrd™ Rear Projection Television Manual
 |
View all Sony KDS-R50XBR1 manuals
Add to My Manuals
Save this manual to your list of manuals |
Sony KDS-R50XBR1 manual content summary:
- Sony KDS-R50XBR1 | Operating Instructions - Page 1
2-637-151-11(1) SXRD Projection TV Operating Instructions KDS-R50XBR1 KDS-R60XBR1 © 2005 Sony Corporation - Sony KDS-R50XBR1 | Operating Instructions - Page 2
serial numbers are located at the rear of the TV. Record these numbers in the spaces provided below. Refer to them whenever you call upon your Sony dealer regarding this product. Model No. Serial No. Contacting Sony If, after reading the following instructions, you have additional questions related - Sony KDS-R50XBR1 | Operating Instructions - Page 3
Services Center 1-800-222-7669 or http://www.sony.com/ Declaration of Conformity Trade Name: SONY Model: KDS-R50XBR1/KDS-R60XBR1 Responsible Party: Sony Electronics Inc. Address: 16450 W. Bernardo Dr., San Diego, CA 92127 U.S.A. Telephone Number: 858-942-2230 This device complies with part - Sony KDS-R50XBR1 | Operating Instructions - Page 4
the installation. CAUTION Use the following Sony appliance(s) only with the following TV STAND. Use with other TV STAND may cause instability and possibly result in injury. SONY APPLIANCE MODEL NO. KDS-R50XBR1 KDS-R60XBR1 SONY TV STAND MODEL NO. SU-GW12 SONY THEATRE STAND SYSTEM MODEL NO. RHT-G2000 - Sony KDS-R50XBR1 | Operating Instructions - Page 5
block any ventilation openings. Install in accordance with the manufacturer's instructions an electrician for replacement of the only with the cart, stand, tripod, bracket, all servicing to qualified service personnel. Servicing other electric light or power mast and supporting structure, service - Sony KDS-R50XBR1 | Operating Instructions - Page 6
uses a projection lamp as its light source. It is time to replace the lamp with a new one (not supplied) when: • the lamp replacement indicator on the front panel blinks in red, • screen images become dark, • no image appears on the display after prolonged use. ❑ In rare instances, the bulb may pop - Sony KDS-R50XBR1 | Operating Instructions - Page 7
the TV 11 Screen 11 Indicators 12 Projection Lamp 12 Installing the TV 13 Carrying Your Optical 31 Using the CableCARD Device 32 About Using the CableCARD Device 32 Activating CableCARD Service Remote Control 50 Special Buttons on the Remote Control ...........51 Using the GUIDE Button 51 - Sony KDS-R50XBR1 | Operating Instructions - Page 8
Parental Lock Settings 92 Selecting Parental Lock Options 92 Viewing Blocked Programs 93 Selecting Custom Rating Options 94 Accessing the Setup Other Information Overview 103 Contacting Sony 103 Replacing the Lamp 104 How to Replace the Lamp 105 Troubleshooting 108 Twin View 108 Remote - Sony KDS-R50XBR1 | Operating Instructions - Page 9
purchasing this Sony SXRD projection TV. This manual is for models KDS-R50XBR1 and KDS-R60XBR1. Along devices. ❑ WEGA Engine: Delivers superb picture doublers, the DRC Multifunction feature replaces the signal's NTSC waveform with in dark scenes. ❑ Integrated HDTV: You can watch digital television - Sony KDS-R50XBR1 | Operating Instructions - Page 10
block replaces the need for a separate set-top box. (Check with your cable TV company about CableCARD service details, limitations, pricing, and availability. For more information about the CableCARD device in this manual player, and A/V receiver. HDMI supports enhanced, or highdefinition video, plus - Sony KDS-R50XBR1 | Operating Instructions - Page 11
the TV To enjoy clear picture ❑ Prevent sunlight or other light sources from shining directly on to the screen. ❑ The a week. When turning off the power ❑ The cooling fan will continue to operate for about two minutes. Allow several minutes instruction on page 6 for stubborn stains and dirt. 11 - Sony KDS-R50XBR1 | Operating Instructions - Page 12
the TV Indicators Projection Lamp How to replace the lamp, see page 104. Screen STD/DUO POWER/STANDBY LAMP TIMER POWER Indicators The indicators show the current status of your TV. If there is a change in the condition or a problem with the TV, the indicators will flash or light up in the - Sony KDS-R50XBR1 | Operating Instructions - Page 13
people. Do not hold the TV by the pedestal or the front panel. Doing so may cause these parts to break off. Introducing the TV Do not grasp the pedestal or the front panel of the TV. the TV during installation. Climbing on or pushing the TV or its stand may cause it to fall and damage the TV. 13 - Sony KDS-R50XBR1 | Operating Instructions - Page 14
the TV. ✍ When using the SU-GW12 stand for your TV, you must use the support belt. When Installing Your TV against a Wall Keep your TV at least 4 inches (10 cm) away from the wall to provide proper ventilation. Blocking the ventilation opening of the cooling fan may cause a damage on the TV. Allow - Sony KDS-R50XBR1 | Operating Instructions - Page 15
Your viewing position may affect the picture quality. For the best picture quality, install your TV within the areas shown below. Model KDS-R50XBR1 KDS-R60XBR1 Horizontal Viewing Area POWER 6655˚.m9˚ inft.SK.6mD(-.6aRSinfp-t6R..Kp067(5aD.r0X60poSXpfB-BtxrR.5oRR.(60ax110"1p.X.2p8B.r0oRmmx1.))2.02 - Sony KDS-R50XBR1 | Operating Instructions - Page 16
9 TV/VIDEO q; MENU Description Lights up in green when the TV is turned on. If the LED blinks in red continuously, this may indicate the display unit needs servicing (see "Contacting Sony" on page 2). When the red LED blinks only three times, the lamp door of the lamp unit or the lamp itself is not - Sony KDS-R50XBR1 | Operating Instructions - Page 17
Front Connectors Introducing the TV Introducing the TV STD/DUO POWER/STANDBY LAMP TIMER POWER STD/DUO i.LINK S400 VIDEO 2 INPUT (DV/HDV/MICROMV/TS) S VIDEO VIDEO L(MONO) - AUDIO - R 12 3 Front panel connectors are under the front panel - Sony KDS-R50XBR1 | Operating Instructions - Page 18
Introducing the TV Rear Panel 12 CABLE VHF/UHF 3 DIGITAL AUDIO (OPTICAL) OUT PCM/DOLBY DIGITAL S400 i.LINK (DV/HDV/MICROMV/TV) component, such as a set-top box, DVD player, and A/V receiver. HDMI supports enhanced, or highdefinition video, plus two-channel digital audio. You can also connect a - Sony KDS-R50XBR1 | Operating Instructions - Page 19
OUT (VAR/FIX) L/R 0 CONTROL S IN/OUT qa i.LINK qs DIGITAL AUDIO (OPTICAL) OUT (PCM/DOLBY* DIGITAL) Description Connects to your DVD player or digital set-top is set to Off. For details, see page 87. To control other Sony equipment with the TV's remote control, connect the CONTROL S IN jack of - Sony KDS-R50XBR1 | Operating Instructions - Page 20
- Sony KDS-R50XBR1 | Operating Instructions - Page 21
Connecting the TV Connecting the TV Overview Your new SXRD projection TV can receive both analog and digital broadcasting signals from antenna, satellite and cable TV. To display clear crisp pictures, you must connect your TV - Sony KDS-R50XBR1 | Operating Instructions - Page 22
also need to connect audio cables for sound, as shown below. Example of an S VIDEO Connection Rear of TV S VIDEO cable Equipment with S VIDEO Cables are often color-coded to connectors. Connect red to red, white to white, etc. Audio cable About Using HDMI to DVI Adapter If you are connecting - Sony KDS-R50XBR1 | Operating Instructions - Page 23
Satellite Receiver 27 Digital Cable Box or Digital Satellite Receiver 28 Equipment with HDMI Connection 29 Equipment with DVI Connection 30 Equipment with Digital Audio (Optical) 31 If you are connecting a VCR ❑ See the connections described on pages 36 and 37. 23 - Sony KDS-R50XBR1 | Operating Instructions - Page 24
Connecting the TV Cable System or VHF/UHF For best results, use this connection if you: ❑ Have a cable and/or an antenna. (This is convenient if you are using a separate rooftop antenna to receive additional channels that are not provided by your cable TV company.) ❑ Do not have a cable box or VCR. - Sony KDS-R50XBR1 | Operating Instructions - Page 25
jack. CATV cable IN OUT Cable box Coaxial cable Antenna cable VHF/UHF Rear of TV CABLE Notes on Using This Connection To Do This ... Do cable Press SAT/CABLE (FUNCTION) once, and the SAT/CABLE box indicator lights up. Prevent the accidental switching of TV channels Use the Channel Fix - Sony KDS-R50XBR1 | Operating Instructions - Page 26
Up the Channel List" on page 34. CATV cable Coaxial cable VHF/UHF Rear of TV IN OUT Cable box Notes on Using This Connection To do this... cable Press SAT/CABLE (FUNCTION) once, and the SAT/CABLE box indicator lights up. Prevent the accidental switching of TV channels Use the Channel Fix - Sony KDS-R50XBR1 | Operating Instructions - Page 27
TV's VHF/UHF jack. ✍ If your satellite receiver is not equipped with S VIDEO, use a VIDEO cable (yellow) instead of the S VIDEO cable. Rear of TV CABLE VHF/UHF Coaxial cable S VIDEO Satellite receiver A/V cable S VIDEO cable VIDEO AUDIO-L AUDIO-R Satellite antenna cable Cables are often color - Sony KDS-R50XBR1 | Operating Instructions - Page 28
audio, so audio cables must be connected to provide sound. Digital cable box or satellite receiver OUT IN Component Rear of TV Y video cable PB PR Cables are often color-coded to connectors. Connect red to red, white to white, etc. RF coaxial cable Audio cable AUDIO-L AUDIO-R 28 - Sony KDS-R50XBR1 | Operating Instructions - Page 29
sources before making any connections. Using an HDMI cable, connect the equipment's HDMI OUT jack to the TV's HDMI IN jack. Equipment with HDMI output Rear of TV IN HDMI cable 29 - Sony KDS-R50XBR1 | Operating Instructions - Page 30
any connections. If you are connecting with DVI-HDTV output, you can connect to the TV's HDMI IN jack by using an HDMI-to-DVI cable or an adapter (both not supplied). Rear of TV IN Cables are often color-coded to connectors. Connect red to red, white to white, etc. Equipment with DVI - Sony KDS-R50XBR1 | Operating Instructions - Page 31
Digital compatible, such as an audio amplifier. Using an optical audio cable, connect the device's OPTICAL IN jack to the TV's DIGITAL AUDIO (OPTICAL) OUT jack. Rear of TV DIGITAL AUDIO (OPTICAL) OUT PCM/DOLBY DIGITAL The DIGITAL AUDIO (OPTICAL) OUT jack is available when the TV receives a digital - Sony KDS-R50XBR1 | Operating Instructions - Page 32
the TV's rear panel CableCARD slot. After the service is activated with your cable TV company, the card replaces the need for Sony. Activating CableCARD Service Before you can use CableCARD service, you need to insert the CableCARD device (supplied by your cable TV company) and activate the service - Sony KDS-R50XBR1 | Operating Instructions - Page 33
the TV Connecting the TV 4 Follow the displayed instructions: Phone your cable TV company. A representative will guide you through the activation process. 5 After your CableCARD device is activated, your cable TV company will download the service information, including the channel list, to the the - Sony KDS-R50XBR1 | Operating Instructions - Page 34
receivable channels from both VHF/UHF antenna and cable TV channels if both sources are connected. ✍ Auto Program may take a while (20 to 50 minutes) to complete. A progress bar is displayed while available channels are being scanned. If you cancel the Auto Program before all receivable channels are - Sony KDS-R50XBR1 | Operating Instructions - Page 35
to your TV. This section provides some of the individual connections you can make. For multiple connections, refer to the separate Quick Setup Guide. If You Are Connecting VCR and Cable VCR and Cable Box DVD Player with Component Video Connectors DVD Player with S VIDEO and Audio Connectors - Sony KDS-R50XBR1 | Operating Instructions - Page 36
Connecting the TV VCR and Cable Rear of TV Use this hookup if: ❑ You have cable TV that does VHF/UHF Coaxial cable CATV cable Splitter Cables are often color-coded to connectors. Connect red to red, white to white, etc. 36 S VIDEO VIDEO AUDIO-L AUDIO-R A/V cable S VIDEO cable Coaxial cable - Sony KDS-R50XBR1 | Operating Instructions - Page 37
. With this connection you can: ❑ Use the TV's remote control to change channels on your cable box when the signal is scrambled. To program your Sony remote control to operate your cable box, see "Programming the Remote Control" on page 48. ❑ Use the TV's remote control to change channels on your - Sony KDS-R50XBR1 | Operating Instructions - Page 38
Connecting the TV Rear of TV CABLE VHF/UHF Coaxial cable CATV cable Splitter VIDEO AUDIO-L AUDIO-R 6 VIDEO AUDIO-L AUDIO-R S VIDEO cable VCR A/V cable Cable box Coaxial cable A/V cable Coaxial cable Cables are often color-coded to connectors. Connect red to red, white to white, etc. If you - Sony KDS-R50XBR1 | Operating Instructions - Page 39
of inputs that you used for the video connection (HD/DVD IN 4 or 5). DVD player Component video cable Y PB PR Rear of TV Cables are often color-coded to connectors. Connect red to red, white to white, etc. AUDIO-R AUDIO-L Audio cable ✍ To take advantage of the Wide Mode feature, set the DVD - Sony KDS-R50XBR1 | Operating Instructions - Page 40
an S VIDEO cable to connect the DVD player's S VIDEO jack to the TV's S VIDEO jack. Rear of TV DVD player S VIDEO S VIDEO cable AUDIO-R AUDIO-L VIDEO Cables are often color-coded to connectors. Connect red to red, white to white, etc. A/V cable ✍ If your DVD player is not equipped with S VIDEO - Sony KDS-R50XBR1 | Operating Instructions - Page 41
TV with the HD15-HD15 cable and optional audio cable, you can view and listen to the PC's video and audio output on the TV. Rear of TV HD15-HD15 cable (analog RGB) Audio cable (stereo mini plugs) To audio output jack To monitor port (15-pin D-Sub) 41 - Sony KDS-R50XBR1 | Operating Instructions - Page 42
Connecting the TV Camcorder or PlayStation Disconnect all power sources before making any connections. For easy connection to a camcorder or PlayStation, the TV has front audio and video inputs (shown below). Use A/V and S VIDEO cables to connect the camcorder or PlayStation AUDIO and S VIDEO OUT - Sony KDS-R50XBR1 | Operating Instructions - Page 43
(VAR/FIX) jacks to the audio receiver's audio LINE IN jacks. ✍ AUDIO OUT jacks are operable only when the TV's Speaker is set to Off. Rear of TV AUDIO OUT (VAR/FIX) AUDIO-L Audio cable AUDIO-R Line input Audio receiver Cables are often color-coded to connectors. Connect - Sony KDS-R50XBR1 | Operating Instructions - Page 44
- Sony KDS-R50XBR1 | Operating Instructions - Page 45
Programming the Remote Control Manufacturer's Codes Using Other Equipment with Your Remote Control Special Buttons on the Remote Control Page 45 46 48 49 50 51 Inserting Batteries into the Remote Control Insert two size AA (R6) batteries (supplied) by matching the e and E on the batteries to the - Sony KDS-R50XBR1 | Operating Instructions - Page 46
a reference when operating the remote control. Button 1 MUTING 2 FUNCTION 3 4 SLEEP 5 GUIDE 6 7 PICTURE 8 WIDE 9 V/v/B/b X/x/m/M q; qa (Twin View) qs ANT INDEX , SAT/CABLE, DVD/VCR, i.LINK) that you want to operate lights up. Press repeatedly to cycle through the available audio effect modes: Dolby - Sony KDS-R50XBR1 | Operating Instructions - Page 47
Watching the TV Watching the TV Button qf POWER buttons qg REC RESET qh TV/VIDEO qj DISPLAY qk JUMP ql 0 - 9 and ENTER w; FAVORITES wa FREEZE ws i.LINK wd MEMORY STICK wf MENU wg CH +/- wh EXIT Description Press to turn on and on/off the TV and other audio/video equipment you have programmed into - Sony KDS-R50XBR1 | Operating Instructions - Page 48
to operate Sony brand video equipment. Function DVD/VCR SAT/CABLE i.LINK Equipment Sony Dream System Sony Satellite Receiver Sony DVD LINK indicator lights up. 3 SAT/CABLE Press for five seconds until the indicator of the selected input flashes. 4 While the desired indicator is flashing, enter - Sony KDS-R50XBR1 | Operating Instructions - Page 49
314, 336, 337, 338 308, 309 311, 312 327, 328, 331, 332, 335 314, 330, 336, 337 Manufacturer Zenith Code 331 Cable Boxes Manufacturer Sony Hamlin/Regal Jerrold/ General Inst./ Motorola Oak Panasonic Pioneer Scientific Atlanta Tocom Zenith Code 230 222, 223, 224, 225, 226 201, 202, 203, 204, 205 - Sony KDS-R50XBR1 | Operating Instructions - Page 50
on/off Play Stop Press FUNCTION repeatedly until the DVD/VCR indicator lights up. SAT/CABLE x Operating an MDP (Laserdisc Player) To Do number Display SAT Index Display SAT Guide Display SAT Menu Move highlight (cursor) Select item Press DISPLAY INDEX GUIDE MENU V v B b To playback) CH +/- 50 - Sony KDS-R50XBR1 | Operating Instructions - Page 51
that can be accessed using special buttons on the remote control. Using the GUIDE Button This TV is equipped to show program information if it is available from the station. The Program Guide lets you review program information, and select both analog and digital channels. To display the Program - Sony KDS-R50XBR1 | Operating Instructions - Page 52
allows you to select the channels from a drop down list. The Guide also provides information about the current program being shown on each channel. Make Way for Ducks! Series follows the aquatic misadventures of Henry and Riley, - Sony KDS-R50XBR1 | Operating Instructions - Page 53
Watching the TV Watching the TV Using the WIDE Button Wide screen mode lets you watch 4:3 normal broadcasts in several wide screen modes (16:9 aspect ratio). 4:3 Original source 16:9 Original source (Standard definition source) (High definition source) z When the TV receives a 720p or 1080i - Sony KDS-R50XBR1 | Operating Instructions - Page 54
Watching the TV Using the JUMP Button The JUMP button allows you to jump back and forth between the current channel and the last channel that was selected. Previous channel Using the FREEZE Button The FREEZE button allows you to temporarily capture a program's picture. You can use this feature - Sony KDS-R50XBR1 | Operating Instructions - Page 55
Watching the TV Watching the TV Using Twin View Twin View lets you see two pictures from two sources - from an antenna, VCR, DVD, etc. - on the screen at the same time. You hear the sound from only one of the sources at a time, but you can choose which source's sound is selected. You can also - Sony KDS-R50XBR1 | Operating Instructions - Page 56
are viewing a 4:3 source and a 16:9 enhanced source (such as a DVD) side by side, the 4:3 source appears larger. ❑ Twin View does not display channels that are blocked by parental lock settings (see page 92). 56 - Sony KDS-R50XBR1 | Operating Instructions - Page 57
Changing the Picture Size Watching the TV The zoom feature lets you change the size of the left and right pictures. To enlarge the left picture (reduce the right) 1 Press B to activate the left picture (if not already activated). 2 Press V to enlarge the picture and v to reduce the picture. To - Sony KDS-R50XBR1 | Operating Instructions - Page 58
You can create a list using the Favorite Channels option in the Channel setting, or by using the Add to Favorites feature in the Favorite Channels guide. Using the Channel Menu z For details on using the Channel setting, see page 90. 1 Press MENU to display the setting. 2 Press V or v to highlight - Sony KDS-R50XBR1 | Operating Instructions - Page 59
Watching the TV Watching the TV Using the Favorite Channels Guide 1 Press FAVORITES. The Favorite Channels list appears. Favorite Channels Add to Favorites 1 8.14 PBS 2 15.8 NBC 3 27 HGTV 4 45.12 TNT 5 98 CNN 6 112.3 ESPN 7 - Sony KDS-R50XBR1 | Operating Instructions - Page 60
Watching the TV Using the PC Input The PC Input feature allows you to connect a personal computer to your TV so you can play PC content through the TV's large display and audio speakers. ✍ For details on how to connect a personal computer to your TV, see "Personal Computer" on page 41. Displaying - Sony KDS-R50XBR1 | Operating Instructions - Page 61
on page 62. Memory Stick Compatibility This TV is compatible with the following Sony brand Memory Stick media types: ❑ Memory Stick Media ❑ Memory Stick in this TV has been tested to support up to 1 GB media capacity and does not support high-speed transfer, MagicGate copyright protection technology, - Sony KDS-R50XBR1 | Operating Instructions - Page 62
back correctly. File Type JPEG MPEG1 Supported File Name Extensions .jpg .jpeg .mpg .mpeg Most Sony brand digital still and video cameras camera's instruction manual handy in order to check how files and directories are organized for your specific model of digital camera. DCF stands for " - Sony KDS-R50XBR1 | Operating Instructions - Page 63
into the Memory Stick slot may damage the TV. Removing a Memory Stick/Memory Stick Duo 1 Check that the Memory Stick indicator is off. (When the light is on, this indicates that the TV is reading data from the Memory Stick/Memory Stick Duo.) ✍ Removing the Memory Stick/Memory Stick Duo while - Sony KDS-R50XBR1 | Operating Instructions - Page 64
Using the Memory Stick Viewer Viewing Photo or Movie Files The Memory Stick Index enables you to view all photo or movie files contained in a Memory Stick as thumbnails and let you choose the files you want to display. 1 Turn on the TV and insert a Memory Stick that contains the photo or movie - Sony KDS-R50XBR1 | Operating Instructions - Page 65
Using the Memory Stick Viewer Using the Memory Stick Viewer Using the Photo Viewer Information about selected photo Selected photo When you select a photo from the Memory Stick Index (described on page 64), it displays as shown below, with the following controls. Summer 2005 / DSC00012 Jul 30, - Sony KDS-R50XBR1 | Operating Instructions - Page 66
bar ✍ MPEG movies recorded in VX Fine mode with Sony digital cameras cannot be played back with the Memory Stick Viewer. z The quality of the movie when enlarged depends on the resolution of the MPEG1 file. See your camera's instruction manual for details. To Do This ... Do This ... Enlarge the - Sony KDS-R50XBR1 | Operating Instructions - Page 67
Using the Memory Stick Viewer Using the Memory Stick Viewer Using the Menu Bar Options z JPEG/MPEG1 files that are protected are indicated by the Lock icon. z You cannot rotate a photo that has been protected. z Pan is available only when the photo is magnified using Zoom. z The Print Quantity - Sony KDS-R50XBR1 | Operating Instructions - Page 68
the next slide. Fast Slide advances after about 3 seconds. Medium Slide advances after about 6 seconds. Slow Slide advances after about 12 seconds. Manual advance Slide advances only after you press B or b. Determines whether file information is displayed. Select On or Off. On Slide Show - Sony KDS-R50XBR1 | Operating Instructions - Page 69
different folders to view in the Memory Stick Viewer. Digital Camera Folders Selects all folders within the directories defined by the DCF rules used by Sony digital cameras (see page 62). JPEG and MPEG1 files in those directories are recognized even if they do not conform to the DCF file naming - Sony KDS-R50XBR1 | Operating Instructions - Page 70
turn off the TV or remove Memory Stick media from the insertion slot while data is being read (as indicated by the Memory Stick indicator light being on). ❑ Avoid touching the terminal of Memory Stick media or bringing it into contact with a metal object. ❑ Do not drop, bend, or submit Memory - Sony KDS-R50XBR1 | Operating Instructions - Page 71
For certain non-Sony brand Memory Stick media, you can view images, but you cannot rotate, delete or protect/unprotect images on the TV. An error message will occur if you attempt any of these operations. This is a result of the unique file directory structure on these particular flash memory media - Sony KDS-R50XBR1 | Operating Instructions - Page 72
- Sony KDS-R50XBR1 | Operating Instructions - Page 73
i.LINK cable Sony Model Length VMC the instruction manual of the i.LINK device to be connected. To connect a digital i.LINK device (using only a digital signal) 1 Using an i.LINK cable, connect the device's i.LINK jack to any of the TV's i.LINK jacks. To connect an i.LINK device that supports - Sony KDS-R50XBR1 | Operating Instructions - Page 74
Rear of TV DIGITAL AUDIO (OPTICAL) OUT PCM/DOLBY DIGITAL S400 i.LINK (DV/HDV/MICROMV/TV) i.LINK cable VIDEO IN 1 3 HD/DVD IN (1080i/720p/480p/480i) 4 5 CONTROL S IN OUT AUDIO OUT (VAR/FIX) Cables are often colorcoded to connectors. Connect red to red LINK device 1 that supports an EIA- 775A - Sony KDS-R50XBR1 | Operating Instructions - Page 75
i.LINK device that you wish to operate. ✍ For instructions on connecting i.LINK devices, see page 73. 2 remote control. i.LINK Device List DTV Digital VCR Sony DTV Status: Viewing. The TV (DTV), along the i.LINK Device List. Devices that are not supported by the TV appear on the Device List as - Sony KDS-R50XBR1 | Operating Instructions - Page 76
Using i.LINK Using the i.LINK Control Panel After you select an i.LINK device using the Device List, the TV displays the i.LINK Control Panel, which allows you to use the TV's remote to control the selected i.LINK device. 1 If the i.LINK Control Panel is not already displayed, press i.LINK on the - Sony KDS-R50XBR1 | Operating Instructions - Page 77
being controlled. ❑ Only i.LINK-equipped digital camcorders and digital VCRs can be controlled directly through the i.LINK Control Panel. ❑ Not all functions are supported for all i.LINK devices. ❑ If you are using a digital VCR, turn off any Auto LINC functionality of the VCR. For details, see the - Sony KDS-R50XBR1 | Operating Instructions - Page 78
to access digital setup options, some of which are also available through the Program Guide (described on page 52). To set up the selected device: Press V v Video Alternate Audio Analog Video Power Swap Audio Full Screen Sony DV-VCR The following options are displayed: Option Description - Sony KDS-R50XBR1 | Operating Instructions - Page 79
Using the Settings Using the Settings Overview Settings Video Antenna Video Picture Mode Iris Picture Brightness Color Hue Sharpness Color Temp. Noise Reduction Standard Max 58 31 31 0 25 Cool Medium Audio Antenna Audio Sound Mode Treble Bass Balance Steady Sound Effect MTS Audio Out Speaker - Sony KDS-R50XBR1 | Operating Instructions - Page 80
Using the Settings Settings Channel Antenna Channel Favorite Channels Channel Fix Off Digital Channels Auto Program Show/Hide Channels Label Channels Parental Lock Antenna Parental Lock Password Setup Antenna Setup Caption Vision Info Banner Label Video Inputs Language i.LINK Standby Menu - Sony KDS-R50XBR1 | Operating Instructions - Page 81
the color. Brightness Adjust to brighten or darken the picture. Color Adjust to increase or decrease color intensity. Hue Adjust to increase or decrease the green tones. Sharpness Adjust to sharpen or soften the picture. (Continued) 81 - Sony KDS-R50XBR1 | Operating Instructions - Page 82
three color temperatures: Cool Select to give the white colors a blue tint. Neutral Select to give the white colors a neutral tint. Warm When Pro is selected in Picture Mode, select to give the white colors a red tint. Noise Reduction Select to reduce the noise level of connected equipment - Sony KDS-R50XBR1 | Operating Instructions - Page 83
Using the Settings z The following settings are available, when Picture Mode is set to Pro; Advanced Iris, Color Corrector, DTE, Clear White, Detail Enhancer, Black Corrector, Gamma Corrector, White Balance. Using the Settings Option Advanced Video (Continued) Description DRC Palette Allows - Sony KDS-R50XBR1 | Operating Instructions - Page 84
of the picture. Select from High, Medium, Low, and Off. White Balance Select to fine-adjust the white color intensity by changing the red, green and blue levels. Select Adjust to choose among the R-Gain, G-Gain, B-Gain, RBias, G-Bias, and B-Bias options. To restore the factory default setting - Sony KDS-R50XBR1 | Operating Instructions - Page 85
picture. Color Temp. Choose from three color temperatures: Cool Select to give the white colors a blue tint. Neutral Select to give the white colors a neutral tint. Warm Select to give the white colors a red tint. Reset Select to restore the factory default settings. Using the Settings 85 - Sony KDS-R50XBR1 | Operating Instructions - Page 86
Using the Settings Accessing the Audio Settings 1. Press MENU MENU 2. Highlight 3. Press to select To highlight an option and to change settings, press V v B b. Press to confirm the selection. To exit the Audio settings, press . Antenna Audio Custom settings Sound Mode Treble Bass Balance - Sony KDS-R50XBR1 | Operating Instructions - Page 87
Using the Settings Using the Settings Option Description MTS Stereo Enjoy stereo, bilingual and Auto SAP mono programs Select for stereo reception when viewing a program broadcast in stereo. Select to automatically switch to second audio programs when a signal is received. (If no SAP signal - Sony KDS-R50XBR1 | Operating Instructions - Page 88
Using the Settings Accessing the Screen Settings MENU 1. Press MENU 2. Highlight 3. Press to select To highlight an option and to change settings, press V v B b. Press to confirm the selection. To exit the Screen settings, press . Antenna Screen Automatic sizing for 4:3 pictures Wide Mode - Sony KDS-R50XBR1 | Operating Instructions - Page 89
set to anything but Off, the Wide Mode setting changes only for the current channel. When you change channels (or inputs), Wide Mode is automatically replaced with the 4:3 Default setting. To retain the current Wide Mode setting as channels and inputs are changed, set 4:3 Default to Off. Option - Sony KDS-R50XBR1 | Operating Instructions - Page 90
for all receivable channels for the current input (VHF/UHF or CABLE). Select to start the Auto Program. ✍ Auto Program may take between 20-50 minutes to complete. A progress bar will display the approximate progress of the Auto Program and Digital Channels/Add sequences. ✍ Auto Program will create - Sony KDS-R50XBR1 | Operating Instructions - Page 91
Allows you to show or hide channels that appear in the Program Guide and when you use the CH+/- buttons to channel surf. Channels that are set to Hidden do not appear in the Program Guide or when you use the CH+/- buttons. 1 Press V or v to highlight - Sony KDS-R50XBR1 | Operating Instructions - Page 92
settings, press . The Parental Lock setting allows you to set up the TV to block programs according to their content and rating levels. ✍ You need your password for any future 13 ans+, TV-14 Custom Select to set ratings manually. U.S.: See page 94 for details. Canada: See page 95 for details. 92 - Sony KDS-R50XBR1 | Operating Instructions - Page 93
Confirm the new password by entering it again. 4 Press MENU to exit the setting screen. You can view a blocked program by entering the password. 1 Press ENTER when tuned to a blocked program. 2 Enter your password using the 0-9 buttons. Parental Lock will be canceled temporarily until you turn your - Sony KDS-R50XBR1 | Operating Instructions - Page 94
Rating Options z To ensure maximum blocking capability, the age-based ratings should be blocked. z If you select Block, be aware that the following programs may be blocked: news, sports, weather, emergency broadcasts, political programs, public service announcements, and religious programs. US - Sony KDS-R50XBR1 | Operating Instructions - Page 95
Using the Settings Canadian custom rating options If you selected Canada as the country of residence on page 93, the Custom Rating setting includes the following options. (If you selected U.S.A., see page 94.) Option English Rating French Rating U.S.A. Rating Description C All children. C8+ - Sony KDS-R50XBR1 | Operating Instructions - Page 96
" on page 98. Set to On or Off. Select On to display the program name, time remaining and other information (if the broadcaster offers this service). Also displays when the channel is changed or the DISPLAY button is pressed. Allows you to label the audio/video equipment you have connected to - Sony KDS-R50XBR1 | Operating Instructions - Page 97
when the TV is turned off. The front panel POWER/STANDBY LED shows red. The TV uses more standby power than when this option is set to On. Enables you to select a specific color for the on-screen settings: Gray, Red, Green, Indigo and Purple. Select On to use the TV at an altitude of 5,000 - Sony KDS-R50XBR1 | Operating Instructions - Page 98
Using the Settings Programming Caption Vision If you selected the Program option under Caption Vision (see page 96), you can change the following settings: Option Basic Advanced Digital CC Advanced Settings Description Allows you to select basic analog (EIA-608) closed caption options. CC1, CC2 - Sony KDS-R50XBR1 | Operating Instructions - Page 99
Adjustment may not work well with certain input signals. In such cases, manually adjust the options below. Select to adjust the phase when the screen flickers is no signal input for 10 minutes. ✍ POWER/STANDBY LED will light up in red when your TV is in the power saving mode. Off Select to - Sony KDS-R50XBR1 | Operating Instructions - Page 100
standard (Hz) 70 -* 70 -* 60 -* 72 ✔ 75 ✔ 85 ✔ 56 ✔ 60 ✔ 72 ✔ 75 ✔ 85 ✔ 60 ✔ 70 ✔ 75 ✔ 85 ✔ 60 ✔ 60 ✔ ✍ This TV does not support Sync on Green or Composite Sync. ✍ If a signal other than in the above chart is input, it may not be displayed properly or may not be - Sony KDS-R50XBR1 | Operating Instructions - Page 101
Using the Settings Accessing the Applications Settings Using the Settings MENU 1. Press MENU 2. Highlight 3. Press to select To highlight an option and to change settings, press V v B b. Press to confirm the selection. To exit the Applications settings, press . Antenna Applications Start - Sony KDS-R50XBR1 | Operating Instructions - Page 102
previous setting. 4 Press MENU to exit the setting screen. An LED on the front panel will light, indicating the Timer has been set. Current Time You can set the current time. 1 Press to to an authorized technician or repair person. This list of selectable CableCARD options will vary, depending on your - Sony KDS-R50XBR1 | Operating Instructions - Page 103
Sony Replacing the Lamp Troubleshooting Specifications Optional accessories: Index Page 103 104 108 115 116 117 Contacting Sony If, after reading these operating instructions, you have additional questions related to the use of your Sony television, please call our Customer Information Services - Sony KDS-R50XBR1 | Operating Instructions - Page 104
TV flashes, this indicates the lamp needs to be replaced with a new one (not supplied). WARNING Electric appliances can cause fire or high temperature, resulting in injury or death. Be sure to follow the instructions below. ❑ Use a Sony XL-5100 replacement lamp (not supplied) for replacement. Use - Sony KDS-R50XBR1 | Operating Instructions - Page 105
out. Other Information ✍ The lamp is very hot after use. Never touch the glass portion of the lamp or the non-designated surrounding parts (shown in gray). ✍ After the used lamp has cooled, place it into the empty box of the replacement lamp. Never put the used lamp into a plastic bag. (Continued - Sony KDS-R50XBR1 | Operating Instructions - Page 106
clicking sound to lock. PUSH PUSH ✍ To ensure the lamp is securely installed, press the area marked PUSH before closing the lamp cover. ✍ If the lamp is not securely reattached, the self-diagnostic function may be triggered and the POWER/STANDBY indicator flashes in red three times (see page 12). - Sony KDS-R50XBR1 | Operating Instructions - Page 107
dealer for a Sony XL-5100 replacement lamp. ✍ Take great care when replacing the lamp or plugging in/unplugging the connecting cords. Rough handling may cause the TV to fall, damaging the TV, the TV stand and the floor. The used lamp This product contains mercury. Disposal of this product may be - Sony KDS-R50XBR1 | Operating Instructions - Page 108
from fluorescent lights. ❏ If the "High Temperature Warning!" message appears, turn off the TV and wait until the TV's projection lamp cools down (approximately 5 minutes). If the remote control still does not work, make sure to dust the ventilation slots on the rear of the TV and the cooling fan to - Sony KDS-R50XBR1 | Operating Instructions - Page 109
before you can receive digital cable TV services. See the activation instructions on page 32. ❏ Check the Diagnostics and CableCARD setting options (see page 102). (This can be useful in providing information to an authorized technician or repair person.) ❏ Contact your cable TV provider. ❏ If - Sony KDS-R50XBR1 | Operating Instructions - Page 110
Problem Sony digital cameras cannot be played back with the Memory Stick Viewer. MPEG1 quality is poor when ❏ The quality of the movie when enlarged depends on the resolution of the MPEG1 enlarged (page 66). file. See your camera's instruction manual is not supported). The thumbnail is - Sony KDS-R50XBR1 | Operating Instructions - Page 111
Problem Possible Remedies No picture (screen not lit), no ❏ If your TV does not turn on, and a red light keeps flashing, your TV may need sound. service. Call your local Sony Service display less detail than usual, or cause artifacts (small blocks or dots, pixelations) to appear on your screen. - Sony KDS-R50XBR1 | Operating Instructions - Page 112
box's remote control. Then press FUNCTION repeatedly until the TV indicator lights up and adjust the TV's volume. ❏ The TV's audio might TV speakers, set the Speaker option to On (see page 87). Channels Problem Possible Remedies Cannot receive upper channels ❏ Press ANT to select the VHF/UHF - Sony KDS-R50XBR1 | Operating Instructions - Page 113
TV when any ventilation openings are blocked. ❏ The signal from an i.LINK device is being shown. LAMP LED blinks in red. ❏ Replace the lamp (see page 104). The replacement lamp does not ❏ The screw of the lamp cover may be slanted. Take out the screw, insert it straight light up. into the screw - Sony KDS-R50XBR1 | Operating Instructions - Page 114
Information Problem reappears and TV turns off again, the TV may need servicing. Call your local Sony Service Center. ❏ If you have several i.LINK devices connected VCR. For details, see the digital VCR's user manual. ❏ The TV cools down its projection lamp when the power is turned off. It takes up - Sony KDS-R50XBR1 | Operating Instructions - Page 115
hybrid lens F2.5 75 ohm external terminal for VHF/UHF UHP lamp, 120W, XL-5100 NTSC American TV Standard ATSC (8VSB terrestrial) ATSC compliant 8VSB QAM on cable ANSI/SCTE 07 2000 KDS-R50XBR1: 50 inches KDS-R60XBR1: 60 inches Terrestrial (analog) 2-69 Cable TV (analog) 1-125 Terrestrial - Sony KDS-R50XBR1 | Operating Instructions - Page 116
Setup Guide Warranty Product Registration Card D-sub 15-pin, analog RGB, 0.7 Vp-p, 75 ohms, positive ✍ See the PC Input Signal Compatibility Chart on page 100. 3 total (1 on front panel) 4-pin S400 i.LINK terminal 2 1 Optical Rectangular (1) PCMCIA Type I/II 15 W (L), 15 W (R) KDS-R50XBR1 - Sony KDS-R50XBR1 | Operating Instructions - Page 117
with VCR 37 using with remote control 50 CableCARD device 32, 102 slot 18 Camcorder Detail Enhancer 84 Diagnostics 102 DIGITAL AUDIO (OPTICAL) OUT 19 Digital Channels 90 Digital subchannels 52 Mode 82 Game Picture 88 Gamma Corrector 84 GUIDE button 46, 51 Guide menu 52 H HD/DVD IN jack (1080i - Sony KDS-R50XBR1 | Operating Instructions - Page 118
LAMP LED 16 Lamp, replacing 104-107 Language 97 M Memory Stick button 47 features 61 Index 64 indicator 17 playing movies 66 precautions 70 removing 63 Slide Show options 68 slot 17 troubleshooting Guide 52 Program Options menu 52 Protect 67 R Ratings setting 94 viewing blocked control 50 Screen - Sony KDS-R50XBR1 | Operating Instructions - Page 119
- Sony KDS-R50XBR1 | Operating Instructions - Page 120
http://www.sony.net/ Printed on 100% recycled paper. Printed in Japan
-
 1
1 -
 2
2 -
 3
3 -
 4
4 -
 5
5 -
 6
6 -
 7
7 -
8
-
9
-
10
-
11
-
12
-
13
-
14
-
15
-
16
-
17
-
18
-
19
-
20
-
21
-
22
-
23
-
24
-
25
-
26
-
27
-
28
-
29
-
30
-
31
-
32
-
33
-
34
-
35
-
36
-
37
-
38
-
39
-
40
-
41
-
42
-
43
-
44
-
45
-
46
-
47
-
48
-
49
-
50
-
51
-
52
-
53
-
54
-
55
-
56
-
57
-
58
-
59
-
60
-
61
-
62
-
63
-
64
-
65
-
66
-
67
-
68
-
69
-
70
-
71
-
72
-
73
-
74
-
75
-
76
-
77
-
78
-
79
-
80
-
81
-
82
-
83
-
84
-
85
-
86
-
87
-
88
-
89
-
90
-
91
-
92
-
93
-
94
-
95
-
96
-
97
-
98
-
99
-
100
-
101
-
102
-
103
-
104
-
105
-
106
-
107
-
108
-
109
-
110
-
111
-
112
-
113
-
114
-
115
-
116
-
117
-
118
-
119
-
120
 |
 |

SXRD Projection TV
Operating Instructions
2-637-151-
11
(1)
KDS-R50XBR1
KDS-R60XBR1
© 2005 Sony Corporation