Sony KLV-S32A10 Operating Instructions
Sony KLV-S32A10 - Lcd Wega™ Flat Panel Television Manual
 |
View all Sony KLV-S32A10 manuals
Add to My Manuals
Save this manual to your list of manuals |
Sony KLV-S32A10 manual content summary:
- Sony KLV-S32A10 | Operating Instructions - Page 1
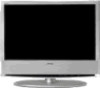
2-589-826-14(2) LCD Color TV Operating Instructions KLV-S19A10 KLV-S26A10 KLV-S23A10 KLV-S32A10 © 2005 Sony Corporation - Sony KLV-S32A10 | Operating Instructions - Page 2
. Model No. Serial No. Contacting Sony If, after reading these operating instructions, you have additional questions related to the use of your Sony TV, please call our Customer Information Services Center at 1-800-222-SONY (7669) (US residents only) or 1-877-899-SONY (7669) (Canadian residents only - Sony KLV-S32A10 | Operating Instructions - Page 3
in Canada This Class B digital apparatus complies with Canadian ICES-003. Safety s Operate the TV only on 120 V-240 V AC. s Use the AC power cord specified by Sony and suitable for the voltage where you use it. s The plug is designed, for safety purposes, to fit into the wall outlet only one way. If - Sony KLV-S32A10 | Operating Instructions - Page 4
org). To Sony Dealers For installation of SONY WALL-MOUNT BRACKET, be sure to read and follow the instructions supplied with those fit into your outlet, consult an electrician for replacement of the obsolete outlet. 10) Protect the power cord from being walked on or pinched particularly at plugs - Sony KLV-S32A10 | Operating Instructions - Page 5
the AC power cord. s Do not put anything heavy on the AC power cord. Do not pull the AC power cord. s Keep the AC power cord away from heat sources. s Be sure to grasp the plug when disconnecting the AC power cord. If the AC power cord is damaged, stop using it and ask your dealer or Sony service - Sony KLV-S32A10 | Operating Instructions - Page 6
and cause injury. s Be sure to follow the operating instructions supplied with the wall-mount bracket when installing the unit. s Be sure to attach the brackets supplied with the wall-mount bracket. Protruding location Do not install the TV in protruding locations. If you install the unit in the - Sony KLV-S32A10 | Operating Instructions - Page 7
AC power adaptor. Otherwise, adequate air-circulation may be blocked causing overheating and cause fire or damage the unit. When installing the unit on the wall, allow this much space. 30 cm (117/8 inches) 10 cm (4 inches) 10 cm (4 inches) 10 cm (4 inches) When installing the unit using a stand - Sony KLV-S32A10 | Operating Instructions - Page 8
on the unit. The unit may fall from the stand or wall-mount bracket, causing damage or serious injury. AC power cord Unplug the AC power cord when moving the unit. Do not move the unit with the AC power cord plugged in. It may damage the AC power cord and result in fire or electric shock. Do not - Sony KLV-S32A10 | Operating Instructions - Page 9
Cable and Antenna 22 DVD Player 24 HDMI-Equipped Device 26 DVI-HDTV-Equipped Device 27 Personal Computer 28 Camcorder or "PlayStation 29 Setting Up the Channel List 30 Using Initial Setup 30 Watching the TV Button Descriptions 32 Programming the Remote Control 34 Using Other Equipment with - Sony KLV-S32A10 | Operating Instructions - Page 10
attached), AC power cord, AC power adaptor (KLV-S19A10 only), HD15-HD15 cable, Support belt, securing screw, wood screw, Operating Instructions, Quick Setup Guide, Leaflet (Installing the Wall-Mount Bracket, KLV-S19A10 only) and warranty card. See page 66 for the quantity of each supplied accessory - Sony KLV-S32A10 | Operating Instructions - Page 11
about the types of screw. When Mounting on a Wall Be sure to use the following optional wall-mount brackets to hang the TV on the wall. KLV-S19A10: SU-WL11 KLV-S23A10/KLV-S26A10/KLV-S32A10: SU-WL31 See the Instruction Guide supplied with the wall-mount bracket on how to mount the TV on the wall. 11 - Sony KLV-S32A10 | Operating Instructions - Page 12
the connecting cables. KLV-S19A10 KLV-S23A10 KLV-S26A10 KLV-S32A10 2 Route the connecting cables through the hook. Do not bundle the AC power cord for KLV-S23A10, KLV-S26A10 and KLV-S32A10 in the stand with other connecting cables. Adjusting the Viewing Angle of the TV This TV can be adjusted - Sony KLV-S32A10 | Operating Instructions - Page 13
on and off the TV. Receives IR signals from the remote control. Senses room light level and adjusts the screen brightness accordingly (see page green when the TV is turned on. If the LED blinks in red continuously, this may indicate the display unit needs servicing (see "Contacting Sony" on page 2). - Sony KLV-S32A10 | Operating Instructions - Page 14
supplied digital audio/video interface between this TV and any HDMI-equipped audio/video component, such as a set-top box, DVD player, and A/V receiver. HDMI supports enhanced, or high-definition video, plus two-channel digital audio. The AUDIO IN (L/R) of HDMI IN is for DVI connection. See page 27 - Sony KLV-S32A10 | Operating Instructions - Page 15
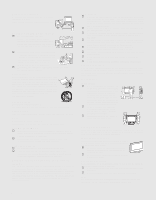
the TV KLV-S23A10 Introducing the TV VHF/UHF 1 DC IN 2 VHF/UHF 1 AC IN 3 4 5 PC AUDIO Y IN S VIDEO PB VIDEO PR L (MONO) L L AUDIO AUDIO R R R 1 3 4 VIDEO IN HD/DVD IN (1080i/720p/480p/480i) AUDIO OUT KLV-S26A10 6 7 8 KLV-S32A10 VHF/UHF 1 AC IN 3 VHF/UHF 1 AC IN - Sony KLV-S32A10 | Operating Instructions - Page 16
/ KLV-S26A10/ KLV-S32A10) 4 VIDEO IN 1/3 S VIDEO 5 VIDEO IN 1/3 VIDEO/ L-AUDIO-R 6 HD/DVD IN 4 (1080i/720p/ 480p/480i)/ L-AUDIO-R 7 PC AUDIO IN 8 AUDIO OUT (L/R) Description RF input that connects to your VHF/UHF antenna. Connects the supplied AC power adaptor. Connects the supplied AC power cord - Sony KLV-S32A10 | Operating Instructions - Page 17
To display clear crisp pictures, first you must connect your TV correctly and also need to choose the correct display format (see "Changing the wide screen mode" on page 38). It is strongly recommended to connect the antenna using the supplied 75-ohm coaxial cable to receive optimum picture quality - Sony KLV-S32A10 | Operating Instructions - Page 18
the ferrite core into the VHF/UHF jack. Cable Box/Digital Cable Box z The supplied remote control can be programmed to operate your cable box (see "Programming the Remote Control" on page 34). z To change channels using the cable box, set your TV to channel 3 or 4 depending on the cable box channel - Sony KLV-S32A10 | Operating Instructions - Page 19
. or Press TV/VIDEO repeatedly to select the satellite receiver input (Video 1, 2 or 3). You must program the remote control. See "Programming the Remote Control" on page 34. Press SAT/CABLE (FUNCTION). See "Operating a Satellite Receiver" on page 36. See the instructions for setting up Label Video - Sony KLV-S32A10 | Operating Instructions - Page 20
Component video (YPBPR) connection is necessary to view 480p, 720p, and 1080i formats. Note that this TV displays all format types of picture in a resolution of 1,280 dots × 768 lines (KLV-S19A10) and 1,366 dots × 768 lines (KLV-S23A10, KLV-S26A10 and KLVS32A10). 2 Using an audio cable, connect your - Sony KLV-S32A10 | Operating Instructions - Page 21
HD equipment Press SAT/CABLE (FUNCTION). Control HD equipment functions See "Using Other Equipment with Your Remote Control" on page 36. with the remote control Label video inputs to easily See the instructions for setting up Label Video Inputs on page 61. identify equipment connected to the - Sony KLV-S32A10 | Operating Instructions - Page 22
by the VCR through the video inputs while TV signal (Antenna) is selected by the TV tuner. To connect the VCR and cable 1 Connect the CATV cable to the VCR's VHF/UHF input jack. 2 Connect the supplied 75-ohm coaxial cable from the antenna to the TV's VHF/UHF input jack. 3 Use an A/V and S VIDEO - Sony KLV-S32A10 | Operating Instructions - Page 23
External Inputs list. or Press TV/VIDEO repeatedly to select the VCR input (VIDEO 1, 2 or 3). You must program the remote control. See "Programming the Remote Control" on page 34. Press DVD/VCR (FUNCTION). See "Operating a VCR" on page 36. See the instructions for setting up Label Video Inputs on - Sony KLV-S32A10 | Operating Instructions - Page 24
to connect the DVD player's YPBPR output jacks to the TV's YPBPR input jacks (HD/DVD IN 4). The YPBPR jacks to connect the DVD player's AUDIO output jacks to the TV's AUDIO input jacks (HD/DVD IN 4). The YPBPR AUDIO-R (red) Audio cable Rear of TV PC AUDIO Y IN S VIDEO PB VIDEO PR L (MONO) - Sony KLV-S32A10 | Operating Instructions - Page 25
list. or Press TV/VIDEO repeatedly to select the DVD player input (Video 4). You must program the remote control. See "Programming the Remote Control" on page 34. Press DVD/VCR (FUNCTION). See "Operating a DVD Player or DVD Changer" on page 36. See the instructions for setting up Label Video Inputs - Sony KLV-S32A10 | Operating Instructions - Page 26
easily identify equipment connected to the TV Do This ... Press WEGA GATE to select the HDMI-equipped device input (Video 5) in the External Inputs list. or Press TV/VIDEO repeatedly to select the HDMI-equipped device input (Video 5). See the instructions for setting up Label Video Inputs on page - Sony KLV-S32A10 | Operating Instructions - Page 27
DVI to HDMI adapter is used. Do not connect a PC to the TV's HDMI input. TV Do This ... Press WEGA GATE to select the DVI-HDTV-equipped input (Video 5) in the External Inputs list. or Press TV/VIDEO repeatedly to select the DVI-HDTV-equipped device input (Video 5). See the instructions for setting - Sony KLV-S32A10 | Operating Instructions - Page 28
not clear adjust the Phase and Pitch in the Screen Settings on page 52. To connect a PC (personal computer) If you connect your PC to the TV, you can watch your personal computer's display on the TV. When your PC is connected to the TV with the supplied HD15-HD15 cable and optional audio cable, you - Sony KLV-S32A10 | Operating Instructions - Page 29
to easily identify equipment connected to the TV Do This ... Press WEGA GATE to select the camcorder or game input (Video 2) in the External Inputs list. or Press TV/VIDEO repeatedly to select the camcorder or game input (Video 2). See the instructions for setting up Label Video Inputs on page 61 - Sony KLV-S32A10 | Operating Instructions - Page 30
Program again after selecting Cable Off from the settings. Using Initial Setup To run Initial Setup the first time you turn on your TV 1 Press POWER to turn on the TV. The Initial Setup screen appears. 2 Press V or v to select the on-screen display language. Then press . The message "First please - Sony KLV-S32A10 | Operating Instructions - Page 31
- Sony KLV-S32A10 | Operating Instructions - Page 32
as a reference when operating the TV. Button 1 MUTING 2 DISPLAY 3 POWER SAVING 4 FREEZE 5 JUMP 6 screen when displaying settings. Press to navigate to TV functions. See "Introducing WEGA GATE" on page 42. Press to have the remote control operate the equipment you want. See "Programming the Remote - Sony KLV-S32A10 | Operating Instructions - Page 33
to change channels immediately. Press V/v/B/b to move the on-screen cursor. To select an item, press . Press to select the function of your video equipment which is programmed on the TV's remote control. See pages 36, 37 for specific functions. Press to select the function of your video equipment - Sony KLV-S32A10 | Operating Instructions - Page 34
SAP POWER SAVING FREEZE TV/ VIDEO Sony Equipment 1 DVD/VCR SAT/Cable Programmable Code Number 601 (Sony Dream System) 801 (Sony Satellite Receiver) RETURN WEGA GATE Follow the steps below to program your TV's remote control to operate the other video equipment. 2 Find the three-digit code - Sony KLV-S32A10 | Operating Instructions - Page 35
Watching the TV Watching the TV Manufacturer's Codes DVD Players Manufacturer Sony General Electric Hitachi JVC Magnavox Mitsubishi Panasonic Philips Pioneer RCA/PROSCAN Samsung Toshiba Zenith Code 751 755 758 756 757 761 753 757 752 755 758 754 760 DVD Changers Manufacturer Sony Panasonic - Sony KLV-S32A10 | Operating Instructions - Page 36
equipment, press TV/VIDEO repeatedly until you see the video input on the screen for your connected equipment. Remote control operation tips are provided below. Some functions cannot be operated depending on the equipment. In that case, operate by the remote control supplied with the equipment - Sony KLV-S32A10 | Operating Instructions - Page 37
TV Operating a 5.1ch DVD AV System (Sony DAV) To Do This ... Press ... Activate the remote control to operate the DVD DVD/VCR (FUNCTION) Turn on/off Select other equipment connected to the DAV Skip a disk Display the top menu Display the DVD disc menu POWER z 0-9, ENT (using tuner) CH - CH + - Sony KLV-S32A10 | Operating Instructions - Page 38
Watching the TV Special Buttons on the Remote Control Using the Wide Screen Mode 4:3 Original source 16:9 Original source (Standard Mode settings in the Screen settings. For details, see page 51. When the TV receives a 720p or 1080i signal, Normal cannot be selected. Changing the wide screen - Sony KLV-S32A10 | Operating Instructions - Page 39
Saving mode is on, the mode stays on next time you turn on the TV except Picture Off. z You can set the Power Saving mode to on using the settings screen. Select Power Saving in the Setup settings, then set it to Standard or Reduced. z When Picture Off is selected, the PIC OFF LED lights. Current - Sony KLV-S32A10 | Operating Instructions - Page 40
turn off soon" appears one minute before the TV shuts off. This message may not appear if you are performing other operations in the settings. z You can set the Sleep timer to on using the Clock/Timers settings. Select Sleep in the Clock/Timers settings, then set it to 15, 30, 45, 60, 90 or Off - Sony KLV-S32A10 | Operating Instructions - Page 41
- Sony KLV-S32A10 | Operating Instructions - Page 42
on the screen rather than a variety of remote control button presses. When you press the WEGA GATE button, you can perform basic TV operation: your favorite channels, watching TV, images from external equipment or setting menus. WEGA GATE RETURN FUNCTION F1 F2 TOP MENU MENU GUIDE SLEEP 1 Press - Sony KLV-S32A10 | Operating Instructions - Page 43
that is connected to your TV, such as a DVD player. You can assign a label to your equipment or skip unused inputs conveniently. For details, see page 45. The Settings feature lets you adjust the Video, Audio, Screen, Channel, Parent, Clock/Timers or Setup settings. For details, see page 45 - Sony KLV-S32A10 | Operating Instructions - Page 44
remote control to navigate through WEGA GATE and the settings. To Do This ... Display WEGA GATE control panel Display Settings Move through Settings Select an option to change Move back to upper layer Select (confirm) changed setting : NICK 8 20 : PBS Select: Set: Exit: WEGA GATE 2 Press M/m to - Sony KLV-S32A10 | Operating Instructions - Page 45
to your TV. You can also assign a label using Label Video Inputs in the Setup settings. (see Set: Exit: WEGA GATE 2 Press M/m to highlight the desired external input and press . Using Settings in WEGA GATE The Settings feature lets you enter to the settings screen where most of advanced settings - Sony KLV-S32A10 | Operating Instructions - Page 46
Dynamic 0 0 0 Off Off Stereo On Select : Set: Back: Exit: WEGA GATE Screen Screen Wide Mode: 4:3 Default: Overscan: V Center: H Center: Phase: Pitch: Reset: TV Wide Zoom Wide Zoom Normal 0 0 Select : Set: Back: Exit: WEGA GATE Channel Channel TV Favorite Channels Cable: On Channel Fix - Sony KLV-S32A10 | Operating Instructions - Page 47
: Exit: WEGA GATE Setup Setup Caption Vision: Info Banner: Label Video Inputs Language: Auto YC: Power Saving: Light Sensor: TV Off On English Standard On Select : Set: Back: Exit: WEGA GATE Allows you to set/change Lock (page 55) Select Country (page 55) Change Password (page 55) Using the - Sony KLV-S32A10 | Operating Instructions - Page 48
from one Picture Mode to another, use PICTURE on the remote control. z You can alter the Picture Mode options (Vivid, Standard, Pro) for each video input (including the TV antenna input). z You can alter the Video settings (Picture, Brightness, Color, etc.) for each Mode. z Color, Hue, Sharpness - Sony KLV-S32A10 | Operating Instructions - Page 49
remote control. z To change from one MTS option to another, use MTS/SAP on the remote control. z MTS is not available when Video, Component, HDMI or PC input is selected. The Audio settings the TV to second audio programs when a signal is received. If no SAP signal is present, the TV remains in - Sony KLV-S32A10 | Operating Instructions - Page 50
off, and the audio output from your audio system can still be controlled by the TV's remote control. The TV's speakers are turned off and the audio output of the TV is fixed. Use your audio receiver's remote control to adjust the volume (and other audio settings) through your audio system. 50 - Sony KLV-S32A10 | Operating Instructions - Page 51
Phase: Pitch: Reset: TV Wide ZZoooomm NWoidrme aZl oom FNuolrl mal Z0oom 0 Using the Settings WEGA GATE To exit the Screen settings, press . Select : Set: Back: Exit: WEGA GATE Selecting Screen Options z To change from one Wide Mode option to another, use WIDE on the remote control. z For Wide - Sony KLV-S32A10 | Operating Instructions - Page 52
. Pitch Adjust uneven sharpness on screen. Available only for PC input. the factory settings. Available only for PC input. PC Input Signal Compatibility Chart Resolution Signals Horizontal 75 60 VESA standard -* ✔ ✔ -* This TV does not support Sync on Green or Composite Sync. If a signal - Sony KLV-S32A10 | Operating Instructions - Page 53
Channel 4. Press to select WEGA GATE Using the Settings Channel TV Favorite Channels Cable: OOn n Channel Fix: OOff ff Auto Program: Show/Hide Channels Label Channels WEGA GATE To exit the Channel settings, press . Select : Set: Back: Exit: WEGA GATE Selecting Channel Options z Also - Sony KLV-S32A10 | Operating Instructions - Page 54
Using the Settings z Channels that you set to be hidden can be accessed only with the 0-9 buttons. z Also, you can access the TV channel list on the WEGA GATE control panel. Option Show/Hide Channels Label Channels Description Allows you to show or hide channels that appear when - Sony KLV-S32A10 | Operating Instructions - Page 55
Country: Change Password TV OOffff Child Youth Young Adult Custom Using the Settings Use 0-9 on the remote control to enter a four-digit password. The Young Adult to help simplify the rating selection. To set more specific ratings, select Custom. z For descriptions of Child, Youth, and Young - Sony KLV-S32A10 | Operating Instructions - Page 56
maximum blocking capability, set the Age-Based Ratings. z If you block unrated TV programs, be aware that the following types of programs may be blocked: programs broadcast from another country, emergency broadcasts, political programs, sports, news, public service announcements, religious programs - Sony KLV-S32A10 | Operating Instructions - Page 57
Using the Settings Canadian Models: Selecting Custom Rating Options For Canadian models, the Custom Rating menu includes blocked program, then enter the password. This temporarily switches off Parent. To reactivate the Parent settings, turn off the TV. When the TV is turned on again, your Parent - Sony KLV-S32A10 | Operating Instructions - Page 58
Timers Options z To return to the Timer settings after programming one of the Timers or current time, press B. z Timer will be set to Off when: • Auto Program is executed • Channel Fix is set • the AC power cord is disconnected and then reconnected to turn the TV on and the Current Time is displayed - Sony KLV-S32A10 | Operating Instructions - Page 59
Option Current Time Description Select to set the current time (day, hour, minute, and AM/PM). 1 Press to select Current Time. 2 Press V/v to set the current time (day, hour, minute, and AM/PM). Press or b to confirm each setting and move to the next setting. Press B to go back to the - Sony KLV-S32A10 | Operating Instructions - Page 60
,Text2, Displays network/station information presented Text3,Text4 using either half or the whole screen (if available). Set to On or Off. When on, displays the program name (if the broadcaster offers this service). Displays for up to four seconds when the channel is changed or the DISPLAY button - Sony KLV-S32A10 | Operating Instructions - Page 61
Saving option to another, use POWER SAVING on the remote control. z In low light ambient the range of the backlight control is reduced when the light sensor is set to On. Option Label Video Inputs Description Allows you to identify A/V equipment you connected to the TV, such as a VCR, DVD, etc - Sony KLV-S32A10 | Operating Instructions - Page 62
not turn on, and a red light keeps flashing, your TV may need service. Call your local Sony Service Center. ❑ Check Power Saving settings (page 61). ❑ Make sure the power cord is connected securely. ❑ Turn on the power of the TV. ❑ Check antenna/cable connections. ❑ Set Cable to Off in the Channel - Sony KLV-S32A10 | Operating Instructions - Page 63
to Off in the Screen settings (page 51). ❑ The batteries could be weak. Replace the batteries. ❑ Check the polarity of the batteries. ❑ Press the TV (FUNCTION) button first for TV operation. ❑ Point the remote control at the remote control sensor of the TV. ❑ Install the TV away from fluorescent - Sony KLV-S32A10 | Operating Instructions - Page 64
these operating instructions, you have additional questions related to the use of your Sony TV, please call our Customer Information Services Center at 1-800-222-SONY (7669) (US residents only) or 1-877-899-SONY (7669) (Canadian residents only). Before calling Sony customer support, please write - Sony KLV-S32A10 | Operating Instructions - Page 65
Specifications Television system: American TV standard Channel coverage: VHF: 2-13/UHF: 14-69/CATV: 1-125 Antenna: 75-ohm external terminal for VHF/UHF Screen size (measured diagonally): KLV-S19A10: 19 inches KLV-S23A10: 23 inches KLV-S26A10: 26 inches KLV-S32A10: 32 inches Panel System: LCD - Sony KLV-S32A10 | Operating Instructions - Page 66
Remote control RM-YA001 (1) Size AA batteries (2) 75-ohm coaxial cable (1) AC power cord (1) AC power adaptor (1) (KLV-S19A10 only) HD15-HD15 cable (1) Support belt (1), securing screw (1) and wood screw (1) Operating Instructions (1) Quick Setup Guide (1) Leaflet (Installing the Wall-Mount Bracket - Sony KLV-S32A10 | Operating Instructions - Page 67
Full mode, screen setting 38, 51 Full1 mode, screen setting 51 Full2 mode, screen setting 51 FUNCTION buttons 32 G GUIDE button 33 H H Center, adjusting 52 HD/DVD IN jack (1080i/720p/ 480p/480i), described 16 HDMI IN jack, described 14 HDMI-equipped device connection 26 Headphones jack, described - Sony KLV-S32A10 | Operating Instructions - Page 68
, adjusting 48 pitch, adjusting 52 POWER button 13, 33 POWER LED 13 Power Saving 39, 61 POWER SAVING button 32 Pro mode 48 problems, troubleshooting 62-64 Settings Audio 46, 49 Channel 46, 53 Clock/Timers 47, 58 Parent 47, 55 Screen 46, 51 Setup 47, 60 Video 46, 48 Settings, WEGA GATE 43, 45 Setup - Sony KLV-S32A10 | Operating Instructions - Page 69
- Sony KLV-S32A10 | Operating Instructions - Page 70
- Sony KLV-S32A10 | Operating Instructions - Page 71
- Sony KLV-S32A10 | Operating Instructions - Page 72
Printed on 100% recycled paper. Printed in Japan
-
 1
1 -
 2
2 -
 3
3 -
 4
4 -
 5
5 -
 6
6 -
 7
7 -
8
-
9
-
10
-
11
-
12
-
13
-
14
-
15
-
16
-
17
-
18
-
19
-
20
-
21
-
22
-
23
-
24
-
25
-
26
-
27
-
28
-
29
-
30
-
31
-
32
-
33
-
34
-
35
-
36
-
37
-
38
-
39
-
40
-
41
-
42
-
43
-
44
-
45
-
46
-
47
-
48
-
49
-
50
-
51
-
52
-
53
-
54
-
55
-
56
-
57
-
58
-
59
-
60
-
61
-
62
-
63
-
64
-
65
-
66
-
67
-
68
-
69
-
70
-
71
-
72
 |
 |
© 2005 Sony Corporation
2-589-826-
14
(2)
LCD Color TV
Operating Instructions
KLV-S19A10
KLV-S23A10
KLV-S26A10
KLV-S32A10