Sony KLV-S40A10 Operating Instructions
Sony KLV-S40A10 - Lcd Wega™ Flat Panel Television Manual
 |
View all Sony KLV-S40A10 manuals
Add to My Manuals
Save this manual to your list of manuals |
Sony KLV-S40A10 manual content summary:
- Sony KLV-S40A10 | Operating Instructions - Page 1
2-650-915-11(2) LCD Color TV Operating Instructions KLV-S40A10 © 2005 Sony Corporation - Sony KLV-S40A10 | Operating Instructions - Page 2
whenever you call upon your Sony dealer regarding this product. Model No. Serial No. Contacting Sony If, after reading the following instructions, you have additional questions related to the use of your Sony® TV, please call the following number. Customers in Canada contact the Customer Relations - Sony KLV-S40A10 | Operating Instructions - Page 3
be fully inserted to prevent blade exposure. For Customers in Canada This Class B digital apparatus complies with Canadian ICES-003. Safety s Operate the TV only on 120 V-240 V AC. s Use the AC power cord specified by Sony and suitable for the voltage where you use it. s The plug is designed, for - Sony KLV-S40A10 | Operating Instructions - Page 4
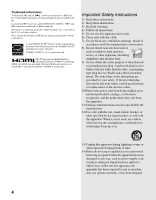
. This TV incorporates High-Definition Multimedia Interface (HDMI™) technology. HDMI, the HDMI logo and High-Definition Multimedia Interface are trademarks or registered trademarks of HDMI Licensing LLC. Important Safety Instructions 1) Read these instructions. 2) Keep these instructions. 3) Heed - Sony KLV-S40A10 | Operating Instructions - Page 5
instructions or service manual. WARNING To guard against injury, the following basic safety precautions should be observed in the installation, use and servicing of the unit. Use Power the cabinet slots as they may touch dangerous voltage points or short out parts that could result in a fire or - Sony KLV-S40A10 | Operating Instructions - Page 6
No part of the TV should overhang any edge of the TV cart or stand; any LCD screen s Although the LCD screen is made with high-precision stand/wall in accordance with the installation instructions. s Carrying the TV requires two or more people. s When lifting the TV or moving the LCD panel of the TV - Sony KLV-S40A10 | Operating Instructions - Page 7
and cause injury. s Be sure to follow the operating instructions supplied with the wall-mount bracket when installing the unit. s Be sure to attach the brackets supplied with the wall-mount bracket. Protruding location Do not install the TV in protruding locations. If you install the unit in the - Sony KLV-S40A10 | Operating Instructions - Page 8
-in wire Electric service equipment NEC: National Electrical Code Antenna discharge unit (NEC Section 810-20) Grounding conductors (NEC Section 810-21) Ground clamps Power service grounding electrode system (NEC Art 250 Part H) Lightning For added protection for this TV during a lightning storm - Sony KLV-S40A10 | Operating Instructions - Page 9
Function 39 Using the Freeze Function 39 Using the Power Saving Function 39 Using the Sleep Function 40 Introducing WEGA GATE Overview of WEGA GATE 42 Navigating 60 Other Information Troubleshooting 62 Trouble Symptoms and Remedies 62 Contacting Sony 64 Specifications 65 Index 66 9 - Sony KLV-S40A10 | Operating Instructions - Page 10
Ready LCD TV. This manual is for model KLV-S40A10. Along with your new TV, the packaging box contains a remote control, size AA batteries, 75-ohm coaxial cable (ferrite core attached), AC power cord, HD15-HD15 cable, Support belt, securing screw, wood screw, Operating Instructions, Quick Setup Guide - Sony KLV-S40A10 | Operating Instructions - Page 11
fit to the TV stand. Use commercial screws of 3 to 4 mm (1/8 to 3/16 inches) diameter. Consult your dealer about the types of screw. When Mounting on a Wall Be sure to use the optional wall-mount bracket (model: SU-PW2) to mount the TV on a wall. Refer to the Instruction Guide supplied with the wall - Sony KLV-S40A10 | Operating Instructions - Page 12
can bundle the connecting cables as illustrated below. 1 Bundle the connecting cables. 2 Route the connecting cables through the hook. Adjusting the Viewing Angle of the TV This TV can be adjusted within the angles left and right (swivel). Top view 15° 15° 15° 15° Front 12 - Sony KLV-S40A10 | Operating Instructions - Page 13
is set, this LED will remain lit even if the TV is turned off. For details, see page 58. Lights up in green when the TV is turned on. If the LED blinks in red continuously, this may indicate the TV needs servicing (see "Contacting Sony" on page 2). Outputs audio signal. The CHANNEL + button has - Sony KLV-S40A10 | Operating Instructions - Page 14
Multimedia Interface) provides an uncompressed, all-digital audio/video interface between this TV and any HDMI-equipped audio/video component, such as a set-top box, DVD player, and A/V receiver. HDMI supports enhanced, or high-definition video, plus two-channel digital audio. The AUDIO IN - Sony KLV-S40A10 | Operating Instructions - Page 15
R R 4 HD/DVD IN AUDIO (1080i/720p/480p/480i) OUT 7 3 VHF/UHF AC IN 45 6 Jack 1 VIDEO IN 1/3 S VIDEO 2 VIDEO IN 1/3 VIDEO/ L(MONO)AUDIO-R 3 VHF/UHF Description Connect to the S VIDEO output jack of your VCR or other video equipment that has S VIDEO. S VIDEO provides better picture quality - Sony KLV-S40A10 | Operating Instructions - Page 16
video provides better picture quality than the S VIDEO (1) or the composite video (2) connections. Connect to the left and right audio input jacks of your audio or video equipment. You can use these outputs to listen to your TV's audio through your stereo system. Connect the supplied AC power - Sony KLV-S40A10 | Operating Instructions - Page 17
using the supplied 75-ohm coaxial cable to receive optimum picture quality signal. A 300-ohm twin lead cable can be easily affected by radio noise and the like, resulting in signal deterioration. If you use a 300-ohm twin lead cable, keep it as far away as possible from the TV. Making Video and - Sony KLV-S40A10 | Operating Instructions - Page 18
do not intend to hook up any other audio or video equipment to your TV. 1 Connect the coaxial connector from your cable service to the cable box's IN jack. 2 Using the supplied 75-ohm coaxial cable, connect the cable box's OUT jack to the TV's VHF/UHF jack. Cable 75-ohm coaxial cable Rear of - Sony KLV-S40A10 | Operating Instructions - Page 19
with S VIDEO, use a VIDEO cable (yellow) instead of the S VIDEO cable. Satellite antenna cable S VIDEO cable S VIDEO Rear of TV Y PC AUDIO IN VIDEO (yellow) AUDIO-L (white) A/V cable AUDIO-R (red) S VIDEO PB VIDEO PR L (MONO) L L AUDIO AUDIO R R R 1 3 4 VIDEO IN HD/DVD IN - Sony KLV-S40A10 | Operating Instructions - Page 20
your equipment's YPBPR output jacks to the TV's YPBPR input jacks. Use the HD/DVD IN 4 connections. Component video (YPBPR) connection is necessary to view 480p, 720p, and 1080i formats. Note that this TV displays all format types of picture in a resolution of 1,366 dots × 768 lines. 2 Using an - Sony KLV-S40A10 | Operating Instructions - Page 21
CABLE (FUNCTION). Control HD equipment functions See "Using Other Equipment with Your Remote Control" on page 36. with the remote control Label video inputs to easily See the instructions for setting up Label Video Inputs on page 61. identify equipment connected to the TV Connecting the TV 21 - Sony KLV-S40A10 | Operating Instructions - Page 22
with S VIDEO, use a VIDEO cable (yellow) instead of the S VIDEO cable. VCR CATV cable S VIDEO cable S VIDEO VIDEO (yellow) AUDIO-L (white) AUDIO-R (red) 75-ohm coaxial cable Rear of TV PC AUDIO Y IN S VIDEO PB VIDEO PR L (MONO) L L AUDIO AUDIO R R R 1 3 4 VIDEO IN HD/DVD IN - Sony KLV-S40A10 | Operating Instructions - Page 23
Inputs list. or Press TV/VIDEO repeatedly to select the VCR input (Video 1, 2 or 3). Program the remote control. See "Programming the Remote Control" on page 34. Press DVD/VCR (FUNCTION). See "Operating a VCR" on page 36. See the instructions for setting up Label Video Inputs on page 61. 23 - Sony KLV-S40A10 | Operating Instructions - Page 24
so audio cables must be connected to provide sound. Y PB Component video cable PR AUDIO-L (white) AUDIO-R (red) Audio cable Rear of TV PC AUDIO Y IN S VIDEO PB VIDEO PR L (MONO) L L AUDIO AUDIO R R R 1 3 4 VIDEO IN HD/DVD IN (1080i/720p/480p/480i) AUDIO OUT VHF/UHF DVD - Sony KLV-S40A10 | Operating Instructions - Page 25
list. or Press TV/VIDEO repeatedly to select the DVD player input (Video 4). Program the remote control. See "Programming the Remote Control" on page 34. Press DVD/VCR (FUNCTION). See "Operating a DVD Player or DVD Changer" on page 36. See the instructions for setting up Label Video Inputs on page - Sony KLV-S40A10 | Operating Instructions - Page 26
identify equipment connected to the TV Do This ... Press WEGA GATE to select the HDMI-equipped device input (Video 5) in the External Inputs list. or Press TV/VIDEO repeatedly to select the HDMI-equipped device input (Video 5). See the instructions for setting up Label Video Inputs on page 61. 26 - Sony KLV-S40A10 | Operating Instructions - Page 27
identify equipment connected to the TV Do This ... Press WEGA GATE to select the DVI-HDTV-equipped input (Video 5) in the External Inputs list. or Press TV/VIDEO repeatedly to select the DVI-HDTV-equipped device input (Video 5). See the instructions for setting up Label Video Inputs on page 61. 27 - Sony KLV-S40A10 | Operating Instructions - Page 28
IN 6 (RGB IN) IN 5 Rear of TV Y S VIDEO PB PC AUDIO IN To PC AUDIO IN jack VIDEO PR L (MONO) L L AUDIO AUDIO R R R 1 3 4 VIDEO IN HD/DVD IN (1080i/720p/480p/480i) AUDIO OUT VHF/UHF L AUDIO IN R HD15-HD15 cable (analog RGB, supplied) Audio cable (optional: stereo mini jack - Sony KLV-S40A10 | Operating Instructions - Page 29
easily identify equipment connected to the TV Do This ... Press WEGA GATE to select the camcorder or game input (Video 2) in the External Inputs list. or Press TV/VIDEO repeatedly to select the camcorder or game input (Video 2). See the instructions for setting up Label Video Inputs on page 61. 29 - Sony KLV-S40A10 | Operating Instructions - Page 30
To run Initial Setup the first time you turn on your TV 1 Press POWER to turn on the TV. The Initial Setup screen appears. 2 Press instructions. Depending on your signal source, be sure to set Cable to On or Off accordingly (see page 53). The Initial Setup menu will appear each time the TV is turned - Sony KLV-S40A10 | Operating Instructions - Page 31
- Sony KLV-S40A10 | Operating Instructions - Page 32
Watching the TV Button Descriptions 1 2 3 4 5 6 7 MTS/ POWER MUTING DISPLAY SAP POWER SAVING FREEZE TV/ VIDEO RETURN WEGA GATE 8 9 0 qa qs FUNCTION F1 F2 TOP MENU MENU GUIDE SLEEP MODE TV/SAT SOUND PICTURE WIDE z The 5 button, CH + button, N (Play) button and MTS/SAP button have a - Sony KLV-S40A10 | Operating Instructions - Page 33
Watching the TV Watching the TV MTS/ POWER MUTING DISPLAY SAP POWER SAVING FREEZE TV/ VIDEO RETURN WEGA GATE Button qd SOUND qg qh qf PICTURE qj qk qg POWER qh MTS/SAP ql qj TV/VIDEO FUNCTION F1 F2 TOP MENU MENU GUIDE SLEEP qd qf MODE TV/SAT SOUND PICTURE WIDE w; qk 0 - 9 ENT wa ws ql - Sony KLV-S40A10 | Operating Instructions - Page 34
Remote Control The remote control is preset to operate Sony brand video equipment. MTS/ POWER MUTING DISPLAY SAP POWER SAVING FREEZE TV/ VIDEO Sony Equipment 1 DVD/VCR SAT/Cable Programmable Code Number 601 (Sony Dream System) 801 (Sony Satellite Receiver) RETURN WEGA GATE Follow the steps - Sony KLV-S40A10 | Operating Instructions - Page 35
Manufacturer Sony Code 764 VCRs Manufacturer Code Sony 301, 302, 303 Admiral (M. Ward) 327 Aiwa* 338, 344 Audio Dynamic 314, 337 Broksonic 319, 317 Canon 309, 308 Manufacturer Citizen Craig Curtis Mathes Daewoo DBX Dimensia Emerson Fisher Funai General Electric Go Video Goldstar - Sony KLV-S40A10 | Operating Instructions - Page 36
... GUIDE Display SAT Menu Move highlight (cursor) Select item Switch between the TV and satellite broadcasts MENU V v B b TV/SAT Operating a VCR To Do This ... Press ... Activate the remote control to operate the VCR DVD/VCR (FUNCTION) Turn on/off Change channels Record Play Stop POWER CH - Sony KLV-S40A10 | Operating Instructions - Page 37
TV Operating a 5.1ch DVD AV System (Sony DAV) To Do This ... Press ... Activate the remote control to operate the DVD DVD/VCR (FUNCTION) Turn on/off Select other equipment connected to the DAV Skip a disk Display the top menu Display the DVD disc menu POWER F1 F2 TOP MENU MENU the picture - Sony KLV-S40A10 | Operating Instructions - Page 38
(Standard definition source) (High definition source) MODE WIDE Wide Mode : Wide Zoom Wide Mode : Normal Wide Mode : Full Wide Mode : Zoom Wide Mode : Wide Zoom Wide Mode : Full Wide Mode : Zoom z When the TV receives a 720p or 1080i signal that is 4:3 aspect ratio picture with a black bar at - Sony KLV-S40A10 | Operating Instructions - Page 39
time, the normal screen returns. FREEZE Freeze Watching the TV Using the Power Saving Function z If you turn off the TV when the Power Saving mode is on, the mode stays on next time you turn on the TV except Picture Off. z You can set the Power Saving mode to on using the settings screen. Select - Sony KLV-S40A10 | Operating Instructions - Page 40
Off. SLEEP Sleep : Off Sleep : 15 Sleep : 30 Sleep : 45 Sleep : 60 Sleep : 90 While the Sleep timer is activated, the TIMER LED on the TV lights up in red. To cancel the Sleep timer Press SLEEP repeatedly until Sleep Off appears or turn the TV power to off then turn on the TV again. 40 - Sony KLV-S40A10 | Operating Instructions - Page 41
- Sony KLV-S40A10 | Operating Instructions - Page 42
button presses. When you press the WEGA GATE button, you can perform basic TV operation: your favorite channels, watching TV, images from external equipment or setting menus. WEGA GATE RETURN FUNCTION F1 F2 TOP MENU MENU GUIDE SLEEP 1 Press WEGA GATE on the remote. WEGA GATE control panel appears - Sony KLV-S40A10 | Operating Instructions - Page 43
lets you select equipment that is connected to your TV, such as a DVD player. You can assign a label to your equipment or skip unused inputs conveniently. For details, see page 45. The Settings feature lets you adjust the Video, Audio, Screen, Channel, Parent, Clock/Timers or Setup settings. For - Sony KLV-S40A10 | Operating Instructions - Page 44
and select Settings. Press V v B b. Press . Press RETURN or select Return in the settings. Press . Press WEGA GATE. Using Favorites in WEGA GATE The Favorites feature lets you select programs from a list of up to 8 favorite channels that you specify. You can create a list using the Add to Favorites - Sony KLV-S40A10 | Operating Instructions - Page 45
to highlight the desired channel and press . Using External Inputs in WEGA GATE The External Inputs feature lets you select the external inputs connected to your TV. You can also assign a label using Label Video Inputs in the Setup settings (see page 61). 1 Select External Inputs from the WEGA GATE - Sony KLV-S40A10 | Operating Instructions - Page 46
provides you access to the following features: Settings Video Video TV Picture Mode: Vivid Reset: Picture: Max Brightness: 40 Color: 60 Hue: 0 Sharpness: 18 Color Temp.: Cool CineMotion: Off Black Corrector: On NR: Medium Backlight: Max Select : Set: Back: Exit: WEGA - Sony KLV-S40A10 | Operating Instructions - Page 47
Timer 1: Off Timer 2: Off Current Time Select : Set: Back: Exit: WEGA GATE Setup Setup Caption Vision: Info Banner: Label Video Inputs Language: Auto YC: Power Saving: Light Sensor: TV Off On English Standard On Select : Set: Back: Exit: WEGA GATE Allows you to set/change Lock (page 55 - Sony KLV-S40A10 | Operating Instructions - Page 48
select WEGA GATE To exit the Video settings, press . Video TV Picture Mode: Vivid Reset: Standard Picture: MPraox Brightness: 40 Color: 60 Hue: 0 Sharpness: 18 Color Temp.: Cool CineMotion: Off Black Corrector: On NR: Medium Backlight: Max Select : Set: Back: Exit: WEGA - Sony KLV-S40A10 | Operating Instructions - Page 49
Reset: Treble: Bass: Balance: Steady Sound: Effect: MTS: Speaker: Audio Out: TV available when Video, Component, HDMI or PC turn TV to second audio programs when a signal is received. If no SAP signal is present, the TV remains in Stereo mode. Mono Select for mono reception. Use to reduce noise - Sony KLV-S40A10 | Operating Instructions - Page 50
of volume adjustments Description On Off Variable Fixed Select to turn on the TV speakers. Select to turn off the TV speakers and listen to the TV's sound only through your external audio receiver and speakers. The TV's speaker are turned off, and the audio output from your audio system can - Sony KLV-S40A10 | Operating Instructions - Page 51
Mode: 4:3 Default: Overscan: V Center: H Center: Phase: Pitch: Reset: TV Wide ZZoooomm NWoidrme aZl oom FNuolrl mal Z0oom 0 Using the Settings WEGA GATE :9 (High definition source), select this mode to display 16:9 picture in original size. Zoom Select to enlarge the original picture without - Sony KLV-S40A10 | Operating Instructions - Page 52
. z H Center feature is useful if TV is connected to game move the position of the picture up and down in (Vertical PC input. Reset Clear Wide Input Signal Compatibility Chart Resolution Signals Horizontal × ( standard -* ✔ ✔ -* This TV does not support Sync on Green or Composite Sync. - Sony KLV-S40A10 | Operating Instructions - Page 53
Channel 4. Press to select WEGA GATE Using the Settings Channel TV Favorite Channels Cable: OOn n Channel Fix: OOff ff Auto Program the cable setting. Off Turns off Channel Fix. 2-6 Select one of these channels if something is connected to the VHF/UHF jack. Video 1, 4 Use this - Sony KLV-S40A10 | Operating Instructions - Page 54
Using the Settings z Channels that you set to be hidden can be accessed only with the 0-9 buttons. z Also, you can access the TV channel list on the WEGA GATE control panel. Option Show/Hide Channels Label Channels Description Allows you to show or hide channels that appear when - Sony KLV-S40A10 | Operating Instructions - Page 55
To set more specific ratings, select TV-Y, TV-G, G s Canada: C, G, TV-Y, TV-G Youth Maximum ratings permitted are: s US: TV-PG, PG s Canada: C8+, PG, 8ans+, TV-PG Young Adult Maximum ratings permitted are: s US: TV-14, PG-13 s Canada: 14+, 13ans+, TV-14 Custom Select to set ratings manually - Sony KLV-S40A10 | Operating Instructions - Page 56
, sports, news, public service announcements, religious programs and weather. For US models, the Custom Rating menu includes the following options. switches off Parent. To reactivate the Parent settings, turn off the TV. When the TV is turned on again, your Parent settings are reactivated. 56 - Sony KLV-S40A10 | Operating Instructions - Page 57
Models: Selecting Custom Rating Options For Canadian models, the Custom Rating menu includes the following options. For US models, see page 56. Option Parent. To reactivate the Parent settings, turn off the TV. When the TV is turned on again, your Parent settings are reactivated. Using the - Sony KLV-S40A10 | Operating Instructions - Page 58
executed • Channel Fix is set • the AC power cord is disconnected and then reconnected to turn the TV on and the Current Time is displayed as want the TV to remain on before shutting off automatically. You can use the Timers to program the TV to turn on and off and tune to a specific channel at - Sony KLV-S40A10 | Operating Instructions - Page 59
Using the Settings Option Current Time Description Select to set the current time (day, hour, minute, and AM/PM). 1 Press to select Current Time. 2 Press V/v to set the current time (day, hour, minute, and AM/PM). Press or b to confirm each setting and move to the next setting. Press B to - Sony KLV-S40A10 | Operating Instructions - Page 60
TV Caption Vision: OOff ff Info Banner: COC1n Label Video Inputs CC2 Language: CECn3glish Auto YC: COC4n Power broadcast with closed caption). Off Caption Vision is turned off. CC1, CC2, CC3, CC4 Displays a broadcaster offers this service). Displays for up to four seconds when the - Sony KLV-S40A10 | Operating Instructions - Page 61
the VIDEO input jack: Press V/v to select Off, then press . 3 Press WEGA GATE to exit Settings. Standard Select to view picture without the benefit of Power Saving. Reduced Select to view picture with reduced power consumption. It also enhances the black level. Picture Off Select to turn off - Sony KLV-S40A10 | Operating Instructions - Page 62
channels. The TV turns off automatically. No picture from some video sources. Poor picture. Double images or ghosts. Possible Remedies ❑ If your TV does not turn on, and a red light keeps flashing, your TV may need service. Call your local Sony Service Center. ❑ Check Power Saving settings (page - Sony KLV-S40A10 | Operating Instructions - Page 63
the end of its serviceable life. (3-5 years in normal use, 1-2 years at the seaside.) ❑ Keep the TV away from noise sources such as cars, motorcycles, or hair- dryers. ❑ Press PICTURE to select the desired Picture mode (page 33). ❑ Adjust the Picture Mode options in the Video settings (page 48 - Sony KLV-S40A10 | Operating Instructions - Page 64
operating instructions, you have additional questions related to the use of your Sony television, please call our Customer Information Services Center. For Canadian residents: 1-877-899-SONY (7669) Before calling Sony customer support, please write down the model and serial numbers of your TV. 64 - Sony KLV-S40A10 | Operating Instructions - Page 65
: without stand: 33 kg (72 lb. 13 oz.) 26.5 kg (58 lb. 7 oz.) Supplied accessories: Remote control RM-YA001 (1) Size AA batteries (2) 75-ohm coaxial cable (1) AC power cord (1) HD15-HD15 cable (1) Support belt (1), securing screw (1) and wood screw (1) Operating Instructions (1) Quick Setup Guide - Sony KLV-S40A10 | Operating Instructions - Page 66
, described 14 High-Definition Multimedia Interface (HDMI) 10 hue, adjusting 48 I Info Banner 10, 60 Infrared Receiver (IR) 13 J, K JUMP 39 JUMP button 32 L Label channels 54 videos 61 Language, setup setting 61 Light Sensor described 10, 13 setting 61 Lock, parent setting 55 M MENU button 32, 36 - Sony KLV-S40A10 | Operating Instructions - Page 67
, power saving 61 Steady Sound described 10 setting 49 Stereo, MTS setting 49 Support Belt 11 swivel 12 T, U time, Clock/Timers setting 58 Timer 58 TIMER LED 13 TOP MENU button 32 treble, adjusting 49 troubleshooting 62-64 TruSurround, Effect 49 turning on/off the TV 13 TV (FUNCTION - Sony KLV-S40A10 | Operating Instructions - Page 68
Printed on 100% recycled paper. Printed in Japan
-
 1
1 -
 2
2 -
 3
3 -
 4
4 -
 5
5 -
 6
6 -
 7
7 -
8
-
9
-
10
-
11
-
12
-
13
-
14
-
15
-
16
-
17
-
18
-
19
-
20
-
21
-
22
-
23
-
24
-
25
-
26
-
27
-
28
-
29
-
30
-
31
-
32
-
33
-
34
-
35
-
36
-
37
-
38
-
39
-
40
-
41
-
42
-
43
-
44
-
45
-
46
-
47
-
48
-
49
-
50
-
51
-
52
-
53
-
54
-
55
-
56
-
57
-
58
-
59
-
60
-
61
-
62
-
63
-
64
-
65
-
66
-
67
-
68
 |
 |

© 2005 Sony Corporation
2-650-915-
11
(2)
LCD Color TV
Operating Instructions
KLV-S40A10