Sony KV-34XBR910 Operating Instructions
Sony KV-34XBR910 - 34" Fd Trinitron Wega Xbr Manual
 |
View all Sony KV-34XBR910 manuals
Add to My Manuals
Save this manual to your list of manuals |
Sony KV-34XBR910 manual content summary:
- Sony KV-34XBR910 | Operating Instructions - Page 1
Sony Corporation 4-094-064-21 ¨ Operating Instructions Printed in U.S.A. © 2003 Sony Corporation ¨ KV-30XBR910 KV-34XBR910 - Sony KV-34XBR910 | Operating Instructions - Page 2
, Inc. and are licensed by BBE Sound, Inc. under U.S. Patent No. 4,638,258 and 4,482,866. Wega, FD Trinitron, Steady Sound, Digital Reality Creation, Caption Vision, CineMotion, Memory Stick, and Twin View are registered trademarks of Sony Corporation. ClearEdge VM and HD Detailer are trademarks of - Sony KV-34XBR910 | Operating Instructions - Page 3
power cord during a heavy storm. Lightning may strike while you are holding the cable or cord, causing serious injury. Turn off your TV and wait for the weather to improve. Memory Stick To protect small children from injury from Memory Stick Media, remove all Memory Stick media from the TV's Memory - Sony KV-34XBR910 | Operating Instructions - Page 4
discharge unit (NEC Section 810-20) Grounding conductors (NEC Section 810-21) Ground clamps Power service grounding electrode system (NEC Art 250 Part H) Lightning For added protection for this television receiver during a lightning storm, or when it is left unattended and unused for long periods - Sony KV-34XBR910 | Operating Instructions - Page 5
- Sony KV-34XBR910 | Operating Instructions - Page 6
FD Trinitron Wega Overview ...9 Presenting the FD Trinitron Wega 9 Package Contents 9 Features 9 Setting Up the TV Overview ...11 About the AC Power Cord 11 TV Satellite Receiver 30 Satellite Receiver and VCR 32 DVD Player with Component Video Connectors 34 DVD Player with S VIDEO and Audio - Sony KV-34XBR910 | Operating Instructions - Page 7
the Features Overview ...49 Watching TV 50 Using the Scrolling Index 51 Factors Affecting Scrolling Index 51 Using Wide Mode 52 Using Twin View 53 Displaying Twin Pictures 53 Factors Affecting Twin View 53 Activating the Picture 54 Changing the Picture Size 55 Using Favorite Channels 56 - Sony KV-34XBR910 | Operating Instructions - Page 8
Screen Menu 82 Using the Channel Menu 84 Using the Parent Menu 86 Using the Setup Menu 89 Other Information Overview ...93 Glossary ...94 Contacting Sony 95 Troubleshooting 95 Twin View 95 Remote Control 96 Channels 96 Memory Stick 97 Video 99 Audio 99 General 100 Specifications 101 - Sony KV-34XBR910 | Operating Instructions - Page 9
- Sony KV-34XBR910 | Operating Instructions - Page 10
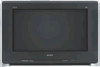
Overview This chapter describes the contents of the package in which the TV is shipped and provides an overview of the features of your Wega TV. Presenting the FD Trinitron Wega The FD Trinitron Wega (pronounced VAY-GAH) is characterized by outstanding contrast, uncompromising accuracy, and corner - Sony KV-34XBR910 | Operating Instructions - Page 11
(JPEG) and movie (MPEG1) files that are stored on Memory Stick media. ❑ Component Video Inputs: Offers the best video quality for DVD (480p, 480i), and digital set-top box (HD1080i, 720p) connections. ❑ HD Detailer™: Wideband video amplifier has a high bandwidth frequency rating, which allows it to - Sony KV-34XBR910 | Operating Instructions - Page 12
with S VIDEO and Audio Connectors DVI-Equipped Device Camcorder Audio Receiver Using the CONTROL S Feature Setting Up the Channel List Page(s) 12-15 16-22 24 26 28 30 32 34 36 37 38 39 40 41 About the AC Power Cord The AC power cord is attached to the rear of the TV with - Sony KV-34XBR910 | Operating Instructions - Page 13
SETUP TV Controls and Connectors Front Panel 1 2 S VIDEO VIDEO 2 INPUT VIDEO L(MONO) - AUDIO - R 3 4 56 7 8 9 MENU TV/VIDEO + VOLUME CHANNEL _ q; qa qs qd qf qg TIMER STAND BY POWER Setup SETUP SETUP SETUP SETUP 12 - Sony KV-34XBR910 | Operating Instructions - Page 14
+ 9 -CHANNEL+ 0 qa Memory Stick LED qs TIMER LED qd STAND BY LED qf Infrared Receiver (IR) qg POWER Press to display the Memory Stick Menu. For details, see "Using the Memory Stick Viewer" on page 61. Press repeatedly to cycle through the video equipment connected to the TV's video inputs. Press to - Sony KV-34XBR910 | Operating Instructions - Page 15
Rear Panel 1 6 7 2 8 3 9 q; 45 14 SETUP SETUP SETUP SETUP Setup SETUP - Sony KV-34XBR910 | Operating Instructions - Page 16
your TV's audio through your stereo system. 6 HD/DVD IN 5/6 Connect to your DVD player's or digital set-top box's component video (Y, PB, PR) (1080i/720p/480p/480i) and audio (L/R) jacks. Component video provides better picture quality than 2, 3, or 9). 7 AUX Auxiliary RF input that connects - Sony KV-34XBR910 | Operating Instructions - Page 17
SETUP Basic Connections: Connecting a Cable or Antenna The way in which you will connect your TV varies, depending on how your home receives a signal (cable, cable box, antenna) and whether or not you plan to connect a VCR. If You Are Connecting - Sony KV-34XBR910 | Operating Instructions - Page 18
As Shown VHF Only or combined VHF/UHF or Cable 75-ohm coaxial cable TV VHF/UHF 300-ohm twin lead cable (usually found in older homes) Cable or UHF Only or combined VHF/UHF 300-ohm twin lead cable TV VHF/UHF Antenna connector (not supplied) 75-ohm coaxial and 300-ohm twin lead cable (found - Sony KV-34XBR910 | Operating Instructions - Page 19
you have a VCR, see pages 24 and 26.) Cable Type Cable TV (CATV) and Antenna Connect As Shown CATV cable (No connection to TO CONVERTER) TV AUX TO CONVERTER Antenna cable VHF/UHF About Using This Connection with Dual Picture (Twin View, etc.) Features With this connection, you cannot view CATV - Sony KV-34XBR910 | Operating Instructions - Page 20
and antenna Receive channels using an antenna, instead of the cable Press ANT to switch back and forth between the TV's VHF/UHF and AUX inputs. 1 Press ANT to switch to the AUX input. 2 Set the Cable option to Off. For details, see "Selecting Channel Options" on page 84. 3 Run the Auto Setup - Sony KV-34XBR910 | Operating Instructions - Page 21
features for channels coming through the cable box to the TV's AUX input jack. For example, when you switch the TV's input to AUX - to select the cable box input - the picture displays only in the left window. For example, if you turn on Twin View, you can watch cable channels coming into the - Sony KV-34XBR910 | Operating Instructions - Page 22
stay on the channel the cable box is set to (usually channel 3 or 4). You can use the TV's Channel Fix feature to lock in a specific channel. For details, see "Using the Channel Menu" on page 84. Switch the TV's input between the cable box and cable Press ANT to switch back and forth between the - Sony KV-34XBR910 | Operating Instructions - Page 23
With this connection you can: ❑ Use the TV remote control to change channels coming through the cable box to the TV's VHF/UHF jack. (You must first program the remote control for your specific cable box.) About Using This Connection with Dual Picture (Twin View, etc.) Features With this connection - Sony KV-34XBR910 | Operating Instructions - Page 24
See Page 24 26 28 30 32 34 36 37 38 39 About Using S VIDEO If the optional equipment you are connecting has an S VIDEO jack (shown at left), you can use an S VIDEO cable for improved picture quality (compared to an A/V cable). Because S VIDEO carries only the video signal, you also need to - Sony KV-34XBR910 | Operating Instructions - Page 25
.) Features With this connection, you can use all the dual picture features. To connect the VCR and cable 1 Connect the CATV cable to the VCR's VHF/UHF input jack. 2 Use a coaxial cable to connect the VCR's VHF/UHF output jack to the TV's VHF/UHF jack. 3 Use an A/V cable to connect the VCR - Sony KV-34XBR910 | Operating Instructions - Page 26
46. Then set the A/V slide switch to the position you programmed for the VCR. Control VCR functions with See "Operating a VCR" on page 58. the TV remote control Label video inputs to easily See the instructions for setting up Video Labels on page 90. identify equipment connected to the - Sony KV-34XBR910 | Operating Instructions - Page 27
Features With this connection, you can use all the dual picture features. With this connection you can: ❑ Use the TV remote control to change channels coming through the cable box. (You must first program the remote control for your specific cable box; see "Programming the Remote Control" on page - Sony KV-34XBR910 | Operating Instructions - Page 28
you programmed for the VCR. Control specific cable box and See "Operating a Cable Box" on page 59 and "Operating a VCR" on page 58. VCR functions with the TV remote control Label video inputs to easily See the instructions for setting up Video Labels on page 90. identify equipment connected - Sony KV-34XBR910 | Operating Instructions - Page 29
S VIDEO jacks? See page 23. Connecting two VCRs lets you record from one VCR to the other. By connecting them as shown below, you can view (monitor) what is being recorded. To connect two VCRs for tape editing 1 Use an A/V cable to connect the playback VCR's A/V output jacks to the TV's A/V input - Sony KV-34XBR910 | Operating Instructions - Page 30
being Press TV/VIDEO repeatedly to select the VCR input (VIDEO 1 in the recorded illustration above). Set up the TV remote control If you have a non-Sony VCR, on page 58. the TV remote control Label video inputs to easily See the instructions for setting up Video Labels on page 90. identify equipment - Sony KV-34XBR910 | Operating Instructions - Page 31
Satellite Receiver Using S VIDEO jacks? See page 23. TV To connect a satellite receiver 1 Connect the satellite antenna cable to the satellite receiver's satellite input jack. 2 Use an A/V cable to connect the satellite receiver's A/V output jacks to the TV's A/V input jacks. 3 Connect a CATV - Sony KV-34XBR910 | Operating Instructions - Page 32
TV/VIDEO repeatedly to select the satellite receiver input (VIDEO 1 in the illustration). Set up the TV remote control to operate the If you have a non-Sony 58. TV remote control Label video inputs to easily identify equipment connected to the TV See the instructions for setting up Video Labels on - Sony KV-34XBR910 | Operating Instructions - Page 33
Setup SETUP Satellite Receiver and VCR Using S VIDEO jacks? See page 23. TV To connect a satellite receiver and VCR 1 Connect the satellite antenna cable to the satellite receiver's satellite input jack. 2 Connect the CATV cable to the VCR's VHF/UHF input jack. 3 Use a coaxial cable to connect - Sony KV-34XBR910 | Operating Instructions - Page 34
the illustration). The VCR must be turned on and set to the satellite receiver's line input. Watch the VCR Press TV/VIDEO repeatedly to select the input to which the VCR is connected (VIDEO 1 in the illustration). Set up the TV remote control If you have a non-Sony VCR or satellite receiver, you - Sony KV-34XBR910 | Operating Instructions - Page 35
If so, connect the cables to like colors. 2 Use an audio cable to connect the DVD player's audio output jacks to the TV's VIDEO 5 audio input jacks. Component video cables TV Cables are often color-coded to connectors. Connect red to red, white to white, etc. Audio cable SETUP SETUP SETUP SETUP - Sony KV-34XBR910 | Operating Instructions - Page 36
player Press TV/VIDEO repeatedly to select the DVD input (VIDEO 5 in the illustration). Set up the TV remote control If you have a non-Sony DVD TV remote control Label video inputs to easily See the instructions for setting up Video Labels on page 90. identify equipment connected to the TV - Sony KV-34XBR910 | Operating Instructions - Page 37
DVD player Press TV/VIDEO repeatedly to select the DVD input (VIDEO 1 in the illustration). Set up the TV remote control If you have a non-Sony DVD player, " on page 59. the TV remote control Label video inputs to easily See the instructions for setting up Video Labels on page 90. identify equipment - Sony KV-34XBR910 | Operating Instructions - Page 38
1 Use the DVI cable that came with your device to connect the device's DVI-HDTV OUT jack to the TV's DVI-HDTV IN jack. 2 Use an audio cable to connect the device's audio output jacks to the TV's DVI-HDTV IN jack audio input jacks. A/V cable DVI cable HDTV Receiver SETUP SETUP SETUP SETUP 37 - Sony KV-34XBR910 | Operating Instructions - Page 39
. Notes on Using This Connection To Do This ... Do This ... Watch the camcorder Press TV/VIDEO repeatedly to select the camcorder input (VIDEO 2 in the illustration). Label video inputs to easily See the instructions for setting up Video Labels on page 90. identify equipment connected to the - Sony KV-34XBR910 | Operating Instructions - Page 40
. 2 Using the TV's Audio Menu, set the Speaker option to Off. Then set the Audio Out option to Fixed or Variable, depending on how you want to control the volume. For details, see "Using the Audio Menu" on page 80. 3 Turn on the audio receiver, and then set the receiver's line input to the jack - Sony KV-34XBR910 | Operating Instructions - Page 41
Feature CONTROL S allows you to control your system and other Sony equipment with one remote control. In addition to allowing you to control, the CONTROL S feature allows you to always point your remote control at your TV, instead of having to point it at the other equipment, which might be hidden or - Sony KV-34XBR910 | Operating Instructions - Page 42
to the picture. You can choose a correction between +5 and -5. When finished, press . The lowest numbered channel is displayed. To reset the TV to factory settings 1 Press POWER to turn on the TV. 2 Hold down RESET on the remote control. 3 Press TV POWER on the TV. (The TV will turn itself off - Sony KV-34XBR910 | Operating Instructions - Page 43
- Sony KV-34XBR910 | Operating Instructions - Page 44
describes how to set up, program, and use the TV's remote control. Topic Inserting Batteries Button Descriptions Outside Panel the battery cover from the remote control. 2 Insert two size AA (R6) batteries (supplied) by matching the e and E terminals on the batteries to the diagram inside the - Sony KV-34XBR910 | Operating Instructions - Page 45
SAT/CABLE POWER FUNCTION SAT/CABLE TV TV/VIDEO ANT PIC MODE Button 1 MUTING qh 2 SLEEP qj 3 FUNCTION qk Buttons JUMP ENTER 6 7 WIDE MODE INDEX TWIN VIEW 8 ql 9 MENU VOL CH q; w; qa MEMORY STICK wa DRC MODE PALETTE qs ws qd DRC RESET FAVORITES GUIDE DISPLAY wd qf - Sony KV-34XBR910 | Operating Instructions - Page 46
the Memory Stick Viewer" on page 61. ws PALETTE wd DISPLAY wf GUIDE Press repeatedly to cycle through the three Custom DRC Palette options. Also available in the Video Menu. For details, see."Using the Video Menu" on page 78-79. Press once to display the current channel number, current time, and - Sony KV-34XBR910 | Operating Instructions - Page 47
SYSSTAETM/CABLE FUNCTION OFF TV TV/VIDEO ANT PIC MODE FREEZE DISJCUMMEPNU SELECT ENMTEENRU WIDE MODE INDEX TWIN VIEW VOL MENU CH DRC MODE MEMORY STICK PALETTE RESET FAVORITES GUIDE CODE SET DISPLAY TV RM-Y188 MUTING SLEEP SAT/CABLE POWER wg SYSTEM OFF TV/VCR VCR/DVD wh - Sony KV-34XBR910 | Operating Instructions - Page 48
video equipment other than Sony brand that you want to control with the TV operate your equipment with the supplied remote control. In such cases setting and must be reset. 1 Turn to the list of "Manufacturer's aim the TV's remote control at the equipment and press the POWER button that corresponds - Sony KV-34XBR910 | Operating Instructions - Page 49
SETUP Remote Control SETUP SETUP Manufacturer's Codes VCRs Manufacturer Sony Admiral (M. Ward) Aiwa Audio Dynamic Broksonic Canon Citizen Craig Criterion Curtis Mathes Daewoo DBX Dimensia Emerson Fisher Funai General Electric Go Video Goldstar Hitachi Instant Replay JC Penney JVC Kenwood LXI - Sony KV-34XBR910 | Operating Instructions - Page 50
Using the Features Overview This chapter describes how to use the features of your TV. Topic Watching TV Using the Scrolling Index Using Wide Mode Using Twin View Using Favorite Channels Using the Freeze Function Using Other Equipment with Your TV Remote Control Page 50 51 52 53 56 57 58 49 - Sony KV-34XBR910 | Operating Instructions - Page 51
to turn Display off. Switch the TV's input to the VCR, DVD player, or other connected equipment Press TV/VIDEO repeatedly to cycle through the video equipment connected to the TV's video inputs. Change video and audio options, customize the TV's setup, set parental controls, and more Press MENU - Sony KV-34XBR910 | Operating Instructions - Page 52
4 To change a frozen video picture to a live video, move the joystick V or v to highlight the picture, then press . 5 To move the live video (from step 4 ) view all channels. ❑ Sources connected to the AUX, VIDEO 5, VIDEO 6, and VIDEO 7 inputs display in the left window, but not the right windows. - Sony KV-34XBR910 | Operating Instructions - Page 53
has an elongated appearance. Zoom Mode enlarges the entire 4:3 picture proportionately to fill the 16:9 screen. Useful for watching Letterbox movies. Zoom When you change channels or inputs, the Wide Mode settings revert to the 4:3 Default setting in the Screen menu. To retain the current Wide - Sony KV-34XBR910 | Operating Instructions - Page 54
source (such as a VCR or DVD player) in the second window by using the TV/VIDEO button. For details, see "Connecting Optional Equipment" on page 23. ❑ Sources connected to the AUX, VIDEO 5, VIDEO 6, and VIDEO 7 inputs display in the left Twin View window, but not the right. ❑ If you are viewing - Sony KV-34XBR910 | Operating Instructions - Page 55
the sound Press MUTING (press again to unmute) Switch the TV's input between Press ANT sources connected to the TV's VHF/UHF and AUX inputs Switch the TV's input between Press TV/VIDEO sources connected to the TV's A/V inputs Change the picture size Move the joystick V or v. (For details, see - Sony KV-34XBR910 | Operating Instructions - Page 56
you want to resize. 2 Move the joystick V to enlarge the picture. 3 Move the joystick v to make the picture smaller. SETUP SETUP Features SETUP SETUP When you adjust the picture sizes, the TV memorizes the change. The next time you use the Twin View function, the memorized sizes appear. 55 - Sony KV-34XBR910 | Operating Instructions - Page 57
up to eight favorite channels that you specify. Creating a List of Favorite Channels z For details on using the Channel Menu, see page 84. 1 Press MENU to display the Menu. 2 Move the joystick B or b to highlight the Channel icon and press . 3 Press to select Favorite Channels. 4 Move the joystick - Sony KV-34XBR910 | Operating Instructions - Page 58
feature is not available while using Twin View. 1 When the program information you want to capture is displayed, press FREEZE. 2 The TV switches to Twin View mode and displays the "frozen" picture on the right, while the current program continues on the left. Current program in progress Call 555 - Sony KV-34XBR910 | Operating Instructions - Page 59
SAT/CABLE FUNCTION to operate the satellite receiver Turn on/off SAT/CABLE POWER Select a channel 0-9, ENTER Change channels CH +/- Back to previous channel JUMP Display channel number DISPLAY Display SAT Guide GUIDE Display SAT Menu MENU Move highlight (cursor) Move the joystick - Sony KV-34XBR910 | Operating Instructions - Page 60
POWER Select a channel 0-9, ENTER Change channels CH +/- Back to previous channel JUMP To Do This ... Activate the remote control to operate the DVD Play Stop Pause Step through different tracks of the disc Step through different chapters of a video disc Display the DVD player Menu the picture - Sony KV-34XBR910 | Operating Instructions - Page 61
- Sony KV-34XBR910 | Operating Instructions - Page 62
is specially designed for sharing digital data among Memory Stick compatible products such as digital cameras and digital video cameras. Because it is removable, Memory Stick can also be used for external data storage. The Memory Stick Viewer on your TV allows you to view files that are stored on - Sony KV-34XBR910 | Operating Instructions - Page 63
SETUP Memory Stick Compatibility This television is compatible with the following Memory Stick media types: ❑ Memory Stick Media ❑ Memory Stick Duo Media ❑ Memory Stick Media with Memory Select Function File Compatibility The Memory Stick Viewer is compatible with JPEG images taken with Sony - Sony KV-34XBR910 | Operating Instructions - Page 64
it should slide in with little resistance and click into place. VIDEO 2 INPUT EO VIDEO L(MONO) - AUDIO - R MENU TV/VIDEO + VOLUME CHANNEL _ TIMER STAND BY PRO ✍ Be sure to insert the Memory Stick in the correct direction. If the Memory Stick is forced in the wrong way, it may become damaged - Sony KV-34XBR910 | Operating Instructions - Page 65
the Memory Stick Duo and the TV. 1 Before inserting a Memory Stick Duo into the TV's Memory Stick slot, you must first insert the Memory Stick Duo into an adapter (sold separately). M Memory Stick Duo Adapter Memory Stick Duo ! CAUTION: Inserting the Memory Stick Duo into the Memory Stick slot - Sony KV-34XBR910 | Operating Instructions - Page 66
light is on, this indicates that the TV is reading data from the Memory Stick.) ✍ Removing the Memory Stick while a file is being accessed (when the Memory Stick LED on the TV's front panel is lit) may damage the Memory Stick or its contents. 2 Push the Memory Stick gently into the slot, and then - Sony KV-34XBR910 | Operating Instructions - Page 67
Memory Stick Index Turn on the TV and insert a Memory Stick that contains the photo or movie files you want to view. For details, see page 63. ✍ If the Memory Stick Index does not appear, press the MEMORY STICK button on the remote control. The Memory Stick Index appears, which displays thumbnail - Sony KV-34XBR910 | Operating Instructions - Page 68
photo or movie file full screen Display the next page of thumbnails Display the previous or next page of thumbnails Use the Memory Stick menu bar to access additional options Move the highlight from the Memory Stick menu bar back to the thumbnails Exit Memory Stick Viewer Do This ... Move the - Sony KV-34XBR910 | Operating Instructions - Page 69
video cameras record still images, and is not a result of a malfunction with the TV. Photo Controls z When the menu is hidden, move the joystick B or b to go to the previous or next photo. To Do This ... Display the next or previous file on the Memory Stick Hide the Photo menu bar, displaying - Sony KV-34XBR910 | Operating Instructions - Page 70
option. Option Description Index Displays the Memory Stick Index, with the highlight on the thumbnail of the currently displayed photo. For details, see "Using the Memory Stick Index" on page 66. Slide Show Displays the Slide Show menu. For details, see "Slide Show Menu Options" on page 73 - Sony KV-34XBR910 | Operating Instructions - Page 71
Photo menu bar, move the joystick to highlight View. 2 Move the joystick to highlight Zoom/Pan and press . 3 Specify the zoom center point by moving the joystick; then press to set the center. The Zoom and Pan controls are displayed. Indicates Zoom increment SETUP SETUP Features Memory Stick - Sony KV-34XBR910 | Operating Instructions - Page 72
With the highlight in the Movie menu bar, move the joystick v. Display the hidden Movie menu bar Move the joystick V. Access additional options See "Movie Menu Bar Options" on page 72. in the Movie menu bar Exit Memory Stick Viewer Press the MEMORY STICK button on the remote control. Features - Sony KV-34XBR910 | Operating Instructions - Page 73
desired option. Option Index Slide Show File Description Displays the Memory Stick Index, with the highlight on the thumbnail of the currently displayed movie. Displays the Slide Show menu. For details, see "Slide Show Menu Options" on page 73. Information Determines whether file information - Sony KV-34XBR910 | Operating Instructions - Page 74
SETUP SETUP SETUP Memory Stick Index Menu Bar Options Slide Show Menu Options z The Slide Show menu is the same whether you select it from the Memory Stick Index (page 66), Photo (page 68), or Movie (page 71) menus. z When you select Complete List, it may take a moment to display the list of all - Sony KV-34XBR910 | Operating Instructions - Page 75
display specific file types within the selected folder. Show All Displays all readable files. Show Photos Only Displays only photo (JPEG) files. Show Movies Only Displays only movie (MPEG1) files. Memory Stick Menu The Memory Stick menu displays the current status of the Memory Stick - Sony KV-34XBR910 | Operating Instructions - Page 76
to check how files and directories are organized for your specific model of digital camera. DCF stands for "Design Rules for Camera File Systems," which are specifications established by the Japan Electronic Industry Development Association (JEIDA). SETUP SETUP Features Memory Stick SETUP 75 - Sony KV-34XBR910 | Operating Instructions - Page 77
avoid permanent damage to still image data, do not turn off the TV or remove Memory Stick media from the insertion slot while data is being read (as indicated by the Memory Stick indicator light being on). ❑ Avoid touching the terminal of Memory Stick media or bringing it into contact with a metal - Sony KV-34XBR910 | Operating Instructions - Page 78
gives you access to the following features: Menu Icon Description Page Allows you to make adjustments to your picture 78 settings. It also allows you to customize the Picture Mode based on the type of program you are viewing, select Advanced Video options, and more. Offers enhanced audio - Sony KV-34XBR910 | Operating Instructions - Page 79
the remote control when in the Video Menu. Selecting Video Options z To change from one Mode to another, use the PIC MODE button on the remote control. z You can alter the Video Menu settings (Picture, Brightness, Color, etc.) for each Mode. The Video Menu includes the following options: Option - Sony KV-34XBR910 | Operating Instructions - Page 80
Video Description Sharpens picture Mode Creates a high-resolution picture with 4x density, for high quality sources (i.e., DVD player, satellite receiver). Interlaced Recommended for moving pictures. Progressive Recommended for still images and text. CineMotion Provides an optimized display - Sony KV-34XBR910 | Operating Instructions - Page 81
panel of the remote control. The Audio Menu includes the following options: Option Treble Bass to stabilize the volume. Off Select to turn off Steady Sound. TruSurround Select for TV to second audio programs when a signal is received. (If no SAP signal is present, the TV remains in Stereo mode - Sony KV-34XBR910 | Operating Instructions - Page 82
SETUP Option Speaker Audio Out Easy control of volume adjustments Description On Select to turn on the TV speakers. Off Select to turn off the TV speakers and listen to the TV's sound only through your external audio system speakers. This option can be set only when the Speaker option is - Sony KV-34XBR910 | Operating Instructions - Page 83
button on the remote control. The Screen menu includes the following options: Option Wide Mode Select a Wide Mode to use for 4:3 sources. Description Wide Zoom Select to enlarge the 4:3 size picture, while the upper and lower parts of the picture are condensed to fit the wide screen. Normal - Sony KV-34XBR910 | Operating Instructions - Page 84
the current Wide Mode setting as channels and inputs are changed, set 4:3 Default to Off. Option Description 4:3 Default Wide Zoom Select the default Screen Mode to use for 4:3 sources Normal Select to enlarge the 4:3 size picture, while the upper and lower parts of the picture are condensed - Sony KV-34XBR910 | Operating Instructions - Page 85
cable box or satellite receiver connected Auto Program Off Turns off Channel Fix. 2-6 "Fix" your TV's channel setting to 2-6 and use the cable 15). Video 1 Use this setting if you have connected the equipment to the A/V input jacks. Automatically sets up the channel list on the TV for all - Sony KV-34XBR910 | Operating Instructions - Page 86
Add or Skip. Then press to select. 3 To add or skip more channels, repeat steps 1 and 2. 4 Move the joystick B to return to the Channel Menu, or press MENU to exit the Menus. Allows you to assign labels (such as station call letters) to channel numbers. You can label up to 20 channels - Sony KV-34XBR910 | Operating Instructions - Page 87
help simplify the rating selection. To set more specific ratings, select Custom. z For descriptions of Child, Youth, and Young Adult ratings, see page 87. The Parent Menu includes the following options: Option Description Parental Lock Off Turn ratings on/off and select a Child rating system - Sony KV-34XBR910 | Operating Instructions - Page 88
service announcements, religious programs and weather. For US models, the Custom Rating Menu includes the following options. (For Canadian models, see page 88.) Option Movie Rating TV reactivate the Parental Lock settings, turn off the TV. When the TV is turned on again, your Parental Lock settings - Sony KV-34XBR910 | Operating Instructions - Page 89
Custom Rating Options For Canadian models, the Custom Rating Menu includes the following options. (For US models, see page 87.) Option Parental Lock. To reactivate the Parental Lock settings, turn off the TV. When the TV is turned on again, your Parental Lock settings are reactivated. SETUP - Sony KV-34XBR910 | Operating Instructions - Page 90
available). For closed captioning, set to CC1. Info Displays the program name and the time remaining in the program (if the broadcaster offers this service). Displays when the channel is changed or the DISPLAY button is pressed. Off Turns off Caption Vision. SETUP SETUP Menus Menus 89 - Sony KV-34XBR910 | Operating Instructions - Page 91
, Cable Box, 8mm, DTV, Game, LD, Web, Beta, Skip Video 5/6/7 DVD, Satellite, Cable Box, DTV, HD, Skip ✍ If you select Skip, your TV skips this input when you press the TV/VIDEO button. Allows you to correct any tilt of the picture. Move the joystick B or b to choose a correction between +7 and - Sony KV-34XBR910 | Operating Instructions - Page 92
Description Select to set the clock and to program your TV to turn on and off at two scheduled viewing times. Timer 1 Timer 2 You can use the Timers to program the TV to turn on and off and tune to a specific channel at two scheduled viewing times. Timer 1 and Timer 2 are not available to be set - Sony KV-34XBR910 | Operating Instructions - Page 93
- Sony KV-34XBR910 | Operating Instructions - Page 94
Other Information Overview This chapter includes the following topics: Topic Glossary Contacting Sony Troubleshooting Specifications Optional Accessories Index Page 94 95 95 101 101 103 93 - Sony KV-34XBR910 | Operating Instructions - Page 95
brightness (luminance) and color (chrominance) signals of the picture separately. S VIDEO provides better resolution than composite video, which carries the signals together. VHF (Very High Frequency) is the part of the frequency spectrum from 30 to 300 megahertz. UHF (Ultra High Frequency) is the - Sony KV-34XBR910 | Operating Instructions - Page 96
only) or (416) 499-SONY (7669) (Canadian residents only). Before calling Sony customer support, please write down the model and serial numbers of your TV. You'll find this information on the front cover of this manual. Troubleshooting Twin View Problem Possible Remedies I cannot get Twin - Sony KV-34XBR910 | Operating Instructions - Page 97
CABLE mode. ❏ Make sure the TV's power cord is connected securely to the wall outlet. ❏ Locate the TV at Sony equipment cannot be operated by your Sony TV remote.You may need to use the equipment's original remote control. Channels Problem Cannot receive upper channels (UHF) when using an antenna TV - Sony KV-34XBR910 | Operating Instructions - Page 98
or Off (see page 72). information in full screen or Slide Show Cannot see menu ❏ Move the joystick V to display the menu again. Cannot hear audio while ❏ Check the TV's volume or Speaker (page 81) settings. using Memory Stick ❏ To hear JPEG voice memo in full screen view, select the Digital - Sony KV-34XBR910 | Operating Instructions - Page 99
Other Info Problem Error message is displayed Error icon is displayed Possible Remedies ❏ No Memory Stick ❏ Memory Stick Locked ❏ Memory Stick Error ❏ Format Error There is no Memory Stick in the slot. The lock mechanism on the Memory Stick is engaged. The Memory Stick in the slot might be - Sony KV-34XBR910 | Operating Instructions - Page 100
Other Info SETUP Video Problem Possible Remedies No picture ❏ If your TV does not turn on, and a red light keeps flashing, your TV may (screen not lit), no sound need service. Call your local Sony Service Center. ❏ Make sure the power cord is plugged in. ❏ Press the POWER button on the - Sony KV-34XBR910 | Operating Instructions - Page 101
degaussing when turned on each time it is turned on. LED on front panel is lit ❏ The STAND BY LED (see page 13) blinks when the TV is turned on, then shuts off when the picture is displayed. If the LED blinks continuously, this may indicate the TV needs service. ❏ The TIMER LED (see page - Sony KV-34XBR910 | Operating Instructions - Page 102
Specifications Picture Tube Antenna Television System Channel Coverage Power Requirements Inputs/Outputs DVI-HDTV Video (IN) S Video (IN) Audio (IN) Component Video Input CONTROL S (IN/OUT) Variable/Fixed Audio (OUT) Supplied Accessories Visible Screen Size Actual CRT Size Speaker Output Dimensions - Sony KV-34XBR910 | Operating Instructions - Page 103
- Sony KV-34XBR910 | Operating Instructions - Page 104
-HDTV 101 E Effect button 46 ENTER button 45, 50 error messages, Memory Stick 98 F Fast-forward button 46 Favorite Channels 10 clearing 56 in Channel Menu 84 using 56 features 9 Fixed audio setting 81 FREEZE button 46, 57 Freeze, using 57 Full mode, setting 82 G GUIDE button 45 H HD Detailer 10 HD - Sony KV-34XBR910 | Operating Instructions - Page 105
viewing thumbnails 66 PIC MODE button 45 picture contrast, adjusting 78 Picture in Picture. See Twin View. Play button 46 POWER button 13 power cord, removing from holder 11 powering on/off, the TV 13 presetting channels 84 Pro (Video) mode 78 problems, troubleshooting 95- 100 progressive 9, 44 - Sony KV-34XBR910 | Operating Instructions - Page 106
the labor charges to any Sony authorized service facility. After the Warranty Period, you must pay for all labor charges. 2. PARTS: In addition, Sony will supply, at no charge, new or rebuilt replacements in exchange for defective parts for a period of one (1) year (color picture tube- two (2) years
-
 1
1 -
 2
2 -
 3
3 -
 4
4 -
 5
5 -
 6
6 -
 7
7 -
8
-
9
-
10
-
11
-
12
-
13
-
14
-
15
-
16
-
17
-
18
-
19
-
20
-
21
-
22
-
23
-
24
-
25
-
26
-
27
-
28
-
29
-
30
-
31
-
32
-
33
-
34
-
35
-
36
-
37
-
38
-
39
-
40
-
41
-
42
-
43
-
44
-
45
-
46
-
47
-
48
-
49
-
50
-
51
-
52
-
53
-
54
-
55
-
56
-
57
-
58
-
59
-
60
-
61
-
62
-
63
-
64
-
65
-
66
-
67
-
68
-
69
-
70
-
71
-
72
-
73
-
74
-
75
-
76
-
77
-
78
-
79
-
80
-
81
-
82
-
83
-
84
-
85
-
86
-
87
-
88
-
89
-
90
-
91
-
92
-
93
-
94
-
95
-
96
-
97
-
98
-
99
-
100
-
101
-
102
-
103
-
104
-
105
-
106
 |
 |
Operating Instructions
© 2003 Sony Corporation
Sony Corporation
Printed in U.S.A.
¨
¨
KV-30XBR910
KV-34XBR910
4-094-064-
21