Sony MFM-HT75W User Manual - Page 31
buttons to select PIP On and press
 |
View all Sony MFM-HT75W manuals
Add to My Manuals
Save this manual to your list of manuals |
Page 31 highlights
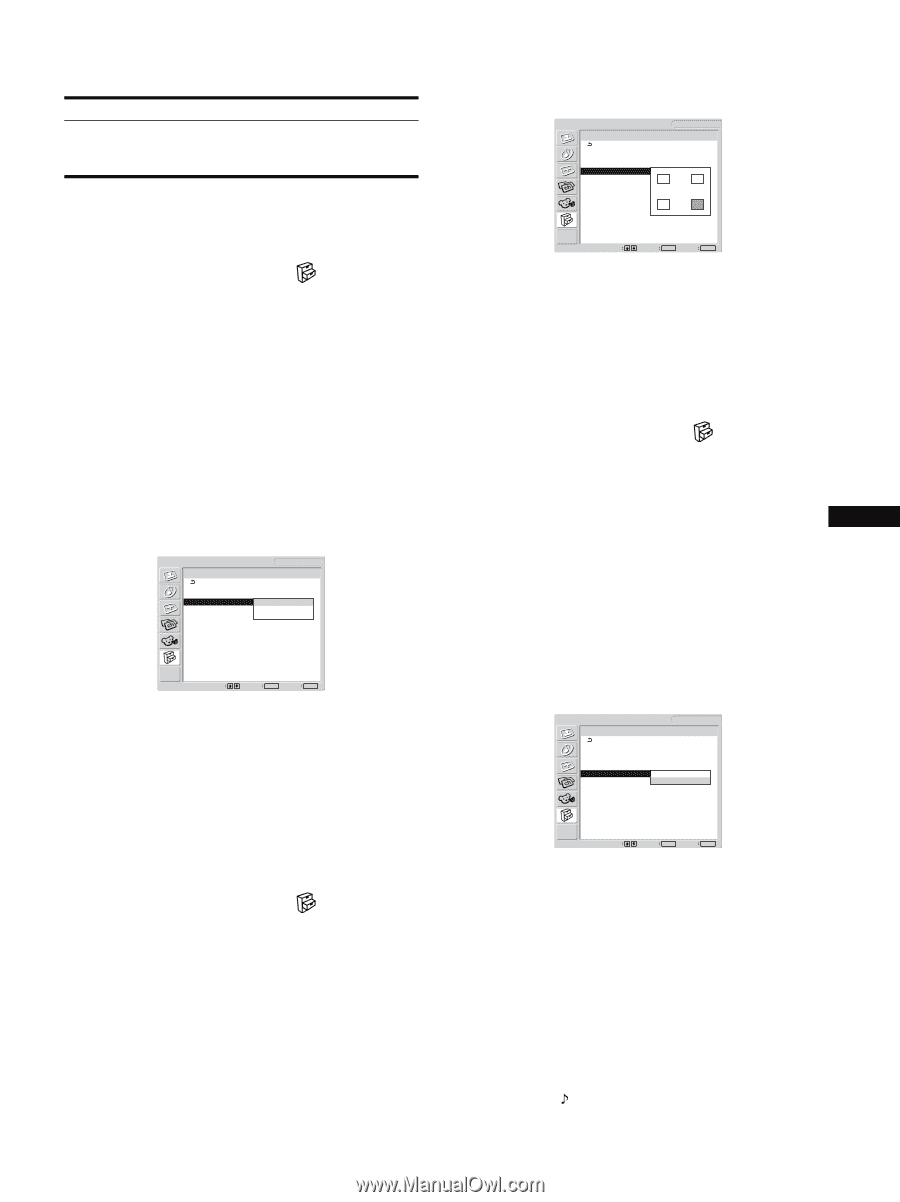
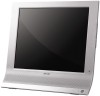
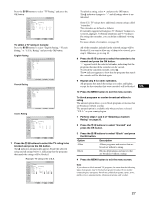
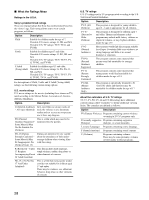
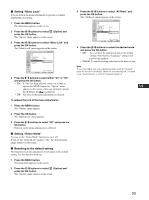
Note The inputs for main/sub pictures must be selected as shown below. Main Sub PC 1 PC 2 TV VIDEO 1 VIDEO 2 To change the sub picture's size (PIP function: On) 1 Press the MENU button. The main menu appears on the screen. 2 Press the M/m buttons to select (Option) and press the OK button. The "Option" menu appears on the screen. 3 Press the M/m buttons to select "PIP" and press the OK button. 4 Press the M/m buttons to select "PIP Setting" and press the OK button. The "PIP Setting" menu appears on the screen. 5 Press the M/m buttons to select "PIP On" and press the OK button. 6 Press the M/m buttons to select "Sub Size" and press the OK button. The "Sub Size" menu appears on the screen. Option PIP On PIP Setting : Sub : Sub Size : Sub Position Audio Select : DVI-D: PC 1 PIP On TV Large Middle Small Select 1280 × 1024/60 Hz Set OK Exit MENU 7 Press the M/m buttons to select the desired size and press the OK button. • Large • Middle • Small To change the sub picture's position (PIP function: On) 1 Press the MENU button. The main menu appears on the screen. 2 Press the M/m buttons to select (Option) and press the OK button. The "Option" menu appears on the screen. 3 Press the M/m buttons to select "PIP" and press the OK button. 4 Press the M/m buttons to select "PIP Setting" and press the OK button. The "PIP Setting" menu appears on the screen. 5 Press the M/m buttons to select "PIP On" and press the OK button. 6 Press the M/m buttons to select "Sub Position" and press the OK button. The "Sub Position" menu appears on the screen. Option PIP On PIP Setting : Sub : Sub Size : Sub Position Audio Select : DVI-D: PC 1 PIP On TV Large Select 1280 × 1024/60 Hz Set OK Exit MENU 7 Press the M/m buttons to select the desired position and press the OK button. You can choose one of 4 positions for the sub picture. To select the audio input source (PIP function: On) 1 Press the MENU button. The main menu appears on the screen. 2 Press the M/m buttons to select (Option) and press the OK button. The "Option" menu appears on the screen. 3 Press the M/m buttons to select "PIP" and press the OK button. US 4 Press the M/m buttons to select "PIP Setting" and press the OK button. The "PIP Setting" menu appears on the screen. 5 Press the M/m buttons to select "PIP On" and press the OK button. 6 Press the M/m buttons to select "Audio Select" and press the OK button. The "Audio Select" menu appears on the screen. Option PIP On PIP Setting : Sub : Sub Size : Sub Position Audio Select : DVI-D: PC 1 PIP On TV Large Main Sub Select 1280 × 1024/60 Hz Set OK Exit MENU 7 Press the M/m buttons to select the desired source and press the OK button. • Main: The sound from the input source selected for the main picture will be used. • Sub: The sound from the input source selected in the "Sub" menu will be used. Notes • Volume should be adjusted on the connected computer or other equipment. • If you set "PIP Setting" to "PIP On," "Audio Select" is set to "Sub" as the default. Tip If you select "Sub," is displayed in the upper left corner of the screen. 31
-
 1
1 -
2
-
3
-
4
-
5
-
6
-
7
-
8
-
9
-
10
-
11
-
12
-
13
-
14
-
15
-
16
-
17
-
18
-
19
-
20
-
21
-
22
-
23
-
24
-
25
-
 26
26 -
 27
27 -
 28
28 -
 29
29 -
 30
30 -
 31
31 -
 32
32 -
 33
33 -
 34
34 -
 35
35 -
 36
36 -
37
-
38
-
39
-
40
-
41
 |
 |