Sony MFM-HT75W User Manual - Page 6
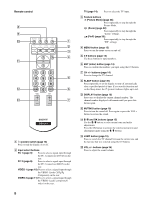
Identifying parts and controls - remote control
 |
View all Sony MFM-HT75W manuals
Add to My Manuals
Save this manual to your list of manuals |
Page 6 highlights
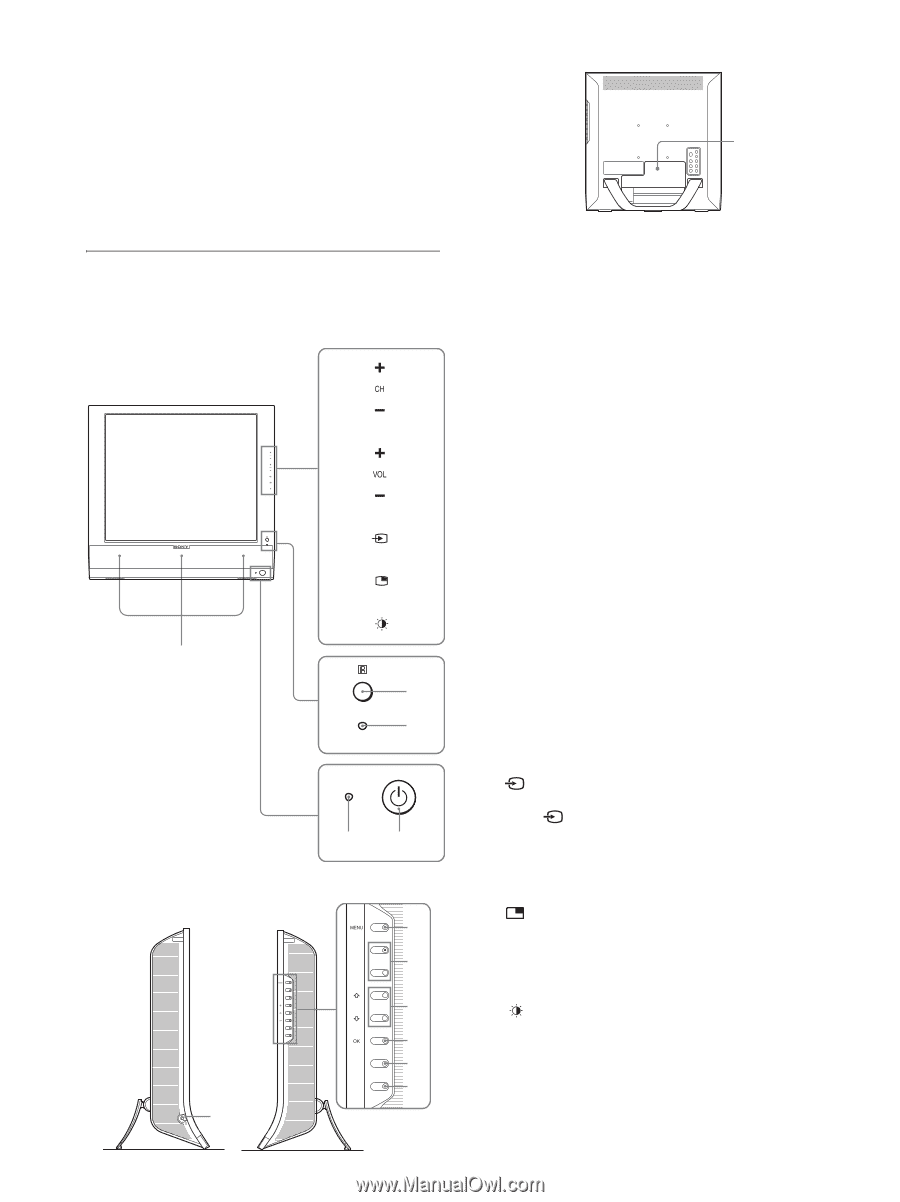
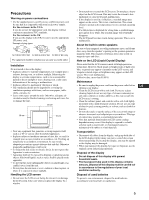
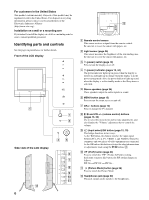
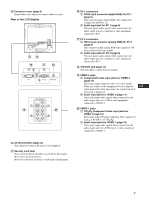
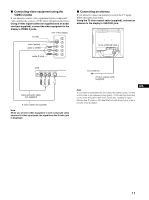
For customers in the United States This product contains mercury. Disposal of this product may be regulated if sold in the United States. For disposal or recycling information, please contact your local authorities or the Electronics Industries Alliance (http://www.eiae.org). Installation on a wall or a mounting arm If you intend to install the display on a wall or a mounting arm, be sure to consult qualified personnel. Identifying parts and controls See the pages in parentheses for further details. Front of the LCD display 5 1 2 Side view of the LCD display qs 6 43 6 7 8 9 0 qa qd A Remote control sensor This sensor receives a signal from the remote control. Be sure not to cover the sensor with papers, etc. B Light sensor (page 35) This sensor measures the brightness of the surrounding area. Be sure not to cover the sensor with papers, etc. C 1 (power) switch (page 12) Press to turn the display on or off. D 1 (power) indicator (pages 12, 34) The power indicator lights up in green when the display is turned on, and lights up in orange when the display is in the power saving mode. Also, the power indicator lights up in red when the display is in the standby mode or the Sleep timer is activated. E Stereo speakers (page 34) These speakers output the audio signals as sound. F MENU button (page 15) Press to turn the menu screen on and off. G CH+/- buttons (page 14) Press to change the TV channel. H M/m and VOL+/- (volume control) buttons (pages 15, 34) Use to select the menu items and to make adjustments, and also display the "Volume" adjustment bar to control the volume. I (input select)/OK button (page 12, 15) This button functions in two ways. As the button, this button switches the input signal between PC 1, PC 2, TV, VIDEO 1, and VIDEO 2 when two computers and two pieces of video equipment are connected. As the OK button, this button activates the selected menu item or adjustments made using the M/m buttons 8. J (PinP) button (page 30) Press to switch the "PIP" (Picture In Picture) setting. Each time you press this button, the PIP setting changes as follows. PIP On t PIP Off t PIP On... K (Picture Mode) button (page 35) Press to switch the Picture Mode. L Headphones jack (page 34) This jack outputs audio signals to the headphones.
-
 1
1 -
 2
2 -
 3
3 -
 4
4 -
 5
5 -
 6
6 -
 7
7 -
 8
8 -
 9
9 -
 10
10 -
 11
11 -
 12
12 -
13
-
14
-
15
-
16
-
17
-
18
-
19
-
20
-
21
-
22
-
23
-
24
-
25
-
26
-
27
-
28
-
29
-
30
-
31
-
32
-
33
-
34
-
35
-
36
-
37
-
38
-
39
-
40
-
41
 |
 |