Sony MHC-GX9900 MHCGX9900 Instructions (main component system)
Sony MHC-GX9900 - Mini Hi Fi Component System Manual
 |
View all Sony MHC-GX9900 manuals
Add to My Manuals
Save this manual to your list of manuals |
Sony MHC-GX9900 manual content summary:
- Sony MHC-GX9900 | MHCGX9900 Instructions (main component system) - Page 1
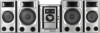
(2) Mini Hi-Fi Component System Operating Instructions Owner's Record The model and serial numbers are located on the rear of the unit. Record the serial number in the space provided below. Refer to them whenever you call upon your Sony dealer regarding this product. Model No. Serial No. MHC - Sony MHC-GX9900 | MHCGX9900 Instructions (main component system) - Page 2
and maintenance (servicing) instructions in the literature accompanying the appliance. WARNING This equipment has been tested and found to comply with the limits for a Class B digital device, pursuant to Part 15 of the FCC Rules. These limits are designed to provide reasonable protection against - Sony MHC-GX9900 | MHCGX9900 Instructions (main component system) - Page 3
28 Selecting the sound system 28 (MHC-GNX88/GNX80/GNX77/ GNX70/GX9900 only) Using the subwoofer 29 (MHC-GNX100/GNX88/GNX80 only) Flashing sound effect 29 - SOUND FLASH Creating a party environment 30 (MHC-GNX100 only) Selecting the speaker system 31 (MHC-GNX100 only) Selecting audio channel 31 - Sony MHC-GX9900 | MHCGX9900 Instructions (main component system) - Page 4
display 38 Optional Components Hooking up optional components ......... 40 Listening to audio from a connected component 41 Recording on a connected component .. 41 (For MHC-GNX100/GNX90/ GNX88/GNX80/GNX77/ GNX70/GNX66/GNX60) Connecting external antennas 42 Troubleshooting Problems and remedies - Sony MHC-GX9900 | MHCGX9900 Instructions (main component system) - Page 5
MHC-GNX70, MHC-GX9900, MHC-GNX66 and MHC-GNX60. In this manual, the MHC-GNX88 is used for illustration purposes unless stated otherwise. The MHC-GNX60 consists of: - Tuner/CD/MP3 player/ Stereo cassette deck/ Amplifier (main unit) HCD-GNX60 - Speaker system • Front speakers SS-GNX60 The MHC - Sony MHC-GX9900 | MHCGX9900 Instructions (main component system) - Page 6
played back. List of playable discs Format of discs Audio CDs Disc logo Contents Audio CD-R/CD-RW (Audio CDs/ CD Graphics (CDG)*/Discs with MP3 audio tracks) CD Graphics (CDG)* Audio Audio + Video * MHC-GNX88/GNX77/GNX66 only Discs that this system cannot play back • CD-ROMs other than those - Sony MHC-GX9900 | MHCGX9900 Instructions (main component system) - Page 7
(CD) standard. Recently, various music discs encoded with copyright protection technologies are marketed by some record companies. Please be aware • This system can play back Multi Session discs when an MP3 audio track is contained in the first session. Any subsequent MP3 audio tracks recorded - Sony MHC-GX9900 | MHCGX9900 Instructions (main component system) - Page 8
system using the supplied cords and accessories (page 53). AM loop antenna FM lead antenna Surround speaker (Right) Subwoofer Surround speaker (Left) 3*1 5 5 2*3 4*4 6 3*1 2*2 2*2 1 Front speaker (Right) Unit *1 MHC-GNX100/GNX88/GNX80 only *2 MHC-GNX88/GNX80/GNX77/GNX70/GX9900 only - Sony MHC-GX9900 | MHCGX9900 Instructions (main component system) - Page 9
SYSTEM CONTROL jack Black (#) Red (3) 2 Connect the surround speakers. Connect the speaker cords of the surround speakers to the SURR SPEAKER terminals as shown below. MHC-GNX100 only SURR SPEAKLER R Grey To disconnect Note Be sure to make this connection before you connect the unit's power - Sony MHC-GX9900 | MHCGX9900 Instructions (main component system) - Page 10
the power cord to a wall outlet. The demonstration appears in the display. When you press ?/1, the system turns speakers securely and correctly. When connecting speaker cords, insert the connectors straight into the terminals. To connect optional components See "Hooking up optional components - Sony MHC-GX9900 | MHCGX9900 Instructions (main component system) - Page 11
Tip With normal use, the batteries should last for about six months. When the remote no longer operates the system, replace both batteries with new ones. When carrying this unit Do the following procedure to protect the disc mechanism. Use buttons on the unit for the operation. 1 Press ?/1 to turn - Sony MHC-GX9900 | MHCGX9900 Instructions (main component system) - Page 12
GNX70/GNX66/GNX60/GX9900 Place the front speakers at an angle of 45 degrees from your listening position. Unit Subwoofer* Front speaker (L) 0.3m Front speaker (R) 45° Surround speaker** (L) Surround speaker** (R) * MHC-GNX88/GNX80 only ** Except for MHC-GNX90/GNX66/GNX60 For MHC-GNX100 There - Sony MHC-GX9900 | MHCGX9900 Instructions (main component system) - Page 13
Getting Started Setting the clock Use buttons on the remote for the operation. 1 Press ?/1 to turn on the system. 2 Press CLOCK/TIMER SET. "CLOCK" appears in are canceled when you disconnect the power cord or if a power failure occurs. • You cannot set the clock in Power Saving Mode (page 36). 13GB - Sony MHC-GX9900 | MHCGX9900 Instructions (main component system) - Page 14
a disc - Normal Play/Shuffle Play This system lets you play back CDGs*, audio CDs and discs with MP3 audio tracks in different play modes. Before playing a CDG*, turn on your TV and select the video input. * MHC-GNX88/GNX77/GNX66 only When playing an audio CD Disc tray number Track number Elapsed - Sony MHC-GX9900 | MHCGX9900 Instructions (main component system) - Page 15
in the album on the disc you have selected in original order. For discs other than discs with MP3 audio tracks, "ALBM" play mode performs the same operation as "1DISC" play mode. Select ALL DISCS SHUF (Shuffle Play) 1DISC SHUF (Shuffle Play) ALBM SHUF (Shuffle Play) PROGRAM (Program Play) To - Sony MHC-GX9900 | MHCGX9900 Instructions (main component system) - Page 16
device, or the recording media used at the time an MP3 audio track is recorded, you may encounter problems such as cannot play back, sound interruptions and noise. Tips • When you press CD or one of the DISC 1 ~ 3 buttons to switch to "CD" function from "TUNER" function, you may require a longer - Sony MHC-GX9900 | MHCGX9900 Instructions (main component system) - Page 17
). 1 Press CD. 2 When playback is stopped, press PLAY MODE on the remote repeatedly until "PROGRAM" lights up in the display. 3 Press one MP3 audio tracks on an album at once, turn and hold ALBUM +/- clockwise or counterclockwise and release it at the album you want (or press ALBUM +/- on the remote - Sony MHC-GX9900 | MHCGX9900 Instructions (main component system) - Page 18
in the display. The total playing time flashes in the display. When programming an MP3 audio track, turn and hold ALBUM +/- clockwise or counterclockwise and release it at the album you want (or press ALBUM +/- on the remote repeatedly until the album you want appears in the display), then turn - Sony MHC-GX9900 | MHCGX9900 Instructions (main component system) - Page 19
or counterclockwise (or press -. or >+ on the remote). The frequency changes as the system scans for a station. Scanning stops automatically when a MODE on the remote repeatedly until "MANUAL" lights up in the display. 3 Turn TUNING +/- clockwise or counterclockwise (or press -. or >+ on the remote - Sony MHC-GX9900 | MHCGX9900 Instructions (main component system) - Page 20
. To reset the interval, repeat the same procedure. Note You cannot change the AM tuning interval in the Power Saving Mode (page 36). Tips • The preset stations are retained for half a day even if you unplug the power cord or if a power failure occurs. • If you press TUNER/BAND while the system is - Sony MHC-GX9900 | MHCGX9900 Instructions (main component system) - Page 21
station you want. Preset number Frequency Listening to a non-preset radio station - Manual Tuning 1 Press TUNER/BAND repeatedly to select "FM" or "AM". 2 Press TUNING MODE on the remote repeatedly until "MANUAL" lights up in the display. 3 Turn TUNING +/- clockwise or counterclockwise (or press - Sony MHC-GX9900 | MHCGX9900 Instructions (main component system) - Page 22
want to play back or record facing forward Playing a tape You can use TYPE I (normal) tape. 1 Load a tape. 2 Press TAPE A/B (or TAPE on the remote) repeatedly until "TAPE A" or "TAPE B" appears in the display. 3 Press DIRECTION repeatedly to select "g" to play back one side, "j"*1 to play back both - Sony MHC-GX9900 | MHCGX9900 Instructions (main component system) - Page 23
automatically and "TAPE A" or "TAPE B" is selected as the function. • If you press nN (or N on the remote) during "TAPE A" function and there is no tape in Deck A, the system automatically switches to "TAPE B" function when there is a tape in Deck B. Then, playback will start and vice versa. • You - Sony MHC-GX9900 | MHCGX9900 Instructions (main component system) - Page 24
a recordable tape into Deck B. 2 Press CD and load a disc you want to record. When you want to record an album of MP3 audio tracks, press PLAY MODE on the remote repeatedly until "ALBM" lights up in the display. Then turn and hold ALBUM +/- clockwise or counterclockwise and release it at the album - Sony MHC-GX9900 | MHCGX9900 Instructions (main component system) - Page 25
manually - Manual Recording You can record just the portions you like from a disc, tape or radio program on a tape. You can also record from connected components (see "Hooking up optional components recording an album of MP3 audio tracks: Press PLAY MODE on the remote repeatedly until "ALBM" lights - Sony MHC-GX9900 | MHCGX9900 Instructions (main component system) - Page 26
can reinforce the bass and create a more powerful sound. Press GROOVE repeatedly. Each time you press the button, the display changes cyclically as follows: GROOVE ON* t GROOVE OFF * The volume switches to power mode and the equalizer curve changes. Tips • The default setting is "GROOVE ON". • When - Sony MHC-GX9900 | MHCGX9900 Instructions (main component system) - Page 27
You can adjust the sound by raising or lowering the level of specific frequency band, then store up to three user equalizer setting in the memory user equalizer setting Turn OPERATION DIAL clockwise or counterclockwise until the user equalizer setting number you want appears in the display. MHC- - Sony MHC-GX9900 | MHCGX9900 Instructions (main component system) - Page 28
only can be changed when disc with MP3 audio tracks is selected during "CD" function. Selecting the sound system (MHC-GNX88/GNX80/GNX77/GNX70/ GX9900 only) You can enjoy different sounds by selecting the sound mode you want. MHC-GNX88/GNX80 only Press SURR SPEAKER MODE on the unit or the subwoofer - Sony MHC-GX9900 | MHCGX9900 Instructions (main component system) - Page 29
for all speakers will change. • (MHC-GNX100 only) When you select "SPEAKERS B", the subwoofer is turned off automatically. Tip You can turn MASTER VOLUME (or press VOLUME +/- on the remote) to adjust the volume of the subwoofer linked to the front speakers. Flashing sound effect - SOUND FLASH With - Sony MHC-GX9900 | MHCGX9900 Instructions (main component system) - Page 30
and MANUAL WAVE, AUTO FADER and MANUAL FADER or AUTO BAL and MANUAL BAL, press AUTO/ MANUAL repeatedly until the mode you want appears in the display. Select To output sound AUTO WAVE1), In circular motion MANUAL WAVE2) AUTO FADER1), From front speakers to surround MANUAL FADER2) speakers or - Sony MHC-GX9900 | MHCGX9900 Instructions (main component system) - Page 31
you select "SPEAKERS B", the subwoofer is turned off automatically. Selecting audio channel - Multiplex Effect (MHC-GNX88/GNX77/GNX66 only) When playing a multiplex audio CD or multiplex CDG (disc with the vocals on one channel and the instruments on the other channel), you can switch the sound to - Sony MHC-GX9900 | MHCGX9900 Instructions (main component system) - Page 32
microphone away from the speakers or change the direction of the microphone. • If you want to record your voice through the microphone only, you can do so by selecting the "CD" function and not playing a disc. • When high level sound signals are input, the system automatically adjusts the recording - Sony MHC-GX9900 | MHCGX9900 Instructions (main component system) - Page 33
Timer Timer Falling asleep to music - Sleep Timer You can set the system to turn off at a preset time, so that you can fall asleep to music. Use buttons on the remote for the operation. Press SLEEP repeatedly. Each time you press the button, the minute display (the turn-off time) changes - Sony MHC-GX9900 | MHCGX9900 Instructions (main component system) - Page 34
timer ("PLAY TIMER"), followed by the start time, the stop time and the music source appears in the display. 9 Press ?/1 to turn off the system. Other operations To Check the setting Change the setting Cancel the timer Do this 1 Press CLOCK/TIMER SELECT. "SELECT" appears in the display. 2 Press - Sony MHC-GX9900 | MHCGX9900 Instructions (main component system) - Page 35
the clock (see "Setting the clock" on page 13). Use buttons on the remote for the operation. 1 Tune in the preset radio station (see "Listening to a the end of the reverse side. 8 Press ?/1 to turn off the system. Other operations To Check the setting Change the setting Cancel the timer Do this - Sony MHC-GX9900 | MHCGX9900 Instructions (main component system) - Page 36
The demonstration display and the clock display can be turned off to minimize the amount of power consumed during standby mode (Power Saving Mode). Press DISPLAY repeatedly while the system is turned off until the demonstration display and the clock display disappears from the display. To cancel - Sony MHC-GX9900 | MHCGX9900 Instructions (main component system) - Page 37
display changes as follows: SPECTRUM 1T t SPECTRUM 2 Y SPECTRUM OFF Y SPECTRUM 3 R t SPECTRUM 4 T R 3 Press ENTER. When X-ROUND mode is selected (MHC-GNX100 only) 1 Press AMP MENU repeatedly to select "X-POSITION". The last selected spectrum setting appears in the display. 2 Turn OPERATION - Sony MHC-GX9900 | MHCGX9900 Instructions (main component system) - Page 38
on the remote), power illuminator shows the current volume level. • During the demonstration display, you can turn on or off power illuminator by or a disc with MP3 audio tracks is loaded, you can also check the information recorded on disc, such as the titles. When the system detects CD-TEXT discs, - Sony MHC-GX9900 | MHCGX9900 Instructions (main component system) - Page 39
8 seconds) 1) For discs with MP3 audio tracks in "ALBM" and "ALBM SHUF" modes. 2) For discs with MP3 audio tracks in play modes other than "ALBM" and "ALBM SHUF". 3) For audio CDs and CDGs*. *MHC-GNX88/GNX77/GNX66 only 4) For discs with MP3 audio tracks in play modes other than "ALBM", "ALBM SHUF - Sony MHC-GX9900 | MHCGX9900 Instructions (main component system) - Page 40
To enhance your system, you can connect optional components. Refer to the operating instructions provided with each component. TV From the audio output jacks of the TV To the video input jack of the TV * For MHC-GNX100/ GNX90/GNX88/GNX80/ GNX77/GNX70/GNX66/ GNX60. ** For MHC-GNX88/ GNX77/GNX66 - Sony MHC-GX9900 | MHCGX9900 Instructions (main component system) - Page 41
release VIDEO/MD. The system switches the function from "VIDEO" to "MD" or vice versa. Note If the sound is distorted or too loud when "VIDEO" is selected, change the function to "MD". Listening to a connected TV 1 Connect the audio cords. See "Hooking up optional components" on page 40. 2 Press - Sony MHC-GX9900 | MHCGX9900 Instructions (main component system) - Page 42
Connecting external antennas Connect an external antenna to improve the reception. FM antenna Connect an optional FM external antenna. You can also use the TV antenna instead. AM FM 75 COAXIAL AM antenna Connect a 6 to 15 meter (20 to 50 feet) insulated wire to the AM antenna terminal. Leave the - Sony MHC-GX9900 | MHCGX9900 Instructions (main component system) - Page 43
your system, do the following: 1 Make sure the power cord and speaker cords are connected correctly and firmly. 2 Find your problem in the troubleshooting checklist below and take the indicated corrective action. If the problem persists after doing all of the above, consult your nearest Sony dealer - Sony MHC-GX9900 | MHCGX9900 Instructions (main component system) - Page 44
stands. When you listen to a track with bass sounds at high volume, the speaker vibration may cause the sound to skip. Playback does not start from the first track. • The system is in Program Play or Shuffle Play mode. Press PLAY MODE on the remote repeatedly until "ALL DISCS", "1 DISC" or "ALBM - Sony MHC-GX9900 | MHCGX9900 Instructions (main component system) - Page 45
equipment. • Set CD power manage function to "CD POWER OFF" (page 20). A stereo FM program cannot be received in stereo. • Press FM MODE on the remote repeatedly until "MONO" disappears in the display. Tape deck The tape does not record or playback, or there is a decrease in sound level. • The tape - Sony MHC-GX9900 | MHCGX9900 Instructions (main component system) - Page 46
measures or other troubles does not described above occur, reset the system as follows: Use buttons on the unit for the operation. 1 Unplug the power cord. 2 Plug the power cord back in. 3 Press ?/1 to turn on the system. 4 Press x, ENTER and ?/1 at the same time. The system is reset to the factory - Sony MHC-GX9900 | MHCGX9900 Instructions (main component system) - Page 47
clock or timer during timer operation. Others Not in Use You have pressed a button those operations is not allowed or invalid at that time. 47GB Troubleshooting - Sony MHC-GX9900 | MHCGX9900 Instructions (main component system) - Page 48
power cord must be changed only at the qualified service shop. On placement • Do not place the system in an inclined position. • Do not place the system move the system, take out any disc. If you have any questions or problems concerning your system, please consult your nearest Sony dealer. Notes - Sony MHC-GX9900 | MHCGX9900 Instructions (main component system) - Page 49
and the metal parts that have contact with the tape after every 20 to 30 hours of use with a separately sold demagnetizing tape. For details, refer to the instructions of the demagnetizing tape. Specifications AUDIO POWER SPECIFICATION (MHC-GX9900 USA model only) POWER OUTPUT AND TOTAL HARMONIC - Sony MHC-GX9900 | MHCGX9900 Instructions (main component system) - Page 50
PHONES (stereo mini jack): accepts headphones of 8 ohms or more FRONT SPEAKER: Use only the supplied speaker • SS-GNX100 (MHC-GNX100/ GNX80/GNX70/ GX9900) • SS-GNX90 (MHC-GNX90) • SS-GNX88 (MHC-GNX88/GNX77) • SS-GNX66 (MHC-GNX66) • SS-GNX60 (MHC-GNX60) SURROUND SPEAKER: Use only - Sony MHC-GX9900 | MHCGX9900 Instructions (main component system) - Page 51
Compact disc and digital audio system Semiconductor laser (λ=780 nm dB More than 90 dB OPTICAL CD DIGITAL OUT (For MHC-GNX100/GNX90/GNX88/GNX80/ GNX77/GNX70/GNX66/GNX60) (Square Recording system Frequency response Wow and flutter 4-track 2-channel stereo 50 - 13,000 Hz (±3 dB), using Sony TYPE - Sony MHC-GX9900 | MHCGX9900 Instructions (main component system) - Page 52
impedance 6 ohms Dimensions (w/h/d) (Approx.) 280 × 416 × 305 mm Mass (Approx.) 6.5 kg net per speaker SS-RSX80 (MHC-GNX88/GNX80/GNX77/ GNX70/GX9900) Speaker system 2-way, 2-unit, bass-reflex type Speaker units Woofer: 13 cm, cone type Tweeter: 2.5 cm, horn type Nominal impedance 24 - Sony MHC-GX9900 | MHCGX9900 Instructions (main component system) - Page 53
HCD-GNX90 HCD-GNX88 HCD-GNX80 HCD-GNX77 HCD-GNX70 HCD-GX9900 HCD-GNX66/GNX60 15.6 kg 12.4 kg 12.8 kg 14.4 kg 11.8 kg 12.1 kg 11.8 kg 11.3 kg Supplied accessories: Remote Commander (1) Batteries (2) AM loop antenna (1) FM lead antenna (1) Front speaker pads (8) Surround speaker pads (8) (MHC - Sony MHC-GX9900 | MHCGX9900 Instructions (main component system) - Page 54
, 43, 50) MIC LEVEL wg (32, 43) MP3 BOOSTER q; (28) MPX4)qk (31, 44, 45) OPERATION DIAL wl (26, 27, 29, 37) PHONES (jack) wk (30, 31, 43) Power illuminator wd (38) REC PAUSE/START qh (24, 25) S - Z SOUND FLASH e; (29) SPEAKERS3) 1 (31) SURROUND1) rg (27) SURR SPEAKER MODE2) rg (28) TAPE A/B ej (22 - Sony MHC-GX9900 | MHCGX9900 Instructions (main component system) - Page 55
Top Panel 12 34 Front Panel rg rf rd rs ra r; el ek ej eh eg ef ed es ea e; wl 7 65 8 9 0 qa qs qd qf qg qh qj qk ql w; wz ws wd wk wj wh wg X Additional Information 55GB - Sony MHC-GX9900 | MHCGX9900 Instructions (main component system) - Page 56
/OFF 1 (29) MHC-GNX100 only SPEAKERS 5 SPEAKERS A (indicator) 6 (31) SPEAKERS A+B (indicator) 2 (31) SPEAKERS B (indicator) 3 (31) MHC-GNX88/GNX80 only LINK (indicator) 6 (28) MATRIX SURR 1 (indicator) 3 (28) MATRIX SURR 2 (indicator) 2 (28) SURROUND SPEAKER MODE 5 (28) 1 2 6 3 5 4 Remote control
-
 1
1 -
 2
2 -
 3
3 -
 4
4 -
 5
5 -
 6
6 -
 7
7 -
8
-
9
-
10
-
11
-
12
-
13
-
14
-
15
-
16
-
17
-
18
-
19
-
20
-
21
-
22
-
23
-
24
-
25
-
26
-
27
-
28
-
29
-
30
-
31
-
32
-
33
-
34
-
35
-
36
-
37
-
38
-
39
-
40
-
41
-
42
-
43
-
44
-
45
-
46
-
47
-
48
-
49
-
50
-
51
-
52
-
53
-
54
-
55
-
56
 |
 |

©2005 Sony Corporation
2-547-453-
11
(2)
Mini Hi-Fi
Component
System
Operating Instructions
Owner’s Record
The model and serial numbers are located on the rear of the unit. Record the serial
number in the space provided below. Refer to them whenever you call upon your
Sony dealer regarding this product.
Model No.
Serial No.
MHC-GNX100
MHC-GNX90
MHC-GNX88/GNX80
MHC-GNX77/GNX70/GX9900
MHC-GNX66/GNX60