Sony MVC-FD200 Operating Instructions - Page 31
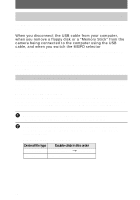
Memory Stick, camera being connected to the computer using the USB
 |
UPC - 027242602335
View all Sony MVC-FD200 manuals
Add to My Manuals
Save this manual to your list of manuals |
Page 31 highlights
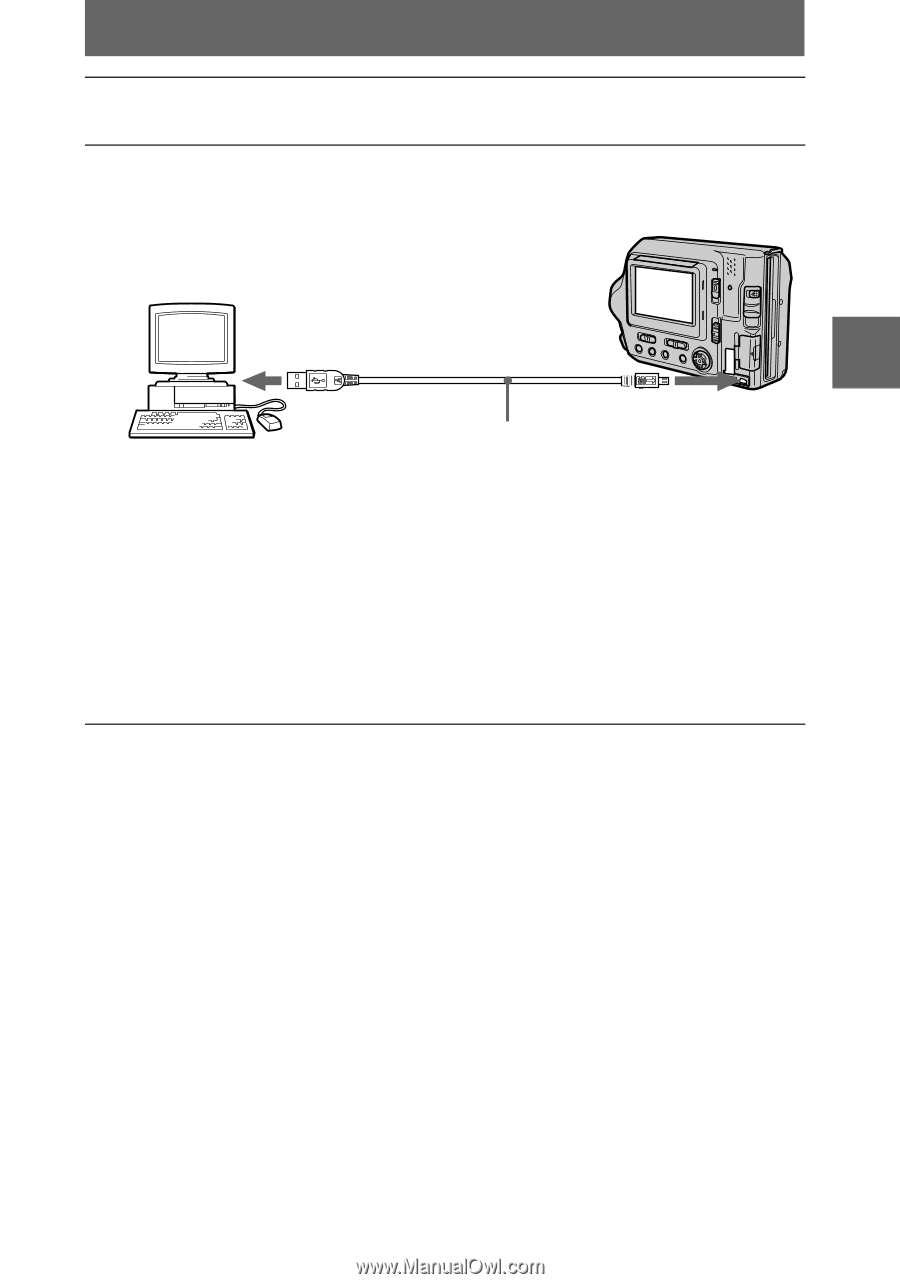
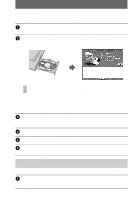
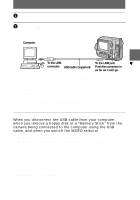
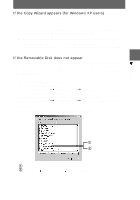
2 Connect the AC power adaptor to your camera and turn on your camera. 3 Use the supplied dedicated USB cable to connect the USB jack (mini-B) on your camera to the USB connector on your computer. Computer B Playback To the USB connector USB cable (supplied) To the USB jack Push the connector in as far as it will go. "USB MODE" appears on the LCD screen of your camera. When you connect the camera for the first time, the operation automatically starts to allow your computer to recognize the camera. Be sure to wait until the operation finishes. See "If the Copy Wizard appears" (page 33) if you are using Windows XP. Cautions • If you connect your camera to a computer with two or more USB jacks, do not connect any other USB device excepting a keyboard and/or mouse. • If you have a desktop computer, use the USB jack on the rear panel of the computer. When you disconnect the USB cable from your computer, when you remove a floppy disk or a "Memory Stick" from the camera being connected to the computer using the USB cable, and when you switch the MS/FD selector For Windows 2000, Windows Me, and Windows XP users 1 Double-click the "Remove hardware" icon displayed at the lower right of the desktop screen. 2 Click "Sony DSC" and click "Stop." 3 Confirm the drive to be removed and click "OK." 4 Click "OK." 5 Perform operations such as disconnecting the USB cable. For Windows 98 and Windows 98SE users Perform only step 5 above. 31
-
 1
1 -
2
-
3
-
4
-
5
-
6
-
7
-
8
-
9
-
10
-
11
-
12
-
13
-
14
-
15
-
16
-
17
-
18
-
19
-
20
-
21
-
22
-
23
-
24
-
25
-
 26
26 -
 27
27 -
 28
28 -
 29
29 -
 30
30 -
 31
31 -
 32
32 -
 33
33 -
 34
34 -
 35
35 -
 36
36 -
37
-
38
-
39
-
40
-
41
-
42
-
43
-
44
-
45
-
46
-
47
-
48
-
49
-
50
-
51
-
52
-
53
-
54
-
55
-
56
-
57
-
58
-
59
-
60
-
61
-
62
-
63
-
64
-
65
-
66
-
67
-
68
-
69
-
70
-
71
-
72
-
73
-
74
-
75
-
76
-
77
-
78
-
79
-
80
-
81
-
82
-
83
-
84
-
85
-
86
-
87
-
88
-
89
-
90
-
91
-
92
-
93
-
94
-
95
-
96
-
97
-
98
-
99
-
100
 |
 |