Sony MVC-FD200 Operating Instructions - Page 44
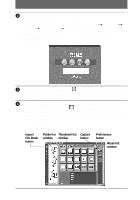
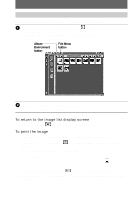
Import, File Mode, button, Folder list, window, Thumbnail list, Capture, Preferences, Album list
 |
UPC - 027242602335
View all Sony MVC-FD200 manuals
Add to My Manuals
Save this manual to your list of manuals |
Page 44 highlights
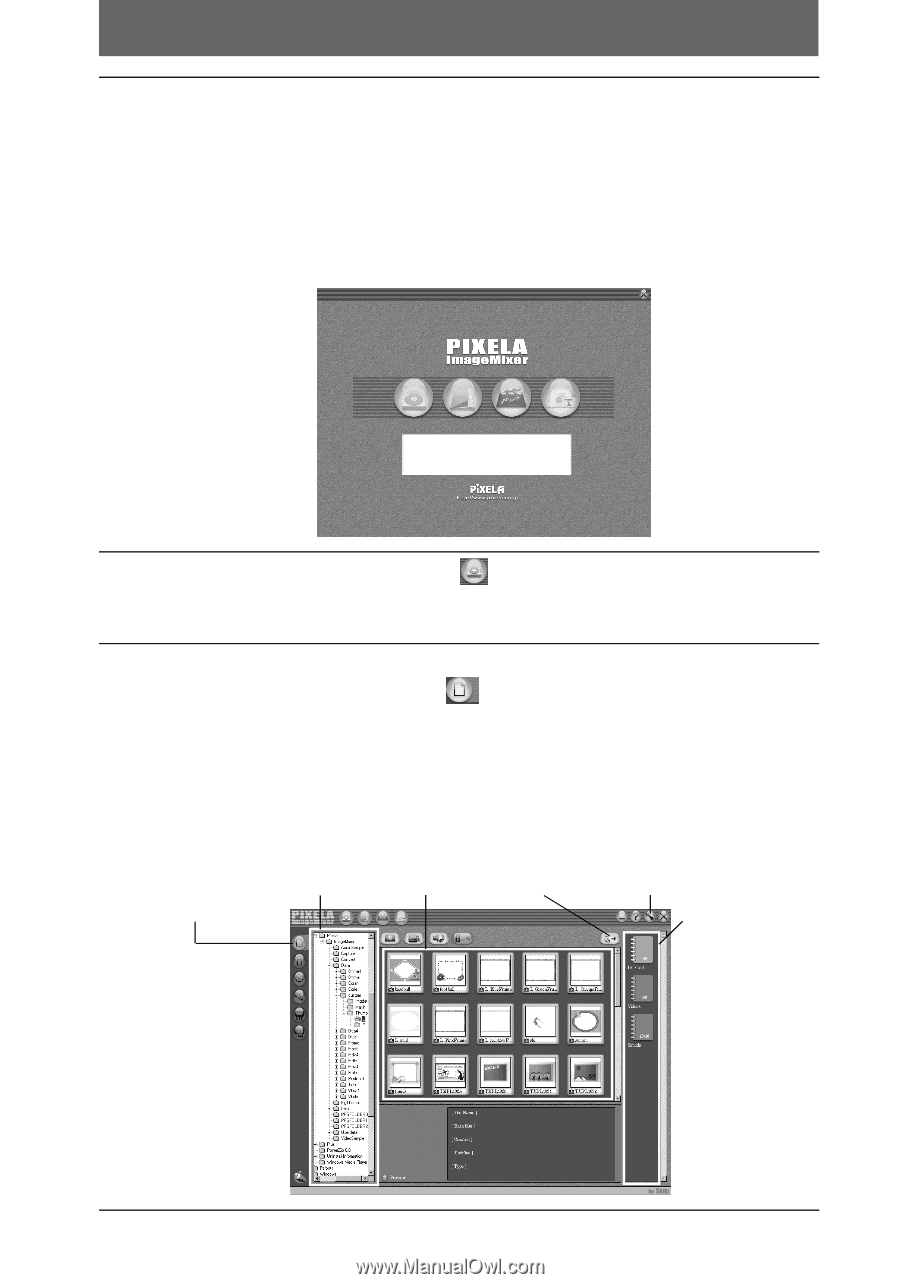
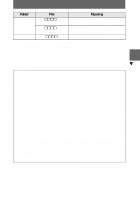
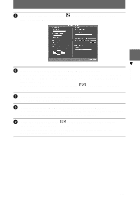
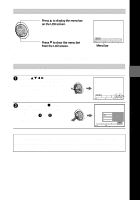
2 Start "ImageMixer" on your computer. For Windows users Open the nested windows in the following order: "Start" t "Program" t "Pixela" t "ImageMixer" t "PIXELA ImageMixer Ver.1.0 for Sony". For Macintosh users Click "PIXELA ImageMixer Ver.1.0 for Sony" in the installed folder. "ImageMixer" starts and the main screen is displayed. 3 Click the Capture Environment displayed on the left edge of the screen. The screen for copying an image is displayed. 4 Select a folder that contains an image to be copied. Click the Import File Mode button displayed on the left of the screen and select a folder that contains an image to be viewed from the folder list window. A list of the images stored in the selected folder is displayed in the file thumbnail list window. If the image is stored in a floppy disk or a "Memory Stick" set in your camera, select "Removable Disk (E:)*". ∗ The drive symbol ((E:), etc.) may differ depending on your computer. Import File Mode button Folder list Thumbnail list Capture window window button Preferences button Album list window 44
-
 1
1 -
2
-
3
-
4
-
5
-
6
-
7
-
8
-
9
-
10
-
11
-
12
-
13
-
14
-
15
-
16
-
17
-
18
-
19
-
20
-
21
-
22
-
23
-
24
-
25
-
26
-
27
-
28
-
29
-
30
-
31
-
32
-
33
-
34
-
35
-
36
-
37
-
38
-
 39
39 -
 40
40 -
 41
41 -
 42
42 -
 43
43 -
 44
44 -
 45
45 -
 46
46 -
 47
47 -
 48
48 -
 49
49 -
50
-
51
-
52
-
53
-
54
-
55
-
56
-
57
-
58
-
59
-
60
-
61
-
62
-
63
-
64
-
65
-
66
-
67
-
68
-
69
-
70
-
71
-
72
-
73
-
74
-
75
-
76
-
77
-
78
-
79
-
80
-
81
-
82
-
83
-
84
-
85
-
86
-
87
-
88
-
89
-
90
-
91
-
92
-
93
-
94
-
95
-
96
-
97
-
98
-
99
-
100
 |
 |