Sony MVC-FD200 Operating Instructions - Page 81
Format, To unmark selected print, marks, To print out using the FVP-1, Mavica Printer - fd mavica
 |
UPC - 027242602335
View all Sony MVC-FD200 manuals
Add to My Manuals
Save this manual to your list of manuals |
Page 81 highlights
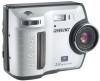
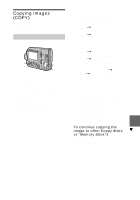
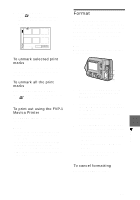
4 Select [ENTER]. The marks on the selected images change from green to white. 0001-0006/0100 PRINT MARK ENTER CANCEL SELECT OK To unmark selected print marks Select the images to be unmarked in step 3 with the control button, then select [ENTER]. To unmark all the print marks Select [FILE], [PRINT MARK], [ALL], and then [OFF] from the menu. The marks on all images are removed. To print out using the FVP-1 Mavica Printer Set PRESET SELECT SW to PC on the printer. Notes • You cannot mark moving images, Clip Motion images or images recorded in TEXT mode. • If you mark an image recorded in TIFF mode with a print mark, only the uncompressed image is printed, and the JPEG image recorded at the same time is not printed. Format When you format a floppy disk or a "Memory Stick," all data stored on the floppy disk or the "Memory Stick" will be deleted. Check the contents of the floppy disk or the "Memory Stick" before formatting. Note Even if images are protected, these images will be deleted. 1 2 3 1 Select the floppy disk or the "Memory Stick" using the MS/FD selector. 2 Insert only the floppy disk or the "Memory Stick" you want to format. Be sure to insert only the media you want to format. 3 Select [FILE] from the menu. • When formatting a floppy disk Select [DISK TOOL], [FORMAT], and then [OK] from the menu. • When formatting a "Memory Stick" Select [FORMAT], and then [OK] from the menu. To cancel formatting Select [CANCEL] in step 3. B Editing 81
-
 1
1 -
2
-
3
-
4
-
5
-
6
-
7
-
8
-
9
-
10
-
11
-
12
-
13
-
14
-
15
-
16
-
17
-
18
-
19
-
20
-
21
-
22
-
23
-
24
-
25
-
26
-
27
-
28
-
29
-
30
-
31
-
32
-
33
-
34
-
35
-
36
-
37
-
38
-
39
-
40
-
41
-
42
-
43
-
44
-
45
-
46
-
47
-
48
-
49
-
50
-
51
-
52
-
53
-
54
-
55
-
56
-
57
-
58
-
59
-
60
-
61
-
62
-
63
-
64
-
65
-
66
-
67
-
68
-
69
-
70
-
71
-
72
-
73
-
74
-
75
-
 76
76 -
 77
77 -
 78
78 -
 79
79 -
 80
80 -
 81
81 -
 82
82 -
 83
83 -
 84
84 -
 85
85 -
 86
86 -
87
-
88
-
89
-
90
-
91
-
92
-
93
-
94
-
95
-
96
-
97
-
98
-
99
-
100
 |
 |