Sony MZ-R700DPC Operating Instructions
Sony MZ-R700DPC Manual
 |
View all Sony MZ-R700DPC manuals
Add to My Manuals
Save this manual to your list of manuals |
Sony MZ-R700DPC manual content summary:
- Sony MZ-R700DPC | Operating Instructions - Page 1
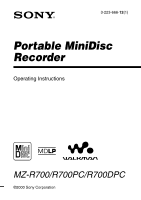
3-223-666-12(1) Portable MiniDisc Recorder Operating Instructions MZ-R700/R700PC/R700DPC ©2000 Sony Corporation - Sony MZ-R700DPC | Operating Instructions - Page 2
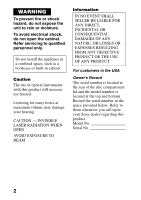
expose the unit to rain or moisture. To avoid electrical shock, do not open the cabinet. Refer servicing to qualified personnel only. Do not install the appliance in a confined space, such as a bookcase to them whenever you call upon your Sony dealer regarding this product. Model No. Serial No. 2 - Sony MZ-R700DPC | Operating Instructions - Page 3
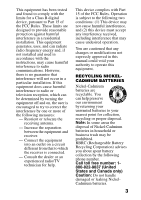
energy and, if not installed and used in accordance with the instructions, may cause harmful interference to radio communications. However, there is that any changes or modifications not expressly approved in this manual could void your authority to operate this equipment. RECYCLING NICKELCADMIUM - Sony MZ-R700DPC | Operating Instructions - Page 4
to the manufacturer or his agent for the cord to be replaced. The C-Tick mark on the Walkman is valid only for the products marketed in Australia. The CE mark on the unit is valid power this product. Please consult with your local authority. WALKMAN and are trademarks of Sony Corporation. 4 - Sony MZ-R700DPC | Operating Instructions - Page 5
5 - Sony MZ-R700DPC | Operating Instructions - Page 6
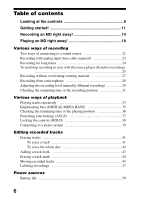
the source player (Synchro-recording 25 Recording without overwriting existing material 27 Recording from a microphone 28 Adjusting the recording level manually (Manual recording 29 Checking the remaining time or the recording position 31 Various ways of playback Playing tracks repeatedly 33 - Sony MZ-R700DPC | Operating Instructions - Page 7
Additional information Precautions 51 Troubleshooting 56 System limitations 58 Messages 60 Specifications 63 What is an MD 65 7 - Sony MZ-R700DPC | Operating Instructions - Page 8
Looking at the controls See pages in ( ) for more details. The recorder A B C D E F G H A REC MODE button (24) B OPEN button (12) C T MARK button (42) D END SEARCH button (15) (48) E X (pause) button (15) (19) (29) (44) (48) F VOL +/- button (18) (48) G DC IN 3V jack (11) (14) (51) H i (headphones) - Sony MZ-R700DPC | Operating Instructions - Page 9
The display window A B C D E F GHI J K A Character information display (32) (34) Displays the disc and track names, error messages, track numbers, etc. B Play mode indication (34) Shows the play mode of the MD. C Time display D Battery indication (50) Shows approximate battery condition. E - Sony MZ-R700DPC | Operating Instructions - Page 10
The remote control F A B G C H D E I A ./>/N (search/ AMS/play) • >/. button (18) (31) (33) (42) (48) B x (stop) • ENTER button (18) (31) (33) (42) C X (pause) • CAPS button (19) (44) (48) D EDIT button (33) (41) (48) E VOL +/-buttons (18) (48) F Headphones/earphones Can be replaced with - Sony MZ-R700DPC | Operating Instructions - Page 11
Getting started! Charge the rechargeable battery before using. Even if the rechargeable battery is not charged, you can use the recorder as long as the AC power adaptor is connected. 1 Insert the rechargeable battery. (Insert the rechargeable battery minus end first) 2 Charging the rechargeable - Sony MZ-R700DPC | Operating Instructions - Page 12
3 Make connections and unlock the control. HOLD to i 1 Connect the supplied headphones/earphones with the remote control to i. 2 Slide HOLD in the opposite direction of the arrow (.) to unlock the controls. 4 Insert an MD. (Use a recordable MD for recording.) 1 Press OPEN to open the lid. 2 - Sony MZ-R700DPC | Operating Instructions - Page 13
Using on a dry battery Insert one LR6 (size AA) alkaline dry battery (not supplied) instead of the rechargeable battery. Notes • If you press CHARGE (x) immediately after charging has completed, charging will begin again. If this happens, press CHARGE (x) again to stop the changing operation since - Sony MZ-R700DPC | Operating Instructions - Page 14
Recording an MD right away! Connect to a digital source using an optical cable (supplied) to make digital recordings. Digital recording is possible even from digital equipment with different sampling rates, such as a DAT deck or a BS tuner, using the built-in sampling rate converter. To record from - Sony MZ-R700DPC | Operating Instructions - Page 15
2 Record an MD. END SEARCH REC x 1 Press and slide REC to the right. REC indication lights up in the display and recording starts. 2 Play the source you want to record. To stop recording, press x. After you press x, the recorder will automatically turn off after: - about 5 minutes when using AC - Sony MZ-R700DPC | Operating Instructions - Page 16
To Remove the MD Press x and open the lid.3) (The lid does not open while "TOC Edit" flashing in the display.) 1) By setting "REC-Posi" to "From End," recording operations will always start from the end of the previously recorded material (page 27). 2) A track mark is added at the point where you - Sony MZ-R700DPC | Operating Instructions - Page 17
z • LINE IN (OPTICAL) jack is for both digital and analog input. The recorder automatically recognizes the type of line cable and switches to digital or analog input. • The level of the recorded sound is adjusted automatically. • You can monitor the sound during recording. Connect the supplied - Sony MZ-R700DPC | Operating Instructions - Page 18
Playing an MD right away! To use the recorder on a rechargeable battery or dry battery, see "Power sources" (page 50). When you operate the recorder with the supplied remote control, use the buttons and control shown in parentheses. 1 Play an MD. N >/N x VOL +/- x VOL +/- 1 Press N (flip the - Sony MZ-R700DPC | Operating Instructions - Page 19
To Press (Beeps in the headphones/ earphones2)) Find the beginning of . once (flip the lever towards .). the current track (Three short beeps) Find the beginning of > once (flip the lever towards >/ the next track N). (Two short beeps) Pause X (Continuous short beeps) Press X again to - Sony MZ-R700DPC | Operating Instructions - Page 20
recording mode of the material (stereo, LP2, LP4, or monaural). Notes • To prevent recorder malfunction, do not use a remote control that was supplied with another Sony portable MD model. • Sound may skip if: -the recorder receives stronger continuous shock than expected. -a dirty or scratched - Sony MZ-R700DPC | Operating Instructions - Page 21
Various ways of recording Two ways of connecting to a sound source The input jack of this recorder works as both digital and analog input jacks. Connect the recorder to a CD player or a cassette recorder using either digital (optical) input or analog (line) input. To record, see "Recording an MD - Sony MZ-R700DPC | Operating Instructions - Page 22
Same as the source. Can also be adjusted manually (Digital REC level control) ("Adjusting the recording level manually (Manual recording)", page 29). Adjusted automatically. Can also be adjusted manually ("Adjusting the recording level manually (Manual recording)", page 29). Note Track marks may - Sony MZ-R700DPC | Operating Instructions - Page 23
Recording with analog input (line cable required) The sound will sent from the connected equipment as analog signal but will be recorded digitally on the disc. Line cable (RK-G129, not supplied)* to LINE IN (OPTICAL) L (white) CD player, cassette recorder, etc. R (red) to LINE OUT ∗ Use the - Sony MZ-R700DPC | Operating Instructions - Page 24
monaural, LP2, or LP4 mode can be played back only on MD players or recorders with a monaural, LP2, or LP4 playback mode. Audio components that support the LP2 or LP4 modes are indicated by the or logo marks. REC MODE REC 1 Press REC MODE repeatedly to select the desired recording mode - Sony MZ-R700DPC | Operating Instructions - Page 25
power adaptor for long recordings. • If you try to play an MD recorded in LP2 or LP4 on MD players or recorders that do not support these modes, playback will not start and "LP:" will appear on the display. • Sound recorded through digital (optical) input can be monitored in stereo through - Sony MZ-R700DPC | Operating Instructions - Page 26
recording. 5 Play the source sound. The recorder starts recording when it receives the playing sound. To stop recording, press x. z • You cannot pause manually during synchro-recording. • When there is no sound from the player for more than 3 seconds during synchro-recording, the recorder goes into - Sony MZ-R700DPC | Operating Instructions - Page 27
if the connecting cord is not an optical cable, or if the cable is connected to the MIC (PLUG IN POWER) jack. • You cannot manually change the recording mode or the recording level during synchro-recording. Recording without overwriting existing material If you wish to avoid overwriting the current - Sony MZ-R700DPC | Operating Instructions - Page 28
Recording from a microphone Connect a stereo microphone (ECM-717, ECM-MS907, ECMMS957, etc.; not supplied) to the MIC (PLUG IN POWER) jack. REC ENTER - Sony MZ-R700DPC | Operating Instructions - Page 29
recording) When you record, the sound level is adjusted automatically. If necessary, you can set the level manually. Note Adjust the recording level while the recorder is in standby mode. You cannot adjust it while recording. REC X ENTER - Sony MZ-R700DPC | Operating Instructions - Page 30
recording level after you have started the recording, press X to pause the recorder. Then do the procedure from step 5. • You cannot adjust the recording level manually during synchro-recording. 30 - Sony MZ-R700DPC | Operating Instructions - Page 31
Checking the remaining time or the recording position You can check the remaining time, track number, etc. when recording or during stop. When you operate the recorder with the supplied remote control, use the buttons and controls shown in parentheses. /. 1 While the - Sony MZ-R700DPC | Operating Instructions - Page 32
Display window A B On A LapTime The elapsed time of the current track. r RecRemain1) The remaining recordable time. r AllRemain2) The remaining time after the current location. 1)"REC REMAIN" begins flashing in the display when the remaining time on the disc reaches 3 minutes or less. 2)Appears - Sony MZ-R700DPC | Operating Instructions - Page 33
Various ways of playback When you operate the recorder with the supplied remote control, use the buttons and controls shown in parentheses. Playing tracks repeatedly You can play tracks repeatedly in three ways - all repeat, single repeat, and shuffle repeat. /. 1 - Sony MZ-R700DPC | Operating Instructions - Page 34
Display window A Shuf.Rep B On A/B Normal/(none) All the tracks are played once. r AllRepeat/ All the tracks are played repeatedly. r 1 Repeat/ A single track is played repeatedly. r Shuf.Rep/ After the currently selected track finishes playing, the remaining tracks are played repeatedly in random - Sony MZ-R700DPC | Operating Instructions - Page 35
Emphasizing bass (DIGITAL MEGA BASS) The Mega Bass function intensifies low frequency sound for richer quality audio reproduction. It affects only the sound from the headphones/earphones. /. 1 Press ENTER (EDIT for 2 seconds or more), press - Sony MZ-R700DPC | Operating Instructions - Page 36
On A/B BASS OFF/(none) Normal play r BASS 1/ BASS Mega Bass (moderate effect) r BASS 2/ BASS Mega Bass (strong effect) Notes • If the sound becomes distorted when emphasizing bass, turn down the volume. • The Mega Bass function does not affect the sound that is being recorded. Checking the remaining - Sony MZ-R700DPC | Operating Instructions - Page 37
2 Press ENTER (ENTER). The display changes as follows. The information selected in step 2 appears in A and B. A - track number, track name1), or disc name2). B - the information selected in step 2. 1)Appears only when "1 Remain" is selected and the track is labeled. 2)Appears only when "AllRemain" - Sony MZ-R700DPC | Operating Instructions - Page 38
To cancel AVLS Select "AVLS OFF" in step 2. Locking the controls (HOLD) To prevent the buttons from being accidentally operated when you carry the recorder, use this function. HOLD HOLD 1 Move HOLD in the direction of the .. To unlock the controls Move HOLD in the opposite direction of the arrow to - Sony MZ-R700DPC | Operating Instructions - Page 39
Connecting to a stereo system Connect the i jack of the recorder to the LINE IN jacks of an amplifier or a tape recorder with a line cable (RK-G129 or RK-G136, not supplied). The output is analog. The recorder plays the MD digitally and sends analog signals to the externally connected equipment. - Sony MZ-R700DPC | Operating Instructions - Page 40
Notes • Even when connecting to the externally connected equipment, the Mega Bass function is operative. If you do not want the effect of the Mega Bass function on your recording or the output from the externally connected equipment, set "BASS" to "BASS OFF" (page 35). • When recording to an - Sony MZ-R700DPC | Operating Instructions - Page 41
Editing recorded tracks You can edit your recordings by adding/erasing track marks or labeling tracks and MDs. Premastered MDs cannot be edited. Notes on editing • Do not move or jog the recorder while "TOC Edit"* is flashing in the display. • You cannot edit tracks on an MD that is record-protected - Sony MZ-R700DPC | Operating Instructions - Page 42
2 Press or .) repeatedly until "EDIT" flashes in the display, and then press ENTER (ENTER) again. " : Name" flashes in the display, and the recorder plays the selected track repeatedly. 3 Press or .) repeatedly until " : Erase" - Sony MZ-R700DPC | Operating Instructions - Page 43
3 Press or .) repeatedly until " : Erase" flashes in the display, and then press ENTER (ENTER). "All Erase?" and "PushENTER" appear alternately in the display. To cancel erasing, press T MARK (T MARK). 4 Press ENTER (ENTER) again. "TOC Edit" flashes in the display, - Sony MZ-R700DPC | Operating Instructions - Page 44
Notes • You cannot add track marks during synchro-recording. • T MARK on the remote control does not function during playback. Erasing a track mark When you record with analog (line) input, unnecessary track marks may be recorded where recording level is low. You can erase a track mark to combine - Sony MZ-R700DPC | Operating Instructions - Page 45
3 Press T MARK to erase the mark. "MARK OFF" appears in the display. The track mark is erased and the two tracks are combined. z When you erase a track mark, name assigned to the mark is also erased. Moving recorded tracks You can change the order of the recorded tracks. Example Move track C from - Sony MZ-R700DPC | Operating Instructions - Page 46
2 Press or .) repeatedly until "EDIT" flashes in the display, and then press ENTER (ENTER) again. " : Name" flashes in the display and the recorder plays the selected track repeatedly. 3 Press or .) repeatedly until " : Move" flashes - Sony MZ-R700DPC | Operating Instructions - Page 47
Labeling recordings You can name discs while the recorder is stopped, tracks while the recorder is playing, and both while the recorder is recording. Each name can be as long as 200 letters. Each disc can hold up to 1700 alphanumeric letters during playback or stop. Available characters • Capital - Sony MZ-R700DPC | Operating Instructions - Page 48
2 Press ENTER (ENTER). The disc is ready to be labeled. 3 Press or .) repeatedly to select a letter and press ENTER (ENTER). The selected letter stops flashing and the cursor moves to the next input position. Press To X (CAPS) Switch between capital letters, - Sony MZ-R700DPC | Operating Instructions - Page 49
4 Follow steps 3 to 5 of "Labeling a disc during stop". Labeling a track or a disc during recording 1 While recording, press ENTER (EDIT for 2 seconds or more). 2 Press or .) repeatedly until "EDIT" flashes in the display, and then press ENTER (ENTER) again. " : Name - Sony MZ-R700DPC | Operating Instructions - Page 50
life1) Batteries (Unit: approx.hours) (JEITA2)) Stereo LP2 LP4 NC-WMAA Nickel Cadmium Recording 4 rechargeable battery3) Playback 13 6 7.5 14.5 18 LR6 (SG) Sony alkaline dry battery4) Recording 9 Playback 40 13 16 46 53 1) The battery life may be shorter due to operating conditions, the - Sony MZ-R700DPC | Operating Instructions - Page 51
Additional information Precautions On safety Do not put any foreign objects in the DC IN 3V jack. On power sources • Use house current, Nickel Cadmium rechargeable battery, LR6 (size AA) battery, or car battery. • For use in your house: Use the AC power adaptor supplied with this recorder. Do not - Sony MZ-R700DPC | Operating Instructions - Page 52
at a moderate level. This will allow you to hear outside sounds and to be considerate of the people around you. On the MiniDisc cartridge • When carrying or storing the MiniDisc, keep it in its case. • Do not break open the shutter. • Do not place the cartridge where it will be subject to - Sony MZ-R700DPC | Operating Instructions - Page 53
mechanical noise The recorder gives off mechanical noise while operating, which is caused by the power-saving system of the recorder and it is not a problem. 53 - Sony MZ-R700DPC | Operating Instructions - Page 54
To protect a recorded MD To record-protect an MD, slide open the tab at the side of the MD. In this position, the MD cannot be recorded or edited. To record again, slide the tab back so the tab is visible. Back of the MD Tab Recorded material is protected. Recorded material is not protected. - Sony MZ-R700DPC | Operating Instructions - Page 55
you have any questions or problems concerning your recorder, please consult your nearest Sony dealer. (If a trouble occurred when the disc was in the recorder, we recommend that the disc be left in the recorder when you consult your Sony dealer so that the cause of trouble may be better understood - Sony MZ-R700DPC | Operating Instructions - Page 56
Troubleshooting Should any problem persist after you have made these checks, consult your nearest Sony dealer. The recorder does not work or works poorly. • Audio sources may not be firmly connected. - Disconnect the audio sources once and connect them again ( - Sony MZ-R700DPC | Operating Instructions - Page 57
"NO SIGNAL" appears in the display when recording from a portable CD player. • There is no digital signal from the portable CD player. - When recording digitally from a portable CD player, use AC power adaptor and disable the anti-skip function (such as ESP) on the CD player (page 16). There is no - Sony MZ-R700DPC | Operating Instructions - Page 58
on very rare occasions with certain sound sources. - Record in normal stereo or LP2 mode. System limitations The recording system in your MiniDisc recorder is radically different from those used in cassette and DAT decks and is characterized by the limitations described below. Note, however, that - Sony MZ-R700DPC | Operating Instructions - Page 59
Symptom Cause Track marks When the data of a track is fragmented, the track cannot be erased. mark of a fragment under 12 seconds long The remaining (recorded in stereo), 24 seconds long (recorded recording time in monaural or LP2 mode), or 48 seconds long does not increase (recorded in LP4 - Sony MZ-R700DPC | Operating Instructions - Page 60
Messages If the following messages flash in the display window, check the messages below. BLANKDISC • An MD with no recording on it is inserted. DISC ERR • The disc is damaged or does not contain proper recording or editing data. - Reinsert the disc. If this fails, rerecord. DISC FULL • There is no - Sony MZ-R700DPC | Operating Instructions - Page 61
Hi DC in • Voltage of the power supply is too high (The supplied AC power adaptor is not used). - Use the supplied AC power adaptor. HOLD • The recorder is locked. - Move HOLD against the arrow to unlock the recorder (pages 12, 38). LOW BATT • Battery is weak. - Charge the rechargeable battery or - Sony MZ-R700DPC | Operating Instructions - Page 62
SORRY • You tried to erase the track mark at the beginning of the first track. • You tried to erase a track mark to combine tracks the recorder cannot combine (a track recorded in different recording mode, or a track recorded through a digital connection and an analog connection, for example). • You - Sony MZ-R700DPC | Operating Instructions - Page 63
Specifications MD Recorder Audio playing system MiniDisc digital audio system Laser diode properties Material: stereo mini-jack, maximum output level 5 mW + 5 mW, load impedance 16 ohm General Power requirements Sony AC Power Adaptor (supplied) connected at the DC IN 3 V jack: 120 V AC, 60 Hz - Sony MZ-R700DPC | Operating Instructions - Page 64
Dimensions Approx. 81 × 28.1 × 74.4 mm (w/h/ d) (31/4 × 11/8 × 3 in.) without projections. Mass Approx. 116 g (4.1 oz) the recorder only Supplied accessories AC power adaptor (1) Headphones/earphones with a remote control (1) Optical cable (1) NC-WMAA Nickel Cadmium rechargeable battery (1) - Sony MZ-R700DPC | Operating Instructions - Page 65
to digital "1" and "0".) The demagnetized MD adopts the polarity of the magnetic field, resulting in a recorded MD. How the MiniDisc got so small The 2.5-inch MiniDisc, encased in a plastic cartridge that looks like a 3.5-inch diskette (see illustration above), uses a new digital audio compression - Sony MZ-R700DPC | Operating Instructions - Page 66
Quick Random Access Like CDs, MDs offer instantaneous random access to the beginning of any music track. Premastered MDs are recorded with location addresses corresponding to each music selection. Recordable MDs are manufactured with a "User TOC Area" to contain the order of the music. The TOC ( - Sony MZ-R700DPC | Operating Instructions - Page 67
- Sony MZ-R700DPC | Operating Instructions - Page 68
This warranty is valid only in the United States Sony Corporation Printed in Malaysia
-
 1
1 -
 2
2 -
 3
3 -
 4
4 -
 5
5 -
 6
6 -
 7
7 -
8
-
9
-
10
-
11
-
12
-
13
-
14
-
15
-
16
-
17
-
18
-
19
-
20
-
21
-
22
-
23
-
24
-
25
-
26
-
27
-
28
-
29
-
30
-
31
-
32
-
33
-
34
-
35
-
36
-
37
-
38
-
39
-
40
-
41
-
42
-
43
-
44
-
45
-
46
-
47
-
48
-
49
-
50
-
51
-
52
-
53
-
54
-
55
-
56
-
57
-
58
-
59
-
60
-
61
-
62
-
63
-
64
-
65
-
66
-
67
-
68
 |
 |
3-223-666-
12
(1)
Portable MiniDisc
Recorder
Operating Instructions
©2000 Sony Corporation
MZ-R700/R700PC/R700DPC