Sony NEX-3 Instruction Manual
Sony NEX-3 - alpha; Interchangeable Lens Digital Camera Manual
 |
UPC - 027242785564
View all Sony NEX-3 manuals
Add to My Manuals
Save this manual to your list of manuals |
Sony NEX-3 manual content summary:
- Sony NEX-3 | Instruction Manual - Page 1
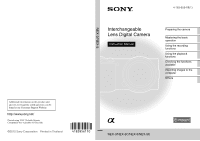
be found at our Customer Support Website. Printed using VOC (Volatile Organic Compound)-free vegetable oil based ink. ©2010 Sony Corporation Printed in Thailand NEX-3/NEX-5 4-183-856-11(1) Interchangeable Lens Digital Camera Instruction Manual Preparing the camera Mastering the basic operation - Sony NEX-3 | Instruction Manual - Page 2
Sony dealer regarding this product. Model No. NEX-3/3C/ NEX-5/5C Serial No WARNING To reduce fire or shock hazard, do not expose the unit to rain or moisture. IMPORTANT SAFETY INSTRUCTIONS -SAVE THESE INSTRUCTIONS objects to come into contact with the battery terminals. • Do not expose to high - Sony NEX-3 | Instruction Manual - Page 3
by Sony. • Dispose of used battery packs promptly as described in the instructions. [ Battery charger Even if the CHARGE lamp is not lit, the battery charger is not disconnected from the AC power source (mains) as long as it is connected to the wall outlet (wall socket). If some trouble occurs - Sony NEX-3 | Instruction Manual - Page 4
matters only. [ Regulatory Information Declaration of Conformity Trade Name: SONY Model No.: NEX-3 Responsible Party: Sony Electronics Inc. Address: 16530 Via Esprillo, San Diego, CA 92127 modifications not expressly approved in this manual could void your authority to operate this equipment. GB 4 - Sony NEX-3 | Instruction Manual - Page 5
Representative for EMC and product safety is Sony Deutschland GmbH, Hedelfinger Strasse 61, 70327 Stuttgart, Germany. For any service or guarantee matters please refer to the addresses given in separate service or guarantee documents. This product has been tested and found compliant with the limits - Sony NEX-3 | Instruction Manual - Page 6
household waste disposal service or the shop where you purchased the product. [ Disposal of waste batteries (applicable in the European Union and other European countries with separate collection systems) This symbol on the battery or on the packaging indicates that the battery provided with this - Sony NEX-3 | Instruction Manual - Page 7
Table of contents Preparing the camera Checking the accessories supplied 10 Identifying parts 12 Preparing the battery pack 16 Attaching/removing the lens 19 Inserting a memory card (sold separately 21 Attaching the flash 23 Turning on the camera and setting up the date 25 Mastering the basic - Sony NEX-3 | Instruction Manual - Page 8
the LCD monitor 65 Learning more about the camera (α Handbook 68 Troubleshooting 69 Precautions 73 Specifications 76 Index 81 This instruction manual is for models NEX-3/3C and NEX-5/5C. The NEX-5/5C is used for illustrations in this manual, unless otherwise specified. The differences between - Sony NEX-3 | Instruction Manual - Page 9
This manual covers several models supplied with different lenses. The model name varies depending on the supplied lens. Model name NEX-5A/5CA/3A/3CA NEX-5D/5CD/3D/3CD NEX-5H/5CH NEX-5K/5CK/3K/3CK Lens E16 mm E18 - 55 mm and E16 mm E18 - 200 mm E18 - 55 mm GB 9 - Sony NEX-3 | Instruction Manual - Page 10
accessories • Battery charger BC-VW1 (1) • CD-ROM (1) - Application Software for α camera - α Handbook • Instruction Manual (This manual) (1) • Power cord (mains lead) (1) (not supplied in the U.S.A. and Canada) x NEX-5A/5CA/3A/3CA • E16 mm single focus lens/Lens cap (1) (attached to the camera - Sony NEX-3 | Instruction Manual - Page 11
Preparing the camera x NEX-5K/5CK/3K/3CK • E18 - 55 mm zoom lens/Lens cap (1) (attached to the camera)/Lens hood (1) GB 11 - Sony NEX-3 | Instruction Manual - Page 12
OFF (Power) switch (25) C Shutter button (28) D Remote sensor E AF illuminator/Self-timer lamp/ Smile Shutter lamp F Speaker G Microphone* H Smart accessory terminal (23) I Lens (19) J Lens release button (20) K Mount L Image sensor** M Lens contact** * Do not cover this part during movie recording - Sony NEX-3 | Instruction Manual - Page 13
NEX-5/5C NEX-3/3C A (USB) terminal B Hook for shoulder strap Attaching the shoulder strap is recommended not to drop the camera. C HDMI terminal (49) D Light sensor E LCD monitor The tilting LCD monitor of the camera allows flexible shooting positions. F MOVIE button (28) G Control wheel (32) H - Sony NEX-3 | Instruction Manual - Page 14
NEX-5/5C x Flash Preparing the camera NEX-3/3C A Screw B Flash C Connector* * Do not touch this part directly. A Battery/Memory card cover (17, 21) B Tripod receptacle • Use a tripod with a screw length of less than 5.5 mm (7/32 inch). You will be unable to firmly secure the camera to tripods - Sony NEX-3 | Instruction Manual - Page 15
E18 - 200 mm lens, refer to the instruction manual of the E18 - 200 mm lens (supplied). E18 - 55 mm F3.5-5.6 OSS (supplied with NEX-5D/ 5CD/5K/5CK/3D/3CD/3K/ 3CK) E16 mm F2.8 (supplied with NEX-5A/5CA/3A/3CA) A Converter index* B Focusing ring C Lens contacts** D Mounting index * A converter is - Sony NEX-3 | Instruction Manual - Page 16
been fully depleted. It can also be used when it has not been fully charged. 1 Insert the battery pack onto the battery charger. • Push the battery pack until it clicks. 2 Connect the battery charger to For the U.S.A and Canada the wall outlet (wall socket). Plug • The CHARGE lamp turns off when - Sony NEX-3 | Instruction Manual - Page 17
, or when it has not been used after being charged. Doing so will affect the performance of the battery pack. z Using your camera abroad - Power source You can use your camera and battery charger, and the AC-PW20 AC Adaptor (sold separately) in any countries/regions where the power supply is within - Sony NEX-3 | Instruction Manual - Page 18
2 Firmly insert the battery pack NEX-5/5C all the way while pressing the lock lever with the tip of the battery. Lock lever NEX-3/3C Lock lever 3 Close the cover. Preparing the camera x Checking the remaining battery level Check the level with the following indicators and percent figures displayed - Sony NEX-3 | Instruction Manual - Page 19
careful not to drop the battery pack. NEX-5/5C Lock lever NEX-3/3C Lock lever Attaching/removing the lens The camera will come with the lens attached (except for the NEX-5H/5CH). Refer to the steps below when attaching other lenses. 1 If the body cap or the packaging lid is attached, remove it - Sony NEX-3 | Instruction Manual - Page 20
. White index marks Preparing the camera Notes • When attaching a lens, do not press the lens release button. • Do not use force when attaching a lens. • The Mount Adaptor (sold separately) is required to use an A-mount lens (sold separately). For details, refer to the operating manual supplied - Sony NEX-3 | Instruction Manual - Page 21
away from dusty locations. • Do not leave the camera with the lens removed. Inserting a memory card (sold separately) 1 Open the cover. Preparing the camera 2 Insert a memory card. • Insert the memory card until it clicks as illustrated. NEX-5/5C Check on the direction of the notched corner - Sony NEX-3 | Instruction Manual - Page 22
lamp is not lit, and push the memory card once. NEX-3/3C Access lamp Preparing the camera Access lamp Note • When the access lamp is lit, do not remove the memory card or the battery pack, or turn off the power. The data may be corrupted. x Memory cards that you can use You can use following - Sony NEX-3 | Instruction Manual - Page 23
use it. Notes • The power for the flash is provided from the camera. When the camera is charging the flash, blinks on the LCD monitor. You cannot press the shutter button when this icon is blinking. • Plug the flash fully into the accessory terminal of the camera, and fasten the screw securely. Make - Sony NEX-3 | Instruction Manual - Page 24
attached to the shoulder strap. Put the flash in the case when you are not using it to protect it from harm. x Attaching the extender (when using the E18 - 200 mm lens) If you attach the flash directly to the camera, images will be partly shadowed by the lens. To avoid this situation, attach the - Sony NEX-3 | Instruction Manual - Page 25
time, the screen to set date and time appears. 1 Set the power switch to ON to turn on the camera. The screen to set date and time appears. • To turn off the camera, set the power switch to OFF. 2 Press the center of the control wheel to confirm [OK]. 3 Select your area - Sony NEX-3 | Instruction Manual - Page 26
/Checking the current clock setting Press [Menu], then select [Setup] t [Date/Time Setup] (page 32, 54). x Maintaining the date and time setting This camera has an internal rechargeable battery for maintaining the date and time and other settings regardless of whether the power is on or off, or the - Sony NEX-3 | Instruction Manual - Page 27
camera recognizes the scene, the Scene Recognition icon and guide appear on the LCD monitor: (Night View), (Tripod Night View), (Night Portrait), (Backlight), (Backlight Scene Recognition icon and guide Portrait), (Portrait), (Landscape), or (Macro). 3 When using a zoom lens, turn the zoom - Sony NEX-3 | Instruction Manual - Page 28
. When the focus is confirmed, beeps sound and z lights up. Focus indicator 5 Press the shutter button fully down to shoot. Recording movies 1 Set the power switch to ON to turn on the camera. 2 Point the camera to the subject. 3 Press the MOVIE button to start recording. Focus and brightness are - Sony NEX-3 | Instruction Manual - Page 29
Mastering the basic operation Notes • The sound of the camera and the lens in operation might be recorded while recording a movie. You can disable the sound recording by selecting [Menu] t [Setup] t [Movie Audio Rec] t [Off] (page 32, 54). • - Sony NEX-3 | Instruction Manual - Page 30
Mastering the basic operation 2 Press the left side of the control wheel repeatedly to select (movie), and press the center. 3 Turn the control wheel to select the desired movie, and press the center. During movie playback To pause/resume To fast-forward To fast-rewind To slow-forward To slow- - Sony NEX-3 | Instruction Manual - Page 31
2 Press the center of the control wheel to confirm [OK]. Press [Cancel] to quit the operation. [Cancel] [OK] z To delete several images Select [Menu] t [Playback] t [Delete] to select and delete specific images at the same time. Mastering the basic operation GB 31 - Sony NEX-3 | Instruction Manual - Page 32
and soft keys allow you to use various functions of the camera. x Control wheel When shooting, DISP (Display Contents), (Flash Mode), (Exposure Comp.) and (Drive Mode) functions are pressing the top/bottom/left/right parts of the control wheel. Press the center to make your choice. GB 32 - Sony NEX-3 | Instruction Manual - Page 33
key C). In this handbook, the soft keys are indicated by the icon or the function shown on the screen. A In this case, soft key A works as the [Menu] button, C and soft key B as the [Shoot. Tips] button. Soft B key C works as the [Shoot Mode] button. Mastering the basic operation GB 33 - Sony NEX-3 | Instruction Manual - Page 34
operation Using the guide function of the camera The camera provides various "Help Guides" which explain the functions, and "Shooting Tips" which introduce tips for better shooting. Use these guides to make better use of the camera. x Help Guides The camera displays the Help Guide to explain the - Sony NEX-3 | Instruction Manual - Page 35
the original status. Control wheel Note • The defocusing effect may not be noticeable, depending on the distance from the subject or the lens used. z For a better result of [Background Defocus] • Move closer to the subject. • Lengthen the distance between the subject and the background. GB - Sony NEX-3 | Instruction Manual - Page 36
is raised. (Autoflash): Fires if it is dark or against light. (Fill-flash): Fires every time you trigger the shutter. (Slow Sync.): Fires every time you trigger the shutter. Slow sync shooting allows you to shoot a clear image of both the subject and the background. (Rear Sync.): Fires right before - Sony NEX-3 | Instruction Manual - Page 37
to include yourself in the picture. To cancel the timer, press again. When you press the shutter button, the self-timer lamp flashes and beeps until the shutter operates. (Self-timer: 2 Sec): Sets the 2-second delay self-timer. You can prevent blur caused by camera shake that occurs when the - Sony NEX-3 | Instruction Manual - Page 38
Shooting still images continuously The camera records images continuously while you press and hold down the shutter button (max. 2.3 images per second). 1 Press (Drive Mode) on the control wheel. 2 Turn the control wheel to select (Continuous Adv.), and press the center. z To - Sony NEX-3 | Instruction Manual - Page 39
condition. (Anti Motion Blur): Reduces the camera shake when shooting a slightly dark indoor scene or a telephoto. (Sweep Panorama): Shoots with panoramic size. M (Manual Exposure): Adjusts the aperture and shutter speed. S (Shutter Priority): Adjusts the shutter speed to express the movement of - Sony NEX-3 | Instruction Manual - Page 40
Motion Blur This is suitable for indoor shots without using the flash, to reduce the subject blur. 1 Select (Anti Motion Blur) (page 39). 2 Shoot with the shutter button. The camera combines six shots at high sensitivity into one still image, so camera shake is reduced while preventing noise. GB 40 - Sony NEX-3 | Instruction Manual - Page 41
and composes them into one panoramic image. 1 Select (Sweep Panorama) (page 39). 2 Point the camera at the edge of the subject, then press the shutter button fully down. This part will not be taken. 3 Pan the camera to the end, following the guidance on the LCD monitor. Guidance bar Note • The - Sony NEX-3 | Instruction Manual - Page 42
pause. • Panoramic images are played back with the supplied software "PMB" (page 60). • Panoramic images shot with other cameras may not be displayed or scrolled correctly. Shows the displayed area of the whole panoramic image. x Shutter Priority You can express the movement of a moving subject in - Sony NEX-3 | Instruction Manual - Page 43
speed is used, a moving subject such as a running person, cars, and sea spray appears as if they are stopped. When a slower shutter speed is used, a trailing image of the movement of the subject is captured to make more natural and dynamic image. x Aperture Priority You can adjust - Sony NEX-3 | Instruction Manual - Page 44
will be reproduced when the image is printed on large format paper. The smaller the image size, the more images can be recorded. In the case of movies, the larger the image size, the higher the image quality. 1 Press [Menu]. [Menu] 2 Use the control wheel to select [Image Size] t [Image Size - Sony NEX-3 | Instruction Manual - Page 45
Shoots images using standard size. Vertical: 2160 × 3872 Horizontal: 8192 × 1856 Shoots images using wide size. Vertical: 2160 × 5536 Horizontal: 12416 × 1856 Movie NEX-5/5C [AVCHD] mode 1920 × 1080 Average bit-rate 17 Mbps [MP4] mode 1440 × 1080 Average bit-rate 12 Mbps VGA (640 × 480) 3 Mbps - Sony NEX-3 | Instruction Manual - Page 46
with priority on adult's face. z Capturing a smiling face (Smile Shutter) If you use the Smile Shutter function, the camera detects a smile and releases the shutter automatically. Select [Menu] t [Camera] t [Smile Shutter] t [On], then point the camera at the subject and wait for him/her to smile - Sony NEX-3 | Instruction Manual - Page 47
Using the playback functions Enlarging the playback image (Enlarge Image) 1 Press the (Playback) button to enter the playback mode. 2 Display the image you want to enlarge, then press [Enlarge] (the center of the control wheel). (Playback) button 3 Turn the control wheel to adjust the scaling. - Sony NEX-3 | Instruction Manual - Page 48
Displaying the image list 1 Press the (Playback) button to enter the playback mode. 2 Press (Image Index) on the control wheel. Six images are displayed at a time. (Playback) button 3 Turn the control wheel to select an image. • To return to the single-image screen, select the desired image, and - Sony NEX-3 | Instruction Manual - Page 49
separately). To the HDMI connector HDMI cable To the HDMI terminal Note • Use an HDMI mini connector on one end (for the camera), and a plug suitable for connecting your TV on the other end. z Using your camera abroad NEX-5/5C: To view movies shot using this camera on a TV, the camera and TV must - Sony NEX-3 | Instruction Manual - Page 50
, such as exposure mode, panoramic, Scene Selection. Intelligent Auto Scene Selection Anti Motion Blur Sweep Panorama Manual Exposure Shutter Priority Aperture Priority Program Auto The camera evaluates the subject and makes the proper settings. Shoots with preset settings according to the subject - Sony NEX-3 | Instruction Manual - Page 51
/Continuous AF) Sets the digital zoom when a single focus lens is used. Detects people's faces automatically, and adjusts focus and exposure to suit the faces. (Off/Auto/Child Priority/Adult Priority) Each time the camera detects a smile, the camera releases the shutter automatically. (Off/On) Sets - Sony NEX-3 | Instruction Manual - Page 52
recording format. (AVCHD/MP4) Selects the image size. * NEX-5/5C only x Brightness/Color Allows you to make brightness settings such as metering mode, and color settings such as white balance. Exposure Comp. ISO White Balance Metering Mode Flash Compensation DRO/Auto HDR GB 52 Compensates for - Sony NEX-3 | Instruction Manual - Page 53
processing method. (Standard/Vivid/Portrait/Landscape/Sunset/Black & White) x Playback Allows you to set playback functions. Delete Setup Allows you to make more detailed shooting settings, or change the camera settings. Shooting Settings AF Illuminator Red Eye Reduction Sets the AF illuminator - Sony NEX-3 | Instruction Manual - Page 54
. (On/Off) Displays an enlarged image when focusing manually. (On/Off) Changes the range of color reproduction. (sRGB/AdobeRGB) Sets camera shake compensation. (On/Off) Sets whether or not to release the shutter when there is no lens. (Enable/Disable) Sets the noise reduction processing for - Sony NEX-3 | Instruction Manual - Page 55
CTRL FOR HDMI USB Connection Cleaning Mode Version Demo Mode Reset Default Memory Card Tool Format File Number Folder Name Select Shoot. Folder New Folder Recover Image DB Display Card Space Eye-Fi Setup* Upload Settings Selects the color of the LCD monitor. (Black/White/Blue/Pink) Selects a method - Sony NEX-3 | Instruction Manual - Page 56
were purchased. Use Eye-Fi cards in accordance with the law of the countries/regions where you purchased the card. NEX-5C/3C do not have this Auto Aperture Priority Shutter Priority Manual Exposure - Self-timer - - - Continuous Face Adv. Detection - - - - - - - - - - Smile Shutter - - - Sony NEX-3 | Instruction Manual - Page 57
- Anti Motion Blur - Scene Selection - Program Auto - Aperture Priority - Shutter Priority - Manual Exposure - Autoflash - - Fill-flash - - - - - - - - - - - - - - - Slow Sync Rear Sync Notes • The flash modes may be limited also by conditions other than the shooting - Sony NEX-3 | Instruction Manual - Page 58
software To utilize images recorded with the camera, the following software is provided: • Sony Image Data Suite "Image Data Converter SR" "Image Data Lightbox SR" • "PMB" (Picture NEX-3/3C: For playing/editing the movies: Intel Core Duo 1.66 GHz or faster /Intel Core 2 Duo 1.20 GHz or faster) Memory - Sony NEX-3 | Instruction Manual - Page 59
both "Sony Image Data Suite" and "PMB" are checked and follow the instructions on the screen. • Connect the camera to the computer during the procedure following the instructions on Ver.3"/"Image Data faster Lightbox SR" Memory: 1 GB or more is recommended. Display: 1024 × 768 dots or more GB 59 - Sony NEX-3 | Instruction Manual - Page 60
can do with the supplied software x "PMB" With "PMB" you can do the following, etc.: • Import images shot with the camera and display them on the t [All Programs] t [PMB] t [PMB Help]. The support information for the "PMB" (English only): http://www.sony.co.jp/pmb-se/ Note • "PMB" is not compatible - Sony NEX-3 | Instruction Manual - Page 61
DVD Writer), you can transfer data by inserting a memory card into the memory card slot of the DVD writer, or connecting your camera to the DVD writer with a USB cable. • When you use Sony DVDirect (DVD writer), make sure that the version of DVD writer's firmware is the latest. For details, refer to - Sony NEX-3 | Instruction Manual - Page 62
image quality (HD) disc is created. • You can play a high definition image quality (HD) disc on AVCHD format playback devices, such as a Sony Blu-ray disc player and a PlayStation®3. You cannot play the disc on ordinary DVD players. Standard definition image quality (STD) movie converted from high - Sony NEX-3 | Instruction Manual - Page 63
images The table shows the approximate number of still images that can be recorded on a memory card formatted with this camera. The values are defined using Sony standard memory cards for testing. The values may vary depending on the shooting conditions. Image size: L 14M Aspect ratio: 3:2* (Units - Sony NEX-3 | Instruction Manual - Page 64
)* 0:20:40 MP4 (1280×720 (Fine))** 0:27:00 * NEX-5/5C ** NEX-3/3C 4GB 0:28:30 0:41:40 0:54:30 8GB 0:58: flash strobes once every two times. - The power turns on and off once every ten times. - Using the battery pack that is charged for an hour after the CHARGE lamp goes out. - Using Sony "Memory - Sony NEX-3 | Instruction Manual - Page 65
of icons on the LCD monitor Icons are displayed on the screen to indicate the camera status. You can change the screen display using DISP (Display Contents) on the control Number of recordable still images Image size of movies Memory card/Upload Others 123 Min Recordable time of movies GB 65 - Sony NEX-3 | Instruction Manual - Page 66
Indication Remaining battery Scene Recognition icons Flash charge in progress AF illuminator Does not record sound during movie recording Camera shake Shoot. Tips z GB 66 D Display Indication Focus status Shutter speed Aperture value Metered manual Exposure compensation Shutter speed indicator - Sony NEX-3 | Instruction Manual - Page 67
Display Indication Drive Mode Display Indication Smile detection sensitivity indicator Focus mode ±0.0 Flash compensation Metering Mode Focus area mode Face Detection Smile Shutter ISO AWB White Balance 7500K G9 Creative Style Others DRO/Auto HDR GB 67 - Sony NEX-3 | Instruction Manual - Page 68
detail, is included on the CD-ROM (supplied). Refer to it for in-depth instructions on the many functions of the camera. x For Windows users 1 Turn on your computer, and insert the CD-ROM (supplied) into the CD-ROM drive. 2 Click [Handbook]. 3 Click [Install]. 4 Start "α Handbook" from the shortcut - Sony NEX-3 | Instruction Manual - Page 69
the power. 3 Reset the settings (page 55). Others 4 Consult your Sony dealer or local authorized Sony service facility. Battery pack and power The battery pack cannot be installed. • When you insert the battery pack, use the tip of the battery pack to push the lock lever (page 17). • You can use - Sony NEX-3 | Instruction Manual - Page 70
down. The shutter does not release. • You are using a memory card with a write-protect switch, and the switch is set to the LOCK position. Set the switch to the recording position. • Check the free capacity of the memory card. • You cannot record images while charging the flash. • The lens is not - Sony NEX-3 | Instruction Manual - Page 71
flash. The image taken with the flash is too dark. • If the subject is beyond the flash range (the distance that the flash can reach), the pictures will be dark because the flash Setting]. The aperture value and/or shutter speed flashes when you press the shutter button halfway down. • Since the - Sony NEX-3 | Instruction Manual - Page 72
picture was taken under a strong light source, and excessive light has entered the lens. When using the zoom lens, attach a lens hood. The corners of the picture • The picture was taken in a dark location without the flash, resulting in camera shake. The use of a tripod or the flash is recommended ( - Sony NEX-3 | Instruction Manual - Page 73
under direct sunlight, attach the lens cap. • A magnet is attached to the back of the LCD monitor. Do not put objects that are affected by magnetic fields, such as a floppy disk or a credit card, between the LCD monitor and the camera body. Magnet • Images may trail across on the LCD monitor in - Sony NEX-3 | Instruction Manual - Page 74
Sony service facility. Charging method of the internal rechargeable battery Insert a charged battery pack into the camera, or connect the camera to a wall outlet (wall socket) using the AC Adaptor (sold separately), and leave the camera for 24 hours or more with the power off. On memory cards - Sony NEX-3 | Instruction Manual - Page 75
stick to the flash surface, resulting in insufficient light emission. • Keep the camera, supplied accessories, etc., out of the reach of children. A memory card, etc., may be swallowed. If such problem occurs, consult a doctor immediately. Notes when playing movies on other devices (NEX-5/5C) • This - Sony NEX-3 | Instruction Manual - Page 76
as described in this manual: at an ordinary ambient temperature of 25ºC (77°F), and using a battery pack that is charged for an hour after the CHARGE lamp goes out. GB 76 Specifications Camera [System] Camera type: Interchangeable lens digital camera Lens: E-mount lens [Image sensor] Image sensor - Sony NEX-3 | Instruction Manual - Page 77
Video: MPEG-4 AVC/H.264 Audio: MPEG-4 AAC-LC 2ch NEX-3/3C: Movie: MPEG-4 Visual USB communication: Hi-Speed USB (USB 2.0 compliant) Flash Flash guide number: GN 7 (in meters at ISO 100) Recycling time: Approx. 4 seconds Flash coverage: Covering 16 mm lens (focal length that the lens indicates) Flash - Sony NEX-3 | Instruction Manual - Page 78
lens, refer to the instruction manual of the E18 - 200 mm lens (supplied). Lens E16 mm single focus lens E18 - 55 mm zoom lens Camera NEX-5A/5CA/5D/5CD/ NEX-5D/5CD/5K/5CK/ 3A/3CA/3D/3CD 3D/3CD/3K/3CK Equivalent 24 35 mm-format focal length*1 (mm) 27 - 82.5 Lens of shutter speed exposure - Sony NEX-3 | Instruction Manual - Page 79
BC-VW1 Battery charger Input rating: 100 V - 240 V AC, 50 Hz/60 Hz, 4.2 W Output camera are not guaranteed. Trademarks • is a trademark of Sony Corporation. • "Memory Stick," , "Memory Stick PRO," , "Memory Stick Duo," , "Memory Stick PRO Duo," , "Memory Stick PRO-HG Duo," , "Memory - Sony NEX-3 | Instruction Manual - Page 80
or registered trademarks of HDMI Licensing LLC. • Macintosh Association. • "PlayStation" is a registered trademark of Sony Computer Entertainment Inc. • Adobe is a registered trademark In addition, system and product names used in this manual are, in general, trademarks or registered trademarks of - Sony NEX-3 | Instruction Manual - Page 81
pack 16 Beep 54 C Charging the battery pack 16 Cleaning Mode 55 Color Space 54 Continuous Adv 38 Control wheel 32 Creative Style 53 CTRL FOR HDMI 55 D Date/Time Setup 54 Delete 30 Demo Mode 55 Disc creation 61 Display Card Space 55 Display Color 55 Display Contents 38, 51 Drive - Sony NEX-3 | Instruction Manual - Page 82
the clock 25 Setup 53 Shoot Mode 39 Shooting still images 27 Shooting Tip List 51 Shooting tips 34 Shutter Priority 42 Slide Show 53 Smile Detection 51 Smile Shutter 46 Soft keys 33 Software 58 Specifications 76 Specify Printing 53 Speed Priority Cont 38 Sports Action 40 SteadyShot
-
 1
1 -
 2
2 -
 3
3 -
 4
4 -
 5
5 -
 6
6 -
 7
7 -
8
-
9
-
10
-
11
-
12
-
13
-
14
-
15
-
16
-
17
-
18
-
19
-
20
-
21
-
22
-
23
-
24
-
25
-
26
-
27
-
28
-
29
-
30
-
31
-
32
-
33
-
34
-
35
-
36
-
37
-
38
-
39
-
40
-
41
-
42
-
43
-
44
-
45
-
46
-
47
-
48
-
49
-
50
-
51
-
52
-
53
-
54
-
55
-
56
-
57
-
58
-
59
-
60
-
61
-
62
-
63
-
64
-
65
-
66
-
67
-
68
-
69
-
70
-
71
-
72
-
73
-
74
-
75
-
76
-
77
-
78
-
79
-
80
-
81
-
82
 |
 |
4-183-856-
11
(1)
NEX-3/NEX-3C/NEX-5/NEX-5C
Interchangeable
Lens Digital Camera
Instruction Manual
Preparing the camera
Mastering the basic
operation
Using the recording
functions
Using the playback
functions
Checking the functions
available
Importing images to the
computer
Others
E-mount
©2010 Sony Corporation
Printed in Thailand
NEX-3/NEX-5
Printed using VOC (Volatile Organic
Compound)-free vegetable oil based ink.
Additional information on this product and
answers to frequently asked questions can be
found at our Customer Support Website.