Sony NWZ-E438F Operation Guide - Page 52
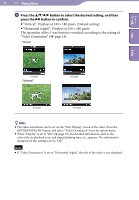
Press the, button to select the desired setting, and then, button to confirm.
 |
View all Sony NWZ-E438F manuals
Add to My Manuals
Save this manual to your list of manuals |
Page 52 highlights
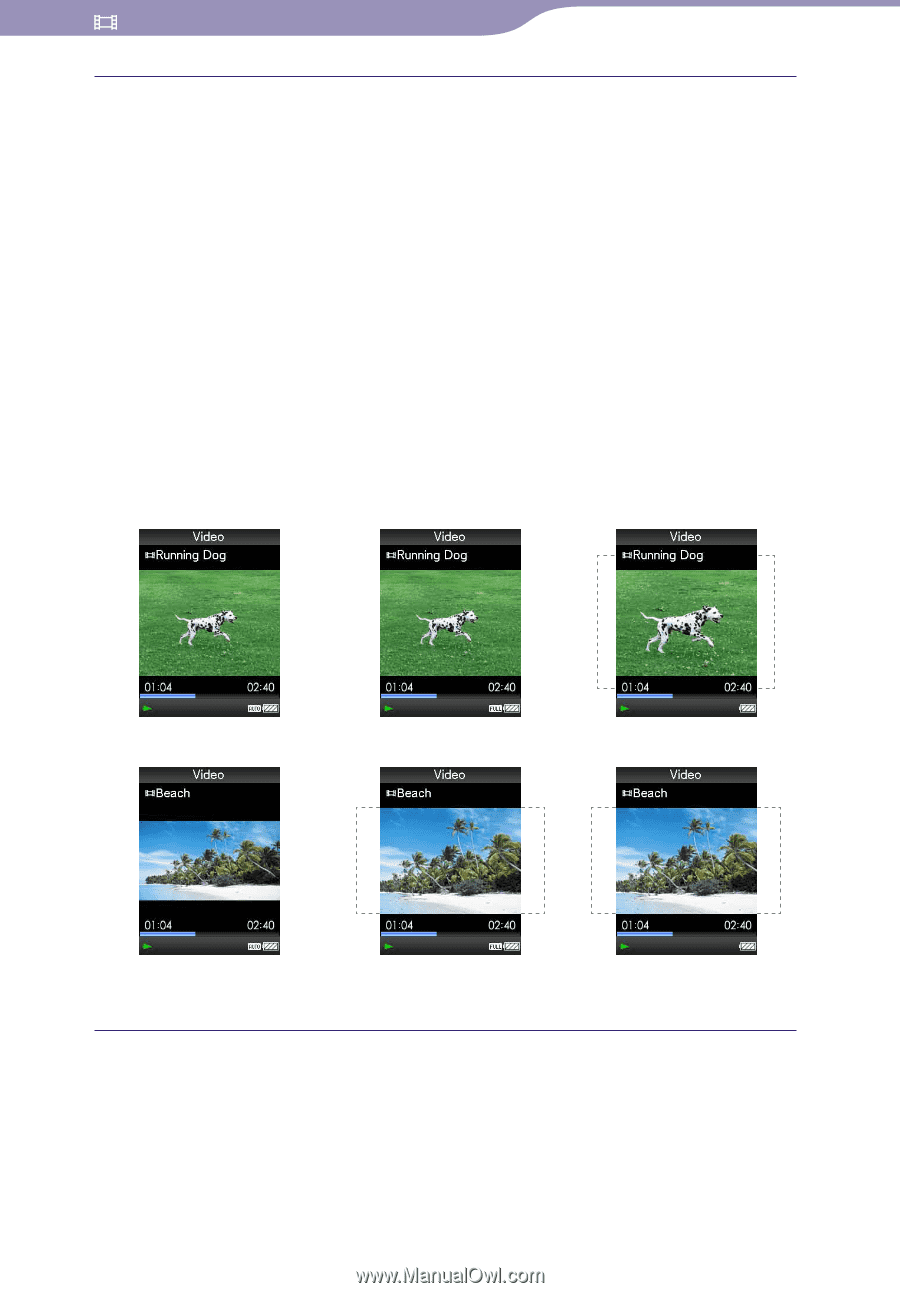
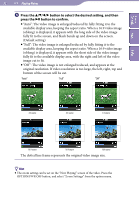
Table of Contents Menu Index 52 Playing Videos Press the button to select the desired setting, and then press the button to confirm. "Auto": The video image is enlarged/reduced by fully fitting it to the available display area, keeping the aspect ratio. When a 16:9 video image (oblong) is displayed, it appears with the long side of the video image fully fit to the screen, and black bands up and down on the screen. (Default setting) "Full": The video image is enlarged/reduced by fully fitting it to the available display area, keeping the aspect ratio. When a 16:9 video image (oblong) is displayed, it appears with the short side of the video image fully fit to the available display area, with the right and left of the video image cut to fit. "Off ": The video image is not enlarged/reduced, and appears at the original resolution. If video resolution is too large, the left, right, top and bottom of the screen will be cut. "Auto" "Full" "Off" 4:3 source 4:3 source 4:3 source 16:9 source 16:9 source 16:9 source The dotted line frame represents the original video image size. Hint The zoom setting can be set on the "Now Playing" screen of the video. Press the OPTION/PWR OFF button, and select "Zoom Settings" from the option menu.
-
 1
1 -
2
-
3
-
4
-
5
-
6
-
7
-
8
-
9
-
10
-
11
-
12
-
13
-
14
-
15
-
16
-
17
-
18
-
19
-
20
-
21
-
22
-
23
-
24
-
25
-
26
-
27
-
28
-
29
-
30
-
31
-
32
-
33
-
34
-
35
-
36
-
37
-
38
-
39
-
40
-
41
-
42
-
43
-
44
-
45
-
46
-
 47
47 -
 48
48 -
 49
49 -
 50
50 -
 51
51 -
 52
52 -
 53
53 -
 54
54 -
 55
55 -
 56
56 -
 57
57 -
58
-
59
-
60
-
61
-
62
-
63
-
64
-
65
-
66
-
67
-
68
-
69
-
70
-
71
-
72
-
73
-
74
-
75
-
76
-
77
-
78
-
79
-
80
-
81
-
82
-
83
-
84
-
85
-
86
-
87
-
88
-
89
-
90
-
91
-
92
-
93
-
94
-
95
-
96
-
97
-
98
-
99
-
100
-
101
-
102
-
103
-
104
-
105
-
106
-
107
-
108
-
109
-
110
-
111
-
112
-
113
-
114
-
115
-
116
-
117
-
118
-
119
-
120
-
121
-
122
-
123
-
124
-
125
-
126
 |
 |