Sony NWZ-W273S Quick Start Guide
Sony NWZ-W273S Manual
 |
View all Sony NWZ-W273S manuals
Add to My Manuals
Save this manual to your list of manuals |
Sony NWZ-W273S manual content summary:
- Sony NWZ-W273S | Quick Start Guide - Page 1
to Use Your "WALKMAN" NWZ-W273S/W274S Access to the online Help Guide (Full version). http://rd1.sony.net/help/dmp/nwzw270s/en/ About the manuals This Quick Start Guide only describes the basic operating instructions and how to install the supplied software. For detailed information and operating - Sony NWZ-W273S | Quick Start Guide - Page 2
Troubleshooting" in the Help Guide (HTML document), and try any corrective actions listed. For details on troubleshooting it. If the problem persists, disconnect the support Korean: http://scs.sony.co.kr/walkman/ Simplified Chinese: http://service.sony.com.cn/KB/ Traditional Chinese: http://service
-
 1
1 -
 2
2
 |
 |

Contents
Please check the items in the package.
ÿ
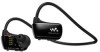
“WALKMAN” (1)
ÿ
USB cradle (1)
ÿ
Earbuds (1 set)
ÿ
Swimming earbuds (1 set)
ÿ
Adjustment band (1)
ÿ
Quick Start Guide (this manual)
ÿ
Using your Walkman while Swimming
About the Operating System
Make sure that the OS is Windows XP*
1
(Service Pack 3 or later), Windows
Vista*
2
(Service Pack 2 or later), Windows 7*
2
(Service Pack 1 or later), or
Windows 8.
*
1
Excluding 64-bit OS versions.
*
2
[Compatibility mode] for Windows XP is not supported.
For a Mac computer, make sure that the OS is Mac OS X v10.6 or later.
Not supported by OSs other than above
Tactile dot
Neckband
Earbud
Headphone section
P.LIST (Playlist)/
SHUF (Shuffle) button
VOL +*
1
/– button
Terminals
OPR (Operation) lamp
Power lock switch
(Power) button
Previous button
Next button
RESET button
button*
1
*
1
There are tactile dots. Use them to help with button operations.
To connect your Walkman to a computer, the Walkman must be attached
to the USB cradle correctly.
1
Dry the terminals of your Walkman (
)
using a soft dry cloth if needed.
2
Attach your Walkman to the USB cradle.
Make sure that the terminals of your Walkman (
) and the
USB cradle (
) are in contact with each other.
3
Connect your Walkman to an operating
computer using the USB cradle.
ˎ
If a screen appears presenting a choice of actions, click
“Cancel.” Charging starts.
ˎ
Make sure that the OPR lamp window on the USB cradle
lights up in red.
OPR lamp
Notes on charging by using the computer
ˎ
Charge the battery when the OPR lamp blinks in red rapidly.
ˎ
While the battery is charging, the OPR lamp indicates the charging status of
your Walkman.
You can see the status of the OPR lamp through the OPR lamp window on
the USB cradle.
Lights up in red: Being charged
Turns off: Charged fully or not being charged
ˎ
Charging time is approx. 1.5 hours.
When your Walkman has been fully charged, disconnect it from the
computer.
For a Mac computer, click the eject icon of [WALKMAN] in the sidebar of
Finder to disconnect your Walkman.
ˎ
The Walkman will not charge if the computer enters a power saving mode
such as Sleep or Hibernate, and will discharge in this case.
ˎ
When you use your Walkman for the first time, or if you have not used the
Walkman for a long time, it may take a few minutes to be recognized by the
computer, even if charging has already started (the OPR lamp lights up in
red). Check that the computer recognizes your Walkman after you have
connected it to the computer for about 5 minutes.
Attaching Your Walkman to the USB Cradle (Supplied) and Charging the Battery
Parts and Controls
Quick Start Guide
How to Install the Supplied Software
How to Use Your “WALKMAN”
NWZ-W273S/W274S
About the manuals
This Quick Start Guide only describes the basic operating
instructions and how to install the supplied software.
For detailed information and operating instructions, refer to the Help
Guide (HTML document) included in the supplied software after
installation.
©2013 Sony Corporation
Printed in Malaysia
4-476-039-
12
(1)
Access to the online Help Guide (Full version).
Installing WALKMAN Guide and Media Go (for
Windows)
1
Connect your Walkman to a running
computer using the USB cradle (supplied).
2
Select the following order with the
computer.
Windows 7 or earlier: Select [Start] – [Computer] or [My Computer]
– [WALKMAN] – [Storage Media] – [FOR_WINDOWS].
Windows 8: Select [Desktop] from [Start screen] to open [File
Explorer]. In the [Computer] list, select [WALKMAN] – [Storage Media]
– [FOR_WINDOWS].
3
Double-click [Setup.exe].
The install wizard appears.
ˎ
When you execute [Setup.exe], the [Setup.exe] file stored
in the [FOR_WINDOWS] folder of your Walkman is copied
to your computer for backup, and WALKMAN Guide and
Media Go are installed to your computer.
ˎ
If [Setup.exe] does not start, copy the [Setup.exe] file to
your desktop, then double-click it.
4
Follow the on-screen instructions.
After the install wizard finishes, the WALKMAN Guide and
Media Go shortcuts appear on the desktop of your
computer.
The Help Guide is included in the WALKMAN Guide.
Installing the Help Guide and the Content Transfer
software (for Mac)
1
Connect your Walkman to a running
computer using the USB cradle (supplied).
2
On the computer, select [WALKMAN] in the
sidebar of Finder, then open the [FOR_MAC]
folder.
3
Double-click the installer icon of the desired
software:
To install the Help Guide:[Help_Guide_Installer_for_Mac]
To install the Content Transfer software: [ContentTransfer.
pkg]
4
Follow the on-screen instructions.
After the installer finishes, the alias (shortcut) of the installed
software (Help Guide or the Content Transfer software)
appears on the desktop of your computer.
Hint
ˎ
Before you attempt to delete the software from your Walkman, copy the
[FOR_MAC] folder to your Mac computer as a backup if necessary.
How to Install the Supplied Software