Sony PLP-91/D Installation Instructions
Sony PLP-91/D Manual
 |
View all Sony PLP-91/D manuals
Add to My Manuals
Save this manual to your list of manuals |
Sony PLP-91/D manual content summary:
- Sony PLP-91/D | Installation Instructions - Page 1
to Lock Display BEFORE YOU BEGIN • Caution: To prevent damage to the PLP-91/D, which could affect or void the Factory warranty, and to the equipment that will be attached to it, thoroughly study all instructions and illustrations before you begin the installation. Pay particular attention to the - Sony PLP-91/D | Installation Instructions - Page 2
of damage or destruction of equipment if you do not follow the corresponding instructions. • WARNING: Improper installation can result in serious personal injury! Make sure that the structural members can support a weight factor five times the total weight of the equipment. If not, reinforce - Sony PLP-91/D | Installation Instructions - Page 3
Installation Instructions CONTENTS DIMENSIONAL DRAWING 3 INSTALL MOUNT 4 INSTALL PSB-91/D DISPLAY BRACKETS..... 4 MOUNT THE DISPLAY 6 TOOLS REQUIRED FOR INSTALLATION • Phillips screwdrivers, No. 1 and No. 2 TIP • Drill and bit set • Wrench set NOTE: Other tools may - Sony PLP-91/D | Installation Instructions - Page 4
Installation Instructions Pitch-Adjustable Mount PLP91/D Tighten this screw to lock tilt in place DIMENSIONAL DRAWING 3 - Sony PLP-91/D | Installation Instructions - Page 5
Installation Instructions Pitch-Adjustable Mount PLP91/D INSTALL MOUNT Install the mount studs or other supporting framework. 3. Check mount to ensure it is level and adjust to level if necessary. Mounting Holes Mounting Holes Figure 1. Mounting Hole Locations INSTALL PSB-91/D DISPLAY BRACKETS - Sony PLP-91/D | Installation Instructions - Page 6
Installation Instructions 3. Attach mounting brackets to the display using the M5 screws for 32" screen or M6 for the 42" and 50" screens (see Figure 4 and Figure 5). - Sony PLP-91/D | Installation Instructions - Page 7
Installation Instructions Pitch-Adjustable Mount PLP91/D MOUNT THE DISPLAY Security Lock May Be Installed Mount the display as follows: 1. Make sure no power is supplied to the
-
 1
1 -
 2
2 -
 3
3 -
 4
4 -
 5
5 -
 6
6 -
 7
7
 |
 |

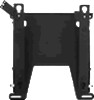
Universal Pitch-Adjustable Wall Mount
For Flat Panel Display PLP-91/D
Your new Wall Mount (PLP-91/D) is a quick disconnect
mounting system with adjustability between 0 and
15 degrees pitch.
Once the Universal Flat Panel Display Wall Mount
Bracket is attached to your display, simply attach the
mount securely on a wall, lock the display in place using
the convenient Q-latch, and attach your audio/video
cables.
The PLP-91/D is virtually invisible when your display is
mounted.
Can Be Used to
Lock Display
BEFORE YOU BEGIN
•
Caution:
To prevent damage to the PLP-91/D, which could affect or void the Factory warranty, and to the equipment
that will be attached to it, thoroughly study all instructions and illustrations before you begin the installation.
Pay par-
ticular attention to the “Important Warnings and Precautions” on Page 1.
•
The mount is designed to be installed using wall studs or supporting framework.
The fasteners used to anchor the mount must
be capable of supporting five times the total weight of the equipment.
•
The maximum weight to be installed on the Universal Pitch-Adjustable Wall Mount is 125 pounds (56.7 Kg).
Sony Electronics Inc.
8805-000087
1 Sony Drive
Park Ridge, NJ
07656
201-930-1000
www.sony.com/displaysystems
INSTALLATION INSTRUCTIONS