Sony RDR-GX360 Operating Instructions
Sony RDR-GX360 Manual
 |
UPC - 027242735507
View all Sony RDR-GX360 manuals
Add to My Manuals
Save this manual to your list of manuals |
Sony RDR-GX360 manual content summary:
- Sony RDR-GX360 | Operating Instructions - Page 1
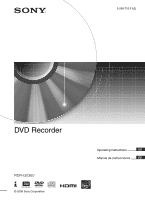
3-296-710-11(2) DVD Recorder RDR-GX360 © 2008 Sony Corporation Operating Instructions US Manual de instrucciones ES - Sony RDR-GX360 | Operating Instructions - Page 2
appliance. For customers in the U.S.A Owner's Record The model and serial numbers are located at the rear of the unit. Record the serial number in the space provided below. Refer to them whenever you call upon your Sony dealer regarding this product. Model No. RDR-GX360 Serial No CAUTION You are - Sony RDR-GX360 | Operating Instructions - Page 3
problems concerning your recorder, please consult your nearest Sony dealer. Important Safety Instructions 1) Read these instructions. 2) Keep these instructions. 3) Heed all warnings. 4) Follow all instructions . 14) Refer all servicing to qualified service personnel. Servicing is required when the - Sony RDR-GX360 | Operating Instructions - Page 4
About this manual • Instructions in this manual describe the controls on the remote. You can also use the controls on the recorder if they have the same or similar names as those on the remote. • The on-screen display illustrations used in this manual may not match the graphics displayed on your TV - Sony RDR-GX360 | Operating Instructions - Page 5
5US - Sony RDR-GX360 | Operating Instructions - Page 6
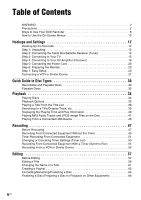
2 Ways to Use Your DVD Recorder 8 How to Use the On-Screen Menus 10 Hookups and Settings 12 Hooking Up the Recorder 12 Step 1: Unpacking 12 6: Preparing the Remote 20 Step 7: Easy Setup 23 Connecting a VCR or Similar Device 27 Quick Guide to Disc Types 30 Recordable and Playable Discs - Sony RDR-GX360 | Operating Instructions - Page 7
Settings (Options 86 Easy Setup (Resetting the Recorder 88 Additional Information 89 Troubleshooting 89 Notes About This Recorder 94 Specifications 95 About i.LINK 96 Guide to Parts and Controls 97 DVD Audio/Subtitle Language 100 Cable Box/Satellite Receiver Brand Code 101 Index 106 7US - Sony RDR-GX360 | Operating Instructions - Page 8
Ways to Use Your DVD Recorder Recording and timer recording , Record TV programs on a DVD, either manually or using the timer. You need to connect a tuner such as a cable box to this recorder. Control your cable box or satellite receiver - Set top box control , Connect the supplied set top box - Sony RDR-GX360 | Operating Instructions - Page 9
camera and save them in JPEG format to a DATA CD (CD-RW/CD-R) or DATA DVD (DVD+RW/DVD-RW/ DVD+R/DVD-R) on a PC. Then play the disc on this recorder (page 41). You can also play MP3 audio files on this recorder (page 41). Shoot Save Play! LINE 2 IN VIDEO L(MONO) AUDIO R DV IN ONE-TOUCH - Sony RDR-GX360 | Operating Instructions - Page 10
Displays the list of the disc contents, including the recording information and movie thumbnail image, which allows you to select a new timer recording as well as change or cancel the timer recordings you set. C "Edit" Used to create or edit a Playlist (unfinalized DVD-RWs (VR mode)/DVD-Rs (VR mode - Sony RDR-GX360 | Operating Instructions - Page 11
press OPTIONS while a DVD VIDEO is playing. DVD VIDEO T Title 1/4 C Chapter 1/1 Time 00:00:25 Audio ENG Dolby D2ch (1/1) Remain 00:01:30 Subtitle 2/2 ENG Angle 1/1 To return to the previous display Press O RETURN. Notes • The OPTIONS menu settings cannot be changed during DVD recording. • The System - Sony RDR-GX360 | Operating Instructions - Page 12
recorder. Notes • Plug cords securely to prevent unwanted noise. • See the instructions supplied with the components to be connected. • You cannot connect this recorder Brand Code" (page 101). - Connect the set top box controller (page 13). - Set the brand code number and the recorder's input - Sony RDR-GX360 | Operating Instructions - Page 13
recorder (LINE1) to the input jack connected to the cable box or satellite receiver (LINE 1 IN). Place the set top box controller near the remote cord (not supplied) to SET TOP BOX CONTROL to LINE 1 IN S VIDEO DVD recorder Audio/video cord (not supplied) to LINE 1 IN : Signal flow To use an - Sony RDR-GX360 | Operating Instructions - Page 14
Top Box Control" in the "Features" setup (page 85). Notes • Do not connect to the S VIDEO and yellow VIDEO jacks at the same time. • Synchro-Recording does not work with some tuners. For details, see the tuner's operating instructions. 14US - Sony RDR-GX360 | Operating Instructions - Page 15
/video cord to the LINE OUT (VIDEO/AUDIO L/R) jacks of the recorder. If your TV has an HDMI jack, or component video input jacks, see page 16 or 17. TV or projector INPUT AUDIO R L (red) (white) VIDEO (yellow) DVD recorder (yellow) Audio/video cord (supplied) (white) (red) to LINE OUT - Sony RDR-GX360 | Operating Instructions - Page 16
on PC displays). • Depending on the connected component, the Control for HDMI function may not work. Refer to the operating instructions supplied with the component. • The recorder supports only the playback option of Control for HDMI. "Player" appears on the TV screen when using the Control for - Sony RDR-GX360 | Operating Instructions - Page 17
to "On" in the "Setup" display (page 81). The PROGRESSIVE indicator lights up when the recorder outputs progressive signals. When using this connection, be sure to connect the audio cord to the flow Component video cord (not supplied) (green) (blue) (red) to COMPONENT VIDEO OUT DVD recorder 17US - Sony RDR-GX360 | Operating Instructions - Page 18
to the input jack on your AV amplifier (receiver). This will enable you to listen to sound through your AV amplifier (receiver). DVD recorder (white) (red) Audio cord (not supplied) (white) (red) to AUDIO OUT (L/R) A INPUT L AUDIO R AV amplifier (receiver) to DIGITAL AUDIO OUT (COAXIAL - Sony RDR-GX360 | Operating Instructions - Page 19
Hints • For correct speaker location, see the operating instructions supplied with the connected components. • With a coaxial digital connection, you cannot: - use the virtual surround effects of this recorder. - switch the bilingual sounds on a DVD-RW/DVD-R (VR mode) by pressing AUDIO when you set - Sony RDR-GX360 | Operating Instructions - Page 20
to close the battery cover properly. When using the remote, point it at the remote sensor on the recorder. to AC outlet < Notes • If the supplied remote interferes your other Sony DVD recorder or player, change the command mode number for this recorder (page 22). • Use the batteries correctly to - Sony RDR-GX360 | Operating Instructions - Page 21
work for the TV. • If you enter a new code number, the code number previously entered will be erased. • When you replace the batteries of the remote, the code number may be reset to the default setting. Set the appropriate code number again. Number buttons 123 456 789 0 TV DIGITAL/ ANALOG TV VOL - Sony RDR-GX360 | Operating Instructions - Page 22
Code number 12 03, 04, 12, 20 11, 14 12 07, 10, 11 03, 05, 18 08, 12 03, 08, 14 07, 18 03, 04, 12 12 14, 15 If you have a Sony DVD player or more than one Sony DVD recorder If the supplied remote interferes with your other Sony DVD recorder or player, set the command mode number for this recorder - Sony RDR-GX360 | Operating Instructions - Page 23
mode for the recorder you set above. Follow the steps below to set the command mode on the remote. A Hold down ENTER. B While holding down ENTER, enter the command mode code number using the number buttons. Command Mode Code number DVD1 number button 1 DVD2 number button 2 DVD3 number button - Sony RDR-GX360 | Operating Instructions - Page 24
from the recorder appears on your TV screen. "Initial settings necessary to operate the DVD recorder will be code number, select "Cancel" and return to step 6. 8 Select "OK," and press ENTER. The setup display for clock setting appears. No Disc Easy Setup 12:00 AM Set the time and date manually - Sony RDR-GX360 | Operating Instructions - Page 25
and the cable box/ satellite receiver. 2 Point the recorder's remote at the recorder (not at the cable box/satellite receiver). 3 Press CH +/- and check that the channel changes on the cable box/satellite receiver window. 4 Press the number buttons and check that the channel changes on the cable - Sony RDR-GX360 | Operating Instructions - Page 26
2 Affix it so that the set top box controller is near the remote control sensor on your cable box/satellite receiver. LINE 2 IN VIDEO L(MONO) AUDIO R DV IN ONE-TOUCH DUBBING REC 26US - Sony RDR-GX360 | Operating Instructions - Page 27
or similar device to the LINE 2 IN jacks of this recorder. You can connect a second DVD player and record DVDs. VCR, etc. OUTPUT VIDEO AUDIO L R Audio/video cord (not supplied) LINE 2 IN VIDEO L(MONO) AUDIO R to LINE 2 IN DVD recorder LINE 2 IN VIDEO L(MONO) AUDIO R DV IN ONE-TOUCH - Sony RDR-GX360 | Operating Instructions - Page 28
output jack connected to the input jack of this recorder. Noise (feedback) may result. • If you pass the recorder signals via the VCR, you may not receive a clear image on your TV screen. DVD recorder VCR TV Be sure to connect your VCR to the DVD recorder and your TV in the order shown below. To - Sony RDR-GX360 | Operating Instructions - Page 29
29US Hookups and Settings - Sony RDR-GX360 | Operating Instructions - Page 30
Quick Guide to Disc Types Recordable and Playable Discs Disc Type Disc Logo Icon used in this manual Formatting (new discs) Compatibility with other DVD players (finalizing) DVD+RW DVDRW VR mode Video mode +RW -RWVR -RWVideo Automatically formatted Playable on DVD+RW compatible players ( - Sony RDR-GX360 | Operating Instructions - Page 31
Recordable Media) is a coding technology that protects copyrights for images. *2 Unused DVD-RWs are automatically formatted according to the setting of "Format DVD DVD+R DL (Double Layer) discs, see the instructions supplied with the discs. *7 For DVD-RWs (Video mode), DVD-Rs (Video mode), and DVD+ - Sony RDR-GX360 | Operating Instructions - Page 32
JPEG image files. • Data part of CD-Extras • DVD-ROMs that are not recorded in DVD Video format, or do not contain MP3 audio tracks or JPEG image files. • DVD Audio discs • HD layer on Super Audio CDs • DVD VIDEOs with a different region code (see page 33) • A disc recorded in a color system other - Sony RDR-GX360 | Operating Instructions - Page 33
which mates DVD recorded material on one side with digital audio material on the other side. However, since the audio material side does not conform to the Compact Disc (CD) standard, playback on this product is not guaranteed. Region code (DVD VIDEO only) Your recorder has a region code printed on - Sony RDR-GX360 | Operating Instructions - Page 34
. Note To play a disc recorded with other equipment on this recorder, finalize the disc on the recording equipment first. Using the DVD's Menu +RW -RWVideo +R -RVideo DVD When you play a DVD VIDEO, or a finalized DVD+RW, DVD-RW (Video mode), DVD+R, or DVD-R (Video mode), you can display - Sony RDR-GX360 | Operating Instructions - Page 35
Playback Options Z OPEN/CLOSE Number buttons ANGLE MENU 123 456 789 0 O RETURN REPLAY/ ADVANCE . PREV SUBTITLE AUDIO angles (multi-angles) for a scene are recorded on the disc, " " appears on the TV screen for a few seconds. See the instructions supplied with the disc for details. DVD • Replays - Sony RDR-GX360 | Operating Instructions - Page 36
pause mode, you can also use the ./> buttons on the recorder as the remote's m/ M buttons. Hold the buttons down during playback to fast recorder. Notes on playing DVDs with a DTS soundtrack DTS audio signals are output only through the DIGITAL AUDIO OUT (COAXIAL)/HDMI OUT jack. When you play a DVD - Sony RDR-GX360 | Operating Instructions - Page 37
, a menu appears. Select an item using the number buttons and press ENTER. Then follow the instructions in the menu (press H PLAY when "Press the number buttons. The recorder starts playback. To register or change the password, see "Parental (DVD VIDEOs only)" on page 86. Locking the recorder - Sony RDR-GX360 | Operating Instructions - Page 38
and the TV's input is switched to the recorder. Playback starts automatically. Set "Control for HDMI" to "On" in the "Features" setup DVD-RWs (VR mode), DVD-Rs (VR mode), and DVD-RAMs. B Movie thumbnail image C Title information: Displays the title number, title name, recording date, and recording - Sony RDR-GX360 | Operating Instructions - Page 39
appear for discs created on other DVD recorders. • Letters that cannot be displayed DVDs) "Chapter" (for DVDs) "Track" (for VIDEO CDs with PBC function off) "Time" (for DVDs/VIDEO CDs with PBC function off): Searches for a starting point using the time code. 3 Press M/m/ - Sony RDR-GX360 | Operating Instructions - Page 40
not be able to search for a scene using the time code. Displaying the Playing Time and Play Information +RW -RWVR -RWVideo +R -RVR -RVideo DVD RAM VCD CD DATA CD DATA DVD You can check disc information, such as playing time, recording mode, and remaining disc space. 123 456 789 0 TIME/TEXT - Sony RDR-GX360 | Operating Instructions - Page 41
a CD Playing time of the current track m Current track number m Clock Playing MP3 Audio Tracks and JPEG Image Files on the Disc DATA CD DATA DVD You can play DATA CDs (CD-ROMs/CD-Rs/ CD-RWs)/DATA DVDs (DVD-ROMs/ DVD+RWs/DVD-RWs/DVD+Rs/DVD-Rs) that contain MP3 audio tracks or JPEG image files - Sony RDR-GX360 | Operating Instructions - Page 42
recorder stops. 42US Playing JPEG image files You can play JPEG image files on DATA CDs or DATA DVDs. 1 Place a DATA CD/DATA DVD on the disc tray. When you insert a DATA CD/DATA DVD . PREV/> NEXT. The following menu icons appear in the upper part of the screen. : Returns to the "Photo" display. : - Sony RDR-GX360 | Operating Instructions - Page 43
show with sound When a disc contains both MP3 audio tracks and JPEG image files, you can enjoy a slide show with sound. 1 Insert a DATA CD/DATA DVD containing both the MP3 audio tracks and JPEG image files. The display for selecting a media type appears. Music Photo Mix 10:10 AM Press ENTER - Sony RDR-GX360 | Operating Instructions - Page 44
albums with no more than two trees. Notes • Some DATA CDs or DATA DVDs cannot be played on this recorder depending on file format. • Only one session of a multi-session DATA DVD can be played back. • Only alphabet and numbers can be used for album or track names. Anything else is displayed as an - Sony RDR-GX360 | Operating Instructions - Page 45
Playing From a Connected USB Device You can play MP3 audio tracks or JPEG image files stored in a USB device connected to the USB jack. Also movie files in the connected HDD camcorder can be played. About USB connection and available USB devices, see page 71. 123 456 789 0 O RETURN H PLAY INPUT - Sony RDR-GX360 | Operating Instructions - Page 46
with an HDD camcorder and have the extension ".MPG." • You cannot play movie files recorded with a digital still camera. Notes • The recorder may not be able to play some JPEG image files, MP3 audio tracks or movie files that have been edited on a PC. • Do not disconnect a - Sony RDR-GX360 | Operating Instructions - Page 47
40). For DVD+RWs or DVD-RWs, you can free up disc space by erasing titles (page 58). • Check that the recorder is connected to a tuner such as a cable box or satellite receiver (page 12). See also the tuner's instruction manual. z Hints • To play a disc recorded with this recorder on other equipment - Sony RDR-GX360 | Operating Instructions - Page 48
Notes • You cannot mix VR mode and Video mode on the same DVD-RW or DVD-R. • You can change the recording format on DVD-RWs by reformatting (page 64). • You cannot change the recording format on used DVDRs. • The recorder records on new DVD-Rs in Video mode unless you first format the discs in VR - Sony RDR-GX360 | Operating Instructions - Page 49
from the front panel display. Unused discs are automatically formatted. For the DVD-RW/DVD-R's recording format (VR mode or Video mode), see "Formatting a new disc" this recorder's remote. The recorder's input is switched to the connected input (LINE1 or LINE2). You can also use the number buttons. - Sony RDR-GX360 | Operating Instructions - Page 50
hours*. 0:30 1:00 7:30 8:00 (Normal recording) "c" and "OTR" light up, and the remaining recording time appears in the front panel display. When the time counter reaches "0:00," the recorder stops recording and turns off. * 14 hours 30 minutes for DVD+R DL (Double Layer) discs. To cancel the - Sony RDR-GX360 | Operating Instructions - Page 51
Z OPEN/CLOSE to close the disc tray. Wait until "LOAD" disappears from the front panel display. Unused discs are automatically formatted. For the DVD-RW/DVD-R's recording format (VR mode or Video mode), see "Formatting a new disc" on page 48. 3 Press TIMER. Timer - Standard 10:10 AM NoNoR.1ec To - Sony RDR-GX360 | Operating Instructions - Page 52
"Edit" from the Timer List (page 53). 6 Press SYSTEM MENU to turn off the menu. There is no need to turn off the recorder before the timer recording starts. Leave the cable box/satellite receiver turned on and do not change the channel selected on the cable box/satellite receiver until the - Sony RDR-GX360 | Operating Instructions - Page 53
Ch Line1 Line1 Mode Edit SP SP --------- Timer information displays the recording date, time, recording mode, etc. If there are more than six timer settings, using M/m. Press ENTER. Timer - Standard 10:10 AM NoNoR.1ec To 01 DVD Date 04/15 Start End Source Mode Edit 09:00PM 10:00PM CH8 02 - Sony RDR-GX360 | Operating Instructions - Page 54
to the LINE 1 IN (VIDEO/AUDIO) jacks on the rear of the recorder (page 13). When the connected equipment turns on, the recorder starts recording a program from the LINE 1 IN jacks. Note To play a disc recorded with this recorder on other equipment, finalize the disc (page 66). SYSTEM MENU 123 456 - Sony RDR-GX360 | Operating Instructions - Page 55
does not work with some tuners. For details, see the tuner's operating instructions. • The Synchro-Rec function does not work for a video signal input via the LINE 1 IN S VIDEO jack. • After a recording has finished, the recorder enters the Synchro-Rec standby mode until the SYNC-REC indicator turns - Sony RDR-GX360 | Operating Instructions - Page 56
" setup (page 85), the Auto Finalize function works for DVDRWs (Video mode), DVD-Rs (Video mode) and DVD+Rs after recording. For details, see page 67. 123 456 789 0 INPUT z REC x STOP REC MODE 1 Insert a recordable disc. 2 Press INPUT repeatedly to select an input source according to the - Sony RDR-GX360 | Operating Instructions - Page 57
contents if you remove the disc or a timer recording starts while editing. • You cannot edit recordings on DVD-RWs (Video mode), DVD+Rs, or DVD-Rs (Video mode) recorded on other DVD equipment. Edit options for DVD+RWs/DVD-RWs (Video mode)/DVD+Rs/DVD-Rs (Video mode) +RW -RWVideo +R -RVideo You - Sony RDR-GX360 | Operating Instructions - Page 58
information is full, erase unnecessary titles. • You cannot create or edit Playlist titles on a finalized disc. When you want to edit or record on the DVD-RW again, unfinalize the disc (page 66). Editing a Title +RW -RWVR -RWVideo +R -RVR -RVideo This section explains the basic edit functions - Sony RDR-GX360 | Operating Instructions - Page 59
Erase"*2: Erases a section of the title (see below). "Divide Title"*2: Divides a title into two (page 60). *1 DVD-RWs (VR mode) and DVD-Rs (VR mode) only *2 DVD+RWs, DVD-RWs (VR mode), and DVD-R (VR mode) only About freeing up disc space Erasing titles, chapters, or scenes: - frees up disc space on - Sony RDR-GX360 | Operating Instructions - Page 60
RW -RWVR -RVR You can divide a title into two. Note that dividing original titles cannot be undone. 1 Press TITLE LIST. When editing a DVD-RW (VR mode) or DVD-R (VR mode), press ORIGINAL/ PLAYLIST to switch to the "Title List (Original)," if necessary. 2 Select a title, and press ENTER. The sub-menu - Sony RDR-GX360 | Operating Instructions - Page 61
can enter a title name of up to 32 characters. Since the displayed number of characters is limited, their appearance in menus such as Title List may ORIGINAL/ PLAYLIST M/m/ - Sony RDR-GX360 | Operating Instructions - Page 62
6 Select "Finish," and press ENTER. Creating a Playlist -RWVR -RVR Playlist titles allow you to edit without changing the original recordings (see "Edit options for DVD-RWs (VR mode)/DVD-Rs (VR mode)" on page 57). You can create a Playlist title by combining up to 99 sections (scenes) from original - Sony RDR-GX360 | Operating Instructions - Page 63
Editing 2 Select "Edit," and press ENTER. Edit Title List Timer Create Playlist Edit Playlist Edit Dubbing Disc Setting Setup 10:10 AM 3 Select "Create Playlist," and press ENTER. The display for creating a Playlist appears. "Start" is selected. Create Playlist 10:10 AM Scene No.01 T - Sony RDR-GX360 | Operating Instructions - Page 64
." Note You cannot create or edit Playlist titles on a finalized disc. When you want to edit or record on the DVD-RW again, unfinalize the disc (page 66). 1 Press SYSTEM MENU while the recorder is in stop mode. 2 Select "Disc Setting," and press ENTER. The "Disc Setting" display appears. 1 2 Disc - Sony RDR-GX360 | Operating Instructions - Page 65
the following information. • Disc name • Disc type (and recording format for a DVD-RW (VR mode)/DVD-R (VR mode)) • Total number of titles • Protect setting • The oldest and most recent recording date • The total available recording time in each recording mode To return to the previous display Press - Sony RDR-GX360 | Operating Instructions - Page 66
-RVideo Finalizing is necessary in order to play discs recorded with this recorder on other DVD equipment. Note that you cannot further record or edit on a finalized disc. When you finalize a DVD+RW/DVD-RW (Video mode)/DVD+R/DVD-R (Video mode), a DVD menu will be automatically created, which can be - Sony RDR-GX360 | Operating Instructions - Page 67
to "On" in the "Features" setup (page 85). Notes • It may take a few minutes for the recorder to finalize a disc. • A disc once finalized cannot be recorded or edited. • DVD-Rs (Vidoe mode)/DVD+Rs cannot be unfinalized. • For discs where erasing titles/chapters does not free up disc space (page 59 - Sony RDR-GX360 | Operating Instructions - Page 68
will fast forward and rewind the tape for you - you do not need to operate your DV camcorder. Refer to the instruction manual supplied with the DV camcorder as well before connecting. DVD recorder LINE 2 IN VIDEO L(MONO) AUDIO R DV IN ONE-TOUCH DUBBING REC DV IN to DV IN i.LINK cable (not - Sony RDR-GX360 | Operating Instructions - Page 69
) Dubbing From a DV/D8 Format Tape to a DVD REC +RW -RWVR -RWVideo +R -RVR -RVideo ONE-TOUCH DUBBING You can simply record the entire contents of a DV/ D8 format tape onto a disc. The recorder controls the DV camcorder for the whole process. You can also select the scenes on the tape using the - Sony RDR-GX360 | Operating Instructions - Page 70
1 Follow steps 1 to 5 of "Dubbing From a DV/ D8 Format Tape to a DVD" (page 69). 2 Select "Dubbing" on the System Menu, and press ENTER. Dubbing screen, you can use z on the TV screen to record the camera image directly on the recorder. DV/D8 Dubbing Title List Timer DV/D8 Simple Dubbing DV - Sony RDR-GX360 | Operating Instructions - Page 71
DVD (page 73). • Copying JPEG image files to a DVD (page 75). ◆Connectable USB devices (as of January 2008) The following Sony devices can be connected to this recorder: DVD the recorder. Also refer to the instruction manual supplied with the connected USB device before connecting. DVD recorder - Sony RDR-GX360 | Operating Instructions - Page 72
discs for backup DVDs Use a new or blank DVD of the same type as the source DVD. Source DVD (8 cm) Recordable DVD , (12 cm) DVD+RW DVD+RW DVD-RW (Video mode) DVD-RW DVD-RW (VR mode) DVD-RW DVD-R (Video mode) new DVD-R DVD+R DL new DVD+R Notes • When using a DVD+R/DVD-R, make sure that - Sony RDR-GX360 | Operating Instructions - Page 73
a HDD Camcorder (Program Dubbing) +RW -RWVideo +R -RVideo You can dub the selected movie files from a HDD camcorder onto a recordable DVD+RW, DVDRW (Video mode), DVD-R (Video mode), or DVD+R. ◆How titles and chapters are created The dubbed contents on the disc become one title, and the title is - Sony RDR-GX360 | Operating Instructions - Page 74
recording mode. 3 Press INPUT repeatedly to select "USB." 4 Connect your HDD camcorder and set it to USB connecting mode. For example, select " COMPUTER for confirmation. Do you want to start dubbing? Number of items : 2 Source : USB Target : DVD Start Clear All Cancel Select the item you want - Sony RDR-GX360 | Operating Instructions - Page 75
on the disc you used for copying photos with this recorder. • The disc will be recognized as a DATA DVD after Photo Copy, and can be played on other DVD devices capable of JPEG playback if you finalize it (page 66). However, note that a DATA DVD may be unrecognizable, depending on the device. • The - Sony RDR-GX360 | Operating Instructions - Page 76
. If not, check the operating instructions supplied with the connected device. 4 Press ONE-TOUCH DUBBING on the recorder. Select the item you want to USB Dubbing," and press ENTER. USB Dubbing Title List Timer Edit DVD Backup HDD-Cam Program Dubbing Photo Copy Dubbing Disc Setting Setup 10 - Sony RDR-GX360 | Operating Instructions - Page 77
for confirmation. Do you want to start copying? Number of items : 1 Source : USB Target : DVD Start Clear All Cancel To return to the previous the recorder to stop copying. To copy more albums on the same disc Press SYSTEM MENU, and repeat from step 3 on page 76. USB Dubbing (USB t DVD) 77US - Sony RDR-GX360 | Operating Instructions - Page 78
M/m/ - Sony RDR-GX360 | Operating Instructions - Page 79
Setting Setup TV Type Resolution (HDMI) Video (HDMI) Black Level Picture Control recorder is in stop mode. 2 Select "Setup," and press ENTER. 3 Select "Clock Set," and press ENTER. The clock setting display appears. Clock Set 10:10 AM Title List Timer Edit Set the time and date manually - Sony RDR-GX360 | Operating Instructions - Page 80
type of TV, tuner, or decoder connected to the recorder. 1 Press SYSTEM MENU while the recorder is in stop mode. 2 Select "Setup," and instruction manual supplied with the TV/ projector, etc. The setting is effective only when you connect a HDMI equipped TV to the HDMI OUT jack. Auto 1920×1080p - Sony RDR-GX360 | Operating Instructions - Page 81
15). You can adjust the video signal of DVD or VIDEO CD (with PBC function off) from the recorder to obtain the picture quality you want. Select case, set "Progressive" to "Off." • When you connect your TV using an HDMI cable, the "Progressive" setting is set to "On." Line1 Input Selects the type - Sony RDR-GX360 | Operating Instructions - Page 82
. Note If the HDMI OUT jack is connected to a TV not compatible with Dolby Digital signals, D-PCM signals will be automatically output, even if "Dolby Digital" is selected. ◆ DTS (DVD VIDEOs only) Selects whether or not to output DTS signals. On Select this when the recorder is connected to an - Sony RDR-GX360 | Operating Instructions - Page 83
Multi-channel audio signals are downmixed to two channels for use with your stereo. To enjoy the surround effect of Dolby Digital, turn off the surround settings of this recorder (page 83). Audio DRC (Dynamic Range Control) (DVDs (HDMI) (DVD VIDEOs only) Selects the output method from the HDMI OUT - Sony RDR-GX360 | Operating Instructions - Page 84
either soundtrack when playing back the disc. z Hint When recording on a disc other than DVD-RWs (VR mode)/DVD-Rs (VR mode), select either sound track with the connected equipment before recording. Recording, Set Top Box, Control for HDMI Settings (Features) The "Features" setup allows you to - Sony RDR-GX360 | Operating Instructions - Page 85
Control" to "On" or "Off," all timer recording settings will be canceled. ◆ Brand Code See "Cable Box/Satellite Receiver Brand Code" (page 101) for the brand code for your cable box or satellite receiver, and enter the code using the number buttons and ENTER. ◆ Connections Selects the connection you - Sony RDR-GX360 | Operating Instructions - Page 86
DVD VIDEO, one of the recorded languages will be automatically selected. Parental (DVD VIDEOs only) Playback of some DVD VIDEOs can be limited according to a predetermined level, such as the age of the users . Enter a 4-digit password using the number buttons. Enter your password Title List 10 - Sony RDR-GX360 | Operating Instructions - Page 87
number buttons. z Hint If you enter a wrong number remote to the setting made here. For details, see "If you have a Sony DVD player or more than one Sony DVD recorder" on page 22. DVD 1 DVD 2 DVD recorder is reset to the factory settings. When the "Easy Setup" display appears, follow the instructions - Sony RDR-GX360 | Operating Instructions - Page 88
) Select this to run the Easy Setup program. 1 Press SYSTEM MENU while the recorder is in stop mode. 2 Select "Setup," and press ENTER. 3 Select "Easy Setup," and press ENTER. Easy Setup 10:10 AM Follow the guide to make initial settings. Before you start, Check that you have made all necessary - Sony RDR-GX360 | Operating Instructions - Page 89
, use this troubleshooting guide to help remedy the problem before requesting repairs. Should any problem persist, consult your nearest Sony dealer. Power The power does not turn on. , Check that the AC power cord is connected securely. The recorder turns on automatically. , HDMI input is selected - Sony RDR-GX360 | Operating Instructions - Page 90
through the recorder is distorted. , If the playback picture output from a DVD player, VCR, or tuner goes through your recorder before settings (page 82). No sound is output from the HDMI OUT jack. , Try the following: 1Turn the recorder off and on again. 2Turn the connected equipment off and - Sony RDR-GX360 | Operating Instructions - Page 91
above. See the instruction manual supplied with the disc. , While the recorder is reading disc recorded on this recorder. The angles cannot be changed. , Multi-angles are not recorded on the DVD VIDEO being played. , The DVD VIDEO prohibits changing angles. , Try changing the angle using the DVD - Sony RDR-GX360 | Operating Instructions - Page 92
the batteries. Reset the code (page 21). , Turn on the recorder. , The remote is not pointed at the remote sensor on the recorder. , Different command modes are set for the recorder and remote. Set the same command mode (page 22). Other Sony equipment responds to the remote. , The same command mode - Sony RDR-GX360 | Operating Instructions - Page 93
Child Lock (page 37). Control by AV mouse is not possible. , Some satellite receivers may not support AV mouse. The Set Top Box Control function does not work. , Turn on the recorder. The Control for HDMI function does not work. , When "HDMI" does not appear in the front panel display, check the - Sony RDR-GX360 | Operating Instructions - Page 94
Notes About This Recorder On adjusting volume Do not turn up the volume while or spray types). These may cause the apparatus to malfunction. On replacement of parts In the event that this unit is repaired, repaired parts may be collected for reuse or recycling purposes. Notes about the discs • - Sony RDR-GX360 | Operating Instructions - Page 95
Specifications System [DVD recorder section] Laser Semiconductor laser Audio recording format Dolby Digital Video recording format MPEG Video [Timer section] Clock Quartz locked Timer indication 12-hour cycle Timer setting 12 programs (max.) Inputs and outputs LINE 1 IN and LINE 2 - Sony RDR-GX360 | Operating Instructions - Page 96
S400 (approx. 400 Mbps) The baud rate is listed under "Specifications" in the instruction manual of each equipment. It is also indicated near the i.LINK jack connecting this recorder, also see the instruction manuals for the equipment to be connected. Required i.LINK cable Use the Sony i.LINK 4-pin - Sony RDR-GX360 | Operating Instructions - Page 97
Guide to Parts and Controls For more information, see the pages in parentheses. Front panel Buttons on the recorder have the same function as the buttons on the remote if they have the same or similar names. LINE 2 IN VIDEO L(MONO) AUDIO R DV IN ONE-TOUCH DUBBING Open the cover REC A "/1 (on/ - Sony RDR-GX360 | Operating Instructions - Page 98
Remote 123 456 789 0 A Z OPEN/CLOSE button (34, 49, 69) B Number buttons*1 (21, 35) SET button (73, 75, 85) C ) I REPLAY/ (35) ADVANCE buttons 98US J CLEAR button (86) K X PAUSE button (49) L z REC (record) button (49) M ?/1 (on/standby) switch (23) N CH (channel) +/- button*1*2 (12, 49) O - Sony RDR-GX360 | Operating Instructions - Page 99
(41): • Playing time/remaining time • Current title/chapter/track/index number • Recording time/recording mode • Clock • Channel G PROGRESSIVE indicator (17, 81) H SYNCHRO REC indicator (54) Additional Information A AUDIO OUT L/R jacks (18) B HDMI OUT jack (16) C SET TOP BOX CONTROL jack (13 - Sony RDR-GX360 | Operating Instructions - Page 100
/Subtitle Language When you play a DVD VIDEO, the language of the selected audio track or subtitle is abbreviated as follows. See page 86 to change the audio track or subtitle. Abbreviation - Sony RDR-GX360 | Operating Instructions - Page 101
Active Aim Allegro Amark American Americast Antronix Anvision Apache Arbatron Archer ASE Auna BBT BCC Belcor Bell & Howell Bell Atlantic Bell South Bestlink Code number 0033 0003, 0007, 0011, 0017, 0008, 0014, 0001, 0013, 0206, 0047, 0237, 0033 0003, 0007, 0013, 0047, 0001, 0011, 0017, 0014, 0206 - Sony RDR-GX360 | Operating Instructions - Page 102
NET Next Level Nexus Northcoast Nova Vision Novabeam Novaplex NSC Oak Omega Omniview Optimus Pace Pacific Bell Panasonic Panther Paragon Penney Philips Pioneer Code number 0812 0797, 0027, 0032, 0334, 0069 0618, 0153 0000 0003 0476, 0276, 1476, 0810, 1376, 1254, 0400, 1106 0156, 0078, 0063, 0203 - Sony RDR-GX360 | Operating Instructions - Page 103
Atlanta Seam Sears Sejin Siemens Sigma Signal Signature SkyCable Skygiant SL Marx Code number 0400 0770 0012, 0013, 0059 0786 0000, 0040 0000 0144, 0011, 0035 0011 0112 1091 0040 Cable box brand Sony Spectradyne Spectravision Sprucer Standard Components Starcom Stargate Starquest StarSight Stealth - Sony RDR-GX360 | Operating Instructions - Page 104
Cable box brand Tusa TV COMM TV Guide TV86 Uniden Unika United Artists United Cable Universal US Electronics V2 Verizon Videoway VideoWorks Vidtech Viewmaster Viewstar Vision Visionetics Vortex View WaveMaster Wiso Zenith Zentek 104US Code number 0015 0035, 0019 1476 0063, 0040 0022, 0225 0207, - Sony RDR-GX360 | Operating Instructions - Page 105
Satellite receiver brand Paysat Philips Primestar Proscan QNS RadioShack RCA Samsung Sky Sony Star Choice Star Trak Thomson Tivo Toshiba UEC Uniden Video Cipher II Plus Zenith Code number 0724 1076, 0099, 1142, 0724, 0722, 0749, 1442, 1749, 0856, 0775 0361, 0627, 0869 0392, 0566 1367 0869 0566, - Sony RDR-GX360 | Operating Instructions - Page 106
to your TV 15 "Connections" 85 Control for HDMI 16, 85 Controlling TVs with the remote 21 Copy protection 48 Copy-Free 48 Copy-Never 48 70 "DV/D8 Simple Dubbing" 70 "DVD Auto Chapter" 84 "DVD Backup" 73 DVD VIDEO 32 DVD+R 30 DVD+R DL 30 DVD+RW 30 DVD-R 30 DVD-RAM 32 DVD-RW 30 E Easy Setup 88 "Edit - Sony RDR-GX360 | Operating Instructions - Page 107
" 81 "Protect" 59 Q Quick Timer 50 R Rear panel 99 REC 49 REC MODE 49 Recording 47 recordable discs 30 recording format 30 recording mode 47 Recording mode 47 Recording time 47, 50 Region code 33 Remaining time 40 Remote 20, 98 REPLAY 35 Resetting 88 Resume Play 37 Rotate 43 S Satellite receiver 13 - Sony RDR-GX360 | Operating Instructions - Page 108
la configuración básica y el funcionamiento de la grabadora de DVD. Para obtener más información, consulte el manual de instrucciones en inglés. Conexiones y ajustes 3 Conexión de la grabadora 3 Paso 1: Desembalaje 3 Paso 2: Conexión del decodificador de cable/receptor vía satélite (sintonizador - Sony RDR-GX360 | Operating Instructions - Page 109
es necesario: - comprobar el código de marca del decodificador de cable/receptor vía satélite. Consulte "Cable Box/Satellite Receiver Brand Code" en el manual de instrucciones en inglés (página 101). - conectar el controlador del decodificador (página 4). - ajustar el número del código de marca y la - Sony RDR-GX360 | Operating Instructions - Page 110
TV Cable de antena (no suministrado) a la entrada de antena Televisor Cable de video S (no suministrado) a SET TOP BOX CONTROL a LINE 1 IN S VIDEO grabadora de DVD : Flujo de señales Cable de audio/ video (no suministrado) a LINE 1 IN 4ES - Sony RDR-GX360 | Operating Instructions - Page 111
Conexiones y ajustes Utilización de un cable de video S para disfrutar de una calidad de imagen superior Conecte la toma LINE 1 IN S VIDEO mediante un cable de video S (no suministrado) en lugar de la clavija amarilla (video) del cable de audio/video. Deje las clavijas de audio conectadas a las - Sony RDR-GX360 | Operating Instructions - Page 112
OUT (VIDEO/AUDIO L/R) de la grabadora. Si su televisor tiene una toma HDMI, o tomas de entrada de video componente, consulte la página 7 o Televisor o proyector AUDIO R L VIDEO (rojo) (blanco) (amarillo) grabadora de DVD (amarillo) Cable de audio/video (suministrado) (blanco) (rojo) a LINE - Sony RDR-GX360 | Operating Instructions - Page 113
de una toma de entrada de HDMI Conecte la toma de salida HDMI* OUT mediante un cable Sony HDMI certificado (no suministrado). Disfrutará de imágenes y sonido de alta calidad. Si su televisor acepta señales progresivas de 1080p, debe usar esta conexión. El indicador de HDMI se ilumina en la pantalla - Sony RDR-GX360 | Operating Instructions - Page 114
/ video (suministrado) (blanco) (rojo) a LINE OUT (AUDIO L/R) : Flujo de señales Cable de video componente (no suministrado) (verde) (azul) (rojo) a COMPONENT VIDEO OUT grabadora de DVD 8ES - Sony RDR-GX360 | Operating Instructions - Page 115
Conexiones y ajustes Paso 4: Conexión del cable Paso 5: Preparación del de alimentación mando a distancia Enchufe los cables de alimentación de la grabadora y del televisor a una toma de ca. A continuación, debe esperar unos instantes antes de utilizar la grabadora. Podrá utilizarla sólo después - Sony RDR-GX360 | Operating Instructions - Page 116
Aparecerá el siguiente mensaje "Initial settings necessary to operate the DVD recorder will be made. You can change them later using setup." (" Se realizarán los ajustes iniciales necesarios para usar la grabadora DVD. Podrá cambiarlos posteriormente utilizando la configuración."). • Si no - Sony RDR-GX360 | Operating Instructions - Page 117
éricos para introducir el código de marca del decodificador de cable/receptor vía satélite. Consulte "Cable Box/Satellite Receiver Brand Code" en el manual de instrucciones en inglés (página 101). No Disc Configuración fácil Introduzca el código de marca del decodificador. Aceptar Cancelar • Para - Sony RDR-GX360 | Operating Instructions - Page 118
de cable o receptor vía satélite, colóquelo en su sitio. 1 Coloque la cinta de doble capa suministrada en el controlador del decodificador. Retire las partes de apoyo de la cinta de doble capa. 2 Colóquelo de manera que el controlador del decodificador esté cerca del sensor de control remoto del - Sony RDR-GX360 | Operating Instructions - Page 119
esta grabadora, primero finalice el disco en el equipo de grabación. Utilización del menú del DVD +RW -RWVideo +R -RVideo DVD Cuando reproduzca un DVD VIDEO, o un DVD+RW, DVD-RW (Modo Video), DVD+R o DVD-R (Modo Video) finalizado, podrá acceder al menú del disco presionando TOP MENU o MENU. La - Sony RDR-GX360 | Operating Instructions - Page 120
selecciona las pistas de audio estéreo o monoaurales. -RWVR -RVR VCD DVD Selecciona el idioma de los subtítulos cuando se . presiona varias veces. DVD Selecciona un ángulo cuando se presiona varias veces. Si se grabaron varios ángulos (multiángulo) de una escena en el disco, aparece " " en la - Sony RDR-GX360 | Operating Instructions - Page 121
pausa. La velocidad de reproducción cambia cada vez que se presiona el botón: retroceso a cámara lenta T T T T T T avance a cámara lenta t t t t t t +RW +R DVD -RWVR -RWVideo -RVR -RVideo RAM VCD * * Sólo dirección de reproducción X PAUSE Hace una pausa en la reproducción. Si ésta dura más de - Sony RDR-GX360 | Operating Instructions - Page 122
> 01:59:00 > 00:58:56 > A Tipo de disco: Muestra el tipo de disco. También muestra los tipos de título (original o Playlist) para DVD-RW (Modo VR), DVD-R (Modo VR) y DVD-RAM. B Imagen en miniatura de película C Información del título: Muestra el número del título, su nombre, la fecha y el modo de - Sony RDR-GX360 | Operating Instructions - Page 123
manual de instrucciones del sintonizador. Número máximo de títulos grabables Disco Número de títulos DVD-RW/DVD-R 99 DVD+RW/DVD+R 49 DVD r 180 LP r 240 EP r 360 SLP (Larga duración) 480 z Observación El tiempo de grabación aproximado para los discos DVD+R DL (doble capa) es el que - Sony RDR-GX360 | Operating Instructions - Page 124
Copy-Free +RW +R -RWVR -RWVideo -RVR -RVideo Copy-Once*1 -RWVR (CPRM*2) -RVR (CPRM*2) Copy-Never Ninguna *1 No se puede grabar en discos DVD disponibles normalmente que no sean compatibles con CPRM. *2 El disco grabado sólo puede reproducirse en un equipo compatible con CPRM. Grabación desde - Sony RDR-GX360 | Operating Instructions - Page 125
en la pantalla del panel frontal. Cuando el contador llega a "0:00", la grabadora detiene la grabación y se apaga. * 14 horas 30 minutos para discos DVD+R DL (doble capa). Para cancelar el Quick Timer Presione z REC varias veces hasta que aparezca el contador en la pantalla del panel frontal. La - Sony RDR-GX360 | Operating Instructions - Page 126
discos. Espere hasta que "LOAD" desaparezca de la pantalla del panel frontal. 20ES 3 Presione TIMER. Temporizador - Estándar 10:10 AM NoNoR.0e1c To 01 DVD Date 04/15 Start End Source Mode Edit. 09:00PM 10:00PM CH8 02 DVDFecha04/3I0nicio 09:15PFMin 09:45PMCanCH11Modo 03 --- Hoy --/--09 : 00 - Sony RDR-GX360 | Operating Instructions - Page 127
5 Presione ENTER. Aparecerá el menú Lista de temporizador. Se ilumina el indicador c en la pantalla del panel frontal, y la grabadora está lista para comenzar a grabar. • Si parpadea el indicador c en la pantalla del panel frontal, compruebe que hay un disco grabable insertado y que en el disco hay - Sony RDR-GX360 | Operating Instructions - Page 128
Sony Corporation Printed in China AK68-01519A
-
 1
1 -
 2
2 -
 3
3 -
 4
4 -
 5
5 -
 6
6 -
 7
7 -
8
-
9
-
10
-
11
-
12
-
13
-
14
-
15
-
16
-
17
-
18
-
19
-
20
-
21
-
22
-
23
-
24
-
25
-
26
-
27
-
28
-
29
-
30
-
31
-
32
-
33
-
34
-
35
-
36
-
37
-
38
-
39
-
40
-
41
-
42
-
43
-
44
-
45
-
46
-
47
-
48
-
49
-
50
-
51
-
52
-
53
-
54
-
55
-
56
-
57
-
58
-
59
-
60
-
61
-
62
-
63
-
64
-
65
-
66
-
67
-
68
-
69
-
70
-
71
-
72
-
73
-
74
-
75
-
76
-
77
-
78
-
79
-
80
-
81
-
82
-
83
-
84
-
85
-
86
-
87
-
88
-
89
-
90
-
91
-
92
-
93
-
94
-
95
-
96
-
97
-
98
-
99
-
100
-
101
-
102
-
103
-
104
-
105
-
106
-
107
-
108
-
109
-
110
-
111
-
112
-
113
-
114
-
115
-
116
-
117
-
118
-
119
-
120
-
121
-
122
-
123
-
124
-
125
-
126
-
127
-
128
 |
 |
US
ES
3-296-710-
11
(2)
DVD Recorder
RDR-GX360
Operating Instructions
Manual de instrucciones
© 2008 Sony Corporation