Sony RM-NU1 Quick Setup Guide
Sony RM-NU1 Manual
 |
View all Sony RM-NU1 manuals
Add to My Manuals
Save this manual to your list of manuals |
Sony RM-NU1 manual content summary:
- Sony RM-NU1 | Quick Setup Guide - Page 1
4-192-580-11(1) Network Remote Controller RMN-U1 Quick Setup Guide for wireless networks This Quick Setup Guide explains how to connect this RMN-U1 Network Remote Controller to your wireless home network, and how to use the functions that can be used over the wireless network. Server (PC, etc.) - Sony RM-NU1 | Quick Setup Guide - Page 2
solutions to common problems and details of error messages: "Troubleshooting" in the Operating Instructions The [Network and Sharing Center] window appears. Customer support sites For customers in the USA http://www.esupport.sony.com/ For customers in Europe http://support.sony-europe.com/ For
-
 1
1 -
 2
2
 |
 |

4-192-580-
11
(1)
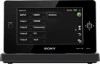
Network Remote Controller
RMN-U1
Quick Setup Guide
for wireless networks
This Quick Setup Guide explains how to connect this RMN-U1 Network Remote Controller to your
wireless home network, and how to use the functions that can be used over the wireless network.
Continued
2
Performing initial setup operations
When the unit is turned on for the first time after you purchase it, some basic setup operations are
required.
To make the network settings, the access point scan method is introduced in this guide.
For details on network connection methods other than the access point scan method:
“Connecting the unit to your home network (network settings)” in the Operating Instructions
Check the following information in advance:
You will be required to select or enter the following information when you make the network settings.
Check the following information in advance and record it in the spaces provided below.
Network name (SSID)*:
Security key (WEP key, WPA/WPA2 key)*:
* This information should be available from a label on your wireless LAN router/access point, from the operating manual, from the
person who set up your wireless network, or from the information provided by your Internet service provider.
1
Turn all the DLNA-compliant devices in your home on.
2
Slide the
/
(power) switch in the direction of the arrow.
The language selection screen appears.
3
Tap the language you want to select, then tap “OK.”
You can select a language from the following languages.
Display
Language
English
English
Français
French
Deutsch
German
Italiano
Italian
Español
Spanish
4
Tap “Access Point Scan,” then tap “Next
.”
The unit automatically starts searching for access points and displays a list of all available access
points. The unit can display a maximum of 20 access points in the list.
5
Tap the desired access point from the list referring to the memo that you
wrote containing the network name (SSID).
6
Tap “Next
.”
The security key input screen appears. If the security key input screen does not appear, proceed to
step 8.
7
Tap the text box and enter your security key (WEP Key, WPA/ WPA2 Key) for
your network, then tap “Next
.”
A confirmation screen appears.
For details on how to input characters, refer to “Entering text”in the operating instructions.
8
Tap “OK.”
“Connection is complete.” appears.
9
Tap “Close.”
A confirmation screen appears.
10
Tap “Close.”
The unit starts registering the DLNA-compliant devices that can be recognized over the network,
automatically. This may take a while.
Tips
You can register up to 20 servers and up to 30 renderers (network controlled players) on this unit.
Tap “
Refresh” to refresh the HOME screen if the desired device is not registered automatically.
©2010 Sony Corporation
Printed in China
Controller (this unit)
Control other servers and renderers
(network controlled players)
Home Network
Wireless LAN router/
access point
Server (PC, etc.)
Stream audio content
Renderer (network
controlled player)
Play audio content stored
on a server
Listening to audio content stored on a server
You can listen to audio content stored on a server (PC, etc) that supports DLNA
standards via your home network.
1
Before you start using the unit
Connecting the AC power adaptor
Connect one end of the AC power adaptor to the DC IN
jack of the remote control charger and the other end to a
wall outlet.
Place the unit on the remote control charger
When you place the unit on the remote control charger,
the CHG indicator lights up in red and charging starts.
The CHG indicator turns off when the unit is fully
charged.
Tips
DLNA is an abbreviation for Digital Living Network Alliance. It is the name of an organization that establishes
guidelines (DLNA guidelines), and it is also the name of the method that allows devices in a house to share digital
content (such as music data, image data, etc.) over a home network. The unit complies with the DLNA standard. You
can listen to music in various ways using the unit together with other DLNA-compliant devices.
The battery of this unit is not sufficiently charged when you purchased the unit. Perform the following operation by
placing the unit on the remote control charger. Or perform it after charging the battery fully.