Sony SLV-N900 Operating Instructions
Sony SLV-N900 - 4 Head Hi-fi Stereo Vhs Video Cassette Recorder Manual
 |
View all Sony SLV-N900 manuals
Add to My Manuals
Save this manual to your list of manuals |
Sony SLV-N900 manual content summary:
- Sony SLV-N900 | Operating Instructions - Page 1
US Video Cassette Recorder Operating Instructions For customers in the USA Many solutions to common problems and service information can be found at www.sony.com/vcrhelp or contact Sony VCR service at 1 (800) VHSSONY. To register your purchase of this product, visit: www.sony.com/productregistration - Sony SLV-N900 | Operating Instructions - Page 2
user to the presence of important operating and maintenance (servicing) instructions contact your Sony dealer. Installing Keep the unit and cassettes away from equipment the VCR and cause damage to the video head and Owner's record The model and serial numbers are located at the rear of the unit. Record - Sony SLV-N900 | Operating Instructions - Page 3
your protection, please read these safety instructions completely before operating the appliance, and keep this manual for future reference. Carefully observe all warnings, precautions and instructions on the appliance, or the one described in the operating instructions and adhere to them. Use Power - Sony SLV-N900 | Operating Instructions - Page 4
supporting instructions. Improper adjustment of other controls may result in damage and will often require extensive work by a qualified technician to restore the set to normal operation. • When the set exhibits a distinct change in performance - this indicates a need for service. Servicing - Sony SLV-N900 | Operating Instructions - Page 5
settings 65 Recording stereo and bilingual programs 66 Searching using various functions 68 Adjusting the picture (tracking) 69 Changing menu options 71 Editing with another VCR Additional Information 73 Antenna information 74 Troubleshooting 76 Specifications 77 Index to parts and controls 82 - Sony SLV-N900 | Operating Instructions - Page 6
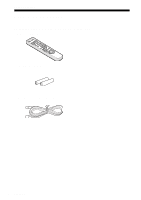
Getting Started Step 1 : Unpacking Check that you have received the following items with the VCR: • Remote commander • Size AA (R6) batteries • 75-ohm coaxial cable with F-type connectors 6 Unpacking - Sony SLV-N900 | Operating Instructions - Page 7
TV does not have the symbol near the remote sensor, this remote commander will not operate the TV. •TV / VIDEO Remote sensor To operate the VCR a Sony TV 123 456 Set •TV / VIDEO to VIDEO and point at the remote sensor at the VCR •TV and point at the remote sensor at the TV Notes • With normal - Sony SLV-N900 | Operating Instructions - Page 8
remote commander to •TV. 2 Hold down ?/1, and enter your TV's code number using the number buttons. Then release ?/1. Now you can use the ?/1, VOL +/-, CH +/-, and TV/VIDEO buttons to control your TV. You can also use the buttons marked with a dot (•) to control a Sony TV. To control the VCR, reset - Sony SLV-N900 | Operating Instructions - Page 9
previously entered will be erased. • If the TV uses a different remote control system from the one programed to work with the VCR, you cannot control your TV with the remote commander. • When you replace the batteries of the remote commander, the code number may change. Set the appropriate code - Sony SLV-N900 | Operating Instructions - Page 10
A digital broadcast service's digital Hookup 5 satellite receiver that is compatible with an infrared remote control Refer to Pages 14 and 15 Pages 16 and 17 Page 18 Page 19 Page 21 After you have completed the connections, follow the instructions for setup. After you have completed the - Sony SLV-N900 | Operating Instructions - Page 11
should be made only as shown in the following instructions. Failure to do so may result in operation that violates the regulations of the Federal Communications Commission regarding the use and operation of RF devices. Never connect the output of the VCR to an antenna or make simultaneous (parallel - Sony SLV-N900 | Operating Instructions - Page 12
inputs, see the following pages for antenna or cable hookups. If your TV has the Control S function, hook up your VCR using the connection shown on page 13. This will allow you to operate your VCR by pointing your VCR's remote commander at your TV. If you are not planning to use your VCR to record - Sony SLV-N900 | Operating Instructions - Page 13
Getting Started C Use this hookup if your TV has the Control S function VCR LINE LINE OUT IN 1 AUDIO VIDEO CONTROL S IN TV CONTROL S OUT IN VIDEO AUDIO OUT AUDIO Stereo receiver AUX IN Video cable (not supplied) Audio/video cable (not supplied) Audio cable (not supplied) Notes • To play a - Sony SLV-N900 | Operating Instructions - Page 14
antenna (you get channels 14 and higher) • Separate VHF and UHF antennas VCR IN OUT Rear of TV VHF/UHF A Match the type of connector on this hookup if you are using a VHF-only antenna (you get channels 2-13 only) VCR IN OUT Rear of TV VHF/UHF A Match the type of connector on your or TV - Sony SLV-N900 | Operating Instructions - Page 15
/disabling channels manually" on page 31. Notes • If you connect the AC power cord before the antenna connections are completed, the channels may be incorrectly set. If this happens, see "Step 6 : Presetting channels" on page 29. • Do not press any buttons on the VCR or remote commander during - Sony SLV-N900 | Operating Instructions - Page 16
your cable system scrambles only a few channels. What you can do with this hookup • Record any unscrambled channel by selecting the channel on the VCR What you cannot do • Record scrambled channels that require a cable box Wall VCR IN OUT Connect this cable directly to your TV if you do not have - Sony SLV-N900 | Operating Instructions - Page 17
/disabling channels manually" on page 31. Notes • If you connect the AC power cord before the antenna connections are completed, the channels may be incorrectly set. If this happens, see "Step 6 : Presetting channels" on page 29. • Do not press any buttons on the VCR or remote commander during - Sony SLV-N900 | Operating Instructions - Page 18
channel by selecting the channel on the cable box What you cannot do • Record with the cable box turned off • Record one channel while watching another channel Wall Cable box IN OUT VCR IN OUT Rear of TV VHF/UHF A Match the type of connector on your or TV: A, B, or C. VHF For connector - Sony SLV-N900 | Operating Instructions - Page 19
cable box, especially if your cable system scrambles all or most channels. This hookup allows the VCR's cable box/satellite receiver control feature to control the channels on the cable box, simplifying the recording process. A list of compatible cable boxes is on page 36. What you can do with this - Sony SLV-N900 | Operating Instructions - Page 20
After you have completed hookup... After you have completed hookup, plug the VCR into the AC outlet and see "Step 4 : Selecting a language" on page 23. AC power cord to AC outlet 20 Hookups - Sony SLV-N900 | Operating Instructions - Page 21
have a digital satellite receiver that is compatible with an infrared remote control. It allows the VCR's cable box/satellite receiver control feature to control the channel on the digital satellite receiver, simplifying the recording process. A list of compatible digital satellite receivers is on - Sony SLV-N900 | Operating Instructions - Page 22
on all the time. - Turn off the display (menu screen, channel number, etc.) of the digital satellite receiver. - To record or receive locked channels, unlock the channel before the VCR starts recording. - To set pay-per-view programs in the timer setting, order the pay-per-view program before the - Sony SLV-N900 | Operating Instructions - Page 23
TV is connected to the VCR using A/V connections, set the TV to video input. • Press TV/VIDEO to display the VIDEO indicator in the VCR's display window. MENU M/m/, 1 MENU Press MENU. MAIN MENU Timer set / check Clock set Tuner preset Cable Box / Sat. Control Advanced options Language / Idioma - Sony SLV-N900 | Operating Instructions - Page 24
TV to video input. • Press TV/VIDEO to display the VIDEO indicator in the VCR's display window. 1 MENU Press MENU. 2 Press M/m to move the cursor (B) to "Clock set," then press OK. PLAY OK MENU M/m/ - Sony SLV-N900 | Operating Instructions - Page 25
Hawaii) y AUTO Select : Vv End : OK Set : Bb Quit : MENU • For "Daylight Saving" Select YES or NO (standard time), or AUTO to have the VCR automatically set the daylight saving time. CLOCK SET Clock set CH: Time zone: Daylight Saving: [ AUTO ] [ AUTO ] [ NO ] Select : Vv End : OK Set : Bb - Sony SLV-N900 | Operating Instructions - Page 26
Notes • The clock cannot be set automatically if you do not receive a channel that carries a time signal in your area. If so, set the clock manually (page 27). • If there are only a few channels in your area that carry time signals, setting the clock automatically may take up to about 20 - Sony SLV-N900 | Operating Instructions - Page 27
is connected to the VCR using A/V connections, set the TV to video input. • Press TV/VIDEO to display the VIDEO indicator in the VCR's display window. MENU M/m/, OK 1 MENU Press MENU. MAIN MENU Timer set / check Clock set Tuner preset Cable Box / Sat. Control Advanced options Language / Idioma - Sony SLV-N900 | Operating Instructions - Page 28
4 Press M/m to set the month. PLAY OK CLOCK SET DATE YEAR TIME 9 / 0 1 2 0 0 3 MON 12 : 0 0 AM Select : Bb End : OK Set : Vv Quit : MENU 5 Press , to flash the day and press M/m to set the day. PLAY OK CLOCK SET DATE YEAR TIME 9 / 2 8 2 0 0 3 SUN 12 : 0 0 AM Select : Bb End : - Sony SLV-N900 | Operating Instructions - Page 29
to video input. • Press TV/VIDEO to display the VIDEO indicator in the VCR's display window. 1 MENU Press MENU. 2 Press M/m to move the cursor (B) to "Tuner preset," then press OK. PLAY OK MENU M/m/ - Sony SLV-N900 | Operating Instructions - Page 30
CABLE. OK • To preset VHF and UHF channels: PLAY Press - Sony SLV-N900 | Operating Instructions - Page 31
, set the TV to video input. • Press TV/VIDEO to display the VIDEO indicator in the VCR's display window. 123 456 789 0 Number buttons ENTER CH +/- MENU M/m/ - Sony SLV-N900 | Operating Instructions - Page 32
3 Press M/m to move the cursor (B) to "Channel add/erase," then press OK. PLAY OK 4 1 2 3 • To preset a channel: 4 5 6 1 Press the number buttons to enter the 789 channel number, then press ENTER. 0 2 Press ,, then press OK or MENU. PLAY OK MENU Channel to be preset CHANNEL ADD / ERASE - Sony SLV-N900 | Operating Instructions - Page 33
boxes or digital satellite receivers equipped with an infrared remote control. With the cable box/satellite receiver control, the VCR controls channels on the cable box or digital satellite receiver for timer recording. You can also use the VCR's remote commander to change channels on the cable box - Sony SLV-N900 | Operating Instructions - Page 34
] [ CH3 ] Select : Vv End : OK Set : Bb Quit : MENU 3 Press M/m to move the cursor (B) to "Cable Box/Sat." PLAY OK CABLE BOX / SAT. CONTROL Cable Box / Sat. Brand Code No. Channel / Line out [ OF F ] [--- ] [ CH3 ] Select : Vv End : OK Set : Bb Quit : MENU 4 Press - Sony SLV-N900 | Operating Instructions - Page 35
8 If you want to control a cable box, press - Sony SLV-N900 | Operating Instructions - Page 36
by one until you come to the correct code for your equipment. Note • Cable box/satellite receiver control may not be compatible with all brands of cable boxes and DirecTV receivers. • Only Sony digital cable box is available for Cablevision. Cable box brand Anvision Archer Cable Star Cable View - Sony SLV-N900 | Operating Instructions - Page 37
view 123 456 789 0 To check the cable box/satellite receiver control setting 1 Press CH +/- on the remote commander. Does the channel indicator on the cable box or digital satellite receiver change? (Point the remote commander at the VCR, not at the cable box or digital satellite receiver.) 2 Press - Sony SLV-N900 | Operating Instructions - Page 38
. • Place the cable box or digital satellite receiver on top of the VCR. Do not place the cable box or digital satellite receiver and VCR away form each other. • Try the setup again making sure to use the correct control code. If the cable box still does not respond, try the other codes - Sony SLV-N900 | Operating Instructions - Page 39
the program you want and the VCR is automatically programed to record that show. It's that simple. How to set up your VCR Setting up your VCR involves coordinating the TV channel number (the number you turn to on your TV or VCR to watch a program) with the guide channel (the number that is assigned - Sony SLV-N900 | Operating Instructions - Page 40
MENU. MENU MAIN MENU Timer set / check Clock set Tuner preset Cable Box / Sat. Control Advanced options Language / Idioma / Langue Select : Vv Set : OK Quit : MENU 2 CABLE ] Auto preset Channel add / erase Guide channel setup Select : Vv End : OK Set : Bb Quit : MENU 40 Setting up the - Sony SLV-N900 | Operating Instructions - Page 41
cable box out put channels. Press - Sony SLV-N900 | Operating Instructions - Page 42
a tape 123 456 789 0 ?/1 Z EJECT CLEAR DISPLAY REPLAY X PAUSE COMMERCIAL SKIP H PLAY M FF x STOP m REW 1 Turn on your TV and set it to the video channel. 2 Insert a tape. The VCR turns on and starts playing automatically if you insert a tape with its safety tab removed. 42 Playing a tape - Sony SLV-N900 | Operating Instructions - Page 43
the scene you want to watch again. During playback, press REPLAY. The VCR rewinds the tape about ten seconds on the counter for each press of and restart playback. During playback, press COMMERCIAL SKIP up to four times. The VCR skips the tape 30 seconds on the counter for each press of the button, - Sony SLV-N900 | Operating Instructions - Page 44
the VCR (either VHS or S-VHS). When S-VHS tapes are played in the SLV-N900, the enhanced resolution will not be visible on screen; there may also be picture distortion while playing the S-VHS tape in slow motion or while utilizing other special playback modes. The SLV-N900 will not record in S-VHS - Sony SLV-N900 | Operating Instructions - Page 45
programs 123 456 789 0 TV/VIDEO COUNTER/ REMAIN DISPLAY ENTER SP/EP CH +/- INPUT SELECT z REC x STOP Basic Operations 1 Turn on your TV and set it to the video channel. To record from a cable box, turn it on. 2 Insert a tape with its safety tab in place. continued Recording TV programs 45 - Sony SLV-N900 | Operating Instructions - Page 46
3 • CH Press CH +/- to select the channel or line input video source you want to record. 4 SP / EP Press SP/EP to select the tape speed, SP or EP. EP (Extended Play) provides recording time three times as long as SP (Standard Play). However, SP produces better picture and audio quality. 5 - Sony SLV-N900 | Operating Instructions - Page 47
TV program while recording 1 Press TV/VIDEO to turn off the VIDEO indicator in the display window. 2 If your TV is connected to the VCR using A/V connections, set the TV to the TV's antenna input; if not, skip this step. 3 Select another channel on the TV. To save a recording To prevent accidental - Sony SLV-N900 | Operating Instructions - Page 48
start... • When using a cable box, turn it on. • Insert a tape with its safety tab in place. Make sure the tape is longer than the total recording time. 1 DIAL TIMER Press DIAL TIMER. "DATE" and "TODAY" appear alternately in the display window. If the date and time are not set, "MONTH" will - Sony SLV-N900 | Operating Instructions - Page 49
START" and "Current time" appear alternately in the display window. Basic Operations 4 DIAL TIMER Turn DIAL TIMER to set the recording start time. You can set the recording start time in 15 minute intervals or adjust the time in one minute intervals by pressing the CHANNEL +/- buttons. CHANNEL - Sony SLV-N900 | Operating Instructions - Page 50
SELECT to display "L1" or "L2." INPUT SELECT 9 DIAL TIMER Press DIAL TIMER to complete the setting. "OK" appears in the display window for about five seconds. The TIMER indicator appears in the display window and the VCR stands by for recording. When using a cable box, leave it on. To return - Sony SLV-N900 | Operating Instructions - Page 51
a Dial Timer setting, press x STOP on the VCR while you are making the setting. • The program is recorded in the current tape speed. To change the tape Notes • If eight programs have already been set using the VCR Plus+C3 system or the manual timer setting, "FULL" appears in the display window for - Sony SLV-N900 | Operating Instructions - Page 52
Demonstration Mode that allows the user, such as a salesperson, recordings. Doing so may cause the settings to be inaccurate. To activate the Demonstration Mode Press X PAUSE on the VCR using the Demonstration Mode will remain. Be sure to manually cancel the timer settings before you use the Dial - Sony SLV-N900 | Operating Instructions - Page 53
Basic Operations Recording TV programs using the VCR Plus+C3® system Just enter the PlusCode number listed in the TV program guide. The date, time and channel number of that program are set automatically. You can preset up to eight programs together with the DIAL TIMER and manual timer settings at - Sony SLV-N900 | Operating Instructions - Page 54
OK Quit : MENU 4 Press M/m to move the cursor (B) to "Mode." PLAY OK 5 Press - Sony SLV-N900 | Operating Instructions - Page 55
MENU to exit the menu. MENU 10 Press ?/1 to turn off the VCR. The TIMER indicator appears in the display window and the VCR stands by for recording. When using a cable box, leave it on. To stop recording To stop the VCR while recording, press x STOP. To use the Auto Tape Speed function When you - Sony SLV-N900 | Operating Instructions - Page 56
the tape is longer than the total recording time. 123 456 789 0 ?/1 CH +/- INPUT SELECT MENU M/m/ - Sony SLV-N900 | Operating Instructions - Page 57
Press MENU to exit the menu. 7 Press ?/1 to turn off the VCR. The TIMER indicator appears in the display window and the VCR stands by for recording. When using a cable box, leave it on. To stop recording To stop the VCR while recording, press x STOP. continued Setting the timer manually 57 - Sony SLV-N900 | Operating Instructions - Page 58
The TIMER indicator disappears from the display window and the VCR switches on. Remember to press ?/1 to reset the VCR to the timer recording standby mode after using the VCR. You can also do the following tasks while the VCR is recording: • Reset the counter (page 44). • Display tape information on - Sony SLV-N900 | Operating Instructions - Page 59
except for timer recordings. To unlock the VCR Hold down ?/1 POWER on the VCR until "LOC" disappears from the display window. The VCR is unlocked and turns on. To stop timer recording while the VCR is locked, press x STOP. The recording stops and the VCR is unlocked. Note • The VCR will be unlocked - Sony SLV-N900 | Operating Instructions - Page 60
During playback, press ×2. Play in slow motion During playback or pause, press y SLOW. Play frame by frame During pause, press M FF on the remote commander. To resume normal playback Press H PLAY. Using the shuttle ring With the shuttle ring, you can operate a variety of playback options. There - Sony SLV-N900 | Operating Instructions - Page 61
on and starts playback automatically by pressing H PLAY on the VCR with the VCR power turned off. Notes • The sound is muted during these operations. • Tapes recorded in the LP mode on other VCRs can be played back on this VCR but the picture quality cannot be guaranteed. • The picture may show - Sony SLV-N900 | Operating Instructions - Page 62
duration time. Each press advances the time in increments of 30 minutes. 0:30 1:00 3:30 4:00 Normal recording The tape counter decreases minute by minute to 0:00, then the VCR stops recording and turns off automatically. To extend the duration Press z REC repeatedly to set a new duration time. To - Sony SLV-N900 | Operating Instructions - Page 63
Checking/changing/canceling timer settings Before you start... • Turn on the TV and set it to the video channel. ?/1 123 456 789 0 CLEAR MENU M/m/ - Sony SLV-N900 | Operating Instructions - Page 64
to change a setting, go on to the next step. • If you do not need to change the settings, press MENU, then turn off the VCR to return to recording standby. 4 Press M/m to move the cursor (B) to the setting you want to change or cancel. • To change the setting, press - Sony SLV-N900 | Operating Instructions - Page 65
Monaural sound on the normal audio track On-screen display HI-FI LEFT RIGHT MONO Display window Hi-Fi Hi-Fi Hi-Fi No indicator How sound is recorded on a video tape The VCR records sound onto two separate tracks. Hi-fi audio is recorded onto the main track along with the picture. Monaural sound - Sony SLV-N900 | Operating Instructions - Page 66
marks the tape with an index signal at the point where each recording begins. Use these signals as references to find a specific recording. 1 Insert an indexed tape into the VCR. 2 Press SEARCH. Scan and play: Press [ B ] or [ b ] Go to [ 0 : 0 0 : 0 0 ] : Press [ V ] End search: Press - Sony SLV-N900 | Operating Instructions - Page 67
beginning of a blank space. If no blank space is found, the VCR reaches the end and the tape will stop. End search 0 : 0 1 : 3 0 SP Note • Once in recording mode, if the VCR is put in pause and then released to start the recording, no index mark will be inserted. An index mark will be inserted - Sony SLV-N900 | Operating Instructions - Page 68
automatically adjusts the tracking when playing a tape, distortion may occur if the recording is in poor condition. In this case, manually adjust the tracking. Press TRACKING +/- on the VCR to display the tracking meter. The distortion should disappear as you press one of the two tracking buttons - Sony SLV-N900 | Operating Instructions - Page 69
to turn off Auto repeat. Auto power off • 1Hr to turn off the VCR automatically one hour after the last operation. • 2Hr to turn off the VCR automatically two hours after the last operation. • OFF to set no specific time to turn off. Power save • ON to turn off the indicators in the - Sony SLV-N900 | Operating Instructions - Page 70
channel), whichever channel is not used in your area. If both are used, set the "VCR Output CH" to either channel. 2 Press ?/1 to turn on the VCR. 3 Press TV/VIDEO to turn on the VCR indicator in the VCR's display window. 4 Press CH +/- to display a channel number in the display window. Select an - Sony SLV-N900 | Operating Instructions - Page 71
and left channels. If you connect to the AUDIO R (red) jack, the sound is recorded only on the right channel. • If you connected this VCR to both the LINE IN and LINE OUT jacks of the other VCR, select the input correctly to prevent a humming noise. • You can use the LINE IN 1 jacks for - Sony SLV-N900 | Operating Instructions - Page 72
Operation (when recording on this VCR) Before you start editing • Turn on the VCR and the TV and set it to the video channel. • Press INPUT SELECT or CHANNEL +/- to display "L1" or "L2" in the display window. • Press SP/EP to select the tape speed, SP or EP. X PAUSE z REC 1 - Sony SLV-N900 | Operating Instructions - Page 73
use an antenna connector (not supplied) to connect the antenna to the VCR. 300-ohm twin lead cable Antenna connector (not supplied) 1 Loosen UHF/VHF band separator/ mixer (not supplied) to connect the antenna to the VCR. 300-ohm twin lead cable UHF/VHF band separator/ mixer (not supplied) 75 - Sony SLV-N900 | Operating Instructions - Page 74
for the VCR. If you are using a monitor, set it to video input. • Adjust the tracking with the TRACKING +/- buttons. • The video heads are dirty (see the last page of "Troubleshooting"). Clean the video heads using a Sony video head cleaning cassette. If a Sony cleaning cassette is not available - Sony SLV-N900 | Operating Instructions - Page 75
the VCR. • Replace all the batteries in the remote commander with new ones if they are weak. • Make sure the •TV / VIDEO switch is set correctly. • If you are not using Control S, make sure that both miniplugs are disconnected. • Make sure the "Cable Box/Sat." option is set to OFF. • The recording - Sony SLV-N900 | Operating Instructions - Page 76
Specifications System Format VHS NTSC standard Video recording system Rotary head helical scanning FM system Video heads Double azimuth four heads Video signal NTSC color, EIA standards Tape speed SP: 33.35 mm/s (1 38 inches/s) EP: 11.12 mm/s ( 7 16 inches/s) LP: 16.67 mm/s ( 11 16 - Sony SLV-N900 | Operating Instructions - Page 77
parts and controls Refer to the pages indicated in parentheses ( ) for details. Front panel A ?/1 POWER switch (55) (57) B Remote sensor record) button (46) (62) (72) K x STOP button* (43) (72) L X PAUSE button (43) (72) M CHANNEL/TRACKING +/- buttons* (46) (68) N DIAL TIMER* (48) O LINE-2 IN VIDEO - Sony SLV-N900 | Operating Instructions - Page 78
Display window A TIMER/recording indicator (55) (57) B LP indicator (46) C Tape indicator (46) D VIDEO indicator (47) (70) E Time counter/clock/line/channel indicator (44) (46) (72) F SAP indicator (65) G Hi-Fi indicator (65) H SP/EP indicator (46) 78 Index to parts and controls - Sony SLV-N900 | Operating Instructions - Page 79
Rear panel A AC power cord (10) (15) (17) B LINE OUT AUDIO R/AUDIO L/VIDEO jacks (12) C LINE IN 1 AUDIO R/AUDIO L/VIDEO jacks (71) D RF IN (FROM ANT.) connector (14) (16) (18) E RF OUT (TO TV) connector (14) (16) (18) F CONTROL S IN jack Additional Information continued Index to parts and - Sony SLV-N900 | Operating Instructions - Page 80
Remote commander 123 456 789 0 A •TV / VIDEO switch (7) B Z EJECT button (43) C TV/VIDEO button (8) (47) D CLEAR button (44) (64) E DISPLAY button (46) F SP (Standard Play)/EP (Extended Play) button (46) G INPUT SELECT button (47) (72) H z REC (record a tactile dot. 80 Index to parts and controls - Sony SLV-N900 | Operating Instructions - Page 81
789 0 L ?/1 (power) switch (8) (55) (57) M COUNTER/REMAIN button (46) N AUDIO MONITOR button* (65) O VCR Plus+ button* (53) P Number buttons* (47) (54) Q ENTER button (47) R CH (channel) +/- buttons* (8) ( 5 and CH + buttons have a tactile dot. Additional Information Index to parts and controls 81 - Sony SLV-N900 | Operating Instructions - Page 82
39 Child Lock 59 Cleaning the video heads 74 Clock setting 24 Commercial Skip 43 mode 46 H Hi-fi audio track 65 L Language selecting 23 Locking the VCR 59 LP mode 47 Recording 45 bilingual programs 65 SAP broadcasts 65 saving 47 stereo broadcasts 65 timer setting 56 using Dial Timer 48 using the VCR - Sony SLV-N900 | Operating Instructions - Page 83
- Sony SLV-N900 | Operating Instructions - Page 84
Hookup 4 To play a tape 1 Set the TV to channel 3 or 4 (or to video input, if you made A/V connections). 2 Insert a tape and pressH PLAY. To record a program 1 Turn on the cable box. 2 Press VCR Plus+ on the remote commander. 3 Enter the PlusCode number. 4 Select ONCE, DAILY, or WEEKLY, then press
-
 1
1 -
 2
2 -
 3
3 -
 4
4 -
 5
5 -
 6
6 -
 7
7 -
8
-
9
-
10
-
11
-
12
-
13
-
14
-
15
-
16
-
17
-
18
-
19
-
20
-
21
-
22
-
23
-
24
-
25
-
26
-
27
-
28
-
29
-
30
-
31
-
32
-
33
-
34
-
35
-
36
-
37
-
38
-
39
-
40
-
41
-
42
-
43
-
44
-
45
-
46
-
47
-
48
-
49
-
50
-
51
-
52
-
53
-
54
-
55
-
56
-
57
-
58
-
59
-
60
-
61
-
62
-
63
-
64
-
65
-
66
-
67
-
68
-
69
-
70
-
71
-
72
-
73
-
74
-
75
-
76
-
77
-
78
-
79
-
80
-
81
-
82
-
83
-
84
 |
 |

3-081-016-
11
(1) US
Video Cassette
Recorder
Operating Instructions
For customers in the USA
Many solutions to common problems and service information can be found at
www.sony.com/vcrhelp
or contact Sony VCR service at 1 (800) VHS-
SONY.
To register your purchase of this product, visit:
www.sony.com/productregistration
For all other Sony product questions, please call
Sony Customer
Information Services Company
at 1-800-222-SONY (7669).
For Customers in Canada
If this product is not working properly, please call 1-877-602-2008 for
Peace of Mind Warranty Replacement service.
For other product related questions please contact our
Customer
Information Service Centre
at 1-877-899-7669 or write to us at: Customer
Information Service 115 Gordon Baker Road, Toronto, Ontario, M2H 3R6
SLV-N900
© 2003 Sony Corporation