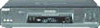
Sony SLV-N99 Operating Instructions
Sony SLV-N99 - Video Cassette Recorder Manual
 |
View all Sony SLV-N99 manuals
Add to My Manuals
Save this manual to your list of manuals |
Sony SLV-N99 manual content summary:
- Sony SLV-N99 | Operating Instructions - Page 1
Cassette Recorder Operating Instructions For customers in the U.S.A. If you have any questions about your Sony VCR, you may call Sony Customer Information Services Company at 1-800-VHS-SONY (847-7669). For all other Sony product questions, please call Sony Customer Information Services Company at - Sony SLV-N99 | Operating Instructions - Page 2
magnitude to constitute a risk of electric shock to persons. This symbol is intended to alert the user to the presence of important operating and maintenance (servicing) instructions in the literature accompanying the appliance. CAUTION To prevent electric shock, do not use this polarized AC - Sony SLV-N99 | Operating Instructions - Page 3
instructions completely before operating the appliance, and keep this manual for future reference. Carefully observe all warnings, precautions and instructions on the appliance, or the one described in the operating instructions or short out parts that could result in SLV-N99] [3-071-065-11 (1)] - Sony SLV-N99 | Operating Instructions - Page 4
Check Upon completion of any service or repairs to the set, ask the service technician to perform routine safety checks (as specified by the manufacturer) to determine that the set is in safe operating condition. 4 Important Safeguards filename[010WAR.fm] model name1[SLV-N99] [3-071-065-11 (1)] - Sony SLV-N99 | Operating Instructions - Page 5
VCR Additional Information 92 General setup information 94 Troubleshooting 96 Specifications 97 Index to parts and controls 102 Index Back Cover Quick reference to using the VCR VCR and/or program owner. Table of contents 5 filename[010COVTOC.fm] model name1[SLV-N99] [3-071-065-11 (1)] - Sony SLV-N99 | Operating Instructions - Page 6
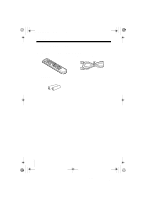
Friday, November 30, 2001 1:47 PM Getting Started Step 1 : Unpacking Check that you have received the following items with the VCR: • Remote commander • 75-ohm coaxial cable with F-type connectors • Size AA (R6) batteries 6 Unpacking filename[010GET.fm] model name1[SLV-N99] [3-071-065-11(1)] - Sony SLV-N99 | Operating Instructions - Page 7
(+) end clicks into position. Using the remote commander You can use this remote commander to operate this VCR and a Sony TV. Buttons on the remote commander marked with a dot (•) can be used to operate your Sony TV. Remote sensor •TV / VIDEO To operate the VCR a Sony TV 123 Set •TV / VIDEO to - Sony SLV-N99 | Operating Instructions - Page 8
the AUDIO MONITOR button, your TV's menu may appear on the TV screen. To exit the TV menu, press the MENU button on the TV remote commander or wait until the menu disappears automatically. 8 Setting up the remote commander filename[010GET.fm] model name1[SLV-N99] [3-071-065-11(1)] - Sony SLV-N99 | Operating Instructions - Page 9
you can find complete, step-by-step instructions. After you've completed the setup, you're ready to use your VCR. Procedures differ depending on the hookup you provided, see your nearest Sony dealer or qualified technician. Hookups 9 filename[010GET.fm] model name1[SLV-N99] [3-071-065-11(1)] - Sony SLV-N99 | Operating Instructions - Page 10
This will allow you to operate your VCR by pointing your VCR's remote commander at your TV. If you're not planning to use your VCR to record programs, you're finished setting up the VCR after you've made the IN jack on your TV. 10 Hookups filename[010GET.fm] model name1[SLV-N99] [3-071-065-11(1)] - Sony SLV-N99 | Operating Instructions - Page 11
instructions. Failure to do so may result in operation that violates the regulations of the Federal Communications Commission regarding the use and operation of RF devices. Never connect the output of the VCR as practical. Hookups 11 filename[010GET.fm] model name1[SLV-N99] [3-071-065-11(1)] - Sony SLV-N99 | Operating Instructions - Page 12
especially if your cable system scrambles all or most channels. This hookup allows the VCR's cable box control feature to control the channels on the cable box, simplifying front of the remote sensor on the cable box. Side view 12 Hookups filename[010GET.fm] model name1[SLV-N99] [3-071-065-11(1)] - Sony SLV-N99 | Operating Instructions - Page 13
2 Turn on your cable box. 3 Press EASY SET UP on the VCR. EASY SET UP 1 The LANGUAGE menu appears. Change the on-screen display and press OK. For details, see page 29. SET UP CLOCK SET AUTO MANUAL SELECT : NEXT : OK CANCEL : EASY SET UP 3 The SMART CHANNEL name1[SLV-N99] [3-071-065-11(1)] - Sony SLV-N99 | Operating Instructions - Page 14
if the channels in your area do not carry time signals, set the clock manually. For details, see page 33. Notes • To use the Auto Clock Set whenever the VCR is turned off. During this time, the VCR will search for a time signal. 14 Hookups filename[010GET.fm] model name1[SLV-N99] [3-071-065-11(1)] - Sony SLV-N99 | Operating Instructions - Page 15
receiver that is compatible with the Cable Mouse. It allows the VCR's cable box control feature to control the channel on the digital over the front of the remote sensor on the digital satellite receiver. Side view continued Hookups 15 filename[010GET.fm] model name1[SLV-N99] [3-071-065-11(1)] - Sony SLV-N99 | Operating Instructions - Page 16
on your digital satellite receiver. 3 Press EASY SET UP on the VCR. EASY SET UP 1 The LANGUAGE menu appears. Change the on-screen and press OK. For details, see page 29. SET UP CLOCK SET AUTO MANUAL SELECT : NEXT : OK CANCEL : EASY SET UP 3 The SMART CHANNEL name1[SLV-N99] [3-071-065-11(1)] - Sony SLV-N99 | Operating Instructions - Page 17
manually. For details, see VCR starts recording. - To set pay-per-view programs in the timer setting, order the pay-per-view program before the VCR starts recording. - Some programs are copy protected. You cannot record these programs. Hookups 17 filename[010GET.fm] model name1[SLV-N99 - Sony SLV-N99 | Operating Instructions - Page 18
Record any unscrambled channel by selecting the channel on the VCR What you can't do • Record scrambled channels that require a cable box Wall VCR VHF/UHF IN OUT Connect this cable directly to your TV is C required. UHF 18 Hookups filename[010GET.fm] model name1[SLV-N99] [3-071-065-11(1)] - Sony SLV-N99 | Operating Instructions - Page 19
to adjust the RF UNIT switch. 2 Press EASY SET UP on the VCR. EASY SET UP 1 The LANGUAGE menu appears. Change the on-screen and press OK. For details, see page 29. SET UP CLOCK SET AUTO MANUAL SELECT : NEXT : OK CANCEL : EASY SET UP 3 The SMART CHANNEL MAPPING name1[SLV-N99] [3-071-065-11(1)] - Sony SLV-N99 | Operating Instructions - Page 20
whenever you turn off the VCR, it checks the time manually. For details, see page 33. Note • If the clock is not set, "ACS" will flash in the display window whenever the VCR is turned off. During this time, the VCR will search for a time signal. 20 Hookups filename[010GET.fm] model name1[SLV-N99 - Sony SLV-N99 | Operating Instructions - Page 21
channels 14 and higher) • UHF-only antenna (you get channels 14 and higher) • Separate VHF and UHF antennas VCR VHF/UHF IN OUT Rear of TV VHF/UHF A Match the type of connector on your or VHF TV: A, see page 93. continued Hookups 21 filename[010GET.fm] model name1[SLV-N99] [3-071-065-11(1)] - Sony SLV-N99 | Operating Instructions - Page 22
to adjust the RF UNIT switch. 2 Press EASY SET UP on the VCR. EASY SET UP 1 The LANGUAGE menu appears. Change the on-screen and press OK. For details, see page 29. SET UP CLOCK SET AUTO MANUAL SELECT : NEXT : OK CANCEL : EASY SET UP 3 The SMART CHANNEL MAPPING name1[SLV-N99] [3-071-065-11(1)] - Sony SLV-N99 | Operating Instructions - Page 23
carry time signals, set the clock manually. For details, see page 33. Note • If the clock is not set, "ACS" will flash in the display window whenever the VCR is turned off. During this time, the VCR will search for a time signal. Hookups 23 filename[010GET.fm] model name1[SLV-N99] [3-071-065-11(1)] - Sony SLV-N99 | Operating Instructions - Page 24
cable box What you can't do • Record with the cable box turned off • Record one channel while watching another channel Wall Cable box IN OUT VCR VHF/UHF IN OUT Rear of TV VHF/UHF A Match the type of connector on your or TV: A, B, or C. VHF For connector B types B and C, no - Sony SLV-N99 | Operating Instructions - Page 25
2 Turn on your cable box. 3 Press EASY SET UP on the VCR. EASY SET UP 1 The LANGUAGE menu appears. Change the on-screen display FRANÇAIS 2 The CLOCK SET menu appears. Select MANUAL and press OK. Then set the clock manually and press OK. For details, see page 34. name1[SLV-N99] [3-071-065-11(1)] - Sony SLV-N99 | Operating Instructions - Page 26
VCR Plus+ GOLD system for recording, go to the pages listed below. Find the VCR Plus+ GOLD system Channel Listing in your program guide to manually select VCR is turned off. During this time, the VCR will search for a time signal. 26 Hookups filename[010GET.fm] model name1[SLV-N99] [3-071-065-11(1)] - Sony SLV-N99 | Operating Instructions - Page 27
and press OK. SETTINGS When using the EASY SET UP procedure, skip steps 1 and 2. TUNER PRESET SET VCR Plus+ sys. CH CABLE BOX CONTROL CLOCK SET LANGUAGE RETURN PLAY OK SELECT : SET : OK QUIT : and press OK. Selecting a language 27 filename[010GET.fm] model name1[SLV-N99] [3-071-065-11(1)] - Sony SLV-N99 | Operating Instructions - Page 28
SET VCR Plus+ sys. CH CABLE BOX CONTROL CLOCK SET LANGUAGE RETURN PLAY OK SELECT : SET : OK QUIT : MENU 2 Press M/m to highlight CLOCK SET, then press OK. PLAY OK CLOCK SET AUTO MANUAL SELECT : SET : OK QUIT : MENU 28 Setting the clock filename[010GET.fm] model name1[SLV-N99] [3-071 - Sony SLV-N99 | Operating Instructions - Page 29
that carries a time signal in your area. If so, set the clock manually (see page 33). • If there are only a few channels in your whenever the VCR is turned off. During this time, the VCR will search for a time signal. continued Setting the clock 29 filename[010GET.fm] model name1[SLV-N99] [3-071- - Sony SLV-N99 | Operating Instructions - Page 30
AUTO CLOCK SET CH TIME ZONE DAYLIGHT SAVING RETURN YES NO SELECT : SET : OK QUIT : MENU 30 Setting the clock filename[010GET.fm] model name1[SLV-N99] [3-071-065-11(1)] - Sony SLV-N99 | Operating Instructions - Page 31
OFF (standard time), or AUTO CLOCK SET AUTO to have the VCR automatically set FULL AUTO CLOCK SET CH NO 123 TIME ZONE the daylight Set function, turn off the VCR. "ACS" will flash in the display window. continued Setting the clock 31 filename[010GET.fm] model name1[SLV-N99] [3-071-065-11(1)] - Sony SLV-N99 | Operating Instructions - Page 32
a channel that carries a time signal is found whenever you turn off the VCR. If you want to stop the search, change the channel on the cable box with the channel buttons either on the VCR or on the remote commander. 32 Setting the clock filename[010GET.fm] model name1[SLV-N99] [3-071-065-11(1)] - Sony SLV-N99 | Operating Instructions - Page 33
SET VCR Plus+ sys. CH CABLE BOX CONTROL CLOCK SET LANGUAGE RETURN PLAY OK SELECT : SET : OK QUIT : MENU 2 Press M/m to highlight CLOCK SET, then press OK. PLAY OK CLOCK SET AUTO MANUAL SELECT : SET : OK QUIT : MENU continued Setting the clock 33 filename[010GET.fm] model name1[SLV-N99 - Sony SLV-N99 | Operating Instructions - Page 34
010GET.fm Page 34 Friday, November 30, 2001 1:47 PM 3 Press M/m to highlight MANUAL, then press OK. PLAY OK CLOCK SET 1 / 1 / 2 0 0 2 TUE 1 2 : 0 0 AM 4 manually change the clock setting to the correct year. 34 Setting the clock filename[010GET.fm] model name1[SLV-N99] [3-071-065-11(1)] - Sony SLV-N99 | Operating Instructions - Page 35
VCR is turned off. To use cable box control, you need to connect the Sony VCR, contact your cable operator VCR Plus+ sys. CH CABLE BOX CONTROL CLOCK SET LANGUAGE RETURN PLAY OK SELECT : SET : OK QUIT : MENU continued Setting up the cable box control 35 filename[010GET.fm] model name1[SLV-N99 - Sony SLV-N99 | Operating Instructions - Page 36
code number from the following chart. SELECT : SET : OK QUIT : MENU PLAY OK 36 Setting up the cable box control filename[010GET.fm] model name1[SLV-N99] [3-071-065-11(1)] - Sony SLV-N99 | Operating Instructions - Page 37
, 081 022, 287, 487 020, 031, 045, 270, 284 022 164, 326 continued Setting up the cable box control 37 filename[010GET.fm] model name1[SLV-N99] [3-071-065-11(1)] - Sony SLV-N99 | Operating Instructions - Page 38
255 038, 071, 074, 122, 222, 269, 300 011, 065, 536 411 576 38 Setting up the cable box control filename[010GET.fm] model name1[SLV-N99] [3-071-065-11(1)] - Sony SLV-N99 | Operating Instructions - Page 39
cable box or digital satellite receiver away from the VCR. • Point the remote commander at the VCR, not at the cable box or digital satellite receiver. Side view : Signal flow 123 456 789 0 continued Setting up the cable box control 39 filename[010GET.fm] model name1[SLV-N99] [3-071-065-11(1)] - Sony SLV-N99 | Operating Instructions - Page 40
off the VCR when you plug in or unplug the Cable Mouse. If you unplug the Cable Mouse and plug it in again, turn on the VCR before you use the cable box or digital satellite receiver control feature. 40 Setting up the cable box control filename[010GET.fm] model name1[SLV-N99] [3-071 - Sony SLV-N99 | Operating Instructions - Page 41
if you are using a cable box or digital satellite receiver control.) This VCR is capable of receiving VHF channels 2 to 13, UHF channels 14 to OK MANUAL SET AFT FINE TUNING RETURN ADD ON SELECT : SET : OK QUIT : MENU continued Presetting channels 41 filename[010GET.fm] model name1[SLV-N99] - Sony SLV-N99 | Operating Instructions - Page 42
sequence. When no more MANUAL SET AFT ADD ON receivable channels can be found, presetting FINE TUNING RETURN stops and the picture from the lowest numbered channel is displayed on the TV PLEASE WAIT screen. 42 Presetting channels filename[010GET.fm] model name1[SLV-N99] [3-071-065-11(1)] - Sony SLV-N99 | Operating Instructions - Page 43
No display • If you want to return to the previous menu, highlight RETURN and press OK. continued Presetting channels 43 filename[010GET.fm] model name1[SLV-N99] [3-071-065-11(1)] - Sony SLV-N99 | Operating Instructions - Page 44
M/m OK 1 MENU Press MENU, then press M/m to highlight SETTINGS and press OK. SETTINGS TUNER PRESET SET VCR Plus+ sys. CH CABLE BOX CONTROL CLOCK SET LANGUAGE RETURN PLAY OK SELECT : SET : OK QUIT : MENU 44 Presetting channels filename[010GET.fm] model name1[SLV-N99] [3-071-065-11(1)] - Sony SLV-N99 | Operating Instructions - Page 45
OK QUIT : MENU CH 1 CABLE ADD ON Channel to be preset TUNER PRESET ANTENNA / CABLE AUTO PRESET MANUAL SET AFT FINE TUNING RETURN SELECT : SET : OK QUIT : MENU CH 5 CABLE ADD ON Channel to be OK. continued Presetting channels 45 filename[010GET.fm] model name1[SLV-N99] [3-071-065-11(1)] - Sony SLV-N99 | Operating Instructions - Page 46
the picture of a channel is not clear, you can also use the manual tuning function. 123 456 789 0 Number buttons, ENTER MENU M/m/ - Sony SLV-N99 | Operating Instructions - Page 47
TUNER PRESET then press OK. PLAY ANTENNA / CABLE OK Note that the AFT setting switches to OFF. AUTO PRESET MANUAL SET AFT FINE TUNING RETURN SELECT : SET : OK QUIT : MENU 6 Press MENU to exit the menu. MENU Presetting channels 47 filename[010GET.fm] model name1[SLV-N99] [3-071-065-11(1)] - Sony SLV-N99 | Operating Instructions - Page 48
The Nashville Network 50 TNT Turner Network Television 51 USA USA Network VCR Plus+ GUIDE CH 35 54 42 28 53 37 34 47 33 46 45 48 38 59 70 41 43 58 49 52 44 48 Setting up the VCR Plus+® GOLD system filename[010GET.fm] model name1[SLV-N99] [3-071-065-11(1)] - Sony SLV-N99 | Operating Instructions - Page 49
data everyday after you complete the following procedure. If you are having trouble setting the guide channels, or if you have many scrambled channels, go to page 52 for manual VCR Plus+ GOLD system set up. Note that the VCR Plus+ GOLD system does not work with a digital satellite receiver. 123 - Sony SLV-N99 | Operating Instructions - Page 50
press OK. SMART CHANNEL MAPPING PLAY OK The SMART CHANNEL MAPPING menu AUTO MANUAL appears. SELECT : SET : OK QUIT : MENU 4 Press M/m to highlight AUTO, then press OK. PLAY VCR WILL LOOK FOR OK The instruction shown on the right appears CHANNEL MAPPING SIGNAL AFTER YOU TURN IT OFF - Sony SLV-N99 | Operating Instructions - Page 51
guide channels correctly unless you enter the ZIP/POSTAL CODE in your area. • When you move to a different area, you must set up the VCR again and enter your new ZIP/ POSTAL CODE in the EASY SET UP procedure. continued Setting up the VCR Plus+® GOLD system 51 filename[010GET.fm] model name1[SLV-N99 - Sony SLV-N99 | Operating Instructions - Page 52
SET : OK QUIT : MENU 2 Press M/m to highlight SET VCR Plus+ sys. (system) CH, then press OK. PLAY OK SET VCR Plus+ sys. CH SMART CHANNEL MAPPING AUTO MANUAL SELECT : SET : OK QUIT : MENU 52 Setting up the VCR Plus+® GOLD system filename[010GET.fm] model name1[SLV-N99] [3-071-065-11(1)] - Sony SLV-N99 | Operating Instructions - Page 53
30, 2001 1:47 PM 3 Press M/m to highlight MANUAL, then press OK. PLAY OK SET VCR Plus+ sys. CH GUIDE CH -- TV CH - -- SET GUIDE CH LIST QUIT : 0-9 : OK : MENU 4 Enter the guide channel number assigned in 123 the program guide and press ENTER. SET VCR Plus+ sys. CH 456 V C R W IGL UL - Sony SLV-N99 | Operating Instructions - Page 54
MENU to exit the menu. MENU Tip • If you want to return to the previous menu, highlight RETURN and press OK. 54 Setting up the VCR Plus+® GOLD system filename[010GET.fm] model name1[SLV-N99] [3-071-065-11(1)] - Sony SLV-N99 | Operating Instructions - Page 55
30, 2001 1:52 PM Basic Operations Playing a tape 123 456 789 0 Z EJECT CLEAR DISPLAY X PAUSE COMMERCIAL PASS H PLAY M FF x STOP m REW Basic Operations 1 Turn on your TV and set it to the video channel. continued Playing a tape 55 filename[010BAS.fm] model name1[SLV-N99] [3-071-065-11 (1)] - Sony SLV-N99 | Operating Instructions - Page 56
playback of the scene you want to skip. The VCR starts searching. 2 Press COMMERCIAL PASS again when you find the scene you want to watch. The VCR stops searching, rewinds a few seconds, then resumes press DISPLAY. 56 Playing a tape filename[010BAS.fm] model name1[SLV-N99] [3-071-065-11 (1)] - Sony SLV-N99 | Operating Instructions - Page 57
Basic Operations 010BAS.fm Page 57 Friday, November 30, 2001 1:52 PM Notes • Tapes recorded in the LP mode on other VCRs can be played back on this VCR but the picture quality cannot be guaranteed. • While displaying a Playing a tape 57 filename[010BAS.fm] model name1[SLV-N99] [3-071-065-11 (1)] - Sony SLV-N99 | Operating Instructions - Page 58
. To record from a cable box, turn it on. 2 Insert a tape with its safety tab in place. 58 Recording TV programs filename[010BAS.fm] model name1[SLV-N99] [3-071-065-11 (1)] - Sony SLV-N99 | Operating Instructions - Page 59
Basic Operations 010BAS.fm Page 59 Friday, November 30 COUNTER/REMAIN, the time counter and the remaining tape length with the indicator appear alternately in the VCR's display window. 1 :38 SP 0 : 0 0 : 2 2 Remaining tape length Time 59 filename[010BAS.fm] model name1[SLV-N99] [3-071-065-11 (1)] - Sony SLV-N99 | Operating Instructions - Page 60
• To select a channel, you can use the number buttons on the remote commander. Enter the channel number, then press ENTER. • You can select for the VCR to calculate and display the remaining tape length after you press DISPLAY. 60 Recording TV programs filename[010BAS.fm] model name1[SLV-N99] [3- - Sony SLV-N99 | Operating Instructions - Page 61
set the date and time. VIDEO APC EP VIDEO APC EP 2 DIAL TIMER Turn DIAL TIMER to set the recording date. VIDEO APC EP Basic Operations continued Recording TV programs using the Dial Timer 61 filename[010BAS.fm] model name1[SLV-N99] [3-071-065-11 (1)] - Sony SLV-N99 | Operating Instructions - Page 62
one minute intervals by pressing the CHANNEL +/- buttons. CHANNEL VIDEO APC EP 62 Recording TV programs using the Dial Timer filename[010BAS.fm] model name1[SLV-N99] [3-071-065-11 (1)] - Sony SLV-N99 | Operating Instructions - Page 63
Basic Operations 010BAS VCR is recording: • Reset the counter (page 56). • Display tape information on the TV screen (page 59). • Check the timer settings (page 76). • Watch another TV program (page 60). continued Recording TV programs using the Dial Timer 63 filename[010BAS.fm] model name1[SLV-N99 - Sony SLV-N99 | Operating Instructions - Page 64
step 9 (page 63) with no tape inserted. • The station ID appears on the TV screen only when you complete Smart Channel Mapping and the VCR receives the program information signal (see page 49). 64 Recording TV programs using the Dial Timer filename[010BAS.fm] model name1[SLV-N99] [3-071-065-11 (1)] - Sony SLV-N99 | Operating Instructions - Page 65
the Demonstration Mode will remain. Be sure to manually cancel the timer settings before you use the Dial Timer or any other timer method after reconnecting the AC power cord (see page 76). Recording TV programs using the Dial Timer 65 filename[010BAS.fm] model name1[SLV-N99] [3-071-065-11 (1)] - Sony SLV-N99 | Operating Instructions - Page 66
+ Number buttons ENTER SP/EP 1 VCR Plus+ Press the VCR Plus+ button. M/m x STOP VCR Plus+ system PlusCode # -------- SP / EP EP USE SP / EP QUIT : 0-9 : SP / EP : VCR Plus+ 66 Recording TV programs using the VCR Plus+ GOLD system filename[010BAS.fm] model name1[SLV-N99] [3-071-065-11 (1)] - Sony SLV-N99 | Operating Instructions - Page 67
appears in the display window and the VCR stands by for recording. When using a cable box, leave it on. To stop recording To stop the VCR while recording, press x STOP. continued Recording TV programs using the VCR Plus+ GOLD system 67 filename[010BAS.fm] model name1[SLV-N99] [3-071-065-11 (1)] - Sony SLV-N99 | Operating Instructions - Page 68
more than seven days ahead. • The station ID appears on the TV screen only when you complete Smart Channel Mapping and the VCR receives the program information signal (see page 49). 68 Recording TV programs using the VCR Plus+ GOLD system filename[010BAS.fm] model name1[SLV-N99] [3-071-065-11 (1)] - Sony SLV-N99 | Operating Instructions - Page 69
manually If the VCR Plus+ GOLD system is not available in your area, follow the instructions below to set the timer to record programs. Before you start... • Check that the VCR STOP Basic Operations 1 continued Setting the timer manually 69 filename[010BAS.fm] model name1[SLV-N99] [3-071-065-11 - Sony SLV-N99 | Operating Instructions - Page 70
?/1 to turn off the VCR. The indicator appears in the display window and the VCR stands by for recording. When using a cable box, leave it on. To stop recording To stop the VCR while recording, press x STOP. 70 Setting the timer manually filename[010BAS.fm] model name1[SLV-N99] [3-071-065-11 - Sony SLV-N99 | Operating Instructions - Page 71
If you want to return to the previous menu and continue with other operations after setting the timer, press m to highlight RETURN, then press OK. and the VCR receives the program information signal (see page 49). Setting the timer manually 71 filename[010BAS.fm] model name1[SLV-N99] [3-071-065-11 - Sony SLV-N99 | Operating Instructions - Page 72
recording stops and the VCR is unlocked. Note • The VCR will be unlocked when: - You stop timer recording by pressing x STOP. - You insert a tape. - The AC power cord is disconnected or power supply stops. 72 Locking the VCR (Child Lock) filename[010BAS.fm] model name1[SLV-N99] [3-071-065-11 (1)] - Sony SLV-N99 | Operating Instructions - Page 73
the button to play one frame each second. Rewind and start play While the tape is stopped, hold down m REW on the VCR and press H PLAY on the VCR. To resume normal playback Press H PLAY. continued Playing/searching at various speeds 73 filename[010ADDO.fm] model name1[SLV-N99] [3-071-065-11(1)] - Sony SLV-N99 | Operating Instructions - Page 74
these operations. • Tapes recorded in the LP mode on other VCRs can be played back on this VCR but the picture quality cannot be guaranteed. • The picture may show noise when playing at high speed in reverse. 74 Playing/searching at various speeds filename[010ADDO.fm] model name1[SLV-N99] [3-071 - Sony SLV-N99 | Operating Instructions - Page 75
the VCR stop recording automatically after a specified duration. z REC Additional Operations 1 decreases minute by minute to 0:00, then the VCR stops recording and turns off automatically. To extend normal recording mode. indicator disappears and the VCR returns to To stop while recording Press - Sony SLV-N99 | Operating Instructions - Page 76
. ?/1 123 456 789 0 CLEAR MENU M/m/ - Sony SLV-N99 | Operating Instructions - Page 77
Press MENU to exit the menu. If any timer settings remain, turn off the VCR to return to recording standby. When the timer settings overlap The program that starts first Additional Operations Checking/changing/canceling timer settings 77 filename[010ADDO.fm] model name1[SLV-N99] [3-071-065-11(1)] - Sony SLV-N99 | Operating Instructions - Page 78
will be recorded in monaural (on both hi-fi and normal audio tracks) but with less noise. For details, see page 88. Recording bilingual programs Normally, this VCR records only the main sound. When a SAP stereo and bilingual programs filename[010ADDO.fm] model name1[SLV-N99] [3-071-065-11(1)] - Sony SLV-N99 | Operating Instructions - Page 79
PM How sound is recorded on a video tape The VCR records sound onto two separate tracks. Hi-fi audio is recorded onto the main track along with the AUDIO MONITOR setting. Additional Operations Recording stereo and bilingual programs 79 filename[010ADDO.fm] model name1[SLV-N99] [3-071-065-11(1)] - Sony SLV-N99 | Operating Instructions - Page 80
ahead, press > INDEX SEARCH. • To search backwards, press . INDEX SEARCH. The VCR starts searching, and playback starts automatically from that point. INDEX SEARCH To stop searching Press x STOP. 80 Searching using the index function filename[010ADDO.fm] model name1[SLV-N99] [3-071-065-11(1)] - Sony SLV-N99 | Operating Instructions - Page 81
to the point where you want to start playback. The VCR starts searching and the cursor (x) moves toward the pointer. When the VCR locates the marked point, playback starts. 0 120 continued Searching for a selected point on the tape 81 filename[010ADDO.fm] model name1[SLV-N99] [3-071-065-11(1)] - Sony SLV-N99 | Operating Instructions - Page 82
are not used for normal tape operation. The M FF and m REW buttons on the VCR are used for normal tape operation. Note, however, if you press these buttons on the VCR, searching is canceled. 82 Searching for a selected point on the tape filename[010ADDO.fm] model name1[SLV-N99] [3-071-065-11(1)] - Sony SLV-N99 | Operating Instructions - Page 83
OFF in the ADVANCED OPTIONS menu (page 89). • If a cable box is connected to your VCR, turn it on. 123 456 789 0 ENTER CH +/- 1 Turn on your TV and set on the TV screen. Additional Operations Locating a channel by Station ID 83 filename[010ADDO.fm] model name1[SLV-N99] [3-071-065-11(1)] - Sony SLV-N99 | Operating Instructions - Page 84
FAVORITE CH to ON in the ADVANCED OPTIONS menu (page 89). • If a cable box is connected to your VCR, turn it on. 0 ENTER CH +/- - Sony SLV-N99 | Operating Instructions - Page 85
4 3 UVW 22 XYZ 10 ABB 4 Press ENTER. Note • If the TV channel has no station ID, the channel number appears on the TV screen. Additional Operations Creating a favorite channel list with Station ID 85 filename[010ADDO.fm] model name1[SLV-N99] [3-071-065-11(1)] - Sony SLV-N99 | Operating Instructions - Page 86
54 PM Adjusting the picture Adjusting the tracking Although the VCR automatically adjusts the tracking when playing a tape (the occur if the recording is in poor condition. In this case, manually adjust the tracking. Press TRACKING +/- to display the tracking meter. [SLV-N99] [3-071-065-11(1)] - Sony SLV-N99 | Operating Instructions - Page 87
Operations 010ADDO.fm Page 87 Friday, November 30, 2001 1:54 PM About the Adaptive Picture Control (APC) function The Adaptive Picture Control (APC) function automatically improves recording and playback quality by adjusting the VCR recording, the VCR adjusts to mode on other VCRs. • The the VCR to - Sony SLV-N99 | Operating Instructions - Page 88
recording tape speed automatically to the EP mode when the remaining tape length becomes shorter than the recording time. To operate AUTO TAPE SPEED, set TAPE SELECT correctly. • OFF to keep the same tape speed. 88 Changing menu options filename[010ADDO.fm] model name1[SLV-N99] [3-071-065-11(1)] - Sony SLV-N99 | Operating Instructions - Page 89
playback. • OFF to switch off Reality Regenerator. • L (Low) through H (High) to adjust the sharpness of the picture. Select L to turn off the sharpness control. Additional Operations Changing menu options 89 filename[010ADDO.fm] model name1[SLV-N99] [3-071-065-11(1)] - Sony SLV-N99 | Operating Instructions - Page 90
the CONTROL S OUT jack of the other VCR to the CONTROL S IN jack on this VCR. Note • If the CONTROL S IN jack is used for Control S connection with a TV, the CONTROL S connection cannot be used for editing. 90 Editing with another VCR filename[010ADDO.fm] model name1[SLV-N99] [3-071-065-11(1)] - Sony SLV-N99 | Operating Instructions - Page 91
the VCR analyzes the tape. Then, press X PAUSE after the APC indicator stops flashing to start recording. If you press X PAUSE before the APC indicator stops flashing, the APC function is canceled. Additional Operations Editing with another VCR 91 filename[010ADDO.fm] model name1[SLV-N99] [3-071 - Sony SLV-N99 | Operating Instructions - Page 92
in step 4 appears on the TV screen. If the channels change when you press CHANNEL +/-, you have made the correct setting. Whenever you use the VCR, set the TV to the channel selected in step 1. 92 General setup information filename[010ADDI.fm] model name1[SLV-N99] [3-071-065-11 (1)] - Sony SLV-N99 | Operating Instructions - Page 93
VHF/UHF antenna, use the EAC-32 antenna connector (not supplied) to connect the antenna to the VCR. 300-ohm twin lead cable EAC-32 antenna connector (not supplied) 1 Loosen the screws on the antenna General setup information 93 filename[010ADDI.fm] model name1[SLV-N99] [3-071-065-11 (1)] - Sony SLV-N99 | Operating Instructions - Page 94
November 30, 2001 1:58 PM Troubleshooting If you have any questions or problems not covered below, please consult your nearest Sony dealer. Power Clock Playback Symptom Remedy The ?/1 switch does not function. • Connect the AC power cord securely. • Make sure the VCR is not locked.To unlock - Sony SLV-N99 | Operating Instructions - Page 95
Symptom The timer does not operate. A tape cannot be inserted. The remote commander does not function. The channels on the VCR cannot be changed. The tracking initial contamination terminal Additional Information Troubleshooting 95 filename[010ADDI.fm] model name1[SLV-N99] [3-071-065-11 (1)] - Sony SLV-N99 | Operating Instructions - Page 96
VHS consumption 22 W Operating temperature 5°C to 40 parts and controls Mass Approx. 4.1 kg (9 lb 1 oz) Supplied accessories Remote Sony Corporation has determined that this product meets the ENERGY STAR® guidelines for energy efficiency. 96 Specifications filename[010ADDI.fm] model name1[SLV-N99 - Sony SLV-N99 | Operating Instructions - Page 97
(59) (86) The + button has a tactile dot. L Remote sensor (7) M INPUT SELECT button (60) N EASY SET UP button (13) (16) (19) (22) (25) O LINE-2 IN VIDEO/AUDIO L/R jacks (90) Additional Information continued Index to parts and controls 97 filename[010ADDI.fm] model name1[SLV-N99] [3-071-065-11 (1)] - Sony SLV-N99 | Operating Instructions - Page 98
) I Child Lock indicator (72) J Time counter/clock/line/channel indicator (56) (59) (91) K Remaining tape length indicator (59) L Tape/recording indicator (59) 98 Index to parts and controls filename[010ADDI.fm] model name1[SLV-N99] [3-071-065-11 (1)] - Sony SLV-N99 | Operating Instructions - Page 99
(12) (15) (18) (21) (24) G VHF/UHF OUT connector (12) (15) (18) (21) (24) H LINE OUT AUDIO R/L/VIDEO jacks (10) Additional Information continued Index to parts and controls 99 filename[010ADDI.fm] model name1[SLV-N99] [3-071-065-11 (1)] - Sony SLV-N99 | Operating Instructions - Page 100
010ADDI.fm Page 100 Friday, November 30, 2001 1:58 PM Remote commander 123 456 789 0 A •TV / VIDEO switch (7) B Z EJECT button (56) C TV/VIDEO ) H PLAY/OK button (27) (56) The H button has a tactile dot. 100 Index to parts and controls filename[010ADDI.fm] model name1[SLV-N99] [3-071-065-11 (1)] - Sony SLV-N99 | Operating Instructions - Page 101
59) N AUDIO MONITOR button (78) The AUDIO MONITOR button has a tactile dot. O VCR Plus+ button (66) P Number buttons (67) The number 5 button has a tactile PASS button (56) Additional Information Index to parts and controls 101 filename[010ADDI.fm] model name1[SLV-N99] [3-071-065-11 (1)] - Sony SLV-N99 | Operating Instructions - Page 102
Favorite channel 84 H Hi-fi audio track 79 I Index search 80 L Language selecting 27 Locking the VCR 72 LP mode 60 M VCR Plus+ GOLD system 66 Tracking adjustment. see Adjusting Tuner presetting 41 V VCR Plus+ GOLD system channel set up 48 recording 66 filename[010COVIX.fm] model name1[SLV-N99 - Sony SLV-N99 | Operating Instructions - Page 103
3, or 4). 2 Insert a tape and press H PLAY. To record a program 1 Press VCR Plus+ on the remote commander. 2 Enter the PlusCode number. 3 Select ONCE, DAILY, or WEEKLY, then press ENTER want to watch. Sony Corporation Printed in Malaysia filename[010QUI.fm] model name1[SLV-N99] [3-071-065-11(1)]
-
 1
1 -
 2
2 -
 3
3 -
 4
4 -
 5
5 -
 6
6 -
 7
7 -
8
-
9
-
10
-
11
-
12
-
13
-
14
-
15
-
16
-
17
-
18
-
19
-
20
-
21
-
22
-
23
-
24
-
25
-
26
-
27
-
28
-
29
-
30
-
31
-
32
-
33
-
34
-
35
-
36
-
37
-
38
-
39
-
40
-
41
-
42
-
43
-
44
-
45
-
46
-
47
-
48
-
49
-
50
-
51
-
52
-
53
-
54
-
55
-
56
-
57
-
58
-
59
-
60
-
61
-
62
-
63
-
64
-
65
-
66
-
67
-
68
-
69
-
70
-
71
-
72
-
73
-
74
-
75
-
76
-
77
-
78
-
79
-
80
-
81
-
82
-
83
-
84
-
85
-
86
-
87
-
88
-
89
-
90
-
91
-
92
-
93
-
94
-
95
-
96
-
97
-
98
-
99
-
100
-
101
-
102
-
103
 |
 |

filename[010cov.fm] model name1[SLV-N99]
[3-071-065-
11
(1)]
3-071-065-
11
(1)
Video Cassette
Recorder
Operating Instructions
For customers in the U.S.A.
If you have any questions about your Sony VCR, you may call
Sony Customer
Information Services Company
at 1-800-VHS-SONY (847-7669). For all other
Sony product questions, please call
Sony Customer Information Services
Company
at 1-800-222-SONY (7669). Or write to:
Sony Customer Information
Services Company
12451 Gateway Boulevard Ft. Myers, FL 33913
Declaration of Conformity
Trade Name:
SONY
Model No.:
SLV-N99
Responsible Party:
Sony Electronics Inc.
Address:
680 Kinderkamack Road Oradell, New Jersey 07649
Telephone No.:
201-930-6972
This device complies with Part 15 of the FCC Rules. Operation is subject to the
following two conditions: (1) This device may not cause harmful interference, and (2)
this device must accept any interference received, including interference that may
cause undesired operation.
For Customers in Canada
If this product is not working properly, please call 1-877-602-2008 for
Peace of Mind
Warranty Replacement service.
For other product related questions please contact our
Customer Information
Service Centre
at 1-877-899-7669 or write to us at: Customer Information Service
115 Gordon Baker Road, Toronto, Ontario, M2H 3R6
SLV-N99
© 2002 Sony Corporation
010cov.fm
Page 1
Friday, November 30, 2001
1:42 PM