Sony SPP-933 Operating Instructions
Sony SPP-933 - 900mhz Cordless Telephone Manual
 |
View all Sony SPP-933 manuals
Add to My Manuals
Save this manual to your list of manuals |
Sony SPP-933 manual content summary:
- Sony SPP-933 | Operating Instructions - Page 1
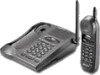
3-043-723-11 (1) Cordless Telephone Operating Instructions US Manual de instrucciones ES SPP-933 ©1999 Sony Corporation - Sony SPP-933 | Operating Instructions - Page 2
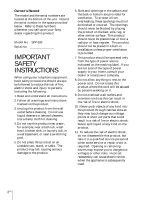
upon your Sony dealer regarding this product. Model No. SPP-933 Serial No IMPORTANT SAFETY INSTRUCTIONS When using your telephone equipment, disassemble this product, but take it to a qualified service personnel when some service or repair work is required. Opening or removing covers may expose - Sony SPP-933 | Operating Instructions - Page 3
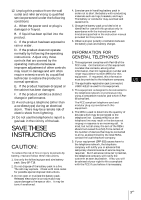
this product only in accordance with the instructions and limitations specified in the instruction manual provided for this product. 6. Observe proper polarity orientation between the battery pack and battery charger. INFORMATION FOR GENERAL TELEPHONES 1. This equipment complies with Part 68 of - Sony SPP-933 | Operating Instructions - Page 4
to maintain uninterrupted service. 7. If trouble is experienced with this equipment (SPP-933), for repair or warranty information, please contact Sony Direct Response Center: Tel 1-800-222-7669. If the equipment is causing harm to the telephone network, the telephone company may request - Sony SPP-933 | Operating Instructions - Page 5
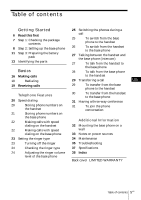
Transferring a call US 19 Receiving calls 29 To transfer from the base phone to the handset Telephone Features 20 Speed dialing 20 Storing phone numbers on the handset 21 Storing phone numbers on the base phone 22 Making calls with speed dialing on the handset 22 Making calls with - Sony SPP-933 | Operating Instructions - Page 6
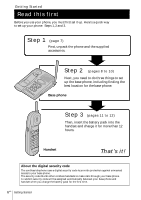
finding the best location for the base phone. Base phone Step 3 (pages 11 to 12) Then, insert the battery pack into the handset and charge it for more than 12 hours. Handset That's it! About the digital security code The cordless telephone uses a digital security code to provide protection - Sony SPP-933 | Operating Instructions - Page 7
package. If anything is missing, contact your local Sony dealer. Getting Started AC power adaptor (AC-T129) Base phone Handset Telephone line cords (2) SPEED DIALING 1 2 3 4 5 6 7 8 9 0 Directories (2) Wall bracket/stand for base phone Rechargeable battery pack (BP-T18) Getting Started 7US - Sony SPP-933 | Operating Instructions - Page 8
loss of audio during a conversation, try moving closer to the base or move base phone away from other noise sources. • The cordless telephone operates at a frequency that may cause interference to nearby TVs and VCRs; the base phone should not be placed near or on the top of a TV or VCR; and - Sony SPP-933 | Operating Instructions - Page 9
you want to use the wall bracket as the stand, attach it on the bottom of the base phone before step 1 as illustrated above. 1 Connect the telephone line cord to the LINE jack and to a telephone outlet. 2 Connect the AC power adaptor to the DC IN 9V jack and to an AC outlet - Sony SPP-933 | Operating Instructions - Page 10
adaptor to a continuous power supply. • Place the base phone close to the AC outlet so that you can unplug the AC power adaptor easily. + - Polarity of the plug Tip If your telephone outlet is not modular, contact your telephone service company for assistance. Modular Choose the dialing mode - Sony SPP-933 | Operating Instructions - Page 11
compartment lid. CHARGE lamp 4 Place the handset on the base phone. The CHARGE lamp lights up when the handset is properly seated on the charge terminals of the base phone. Charge the battery pack for more than 12 hours so that the battery is fully charged. The CHARGE lamp remains lit even after - Sony SPP-933 | Operating Instructions - Page 12
even after 12 hours of charging, the usable life of the battery has expired and needs replacement. Contact your local Sony authorized dealer or service center, and ask for a Sony BP-T18 rechargeable battery pack. Note Battery life may vary depending on usage condition and ambient temperature. 12US - Sony SPP-933 | Operating Instructions - Page 13
2 Speaker 3 TALK/BATT LOW lamp (p. 16, 20) Lights up during a call, flashes when you store a phone number for speed dialing. 4 VOL (volume) switch (p. 16, 19) Adjusts the handset in the dialing sequence. qh PGM (Program) button (p. 20) Used to store numbers for speed dialing. qj Microphone - Sony SPP-933 | Operating Instructions - Page 14
qj 1 PGM (Program) button (p. 21) Used to store numbers for speed dialing. 2 Dialing keys (p. 17) 3 TONE button (p. 17, 19) Allows you to switch temporarily to tone dialing. 4 LINE lamp (p. 17, 19, 25) Lights when one of the phones is in use. 5 CHARGE lamp (p. 11) Lights while the battery is being - Sony SPP-933 | Operating Instructions - Page 15
. qk RINGER switch (p. 24) Adjusts the ringer volume. ql DIAL MODE switch (p. 10) Selects pulse or tone dialing. w; DC IN 9V jack (p. 9, 32) wa LINE (telephone line) jack (p. 9, 32) Getting Started 15US Getting Started - Sony SPP-933 | Operating Instructions - Page 16
the first caller. * You need to subscribe to the service from your telephone company. Notes • Before dialing, make sure you can hear the dial tone, otherwise you cannot dial correctly. • When the TALK/BATT LOW lamp repeats a set of two flashes, the base phone is in use. • When you set the handset - Sony SPP-933 | Operating Instructions - Page 17
a call You hear a beep every three seconds and the TALK/BATT LOW lamp on the handset flashes. The call will disconnect soon. Replace the handset on the base phone to charge. For optimum performance, charge the battery for a full 12 hours. Note that during the first 10 - 15 minutes of charging, the - Sony SPP-933 | Operating Instructions - Page 18
the volume drops suddenly. This is due to a circuit in the telephone designed to protect against feedback. In such cases, lower the speaker 2 Press (REDIAL/PAUSE) to redial the number last dialed. On the base phone 1 Press (SPEAKERPHONE). The SPEAKERPHONE lamp lights up. 2 Press (REDIAL/PAUSE) - Sony SPP-933 | Operating Instructions - Page 19
access the flash function. Press (FLASH) again to return to the first caller. Turn on/off the ringer of the handset See "Setting the ringer type" on page 23. * You need to subscribe to the service from your telephone company. Receiving calls through the speakerphone When the phone rings, press - Sony SPP-933 | Operating Instructions - Page 20
lamp (TALK) (OFF) (SPEED DIAL) (REDIAL/PAUSE) 1 Press (PGM). The TALK/BATT LOW lamp flashes. 2 Press one of the dialing keys ((0) to (9)) for the phone number to be stored. You'll hear a confirmation beep. 3 Enter the phone number you want to store. You can enter up to 16 digits, including a tone - Sony SPP-933 | Operating Instructions - Page 21
PGM). The SPEAKERPHONE lamp flashes quickly. 2 Press one of the dialing keys ((0) to (9)) for the phone number to be stored. You'll hear a confirmation beep. 3 Enter the phone number you want to what you have stored to the speed dialing numbers. Telephone Features continued Telephone Features 21US - Sony SPP-933 | Operating Instructions - Page 22
store a new number, follow the instructions described previously. To clear a phone 1 Press (SPEAKERPHONE). The SPEAKERPHONE lamp lights up. 2 Press (SPEED DIAL). 3 Enter the desired speed dialing number ((0) to (9)). The phone number stored in the speed dialing number will be dialed. 22US Telephone - Sony SPP-933 | Operating Instructions - Page 23
ringer 1 Press (PGM). 2 Press (#) or (*TONE). 3 Press (5). 4 Press (OFF). The ringer on the handset is turned off. To turn the ringer on again Follow the instructions described in "Setting the ringer type." Note Do not allow more than 20 seconds to elapse between each step of the procedure - Sony SPP-933 | Operating Instructions - Page 24
If you hear no sound (only key beep), the ringer on the handset has been turned off. Adjusting the ringer volume level of the base phone Set the RINGER switch on the base phone to HIGH or LOW. To turn the ringer off, set it to OFF. RINGER switch 24US - Sony SPP-933 | Operating Instructions - Page 25
lamp on the handset will flash slowly. 2 Press (TALK) or pick up the handset from the base phone. The LINE lamp and the TALK/ BATT LOW lamp on the handset will light up. (OFF) 3 When you are done talking, press (OFF) or replace the handset to the base phone. Telephone Features Notes • If you - Sony SPP-933 | Operating Instructions - Page 26
HOLD) on the handset. The TALK/BATT LOW lamp and the LINE lamp on the base phone will flash slowly. 2 Press (SPEAKERPHONE). The SPEAKERPHONE lamp on the base phone will light up. The TALK/BATT LOW lamp will flash. 3 When you are done talking, press (SPEAKERPHONE) again. LINE lamp SPEAKERPHONE lamp - Sony SPP-933 | Operating Instructions - Page 27
(OFF) Press (INTERCOM) on the handset. The TALK/BATT LOW lamp lights up, and INTERCOM lamp flashes. The base phone rings. You will be connected automatically after 3 seconds. When a person at the base phone answers, you can talk. The TALK/BATT LOW lamp on the handset and INTERCOM lamp will light up - Sony SPP-933 | Operating Instructions - Page 28
phone to the handset Press (INTERCOM) on the base phone. The handset rings. TALK/BATT LOW lamp flashes phone will light up. When you are done talking or if no one answers the phone phone rings at a low level. To answer the call, press (TALK) on the handset or (SPEAKERPHONE) on the base phone phone, - Sony SPP-933 | Operating Instructions - Page 29
flashes. 2 Press (INTERCOM) on the handset. The TALK/BATT LOW lamp on the handset and INTERCOM lamp on the base phone light up. You can talk between the base phone (INTERCOM) If no one answers the phone Press (SPEAKERPHONE) on the base phone. Telephone Features Tip You can receive an intercom - Sony SPP-933 | Operating Instructions - Page 30
Transferring a call (continued) To transfer from the handset to the base phone TALK/BATT LOW lamp (TALK) 1 Press (INTERCOM). The call is put on hold, the base phone rings. The INTERCOM lamp on the base phone flashes. You will be connected automatically after 3 seconds. The TALK/BATT LOW lamp on - Sony SPP-933 | Operating Instructions - Page 31
(TALK). The TALK/BATT LOW lamp on the handset lights up. If you are at the base phone, simply press (SPEAKERPHONE). The SPEAKERPHONE lamp on the base phone lights up. Telephone Features SPEAKERPHONE (SPEAKERPHONE) lamp When you are done talking Press (OFF) on the handset (or press (SPEAKERPHONE - Sony SPP-933 | Operating Instructions - Page 32
shorter cord for mounting. 3 Attach the wall bracket to the center of the base phone. Align the fmarks of the wall bracket with those of the base phone. 4 Plug the telephone line cord to the telephone outlet, and hook the base phone to the wall plate. 5 Plug the AC power adaptor to an AC outlet - Sony SPP-933 | Operating Instructions - Page 33
disposal. Note: In some areas the disposal of nickel- cadmium batteries in household or business trash may be prohibited. RBRC (Rechargeable Battery Recycling Corporation) advises you about spent battery collection by the following phone number. Call toll free number: 1-800-822-8837 (United States - Sony SPP-933 | Operating Instructions - Page 34
such as alcohol or benzine as they may damage the finish of the cabinet. • If the charge terminals of the base phone and handset are soiled, wipe them with a soft cloth. If you have any questions or problems concerning your phone, please consult your nearest Sony dealer. 34US Additional Information - Sony SPP-933 | Operating Instructions - Page 35
If you've experienced any of the following difficulties while using your phone, use this troubleshooting guide to help you remedy the problem. Should any problem persist, consult your nearest Sony dealer. Making calls Symptom You hear five short error beeps when you press (TALK). You - Sony SPP-933 | Operating Instructions - Page 36
Troubleshooting (continued) Speed dialing Power source/battery Intercom Symptom You cannot store a speed dialing number. You cannot make a speed dialing call. Speed dialing is incorrect. The handset does not ring when calling from the base phone. The CHARGE lamp does not light up when you place - Sony SPP-933 | Operating Instructions - Page 37
MHz Operating channel 40 channels Dial signal Tone, 10 PPS (pulse) selectable Supplied accessories See page 7. Handset Power source Rechargeable battery pack BP-T18 Battery charging time Approx. 12 hours Battery . 210 g (approx. 7.4 oz), battery included Base phone Power source DC 9V from AC power - Sony SPP-933 | Operating Instructions - Page 38
handset 11 Speaker 17, 19 Speed dialing 20 Switching the phones during a call 25 T, U Talking between the phones 27 Three-way conference 31 Tone dialing dialing mode 10 switching to 16, 19 Transferring a call 29 Troubleshooting 35 V, W, X, Y, Z Volume handset 16, 19 speaker 17, 19 38US Additional - Sony SPP-933 | Operating Instructions - Page 39
- Sony SPP-933 | Operating Instructions - Page 40
serie en el espacio que se proporciona a continuación. Refiérase a estos números cada vez que se comunique con su distribuidor Sony con respecto al producto. Modelo No SPP-933 Serie No IMPORTANTES INSTRUCCIONES DE SEGURIDAD A fin de reducir el riesgo de incendio, descarga eléctrica y lesiones a las - Sony SPP-933 | Operating Instructions - Page 41
un paquete de pilas del siguiente tipo y tamaño: Sony BP-T18. 2. No deseche el paquete de pilas en y limitaciones especificadas en el manual de instrucciones correspondiente al producto. contacto con la compañía telefónica. 5. Si su equipo (SPP-933) produce daños en la red telefónica, la compañía - Sony SPP-933 | Operating Instructions - Page 42
SPP-933), con respecto a la reparación o a la información sobre la garantía, póngase en contacto con Sony teléfono dispone de marcadores automáticos Cuando programe números de emergencia y (o) realice llamadas de no aprobado expresamente en el presente manual podría anular su autorización para operar - Sony SPP-933 | Operating Instructions - Page 43
Índice Preparativos 6 Lea esto en primer lugar 7 Paso 1: Comprobación del contenido del paquete 8 Paso 2: Instalación del teléfono base 11 Paso 3: Preparación de la batería 13 Identificación de las partes 25 Cambio de teléfonos durante una llamada 25 Para cambiar de teléfono base al microtelé - Sony SPP-933 | Operating Instructions - Page 44
Preparativos Lea esto en primer lugar Antes de utilizar su teléfono, tendrá que instalarlo. A continuación se indica la forma rápida de hacerlo: Pasos 1, 2, y 3. Paso 1 (página 7) En primer lugar, desembale el teléfono y los accesorios suministrados. Paso 2 (páginas 8 a 10) A continuación, tendrá - Sony SPP-933 | Operating Instructions - Page 45
del paquete Compruebe si con el paquete ha recibido los elementos siguientes. Si falta algo, póngase en contacto con su proveedor Sony. Preparativos Adaptador de alimentación de CA (AC-T129) Teléfono base Microteléfono Cables de línea telefónica (2) SPEED DIALING 1 2 3 4 5 6 7 8 9 0 Directorios - Sony SPP-933 | Operating Instructions - Page 46
Paso 2 Instalación del teléfono base Realice los pasos siguientes: • Elección del mejor lugar • Conexión del teléfono base • Elección del modo de marcación Elección del mejor lugar La situación del teléfono base afectará la calidad de la recepción del microteléfono. Alejado de fuentes de ruido - Sony SPP-933 | Operating Instructions - Page 47
Conexión del teléfono base Si desea colgar el teléfono base de una pared, consulte la página 32. Enrute el cable 3 Preparativos A un tomacorriente de CA A DC IN 9V 2 Adaptador de alimentación de CA (AC-T129 suministrado) A LINE Alinee las marcas f. 1 Cable de línea telefónica 2 A la ( - Sony SPP-933 | Operating Instructions - Page 48
Paso 2: Instalación de la teléfono base (continuación) Notas • Utilice solamente el adaptador de alimentación de CA AC-T129 suministrado. No utilice ningún otro adaptador de alimentación de CA. • Conecte el adaptador de alimentación de CA a un tomacorriente que suministre continuamente alimentaci - Sony SPP-933 | Operating Instructions - Page 49
Preparativos Paso 3 Preparación de la batería Antes de utilizar su teléfono, cargue la batería durante más de 12 horas. 1 Deslice y abra la tapa del compartimiento de la batería del microteléfono. BP-T18 Rojo Negro 2 Conecte el conector con la polaridad correcta (cable negro en el lado izquierdo - Sony SPP-933 | Operating Instructions - Page 50
habrá expirado, y habrá que reemplazarla. Póngase en contacto con su proveedor o con un centro de reparaciones autorizado por Sony, y solicite una nueva batería BP-T18 Sony. Nota La duración de la batería puede variar dependiendo de las condiciones de utilización y de la temperatura ambiental. 12ES - Sony SPP-933 | Operating Instructions - Page 51
qs qd qf qg qh qj 0 Botón de desconexión (OFF) (p. 16, 19) Presiónelo para desconectar una llamada. qa Botón de accionamiento intermitente del gancho (FLASH) (p. 16, 19) qs Botón de retención (HOLD) (p. 16, 19, 26) Utilícelo para poner una llamada en retención. qd Botón de intercomunicaci - Sony SPP-933 | Operating Instructions - Page 52
Botón de marcación rápida (SPEED DIAL) (p. 22) Utilícelo para realizar llamadas con la función de marcación rápida. qf Botón de accionamiento intermitente del gancho (FLASH) (p. 17, 19) - Sony SPP-933 | Operating Instructions - Page 53
qk ql w; wa qg Control de volumen (VOLUME) (p. 17, 19) Presiónelos para ajustar el volumen del altavoz. qh Botón de intercomunicación (INTERCOM) (p. 28) Utilícelo para realizar una llamada de intercomunicación. qj Lámpara indicadora de intercomunicación (INTERCOM) (p. 27) Permanecerá encendido - Sony SPP-933 | Operating Instructions - Page 54
microteléfono del teléfono base. 2 Presione (TALK). La lámpara TALK/BATT LOW del microteléfono y la lámpara LINE del teléfono base se encenderán. (FLASH) Después oirá el tone de (CHANNEL) invitación a marcar. Si oye pitidos de error, acérquese al teléfono base. 3 Marque el número de teléfono - Sony SPP-933 | Operating Instructions - Page 55
encenderán. Lámpara Marque el número de teléfono. LINE Cuando termine de conversar, vuelva a presionar (SPEAKERPHONE). (REDIAL/PAUSE) (FLASH) Tareas adicionales (HOLD) Lámpara SPEAKERPHONE Control VOLUME (SPEAKERPHONE) Para Realice lo siguiente Poner una llamada en retención Ajustar el - Sony SPP-933 | Operating Instructions - Page 56
Realización de llamadas (continuación) Para obtener el máximo rendimiento del modo de interfono • Es posible que en un lugar ruidoso no oiga la voz de su interlocutor. Por lo tanto, utilice la función de interfono en una sala silenciosa. • No acerque demasiado la mano ni ningún otro objeto al micró - Sony SPP-933 | Operating Instructions - Page 57
hasta que se desconecte. Cambiar a una llamada otra (servicio de "llamada en espera"*) Presione el (FLASH) para acceder a la función de llamada en espera. Presione otra vez la tecla (FLASH) para reanudar la conversación. Activar/desactivar la campanilla Consulte "Ajuste el tipo de campanilla" de - Sony SPP-933 | Operating Instructions - Page 58
Funciones del teléfono Marcación rápida Usted podrá marcar presionando unas pocas teclas después de haber almacenado números de teléfono en las teclas de marcatión. Usted podrá almacenar hasta 10 números de teléfono por separado en el microteléfono y en el teléfono base. Almacenamiento de números - Sony SPP-933 | Operating Instructions - Page 59
Almacenamiento de números de teléfono en el teléfono base 1 Presione (PGM). La lámpara SPEAKERPHONE parpadeará rápidamente. Lámpara LINE 2 Presione una de las teclas de marcación ((0) a (9)) para almacenar un número de teléfono. Usted oirá un pitido de confirmación. Lámpara SPEAKERPHONE ( - Sony SPP-933 | Operating Instructions - Page 60
Marcación rápida (continuación) Para almacenar el número previamente marcado Presione (REDIAL/PAUSE) directamente despues del paso 2, a continuación vaya al paso 4. Para almacenar un número para marcarlo mediante la función de tablero conmutador de abonado (PBX) Antes de introducir el número de telé - Sony SPP-933 | Operating Instructions - Page 61
Ajuste el tipo de campanilla Usted podrá selecionar uno de cuatro tipos de campanilla. 1 Presione (PGM). (OFF) (*TONE) 2 Presione (#) o (*TONE). 3 Presione una tecla de número, (1) a (4), para seleccionar un tipo de campanilla. Usted oirá el tono de campanilla correspondiente. 4 Presione (OFF). - Sony SPP-933 | Operating Instructions - Page 62
Ajuste el tipo de campanilla (continuación) Comprobación del tipo de campanilla 1 Presione (PGM). 2 Presione (#) o (*TONE). 3 Presione (0). El tipo de campanilla selecionado sonará. 4 Presione (OFF). Nota Si no oye sonido (sólo un pitido de tecla), la campanilla del microteléfono se habrá - Sony SPP-933 | Operating Instructions - Page 63
Cambio de teléfonos durante una llamada Si pone una llamada en retención, podrá volver a tomarla en el otro teléfono sin que se desconecte. Para cambiar del teléfono base al microteléfono 1 Presione (HOLD) del teléfono Lámpara LINE base. La lámpara LINE y la lámpara TALK/BATT LOW del - Sony SPP-933 | Operating Instructions - Page 64
Cambio de teléfonos durante una llamada (continuación) Para cambiar del microteléfono al teléfono base Lámpara TALK/BATT LOW 1 Presione (HOLD) del microteléfono. La lámpara TALK/BATT LOW y la lámpara LINE del teléfono base parpadearán lentamente. 2 Presione (SPEAKERPHONE). La lámpara SPEAKERPHONE - Sony SPP-933 | Operating Instructions - Page 65
Conversación entre el microteléfono y el teléfono base (Intercomunicación) Usted podrá conversar entre el teléfono base y el microteléfono. Usted podrá iniciar la intercomunicación desde cualquier teléfono. Lámpara TALK/BATT LOW (TALK) (OFF) Para conversar del microteléfono al teléfono base - Sony SPP-933 | Operating Instructions - Page 66
Conversación entre el microteléfono y el teléfono base (Intercomunicación) (continuación) (SPEAKERPHONE) Lámpara INTERCOM Para conversar del teléfono base al microteléfono Presione (INTERCOM) del teléfono base. El microteléfono sonará. La lámpara TALK/BATT LOW parpadeará. Cuando la persona del - Sony SPP-933 | Operating Instructions - Page 67
Transferencia de una llamada Usted podrá transferir una llamada entre el microteléfono y el teléfono base sin desconectar dicha llamada. Para transferir del teléfono base al microteléfono (SPEAKERPHONE) Lámpara INTERCOM Lámpara TALK/BATT LOW (TALK) (INTERCOM) 1 Presione (INTERCOM). La llamada - Sony SPP-933 | Operating Instructions - Page 68
Transferencia de una llamada (continuación) Para transferir del microteléfono al teléfono base Lámpara TALK/BATT LOW (TALK) 1 Presione (INTERCOM). La llamada se pondrá en retención, y sonará el teléfono base. La lámpara INTERCOM del teléfono base parpadeará. Usted se conectará automáticamente - Sony SPP-933 | Operating Instructions - Page 69
Celebración de una conferencia tripartita El microteléfono y el teléfono base funcionan como dos extensiones de la misma línea. Ambos teléfonos podrán utilizarse al mismo tiempo, por lo que usted, la persona que llamó del exterior, y quien se encuentre en el otro teléfono podrán entablar una - Sony SPP-933 | Operating Instructions - Page 70
Información adicional Montaje del teléfono base en una pared 1 2 Cable del adaptador de alimentación de CA Lengüeta de colgado Cable de línea telefónica 1 Levantelalengüetadecolgado. 2 Enchufeelcabledela línea telefónica en la toma LINE y el adaptador de alimentación en la toma DC IN 9V, y - Sony SPP-933 | Operating Instructions - Page 71
. Nota: En ciertas zonas, el desecho de pilas de níquel-cadmio en contenedores domésticos o industriales puede estar prohibido. La RBRC (Rechargeable Battery Recycling Corporation) le aconsejará sobre la recogida de pilas usadas en el siguiente número de teléfono: Llamada gratuita: 1-800-822-8837 - Sony SPP-933 | Operating Instructions - Page 72
del teléfono base y el auricular están sucios, límpielos con un paño suave. En caso de duda o problemas con el teléfono, consulte a su proveedor Sony más próximo. 34ES Información adicional - Sony SPP-933 | Operating Instructions - Page 73
utilice el teléfono, use esta guía para poder solucionar el problema. Si el problema persiste, póngase en contacto con su proveedor Sony. Realización de llamadas Síntoma Solución Se oyen cinco pitidos cortos de error al presionar (TALK). • Compruebe si ha instalado correctamente la unidad - Sony SPP-933 | Operating Instructions - Page 74
Solución de problemas (continuación) Marcación rápida Fuente de alimentación/ Intercomunicación batería Síntoma No es posible almacenar un número de marcación rápida. Solución • Asegúrese que ha realizado correctamente el procedimiento de almacenamiento del número (página 20). • Cuando esté - Sony SPP-933 | Operating Instructions - Page 75
Especificaciones Generales Banda de frecuencias 902 - 928 MHz Canales de operación 40 canales Señal de marcación Tonos y pulsos (10 pps), seleccionable Accesorios suministrados Consulte la página 7. Microteléfono Fuente de alimentación Batería - Sony SPP-933 | Operating Instructions - Page 76
Índice alfabético A Ajuste del volumen volumen del altavoz 17, 19 volumen del microteléfono 16, 19 Altavoz 17, 19 B Batería carga 11 duración 12 C, D, E, F, G, H Cambio de teléfonos durante una llamada 25 Campanilla activación/ desactivación 23 ajuste de la campanilla del teléfono base 24 ajuste el - Sony SPP-933 | Operating Instructions - Page 77
Información adicional Información adicional 39ES - Sony SPP-933 | Operating Instructions - Page 78
40ES Información adicional - Sony SPP-933 | Operating Instructions - Page 79
Para clientes en EE. UU. Información adicional 41ES Información adicional - Sony SPP-933 | Operating Instructions - Page 80
For the customers in the USA Sony Corporation Printed in the Philippines UCZZ01256EZ
-
 1
1 -
 2
2 -
 3
3 -
 4
4 -
 5
5 -
 6
6 -
 7
7 -
8
-
9
-
10
-
11
-
12
-
13
-
14
-
15
-
16
-
17
-
18
-
19
-
20
-
21
-
22
-
23
-
24
-
25
-
26
-
27
-
28
-
29
-
30
-
31
-
32
-
33
-
34
-
35
-
36
-
37
-
38
-
39
-
40
-
41
-
42
-
43
-
44
-
45
-
46
-
47
-
48
-
49
-
50
-
51
-
52
-
53
-
54
-
55
-
56
-
57
-
58
-
59
-
60
-
61
-
62
-
63
-
64
-
65
-
66
-
67
-
68
-
69
-
70
-
71
-
72
-
73
-
74
-
75
-
76
-
77
-
78
-
79
-
80
 |
 |
3-043-723-
11
(1)
©1999 Sony Corporation
ES
Operating Instructions
Manual de instrucciones
SPP-933
US
Cordless
Telephone