Sony STR-K750P Operating Instructions - Page 34
Using the Sleep Timer, Adjustments using the, SET UP menu
 |
View all Sony STR-K750P manuals
Add to My Manuals
Save this manual to your list of manuals |
Page 34 highlights
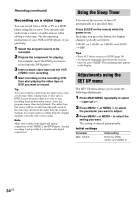
Recording (continued) Recording on a video tape You can record from a VCR, a TV or a DVD player using the receiver. You can also add audio from a variety of audio sources when editing a video tape. See the operating instructions of your VCR or DVD player if you need help. 1 Select the program source to be recorded. 2 Prepare the component for playing. For example, insert the DVD you want to record into the DVD player. 3 Insert a blank video tape into the VCR (VIDEO 1) for recording. 4 Start recording on the recording VCR, then start playing the video tape or DVD you want to record. Tip You can record the sound from any audio source onto a video tape while copying from a video tape or DVD. Locate the point where you want to start recording from another audio source, select the program source, then start playback. The audio from that source will be recorded onto the audio track of the video tape instead of the audio from the original medium. To resume audio recording from the original medium, select the video source again. Note Make sure to make both digital and analog connections to the VIDEO 2 and DVD inputs. Analog recording is not possible if you make only digital connections. Using the Sleep Timer You can set the receiver to turn off automatically at a specified time. Press SLEEP on the remote while the power is on. Each time you press the button, the display changes cyclically as follows: 2-00-00 t 1-30-00 t 1-00-00 t 0-30-00 t OFF Tips • Press ALT before you press SLEEP (page 39). • To check the remaining time before the receiver turns off, press SLEEP. The remaining time appears in the display. Adjustments using the SET UP menu The SET UP menu allows you to make the following adjustments. 1 Press MAIN MENU repeatedly to select " SET UP ". 2 Press MENU or MENU to select the parameter you want to adjust. 3 Press MENU + or MENU - to select the setting you want. The setting is entered automatically. Initial settings Parameter DEC. XXXX Initial setting PCM (for DVD), AUTO (for VIDEO 2) 34GB
-
 1
1 -
2
-
3
-
4
-
5
-
6
-
7
-
8
-
9
-
10
-
11
-
12
-
13
-
14
-
15
-
16
-
17
-
18
-
19
-
20
-
21
-
22
-
23
-
24
-
25
-
26
-
27
-
28
-
 29
29 -
 30
30 -
 31
31 -
 32
32 -
 33
33 -
 34
34 -
 35
35 -
 36
36 -
 37
37 -
 38
38 -
 39
39 -
40
-
41
-
42
-
43
-
44
-
45
-
46
-
47
-
48
-
49
-
50
-
51
-
52
 |
 |