Sony TC-WE475 Operating Instructions (primary manual) - Page 18
Synchro-recording with a CD, player, Connecting the CONTROL, A1II control system
 |
UPC - 027242584419
View all Sony TC-WE475 manuals
Add to My Manuals
Save this manual to your list of manuals |
Page 18 highlights
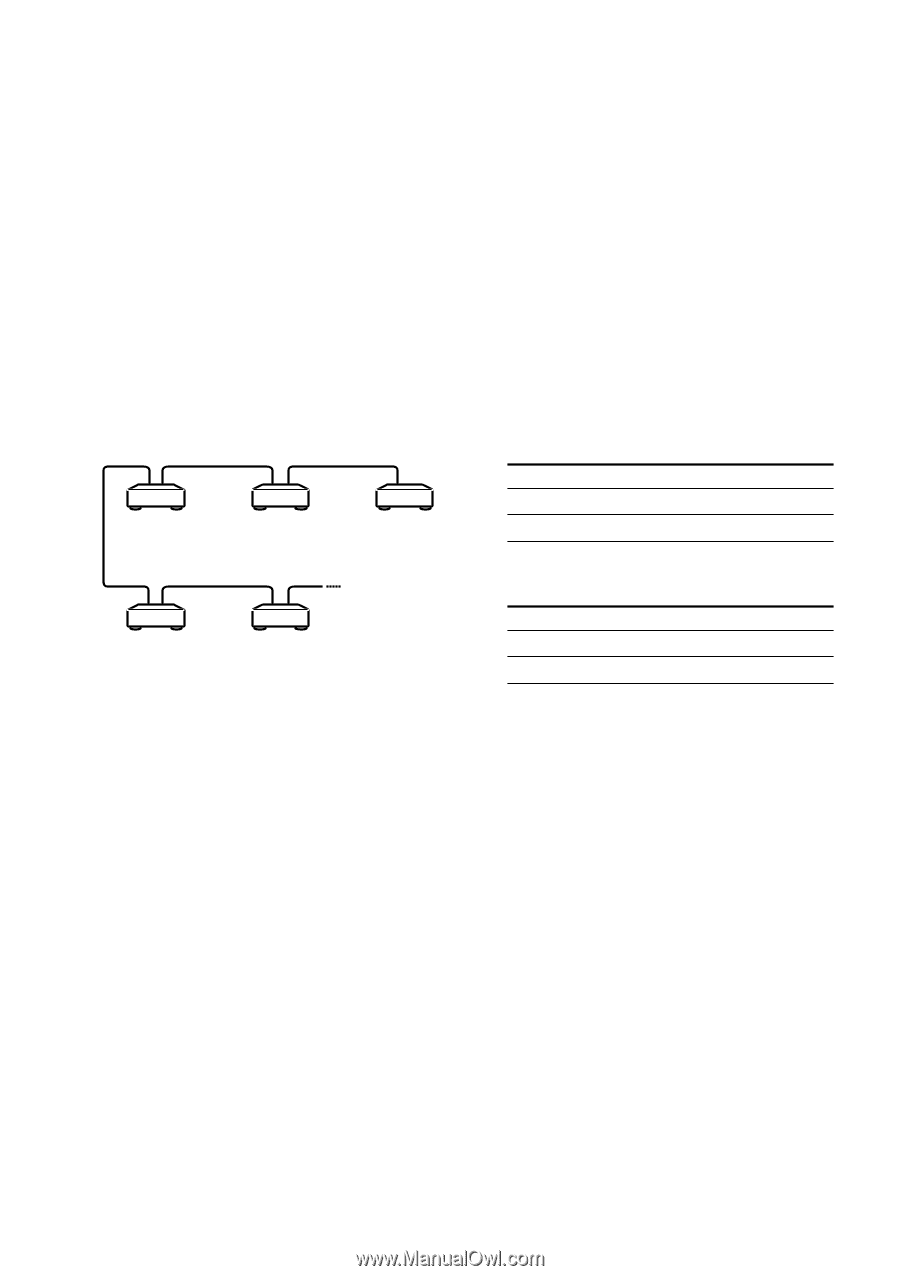
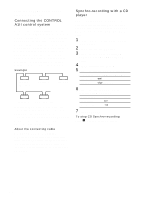
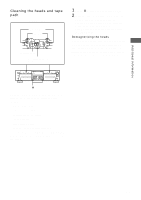
Using the CONTROL A1II control system (continued) Connecting the CONTROL A1II control system Connect monaural (2P) mini-plug cables in series to the CONTROL A1II jacks on the back of each component. You can connect up to ten CONTROL A1II compatible components in any order. However, you can connect only one of each type of component (i.e., 1 CD player, 1 MD deck, 1 tape deck and 1 receiver). (You may be able to connect more than one CD player or MD deck, depending on the model. Refer to the operating instructions supplied with the respective component for details.) Example Amplifier (Receiver) CD player MD deck Tape deck Other component In the CONTROL A1II control system, the control signals flow both ways, so there is no distinction of IN and OUT jacks. If a component has more than one CONTROL A1II jack, you can use either one, or connect different components to each jack. About the connecting cable When a CONTROL A1II compatible component is not supplied with a connecting cable, use a commercially available monaural (2P) mini-plug cable less than 2 meters (6.6 feet) long, with no resistance (such as the Sony RK-G69HG). Synchro-recording with a CD player By pressing SYNCHRO, you can perform synchro-recording on your tape deck with a Sony CD player connected to the CONTROL A1II connector through a CONTROL A1II cable. 1 Set the source selector on the amplifier to CD player. 2 Load a CD into the CD player. 3 Select the play mode (CONTINUE, SHUFFLE, or PROGRAM) of the CD player. 4 Load a cassette into deck B. 5 Select the side(s) to be recorded on. To record on Set DIRECTION MODE to Only one side g Both side s or RELAY 6 Select the side you want to start recording from on deck B. To record from Press The front side H The reverse side h 7 Press SYNCHRO. To stop CD Synchro-recording Press x on deck B or the CD player. 18
-
 1
1 -
2
-
3
-
4
-
5
-
6
-
7
-
8
-
9
-
10
-
11
-
12
-
 13
13 -
 14
14 -
 15
15 -
 16
16 -
 17
17 -
 18
18 -
 19
19 -
 20
20 -
 21
21 -
 22
22 -
 23
23 -
24
 |
 |