Sony VGC-LS31N User Guide
Sony VGC-LS31N - Vaio All-in-one Desktop Computer Manual
 |
View all Sony VGC-LS31N manuals
Add to My Manuals
Save this manual to your list of manuals |
Sony VGC-LS31N manual content summary:
- Sony VGC-LS31N | User Guide - Page 1
N User Guide Personal Computer VGC-LS30 Series - Sony VGC-LS31N | User Guide - Page 2
Safely ...20 Using Your VAIO Computer ...21 Using the Keyboard ...22 Using the Mouse ...29 Using the Built-in MOTION EYE Camera...34 Using the Optical Disc Drive ...36 Using the TV Function ...46 Using PC Cards ...65 Using the ExpressCard Module ...68 Using the Memory Stick Media ...72 Using - Sony VGC-LS31N | User Guide - Page 3
Setting the Password ...96 Setting Up Your Computer with VAIO Central ...99 Using the Power Saving Modes ...100 Upgrading Your VAIO Computer...103 Adding and Removing Memory...104 Precautions ...111 On Handling the LCD Screen ...112 On Using the Power Source ...113 On Handling Your Computer...114 On - Sony VGC-LS31N | User Guide - Page 4
Discs ...139 Display ...143 Printing ...144 Microphone ...145 Mouse ...146 Speakers ...147 Keyboard...148 Floppy Disks ...149 PC Cards ...150 Audio/Video...152 Memory Stick Media ...153 Peripherals ...154 Support Options ...155 Sony Support Information ...155 Program Support Information...159 - Sony VGC-LS31N | User Guide - Page 5
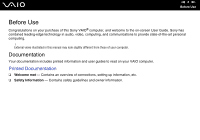
on your purchase of this Sony VAIO® computer, and welcome to the on-screen User Guide. Sony has combined leading-edge technology in audio, video, computing, and communications to provide state-of-the-art personal computing. ! External views illustrated in this manual may look slightly different from - Sony VGC-LS31N | User Guide - Page 6
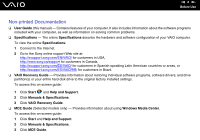
, software drivers, and drive partition(s) or your entire hard disk drive to the original factory installed settings. To access this on-screen guide: 1 Click Start and Help and Support. 2 Click Manuals & Specifications. 3 Click VAIO Recovery Guide. ❑ MCE Guide (Selected models only) - Provides - Sony VGC-LS31N | User Guide - Page 7
Support, click Start and Help and Support. ❑ Manuals & Specifications Here you will find the on-screen User Guide, warranty information, other VAIO documents, and system and software information for your computer. ❑ VAIO Support Microsoft and Sony. ❑ VAIO Sites Contains links to other Internet - Sony VGC-LS31N | User Guide - Page 8
during sessions with your computer. Excessive use of the computer may strain muscles or tendons. ❑ Furniture and posture - Sit in a chair with good back support. Adjust the level of the chair so your feet are flat on the floor. A footrest may make you more comfortable. Sit in a relaxed, upright - Sony VGC-LS31N | User Guide - Page 9
n9 N Before Use ❑ Viewing angle of the display - Use the display's tilting feature to find the best position. You can reduce eye strain and muscle fatigue by adjusting the tilt of the display to the proper position. Adjust the brightness setting of the display as well. ! While adjusting the viewing - Sony VGC-LS31N | User Guide - Page 10
device (for example, a printer, an external hard disk drive, a scanner, and so on) at a time, following the manufacturers' instructions. ❑ Locating Controls and Ports (page 11) ❑ About the Indicator Lights (page 16) ❑ Connecting a Power Source (page 17) ❑ Shutting Down Your Computer Safely (page 20) - Sony VGC-LS31N | User Guide - Page 11
indicator (page 16) E Power button F MONITOR OFF button / MONITOR OFF indicator (page 16) Press this button to turn off the LCD backlight and the speaker volume. ✍ You can change the MONITOR OFF button setting to keep the speaker volume on. See Setting Up Your Computer with VAIO Central (page 99 - Sony VGC-LS31N | User Guide - Page 12
Back n 12 N Getting Started A Back panel cover Remove the back panel cover to access the ports and jacks behind it (page 17). ! Before removing the cover, be sure to shut down your computer. B Prop-up stand Grasp the side ends with both hands and raise the bottom end, as shown below, to place your - Sony VGC-LS31N | User Guide - Page 13
) H CONNECT button (page 22), (page 29) I WLAN (Wireless LAN) switch (page 82) J Hi-Speed USB (USB 2.0) ports*2 (page 89) K Modem port (page 81) *1 On selected models only. *2 Supports high-/full-/low- speeds. - Sony VGC-LS31N | User Guide - Page 14
Right n 14 N Getting Started A Optical disc drive (page 36) B Optical disc drive indicator (page 16) C Drive eject button (page 38) - Sony VGC-LS31N | User Guide - Page 15
n 15 N Getting Started A PC Card slot (page 65) B PC Card release button (page 67) C SD memory card slot (page 79) D 89) *1 Referred to as the ExpressCard slot hereinafter. *2 Your computer supports Memory Stick PRO media and Memory Stick Duo media with high speed and high capacity capabilities - Sony VGC-LS31N | User Guide - Page 16
power of the computer is on, illuminates in orange when the computer is in Sleep mode, and turns off when the computer is off. Media Access Illuminates when data is read from or written to a memory lights. See Setting Up Your Computer with VAIO Central (page 99) and find out more in its help file. - Sony VGC-LS31N | User Guide - Page 17
Connecting a Power Source You need an AC adapter as a power source for your computer. Before Accessing the DC IN Port You need to remove the back panel cover (1). Simply pull the cover off your computer. n 17 N Getting Started ! Be sure to put the cover back on the computer when you are done. - Sony VGC-LS31N | User Guide - Page 18
Using the AC Adapter ✍ Use your computer only with the supplied AC adapter. To use the AC adapter 1 Plug one end of the power cord (1) into the AC adapter (3). 2 Plug the other end of the power cord into an AC outlet (2). 3 Plug the cable attached to the AC adapter (3) into the DC IN port - Sony VGC-LS31N | User Guide - Page 19
cable bundler, route the cables through it, and then snap the cable bundler back shut as shown below: To disconnect your computer completely from AC power, unplug the AC adapter. Make sure that the AC outlet is easily accessible. - Sony VGC-LS31N | User Guide - Page 20
Down. 3 Respond to any prompts warning you to save documents or to consider other users and wait for the computer to turn off automatically. The power indicator light turns off. - Sony VGC-LS31N | User Guide - Page 21
your VAIO computer. ❑ Using the Keyboard (page 22) ❑ Using the Mouse (page 29) ❑ Using the Built-in MOTION EYE Camera (page 34) ❑ Using the Optical Disc Drive (page 36) ❑ Using the TV Function (page 46) ❑ Using PC Cards (page 65) ❑ Using the ExpressCard Module (page 68) ❑ Using the Memory Stick - Sony VGC-LS31N | User Guide - Page 22
n 22 N Using Your VAIO Computer Using the Keyboard A wireless keyboard is supplied with your computer. The wireless keyboard uses a standard key arrangement with additional keys that perform specific functions. - Sony VGC-LS31N | User Guide - Page 23
200%, it goes back to 100%. S3: Opens the Media Center Start menu on models with a TV tuner or launches Windows Mail on models without a TV tuner. ✍ You can change these button assignments with VAIO Central. See Setting Up Your Computer with VAIO Central (page 99) and find out more in its help file. - Sony VGC-LS31N | User Guide - Page 24
n 24 N Using Your VAIO Computer E Standby button Provides for the lower level of power consumption. For details on power management, see Using the Power Saving Modes (page 100). F POWER switch Slide the POWER switch to turn on and off the wireless keyboard. G Indicators (Battery): turns on while - Sony VGC-LS31N | User Guide - Page 25
n 25 N Using Your VAIO Computer A Keyboard feet Flip open to adjust the keyboard angle. B CONNECT button (page 26) Press to enable the wireless keyboard to communicate with the main unit. C Battery compartment Storage compartment for the AA batteries. - Sony VGC-LS31N | User Guide - Page 26
n 26 N Using Your VAIO Computer Before you use the keyboard Four AA alkaline batteries are supplied with your computer for use in keyboard: approximately 32.8 feet (10 m) from your computer. Confirm that the supplied AA batteries are properly installed. Press the CONNECT button located on the back - Sony VGC-LS31N | User Guide - Page 27
.8 inches (30 cm) to approximately 39.4 inches (1 m) from the computer. 1 Insert the supplied four AA batteries (1) into the battery compartment (2) on the bottom of the wireless keyboard. 2 Turn on the computer. 3 Slide the POWER switch (3) at the top of the keyboard to the ON position. 4 Press the - Sony VGC-LS31N | User Guide - Page 28
n 28 N Using Your VAIO Computer ✍ You can check the battery indicator ( or ) in the LCD window on the wireless keyboard for its battery power level. If the wireless keyboard does not operate properly, the batteries may need to be replaced. If the wireless keyboard is not being used for - Sony VGC-LS31N | User Guide - Page 29
n 29 N Using Your VAIO Computer Using the Mouse A wireless mouse is supplied with your computer. Using the Wireless with applications that support it). C Right button Press the right button once to display a context-sensitive shortcut menu (not always an active function). D Power switch Slide the - Sony VGC-LS31N | User Guide - Page 30
n 30 N Using Your VAIO Computer Before you use the mouse Two AA alkaline batteries are supplied with your computer for use in the of mouse: approximately 32.8 feet (10 m) from your computer. Confirm that the supplied AA batteries are properly installed. Press the CONNECT button located on the back of - Sony VGC-LS31N | User Guide - Page 31
n 31 N Using Your VAIO Computer To connect the wireless mouse ! To connect the wireless mouse, it must be located within a range of approximately 11.8 inches (30 cm) to approximately 39.4 inches (1 m) from the computer. 1 Insert the supplied two AA batteries into the wireless mouse as shown below. 2 - Sony VGC-LS31N | User Guide - Page 32
n 32 N Using Your VAIO Computer 4 Turn over the mouse, slide the power switch to the ON position, and press the CONNECT button. Communication between the mouse and the computer should now be established. ! Steps 3 and 4 must be - Sony VGC-LS31N | User Guide - Page 33
Adjusting the Mouse Functions 1 Click Start and Control Panel. 2 Click Mouse under Hardware and Sound. The Mouse Properties window appears. 3 Change the settings. n 33 N Using Your VAIO Computer - Sony VGC-LS31N | User Guide - Page 34
n 34 N Using Your VAIO Computer Using the Built-in MOTION EYE Camera Your computer is equipped with a built-in MOTION EYE camera. The built-in MOTION EYE camera adds - Sony VGC-LS31N | User Guide - Page 35
n 35 N Using Your VAIO Computer ✍ The built-in MOTION EYE camera cannot be shared by more than one software application. If another software application is using the camera, exit - Sony VGC-LS31N | User Guide - Page 36
disc or slot. 1 Turn on the computer. 2 With the label side facing toward you, slide a disc into the optical disc drive slot. n 36 N Using Your VAIO Computer - Sony VGC-LS31N | User Guide - Page 37
n 37 N Using Your VAIO Computer ✍ In Sleep mode, inserting a disc will automatically launch Windows and may display a window for selecting your preferred software program to launch or may automatically - Sony VGC-LS31N | User Guide - Page 38
n 38 N Using Your VAIO Computer To remove a disc ! The drive eject button is disabled when your computer is turned off. Do not remove the optical disc when your computer - Sony VGC-LS31N | User Guide - Page 39
Reading and Writing Optical Discs Your computer plays and records CDs, DVDs, or Blu-ray Discs, depending on the model you purchased. Check your specifications for the type of optical disc drive installed on your model. Use the table below to see which types of media your optical disc drive supports. - Sony VGC-LS31N | User Guide - Page 40
n 40 N Using Your VAIO Computer PR: playable and recordable P: playable but not recordable -: ray Disc drive on your computer does not support BD-RE Version 1.0 discs and Blu-ray cartridge discs. *8 Writing data to Ultra Speed CD-RW discs is not supported on models with the Blu-ray Disc drive. *9 - Sony VGC-LS31N | User Guide - Page 41
buying pre-recorded or blank discs for use with a VAIO Sony does NOT guarantee the compatibility of VAIO VAIO PC supported. Except the Blu-ray Disc drive, all other optical disc drives are capable of reading 8cm discs with the supplied 8cm disc adapter. With the supplied VAIO computers may not support - Sony VGC-LS31N | User Guide - Page 42
VAIO Computer Notes on writing data to a disc ❑ Use only Sony it. To complete this process, follow the instructions included with your software. ❑ Only use disc. ❑ Do not use memory-resident utility software while writing data applications. ❑ Do not switch power modes while using the preinstalled - Sony VGC-LS31N | User Guide - Page 43
Using Your VAIO Computer Notes DVD-RW, or DVD-RAM disc media. ❑ Do not use memory-resident utility software to speed up disc access when playing a DVD. This may cause your computer to malfunction. ❑ Do not switch to power saving modes while your computer is playing a DVD. ❑ Region code - Sony VGC-LS31N | User Guide - Page 44
Using Your VAIO Computer Playing CDs To play an audio CD 1 Insert a disc into the optical disc drive. 2 If nothing appears on the desktop, then window appears, click Burn files to disc and follow the on-screen instructions until the empty disc folder appears. 2 Open the folder that contains the - Sony VGC-LS31N | User Guide - Page 45
n 45 N Using Your VAIO Computer Playing DVDs To play a DVD 1 Close all running software applications. 2 Insert a DVD into the optical disc drive. 3 If nothing appears on the desktop, then click Start, All Programs, and the desired DVD software to play the DVD. For instructions on how to use the - Sony VGC-LS31N | User Guide - Page 46
as music recording and playback. This section describes how to set up your TV, set-top box, and other equipment. See the on-screen MCE Guide for more information on Media Center features. To access this on-screen guide 1 Click Start and Help and Support. 2 Click Manuals & Specifications. 3 Click MCE - Sony VGC-LS31N | User Guide - Page 47
home. TV signal reception strength will vary widely depending on service availability in your area as well as the type of connection available. One primary cable to connect the computer to a TV cable or antenna is the TV coaxial cable (1) (supplied). One end connects to the computer's VHF/UHF port - Sony VGC-LS31N | User Guide - Page 48
n 48 N Using Your VAIO Computer Connecting to standard cable access (CATV) To connect in CATV mode (Option 1) 1 Connect one end of the TV coaxial cable (1) (supplied) to your cable service access (wall outlet) (2). 2 Connect the other end to the VHF/UHF port (3) on the computer. - Sony VGC-LS31N | User Guide - Page 49
N Using Your VAIO Computer To connect in CATV mode (Option 2) 1 Connect the two metal hooks on a 75-ohm/300-ohm RCA transformer cable (1) (not supplied) to the screw-type grips at your cable service access (wall outlet) (2). 2 Connect one end of the TV coaxial cable (3) (supplied) to the transformer - Sony VGC-LS31N | User Guide - Page 50
n 50 N Using Your VAIO Computer Connecting to a standard antenna You can connect your computer of antenna system in your home, your connection may require a VHF/UHF RF combiner/transformer (not supplied) to connect the computer and the indoor/outdoor antenna system. ✍ If you are connecting to an - Sony VGC-LS31N | User Guide - Page 51
Using Your VAIO Computer To connect in terrestrial mode (Option 1) 1 Connect one end of a TV coaxial cable (1) (not supplied) to your antenna outlet (2). Connect the other end to a VHF/UHF RF combiner/transformer (3) (not supplied). 2 Connect a coaxial cable feed connector (4) (not supplied) to the - Sony VGC-LS31N | User Guide - Page 52
N Using Your VAIO Computer To connect in terrestrial mode (Option 2) 1 Connect one end of a 300-ohm twin lead cable (1) (not supplied) to the screw-type grips at your antenna outlet (2). Connect the other end to the grips on a VHF/UHF RF combiner/transformer (3) (not supplied). 2 Connect a coaxial - Sony VGC-LS31N | User Guide - Page 53
VAIO Computer Connecting with a cable or satellite set-top box (STB) You can connect your computer to cable service access that uses a set-top box (cable or satellite). When using the set-top box (STB) setup, you can only change channels through the STB, using its controls or the supplied remote - Sony VGC-LS31N | User Guide - Page 54
n 54 N Using Your VAIO Computer To connect in STB mode (Option 1) 1 Connect one end of a TV coaxial cable (1) (not supplied) to your cable service access (wall outlet) (2). Connect the other end to the VHF/UHF IN port on the back panel of your set-top box (STB) (3). 2 Connect a second - Sony VGC-LS31N | User Guide - Page 55
n 55 N Using Your VAIO Computer To connect in STB mode (Option 2) 1 Connect one end of a TV coaxial cable (1) (supplied) to your cable service access (wall outlet) (2). Connect the other end to the VHF/UHF IN port on the back panel of your set-top box (STB) (3). 2 Connect a second - Sony VGC-LS31N | User Guide - Page 56
n 56 N Using Your VAIO Computer - Sony VGC-LS31N | User Guide - Page 57
n 57 N Using Your VAIO Computer Using the Remote Commander A remote commander is supplied with your computer for using Media Center features, including TV channel selection. - Sony VGC-LS31N | User Guide - Page 58
n 58 N Using Your VAIO Computer A Pause X button Press to pause media playback. Press again to resume playback. Stop x button Press to stop media playback or TV recording session. Forward M - Sony VGC-LS31N | User Guide - Page 59
n 59 N Using Your VAIO Computer E Guide button Press to view the TV program guide for your area. F Alphanumeric buttons Press to window. J Standby button Press to place the computer into Sleep mode to reduce power consumption. K Start button Press to open the Media Center Start menu. L More - Sony VGC-LS31N | User Guide - Page 60
n 60 N Using Your VAIO Computer Before you use the remote commander Before using the remote commander, you need to insert the supplied AA manganese batteries and connect the remote sensor to enable communication between the computer and the remote commander. To insert batteries 1 Turn the remote - Sony VGC-LS31N | User Guide - Page 61
3 Insert the supplied two AA batteries into the remote commander. n 61 N Using Your VAIO Computer 4 Put the battery cover back on the remote commander and slide it in the reverse direction of the arrow illustrated above until the cover - Sony VGC-LS31N | User Guide - Page 62
To connect the remote sensor 1 Choose the USB port (1) you prefer to use. 2 Plug the remote sensor cable (2) into the USB port. n 62 N Using Your VAIO Computer 3 Position the remote sensor (3) to enable unobstructed communication with the remote commander. - Sony VGC-LS31N | User Guide - Page 63
n 63 N Using Your VAIO Computer If you are using a cable or satellite set-top box, you can attach the remote sensor control to the remote sensor, which enables you - Sony VGC-LS31N | User Guide - Page 64
3 Attach the remote sensor control (1) onto the set-top box (3) near the infrared port (4). n 64 N Using Your VAIO Computer ! Do not cover the infrared port when attaching the remote sensor control. The remote sensor must be visible in a line-of-sight with the - Sony VGC-LS31N | User Guide - Page 65
VAIO Computer Using PC Cards PC Cards allow you to connect portable external devices to your computer. Inserting a PC Card ! Some PC Cards or their functions may not be compatible with your computer. You do not need to shut down your computer before inserting or removing a PC Card. To insert a PC - Sony VGC-LS31N | User Guide - Page 66
your system is not recognized. Restart your system to correct the problem. Restarting will restore the original state of your computer. Make sure you use the most recent software driver provided by the PC Card manufacturer. Do not force a PC Card into the slot. It may damage the connector pins. If - Sony VGC-LS31N | User Guide - Page 67
n 67 N Using Your VAIO Computer Removing a PC Card Follow the steps below to remove the PC Card while your computer is on. If it is not removed properly, your system may not work properly. To remove a PC Card ✍ To remove a PC Card when your computer is off, skip steps 1 to 7. 1 Double-click the - Sony VGC-LS31N | User Guide - Page 68
n 68 N Using Your VAIO Computer Using the ExpressCard Module Your computer is equipped with either a Universal ExpressCard™ slot* or an ExpressCard™/34 slot* for transferring data among digital cameras, - Sony VGC-LS31N | User Guide - Page 69
n 69 N Using Your VAIO Computer Inserting an ExpressCard Module ! Your computer is delivered with a slot protector in the ExpressCard slot. Remove the slot protector before you use the slot - Sony VGC-LS31N | User Guide - Page 70
n 70 N Using Your VAIO Computer ! Insert the ExpressCard slot protector to protect against debris entering the slot when not using an ExpressCard and verify you are inserting it in the proper direction. Make sure you use the most recent software driver provided by the ExpressCard module manufacturer. - Sony VGC-LS31N | User Guide - Page 71
n 71 N Using Your VAIO Computer Removing an ExpressCard Module Follow the steps below to remove the ExpressCard module while your computer is on. If it is not removed properly, - Sony VGC-LS31N | User Guide - Page 72
n 72 N Using Your VAIO Computer Using the Memory Stick Media Your computer supports the Memory Stick media. Memory Stick media is a compact compatible with the Sony branded Memory Stick media with capacity of up to 8 GB that are available as of January 2007. However, not all Memory Stick media that - Sony VGC-LS31N | User Guide - Page 73
n 73 N Using Your VAIO Computer Inserting a Memory Stick Media To insert a Memory Stick media 1 Locate the Memory Stick PRO/Duo media slot (page 15). 2 Hold the Memory Stick media with the arrow pointing toward the Memory Stick PRO/Duo media slot. 3 Carefully slide the Memory Stick media into the - Sony VGC-LS31N | User Guide - Page 74
cannot insert it smoothly. Do not insert more than one Memory Stick media into the slot. Improper insertion of the media may damage both your computer and the media. ✍ Your computer supports Memory Stick Duo media and is equipped with the Memory Stick PRO/Duo media slot that is compatible with both - Sony VGC-LS31N | User Guide - Page 75
Your VAIO Computer To format a Memory Stick media The Memory Stick media has been formatted in the factory default setting and is ready for use. If you want to reformat the media with your computer, follow these steps. ! Be sure to use the device that is designed to format the media and supports the - Sony VGC-LS31N | User Guide - Page 76
6 At the confirmation prompt, click OK. The formatting process starts. ! It may take time to format the Memory Stick media depending on the media. 7 Once completed, click OK. 8 Click Close. n 76 N Using Your VAIO Computer - Sony VGC-LS31N | User Guide - Page 77
Your VAIO Computer Removing a Memory Stick Media To remove a Memory Stick media 1 Check that the Media Access indicator light is off. 2 Push the Memory Stick media in toward the computer. The Memory Stick media ejects. 3 Pull the Memory Stick media out of the slot. ! Always remove the Memory Stick - Sony VGC-LS31N | User Guide - Page 78
: ❑ MultiMediaCard (MMC) ❑ Secure Digital (SD) For the latest information on compatible memory cards, visit the Sony online support Web site regularly. ! Always insert the correct memory card into the SD memory card slot. SD memory cards with capacity of over 2 GB, such as SD High Capacity (SDHC - Sony VGC-LS31N | User Guide - Page 79
card slot (page 15). 2 Hold the memory card with the arrow pointing toward the memory card slot. n 79 N Using Your VAIO Computer 3 Carefully slide the memory card into the slot until it clicks into place. Do not force the card into the slot. ✍ If the memory card does not go into the slot easily - Sony VGC-LS31N | User Guide - Page 80
80 N Using Your VAIO Computer Removing a Memory Card ! Do not remove a memory card while the Media Access indicator light is on. The card or its data may become damaged. To remove a memory card 1 Check that the Media Access indicator light is off. 2 Firmly grasp the extended part of the memory card - Sony VGC-LS31N | User Guide - Page 81
Your VAIO Computer Using the Internet Setting Up a Dial-up Internet Connection Before you can connect to the Internet, you need to connect your computer to a telephone line with a telephone cable (not supplied). Once Internet window appears. 3 Click Dial-up. 4 Follow the on-screen instructions. - Sony VGC-LS31N | User Guide - Page 82
n 82 N Using Your VAIO Computer Using Wireless LAN (WLAN) Using the Sony Wireless LAN (WLAN), all your digital devices with built-in WLAN functionality communicate freely with each other through a network. A WLAN is a network in which a user - Sony VGC-LS31N | User Guide - Page 83
n 83 N Using Your VAIO Computer The 2.4 GHz bandwidth used by wireless LAN compatible devices is also used by other various devices. Although technologies to minimize interference from other devices - Sony VGC-LS31N | User Guide - Page 84
with other devices in the network. You can set up an ad-hoc network easily at home. ❑ If the wireless connection is initiated by the VAIO computer, channel 11 will be selected. ❑ If the wireless connection is initiated by peer wireless LAN equipment, the wireless LAN communication will make use of - Sony VGC-LS31N | User Guide - Page 85
. The Set up a connection or network window appears. 5 Select an option to specify the ad-hoc network settings and click Next. 6 Follow the on-screen instructions. n 85 N Using Your VAIO Computer - Sony VGC-LS31N | User Guide - Page 86
VAIO Computer Communicating with an Access Point (Infrastructure) An infrastructure network is a network that extends an existing wired local network to wireless devices by providing an access point (not supplied), for example the Sony access point, see the manual that came with your access point. - Sony VGC-LS31N | User Guide - Page 87
n 87 N Using Your VAIO Computer To connect to a wireless network 1 Make sure an access point is set up. See the manual that came with your access point Click Manage wireless networks. 6 Click Add. 7 Follow the on-screen instructions. To disconnect from a wireless network Turn off the WLAN switch. ! - Sony VGC-LS31N | User Guide - Page 88
Using Peripheral Devices You can add functionality to your VAIO computer by using the various ports on the computer. ❑ Connecting a Universal Serial Bus (USB) Device (page 89) ❑ Connecting a Printer (page 91) ❑ Connecting an i.LINK Device ( - Sony VGC-LS31N | User Guide - Page 89
n 89 N Using Peripheral Devices Connecting a Universal Serial Bus (USB) Device To prevent your computer and/or USB devices from damage, avoid any shock or force to the USB ports when moving the computer with USB devices connected. Connecting a USB Floppy Disk Drive You can purchase a USB floppy disk - Sony VGC-LS31N | User Guide - Page 90
n 90 N Using Peripheral Devices Disconnecting a USB floppy disk drive You can disconnect a USB floppy disk drive when your computer is on or off. Disconnecting the drive when the computer is in Sleep mode may cause the computer to malfunction. If the computer is off, you can unplug the USB cable - Sony VGC-LS31N | User Guide - Page 91
USB Port You can connect a USB printer compatible with your version of Windows to the computer. To connect a printer using the USB port 1 Plug the power cord (1) of your printer into an AC outlet. 2 Choose the USB port (3) you prefer to use. 3 Plug one end of a USB printer cable (2) (not - Sony VGC-LS31N | User Guide - Page 92
i.LINK port on your computer does not supply power to external devices generally powered by i.LINK ports. ❑ The i.LINK port supports transfer rates up to 400 Mbps; however, system, and i.LINK-compatible devices you use. See the manual that came with your software for more information. ❑ Check - Sony VGC-LS31N | User Guide - Page 93
To connect a digital video camcorder Plug one end of an i.LINK cable (1) (not supplied) into the i.LINK port (2) on the computer and the other end into the DV In/ Out port (3) on the digital video camcorder. ✍ On Sony digital video cameras, ports labeled DV Out, DV In/Out, or i.LINK are i.LINK - Sony VGC-LS31N | User Guide - Page 94
(LAN) You can connect your computer to 100BASE-TX/10BASE-T-type networks with an Ethernet network cable. Connect one end of a network cable (not supplied) to the network (Ethernet) port on the computer and the other end to your network. For detailed settings and devices needed to connect to the - Sony VGC-LS31N | User Guide - Page 95
how to change the main settings of your VAIO computer. Among other things, you will learn how to use and customize the look of your Sony software and utilities, etc. ❑ Setting the Password (page 96) ❑ Setting Up Your Computer with VAIO Central (page 99) ❑ Using the Power Saving Modes (page 100) - Sony VGC-LS31N | User Guide - Page 96
VAIO logo appears to start your computer. The power-on password will allow you to protect the computer from unauthorized access. Adding the Power-on Password The power power- ! Once you have set the power-on password, you cannot start people. If you forget the power-on password and need assistance - Sony VGC-LS31N | User Guide - Page 97
VAIO Computer To add the power-on password 1 Turn on the computer. 2 Press the F2 key when the VAIO logo appears. The BIOS setup screen appears. If not, restart the computer and press the F2 key several times when the VAIO setup screen. 6 Select Password when Power On under Security. Press the space - Sony VGC-LS31N | User Guide - Page 98
-on Password To change or remove the power-on password 1 Turn on the computer. 2 Press the F2 key when the VAIO logo appears. The BIOS setup screen appears. If not, restart the computer and press the F2 key several times when the VAIO logo appears. 3 Enter the current password and press the Enter - Sony VGC-LS31N | User Guide - Page 99
utility allows you to consult system information and specify preferences for system behavior. To use VAIO Central 1 Click Start, All Programs, and VAIO Central. The VAIO Central window appears. 2 Click the System Information tab. 3 Select the desired control item and change the settings. 4 Once - Sony VGC-LS31N | User Guide - Page 100
n 100 N Customizing Your VAIO Computer Using the Power Saving Modes In addition to the normal operating mode, which allows you to turn off specific devices, your computer has a distinct power saving modes called Sleep mode. Using Normal Mode This is the normal state of the computer when it is in use - Sony VGC-LS31N | User Guide - Page 101
VAIO Computer Using Sleep Mode Sleep mode turns off the LCD screen and places the hard disk and the CPU into a low power consumption mode. The orange power computer into Sleep mode. To return to Normal mode ❑ Press the power button on your computer. ❑ Press the standby button on the wireless - Sony VGC-LS31N | User Guide - Page 102
n 102 N Customizing Your VAIO Computer If the computer is not used for a certain period of time, it will enter Sleep mode. To avoid this, you can change the Sleep mode settings. To change the Sleep mode settings 1 Right-click the power status icon on the taskbar and select Power Options. 2 Click - Sony VGC-LS31N | User Guide - Page 103
connectors or open the memory module compartment cover. For the type of module and the amount of memory installed on your model, see the online Specifications. For assistance, contact an authorized Sony Service Center. To find the nearest center or agent, see Sony Support Information (page 155) or - Sony VGC-LS31N | User Guide - Page 104
model. Notes on adding/removing memory modules ❑ Be careful when changing memory. Improper installation of memory modules may cause damage to your system. This damage may void your manufacturer's warranty. ❑ Only use memory your computer and disconnect it from its power source (that is, AC adapter) - Sony VGC-LS31N | User Guide - Page 105
VAIO Computer ❑ Use the special bag delivered with the memory module or wrap the module in aluminum foil to protect it from ESD. ❑ Introducing any liquids, foreign substances, or objects into the memory will not be covered by the warranty. ❑ Do not place the memory module in a location subject to: - Sony VGC-LS31N | User Guide - Page 106
n 106 N Upgrading Your VAIO Computer Removing and Installing a Memory Module To change or add a memory module 1 Shut down the computer and turn off all peripheral devices. 2 Remove the back panel cover (1), unplug the computer, and then disconnect all peripheral devices. 3 - Sony VGC-LS31N | User Guide - Page 107
4 Unscrew the screw (2) and remove the memory module compartment cover (3). n 107 N Upgrading Your VAIO Computer 5 Touch a metal object (such as the chassis frame) to discharge static electricity. 6 Remove the currently installed memory module as follows: ❑ Pull the latches in the direction of the - Sony VGC-LS31N | User Guide - Page 108
N Upgrading Your VAIO Computer 7 Remove the new memory module from its packaging. 8 Slide the memory module into the memory module slot and push it in until it clicks into place. ! Do not touch any other components on the motherboard. Be sure to insert the connector edge of the memory module into - Sony VGC-LS31N | User Guide - Page 109
n 109 N Upgrading Your VAIO Computer 9 Replace the memory module compartment cover and tighten the screw. 10 Plug the computer, connect all peripheral devices, replace the back panel cover, and then turn on the computer. - Sony VGC-LS31N | User Guide - Page 110
n 110 N Upgrading Your VAIO Computer Viewing the Amount of Memory To view the amount of memory 1 Turn on the computer. 2 Click Start, All Programs, and VAIO Central. The VAIO Central window appears. 3 Click the System Information tab. 4 Double-click the System Information folder. 5 Double-click the - Sony VGC-LS31N | User Guide - Page 111
n 111 N Precautions Precautions This section describes safety guidelines and precautions to help you protect your VAIO computer from potential damage. ❑ On Handling the LCD Screen (page 112) ❑ On Using the Power Source (page 113) ❑ On Handling Your Computer (page 114) ❑ On Using the Built-in MOTION - Sony VGC-LS31N | User Guide - Page 112
. This could damage the screen. Use a soft, dry cloth to wipe the LCD screen. ❑ Do not change the LCD screen orientation setting in the Tablet PC Settings window even when another option is available for selection, as it may make your computer unstable - Sony VGC-LS31N | User Guide - Page 113
power operation of your model. ❑ Do not share the AC outlet with other power-consuming equipment, such as a photocopier or shredder. ❑ You can purchase a power . ❑ Use the AC adapter supplied with your computer or genuine Sony products. Do not use any other AC adapter as it may cause a malfunction. - Sony VGC-LS31N | User Guide - Page 114
n 114 N Precautions On Handling Your Computer ❑ Clean the cabinet with a soft cloth, which is dry or lightly moistened with a mild detergent solution. Do not use any type of abrasive pad, scouring powder, or solvent such as alcohol or benzine, as these may damage the finish of your computer. ❑ If - Sony VGC-LS31N | User Guide - Page 115
on the computer. If any problems occur, unplug the computer and contact an authorized Sony Service Center. To find the nearest center or agent, see Sony Support Information (page 155) or visit the Sony online support Web site. ❑ Make sure you disconnect the power cord before cleaning your computer - Sony VGC-LS31N | User Guide - Page 116
the scope of the built-in MOTION EYE camera regardless of your computer's power state, as it may cause a malfunction of the camera. ❑ The built it is force-sensitive. On Handling Floppy Disks ❑ Do not open the shutter manually or touch the surface of the floppy disk. ❑ Keep floppy disks away from - Sony VGC-LS31N | User Guide - Page 117
n 117 N Precautions On Handling Discs ❑ Do not touch the surface of the disc. ❑ Do not drop or bend the disc. ❑ Fingerprints and dust on the surface of a disc may cause read errors. Always hold the disc by its edges and central hole, as shown below: ❑ Proper care of the disc is essential to its - Sony VGC-LS31N | User Guide - Page 118
n 118 N Precautions ❑ An 8cm disc adapter exclusively designed for your model is provided for use of 8cm discs on your computer. ❑ Be sure to attach the adapter to an 8cm disc before using it on your computer. Not using the supplied adapter or using a similar kind of the adapter with the disc may - Sony VGC-LS31N | User Guide - Page 119
a car parked in the sun ❑ Direct sunlight ❑ High humidity ❑ Corrosive substances ❑ Use the storage case supplied with the Memory Stick media. ❑ Be sure to make a backup copy of your valuable data. ❑ Keep the Memory Stick media out of reach of children. There is a risk of swallowing the media. ❑ When - Sony VGC-LS31N | User Guide - Page 120
not place your computer in a location subject to mechanical vibration or in an unstable position. ❑ Do not move your computer while the power is on. ❑ Do not turn off the power or restart your computer while reading or writing data to the hard disk. ❑ Do not use your computer in a place subject - Sony VGC-LS31N | User Guide - Page 121
and then follow the on-screen instructions. ❑ VAIO Update 3 Click Start, All Programs, VAIO Update 3, and VAIO Update Options and then follow the on-screen instructions. If you have not yet installed the latest updates, install them with these software. To download and install the updates on the - Sony VGC-LS31N | User Guide - Page 122
n 122 N Troubleshooting Troubleshooting This section describes how to solve common problems you might encounter when using your VAIO computer. Many problems have simple solutions. Try these suggestions before visiting the Sony online support Web site at: http://esupport.sony.com/EN/VAIO/ for - Sony VGC-LS31N | User Guide - Page 123
❑ Memory Stick Media (page 153) ❑ Peripherals (page 154) n 123 N Troubleshooting - Sony VGC-LS31N | User Guide - Page 124
any extra memory modules you may have installed since purchase. ❑ Check that you are using the supplied Sony AC adapter. For your safety, use only genuine Sony AC adapter, which is supplied by Sony for your VAIO computer. ❑ Make sure your computer is not in Sleep mode by pressing the power button on - Sony VGC-LS31N | User Guide - Page 125
n 125 N Troubleshooting What should I do . If not, restart the computer and press the F2 key several times when the VAIO logo appears. 2 Set the date (month/day/year). Press the Enter key. Sony Service Center. To find the nearest center or agent, see Sony Support Information (page 155) or visit the - Sony VGC-LS31N | User Guide - Page 126
n 126 N Troubleshooting What should I do if the power indicator (Green) lights but my screen stays blank? ❑ If the orange MONITOR OFF indicator is on, press the MONITOR OFF button. ❑ Otherwise, follow these steps: 1 Press and hold the power button for more than four seconds to check that the power - Sony VGC-LS31N | User Guide - Page 127
n 127 N Troubleshooting Why doesn't my computer enter Sleep mode? Your computer may become Onetime Password message appears and Windows will not start. Press and hold the power button for more than four seconds to check that the power indicator goes off. Wait for 10 or 15 seconds, then restart your - Sony VGC-LS31N | User Guide - Page 128
n 128 N Troubleshooting What should I do if my game software does not work or it keeps crashing? ❑ Check the Web site of the game if there are any patches or updates to download. ❑ Make sure you have installed the latest video driver. ❑ On some VAIO models, the graphics memory is shared with the - Sony VGC-LS31N | User Guide - Page 129
n 129 N Troubleshooting What should I do if I cannot boot my computer from the USB floppy disk drive connected to the computer? To boot your computer from the USB floppy disk drive, you need to change the boot device. Turn on your computer and press the F11 key when the VAIO logo appears. How can - Sony VGC-LS31N | User Guide - Page 130
Troubleshooting System Security How can I protect my computer against security threats, such as viruses? The Microsoft Windows operating system is preinstalled on your computer. The best way to protect your computer against security threats, such as viruses, is to download -screen instructions to set - Sony VGC-LS31N | User Guide - Page 131
Troubleshooting -in MOTION EYE camera. ❑ The video memory of your computer may have become insufficient for normal and does not indicate a malfunction. ❑ If the problem persists, restart your computer. Why are captured images poor ❑ The power management function of your computer may have been - Sony VGC-LS31N | User Guide - Page 132
n 132 N Troubleshooting Why do the images captured by the built-in MOTION EYE camera flicker? This problem occurs when you use the camera under fluorescent lights due to the mismatch between lighting output frequency and shutter speed. To reduce flicker noise, change - Sony VGC-LS31N | User Guide - Page 133
the built-in MOTION EYE camera. ❑ If the problem persists, you must reinstall the driver software for the camera. Follow these steps: 1 name for your camera and click Update Driver Software. What should I do if my computer becomes unstable when it enters a power saving mode while the built-in MOTION - Sony VGC-LS31N | User Guide - Page 134
n 134 N Troubleshooting Internet What should I do if my modem does not work? ❑ Make correct. ❑ Make sure the software you are using is compatible with your computer's modem. (All preinstalled Sony programs are compatible.) ❑ Make sure the modem is the only device connected to your telephone line. ❑ - Sony VGC-LS31N | User Guide - Page 135
Troubleshooting is not connecting properly to other PC-based modems, fax machines, or your Internet Service Provider (ISP), do any of problem is fax-related, make sure there are no problems with the fax machine you are calling and that it is compatible with fax modems. ❑ If you are having a problem - Sony VGC-LS31N | User Guide - Page 136
Troubleshooting and the Wireless LAN indicator is lit on your computer. ❑ Make sure power to the access point is on. ❑ Follow these steps to check the cannot access the Internet? ❑ Check the access point settings. See the manual that came with your access point for more information. ❑ Make sure your - Sony VGC-LS31N | User Guide - Page 137
n 137 N Troubleshooting Why is the data transfer speed slow? ❑ The wireless LAN data ❑ If your access point interferes with other access points, change the access point channel. See the manual that came with your access point for more information. How do I avoid data transfer interruptions? ❑ When - Sony VGC-LS31N | User Guide - Page 138
as channels. Third-party wireless LAN access point channels may be preset to different channels from Sony devices. ❑ If you are using a wireless LAN access point, see connectivity information contained in the manual that came with your access point. Why does the network connection stop when I change - Sony VGC-LS31N | User Guide - Page 139
n 139 N Troubleshooting Optical Discs Why does my computer freeze when I try to read a Check the disc for dirt or damage. If you need to clean the disc, see On Handling Discs (page 117) for instructions. What should I do if the disc does not slide out? ❑ Make sure your computer is on. ❑ Press the - Sony VGC-LS31N | User Guide - Page 140
Troubleshooting What should I do if I cannot play a disc properly on my computer? ❑ Make sure the disc is inserted into the optical disc drive with the label side facing toward you. ❑ Make sure the necessary program(s) is installed according to the manufacturer's instructions correct driver software - Sony VGC-LS31N | User Guide - Page 141
n 141 N Troubleshooting 5 Double-click the optical disc drive device to open a list of the optical disc drives of your computer. 6 Double-click the desired drive. You can confirm the driver software by selecting the Driver tab, and clicking Driver Details. 7 Click OK to close the window. ❑ Make sure - Sony VGC-LS31N | User Guide - Page 142
n 142 N Troubleshooting What should I do if I cannot write data to CD media? ❑ Make sure you neither launch any software application nor allow any to launch automatically, not - Sony VGC-LS31N | User Guide - Page 143
n 143 N Troubleshooting Display Why did my screen go blank? ❑ Your computer screen may go blank if the computer enters Sleep mode. If the computer is in Sleep mode, press the power button on the computer or the standby button on the wireless keyboard or the remote commander to bring the computer - Sony VGC-LS31N | User Guide - Page 144
n 144 N Troubleshooting Printing What should may need to install the printer driver software before you use your printer. See the manual that came with your printer for Click the Ports tab. 5 Click to cancel the Enable bidirectional support check box. 6 Click OK. This change to the settings disables - Sony VGC-LS31N | User Guide - Page 145
n 145 N Troubleshooting Microphone What should I do if my microphone does not work? ❑ If you are using an external microphone, make sure the microphone is turned on and - Sony VGC-LS31N | User Guide - Page 146
n 146 N Troubleshooting Mouse What should I do if my computer does not recognize my mouse? ❑ Make sure the power switch on the bottom of the wireless mouse is in the ON position. ❑ Make sure another mouse is not connected. ❑ Make sure the supplied AA batteries are properly installed. ❑ Press the - Sony VGC-LS31N | User Guide - Page 147
n 147 N Troubleshooting Speakers What should I do if I do not hear sound from the built-in speakers? ❑ If you are using a program that has its own volume control, - Sony VGC-LS31N | User Guide - Page 148
n 148 N Troubleshooting Keyboard What should I do if the keyboard configuration is computer does not recognize my keyboard? ❑ Make sure the POWER switch at the top of the wireless keyboard is in the ON position. ❑ Make sure the supplied AA batteries are properly installed. ❑ Press the CONNECT button - Sony VGC-LS31N | User Guide - Page 149
n 149 N Troubleshooting Floppy Disks Why doesn't the Safely Remove Hardware icon appear on the taskbar when the drive is connected? Your computer does not recognize the floppy - Sony VGC-LS31N | User Guide - Page 150
with the Microsoft Windows operating system installed on your computer. ❑ See the manual that came with your PC Card for more information. You may need to install driver software if you are not using a Sony PC Card. ❑ If your PC Card, which worked normally before, does not work, you may need to - Sony VGC-LS31N | User Guide - Page 151
n 151 N Troubleshooting Why doesn't my computer recognize attached devices? For some PC Cards, if you alternate between Normal mode and Sleep mode while the card is inserted into the PC Card slot, your computer may not recognize the PC Card or the connected device. Restart the computer. Why can't I - Sony VGC-LS31N | User Guide - Page 152
Troubleshooting 92) for more information. ✍ i.LINK is a trademark of Sony used only to designate that a product contains an IEEE 1394 communicate with each other. See the manual that came with your compatible i.LINK connection. Before connecting compatible i.LINK PC peripherals to your system, such - Sony VGC-LS31N | User Guide - Page 153
n 153 N Troubleshooting Memory Stick Media What should I do if I cannot use Memory Stick media, which were formatted on a VAIO computer, on other devices? You may need to reformat your Memory Stick media. Formatting Memory Stick media erases all data, including music data previously saved on it. - Sony VGC-LS31N | User Guide - Page 154
N Troubleshooting Peripherals What should I do if I cannot connect a USB device? ❑ If applicable, check the USB device is turned on and using its own power supply. For example, if you are using a digital camera, check if the battery is charged. If you are using a printer, check if the power cable - Sony VGC-LS31N | User Guide - Page 155
Computing Support This service provides instant access to information on commonly encountered problems. Type a description of the problem and the Knowledge Database searches for the corresponding solutions online. You can visit the Sony online support Web site at: http://esupport.sony.com/EN/VAIO - Sony VGC-LS31N | User Guide - Page 156
n 156 N Support Options 5 VAIO Update When your computer is connected to the Internet, VAIO Update automatically notifies you when critical software and security information is posted on the support Web site. Click the VAIO Update notice to open the VAIO Support Web site and view the information. - Sony VGC-LS31N | User Guide - Page 157
may call Sony directly. In order to receive the fastest and most efficient services, please have the following information readily available: 1 Your VAIO computer model You can the back or bottom of the notebook or on the back of the desktop; the serial number is the last 7 digits of the number below - Sony VGC-LS31N | User Guide - Page 158
contact a Sony technical support representative, please call the following numbers: ❑ In Argentina: (011) 6770-SONY (7669) ❑ In Mexico: In Mexico City: 5002-9819 In the Mexican Republic: 01-800-759-7669 ❑ In Colombia: 01-800-550-7000 ❑ In Peru: 0-801-1-7000 or 511-6100 ❑ In Chile: Sony answers: 800 - Sony VGC-LS31N | User Guide - Page 159
software products are listed below: ❑ For users in USA Web site http://esupport.sony.com/EN/VAIO/ Telephone 888-4-SONY-PC (888-476-6972) ❑ For users in Canada Web site http://www.sony.ca/support Telephone 888-4-SONY-PC (888-476-6972) ❑ For users in Spanish speaking Latin American countries or areas - Sony VGC-LS31N | User Guide - Page 160
Web site http://www.aol.com AOL® Toolbar America Online, Inc. ❑ For users in USA and Canada Web site http://help.aol.com/help n 160 N Support Options - Sony VGC-LS31N | User Guide - Page 161
Information (page 159). Cingular Connection Manager Cingular Wireless For contacts about the software, see Program Support Information (page 159). Click to DVD® software Sony Electronics Inc. At the touch of a button, Click to DVD software allows you to automatically burn DVDs from a digital video - Sony VGC-LS31N | User Guide - Page 162
Microsoft® Office Basic Edition, Office Professional Edition, Office Small Business Edition Microsoft Corp. ❑ For users in USA and Canada Web site http://support.microsoft.com 60-Day Trial Version of Microsoft® Office ! The Microsoft Office 60-Day Trial software included with this computer system is - Sony VGC-LS31N | User Guide - Page 163
.microsoft.com MobiTV® MobiTV, Inc. ❑ For users in USA and Canada Web site http://www.mobitv.com/support/support.php Norton Internet Security™ Symantec Corporation ❑ For users in USA and Canada Web site http://www.symantec.com/techsupp One Voice One Voice Technologies, Inc. ❑ - Sony VGC-LS31N | User Guide - Page 164
N Support Options PenPlus for VAIO® PC Sony Electronics Inc. PenPlus for VAIO PC will allow you to write or draw directly on the screen with the stylus or create "sticky note" reminders. For contacts about the software, see Program Support Information (page 159). Protector Suite QL Sony Electronics - Sony VGC-LS31N | User Guide - Page 165
Wireless WAN, and Bluetooth® technology connectivity) that came with your computer. For contacts about the software, see Program Support Information (page 159). SonicStage® software Sony Electronics Inc. The SonicStage jukebox software program gives you all the tools you need to manage music on your - Sony VGC-LS31N | User Guide - Page 166
manages the settings for your computer's shortcut keys. For contacts about the software, see Program Support Information (page 159). VAIO® Camera Capture Utility Sony Electronics Inc. VAIO Camera Capture Utility is provided for capturing still images and movies with the external camera connected to - Sony VGC-LS31N | User Guide - Page 167
For contacts about the software, see Program Support Information (page 159). VAIO® Diagnostic Sony Electronics Inc. For contacts about the software, see Program Support Information (page 159). VAIO® Edit Component Sony Electronics Inc. VAIO Edit Component provides enhanced editing functionality when - Sony VGC-LS31N | User Guide - Page 168
your wired or wireless network. For contacts about the software, see Program Support Information (page 159). VAIO® Security Center Sony Electronics Inc. Sony cares about your VAIO personal computer. The VAIO Security Center highlights some of the security features your machine includes. For contacts - Sony VGC-LS31N | User Guide - Page 169
site for important software updates and information for your specific VAIO computer model. For contacts about the software, see Program Support Information (page 159). VAIO Video & Photo Suite Sony Electronics Inc. VAIO Content Importer and VAIO Content Exporter are included in this utility software - Sony VGC-LS31N | User Guide - Page 170
WinDVD® software for VAIO® computers InterVideo, Inc. ❑ For users in USA and Canada Web site http://www.intervideo.com/jsp/Support.jsp Telephone 510-651-0888 Xdrive™ America Online, Inc. ❑ For users in USA and Canada Web site http://www.xdrive.com/support Zoom Utility Sony Electronics Inc. The Zoom - Sony VGC-LS31N | User Guide - Page 171
n © 2007 Sony Corporation
-
 1
1 -
 2
2 -
 3
3 -
 4
4 -
 5
5 -
 6
6 -
 7
7 -
8
-
9
-
10
-
11
-
12
-
13
-
14
-
15
-
16
-
17
-
18
-
19
-
20
-
21
-
22
-
23
-
24
-
25
-
26
-
27
-
28
-
29
-
30
-
31
-
32
-
33
-
34
-
35
-
36
-
37
-
38
-
39
-
40
-
41
-
42
-
43
-
44
-
45
-
46
-
47
-
48
-
49
-
50
-
51
-
52
-
53
-
54
-
55
-
56
-
57
-
58
-
59
-
60
-
61
-
62
-
63
-
64
-
65
-
66
-
67
-
68
-
69
-
70
-
71
-
72
-
73
-
74
-
75
-
76
-
77
-
78
-
79
-
80
-
81
-
82
-
83
-
84
-
85
-
86
-
87
-
88
-
89
-
90
-
91
-
92
-
93
-
94
-
95
-
96
-
97
-
98
-
99
-
100
-
101
-
102
-
103
-
104
-
105
-
106
-
107
-
108
-
109
-
110
-
111
-
112
-
113
-
114
-
115
-
116
-
117
-
118
-
119
-
120
-
121
-
122
-
123
-
124
-
125
-
126
-
127
-
128
-
129
-
130
-
131
-
132
-
133
-
134
-
135
-
136
-
137
-
138
-
139
-
140
-
141
-
142
-
143
-
144
-
145
-
146
-
147
-
148
-
149
-
150
-
151
-
152
-
153
-
154
-
155
-
156
-
157
-
158
-
159
-
160
-
161
-
162
-
163
-
164
-
165
-
166
-
167
-
168
-
169
-
170
-
171
 |
 |
N
User Guide
Personal Computer
VGC-LS30 Series