Sony VGF-HS1U Quick Start Guide
Sony VGF-HS1U - Vaio Home Server Manual
 |
View all Sony VGF-HS1U manuals
Add to My Manuals
Save this manual to your list of manuals |
Sony VGF-HS1U manual content summary:
- Sony VGF-HS1U | Quick Start Guide - Page 1
Start Guide (this document) ❑ Warranty sheet or Guarantee and Service Support booklet (depending on the country or region of residency) ❑ CD-ROM disc • Software - PC Link - VAIO Media • Contents Sample contents (also stored on your Home Server at the time of delivery) 4-121-976-01(1) © 2008 Sony - Sony VGF-HS1U | Quick Start Guide - Page 2
Guide for detailed instructions on connecting to a network. 3 Attach the rear cover. 1 To DC IN 19.5V Installing Software The PC Link software provides you with easy ways to keep your folder content updated (data synchronization) between your personal computer and your Home Server. 1 Insert
-
 1
1 -
 2
2
 |
 |

© 2008 Sony Corporation / Printed in Japan
4-121-976-
01
(1)
❑
Home Server
❑
Rear cover
❑
AC adapter
❑
Power cord
❑
Network (LAN) cable (straight-
through Ethernet cable, 2 m)
❑
User Guide
❑
Setup Guide
❑
Quick Start Guide
(this document)
❑
Warranty sheet or Guarantee
and Service Support booklet
(depending on the country or
region of residency)
❑
CD-ROM disc
• Software
– PC Link
– VAIO Media
• Contents
Sample contents
(also stored on your Home
Server at the time of delivery)
1
COPY indicator light
Indicates the state of a USB device
or a memory card and the status of
data imported from the device or
card.
2
NETSERVER indicator light
Indicates the server test status or
the state of the Home Server.
3
1
(POWER) indicator light
Indicates the state of the power
supply or the state of the Home
Server.
4
1
(POWER) button
Press this button to turn on and off
the Home Server.
5
INFO indicator light
Indicates the state of the Home
Server.
6
HDD indicator light
Indicates the remaining capacity or
the state of the hard disk drive.
7
CONNECT button
Press this button to obtain a
permission code for adding a Data
Sync (receiving) profile.
8
COPY button
Press this button to import data
from a USB device or a memory
card.
9
SD (SD memory card) slot
Insert an SD memory card.
q;
(USB) port
Connect a USB mass storage
class device, such as a digital still
camera or a digital camcorder.
This port is also labeled as Front
USB on the Home Server Settings
Page.
qa
Display
Displays information on the Home
Server.
qs
DISPLAY button
Press this button to turn on the
display on the Home Server and
select the required information.
qd
Memory Stick slot
Insert a “Memory Stick” media.
This slot can also accommodate
the Duo-type media without an
adapter.
qf
OK button
Press this button to confirm the
information displayed on the
display.
qg
CANCEL button
Press this button to cancel the on-
going operation. You can also
press and hold this button for 10
seconds to clear the administrator
registration and the IP address
settings.
qh
MEMORY CARD access indicator
light
Blinks while access to the memory
card is in progress.
qj
CF (CompactFlash) slot
qk
CF (CompactFlash) media eject
button
ql
Front door
To open the front door, put your
fingertip on the left end of the door
and slide it half way to the right. To
close the door, slide it half way to
the left.
w;
ID label
Shows the model name of the
Home Server.
1
Air vents
2
DC IN port
Connect to the AC adapter.
3
Network (LAN) port
Connect a network (LAN) cable.
Note
Be sure not to connect any
unsupported networks or any
telephone lines to the Network
port.
Ports
Front
Back
4
(USB) port 1
Connect a USB mass storage
class device, such as a digital still
camera or a digital camcorder.
This port is also labeled as Rear
USB1 on the Home Server Settings
Page.
Unpacking
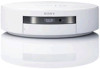
Getting to know your VGF-HS1 Home Server
The information provided here is designed to help you become familiar with your Home Server.
Note
Some of the above products may not be available, depending on the country or region of residency.
5
(USB) port 2
Connect a USB mass storage
class device, such as a digital still
camera or a digital camcorder.
This port is also labeled as Rear
USB2 on the Home Server Settings
Page.
VGF-HS1 Series
Store
Share