Sony VGP-MR200 Operating Instructions
Sony VGP-MR200 - VAIO RoomLink Network Media Receiver Manual
 |
View all Sony VGP-MR200 manuals
Add to My Manuals
Save this manual to your list of manuals |
Sony VGP-MR200 manual content summary:
- Sony VGP-MR200 | Operating Instructions - Page 1
Network Media Receiver VGP-MR200U/E Operating Instructions - Sony VGP-MR200 | Operating Instructions - Page 2
• VAIO, , and VAIO Media are registered trademarks of Sony Corporation. are not shown in this document. • In this manual, Microsoft® Windows® XP Home Edition, Microsoft® Windows supplied guides The following guides are included with this Network Media Receiver. • Operating Instructions ( - Sony VGP-MR200 | Operating Instructions - Page 3
Introduction Table of Contents Introduction What this product can do 5 Operating environment 8 Computers that can be connected to this product 8 Check the supplied accessories 9 Names of parts 10 Setup Setup overview 13 Connection between the Network Media Receiver and computer 13 Getting - Sony VGP-MR200 | Operating Instructions - Page 4
STATUS and WIRELESS indicators 58 Meaning of STATUS and WIRELESS indicators during hardware diagnosis 59 Notes on Use 60 Specifications 62 Getting Help 63 Troubleshooting Power 64 Power does not come on 64 Network Media Receiver cannot be switched off 64 Computer does not come on (does not - Sony VGP-MR200 | Operating Instructions - Page 5
Introduction Introduction What this product can do You can use your TV set to enjoy photos, video, or music stored on your computer. Support for connecting multiple computers Multiple computers can be connected through a router with a built-in Ethernet hub (or a stand-alone Ethernet hub). When - Sony VGP-MR200 | Operating Instructions - Page 6
show of photos stored on the computer (page 48) • View a single photo (page 49) • Listen to background music during a slide show (page 50) The VAIO Web site always has the latest information and allows you to download software upgrades that may be useful in resolving various issues. To get the - Sony VGP-MR200 | Operating Instructions - Page 7
Content Video • Video Capsules recorded on a VAIO with Giga Pocket, VAIO Zone, or other video files stored on the computer Music Music files and playlists stored on the computer Photos Photo (still image) files stored on the computer Supported file types • Video Capsule • MPEG1 • MPEG2 - Sony VGP-MR200 | Operating Instructions - Page 8
that can be connected to this product: • Sony VAIO computers with Windows XP installed and VAIO Media Version 4.1 or later pre-installed • Sony VAIO computers sold after September 2002 with VAIO Media Version 2.0 pre-installed and upgraded with VAIO Media Upgrade Program 4.1 or later Note Depending - Sony VGP-MR200 | Operating Instructions - Page 9
If anything is missing, contact the Sony dealer where you purchased this product or a Sony service representative in your area. You can ❏ Crossover cable (1 m) (1) ❏ Printed documentation • Quick Start Guide (1) • Quick Connection Guide (1 or 2) 1 • For users connecting the Network Media Receiver - Sony VGP-MR200 | Operating Instructions - Page 10
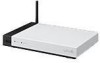
green. Note If the standby indicator does not light up in red about 20 seconds after the power cord is connected, visit the Sony Web site for additional instructions. See "Getting Help" (page 63). 2 Remote control sensor (page 15) 3 STATUS indicator (page 58) 4 WIRELESS indicator (page 58) Side view - Sony VGP-MR200 | Operating Instructions - Page 11
Introduction Rear view 1 1 DC IN 5.2V connector (page 29) 2 COMPONENT VIDEO OUT connectors (page 19) 3 S VIDEO OUT connector (page 18) 4 VIDEO OUT connector AUDIO OUT (left/right) connectors (page 18) 5 OPTICAL OUT connector (page 20) 6 NETWORK connector (pages 25, 26, 27) 7 Antenna When connecting - Sony VGP-MR200 | Operating Instructions - Page 12
Remote control 1 TV CHANNEL +/- buttons 2 TV MUTING button 3 Number buttons (page 16) 4 CLEAR button (page 45) 5 REW/FWD buttons (page 46) 6 STOP button (pages 44, 46, 49) 7 OPTIONS button (page 40) 8 V/v/B/b/SELECT buttons (page 16) 9 VIEW button (page 42) 0 TV VOLUME +/- buttons qa TV POWER - Sony VGP-MR200 | Operating Instructions - Page 13
Network Media Receiver always operates in wireless LAN infrastructure mode (access point network mode). Ad-Hoc (Peer-to-Peer) mode is not supported. Cable based connection Using the Ethernet cable connection, the Network Media Receiver is connected to the computer using a network cable. Depending on - Sony VGP-MR200 | Operating Instructions - Page 14
(using router)". 7. Configure settings at the computer c Page 35 The computer must be configured to share its photos, video, and music. When using a VAIO computer, the VAIO Media software must be configured. When using a different kind of computer, corresponding settings must be configured. 14 - Sony VGP-MR200 | Operating Instructions - Page 15
Setup 1 Prepare the remote control for use Inserting the batteries As shown in the illustration, open the battery cover lid of the remote control, and insert two AA (R6) batteries (supplied). Verify e/E polarities, and insert the batteries from the E side. Using the remote control To use the remote - Sony VGP-MR200 | Operating Instructions - Page 16
the appropriate TV manufacturer code is entered. If you are using a Sony TV set, you do not need to program the remote control, Philips Pioneer Portland Quasar Radio Shack RCA/PROSCAN Samsung Sanyo Scott Sharp Signature Sony Sylvania Symphonic Toshiba Vidtech Wards Zenith Code Number 03, 12 16, 18 - Sony VGP-MR200 | Operating Instructions - Page 17
26 04, 07 07 04, 27, 28 02, 11 04, 07 04 13, 14 15 TV Manufacturer NEC Panasonic Philips Pioneer Samsung Sanyo Schneider Sharp Sony Thomson Toshiba Code Number 16 17 04 19 04, 07 02 02, 03, 04 21 01 22 03, 24 Setup 17 - Sony VGP-MR200 | Operating Instructions - Page 18
2 Connect the Network Media Receiver to a TV Note Make sure that the power cord is not plugged into an AC outlet when you connect the Network Media Receiver to the TV, or the Network Media Receiver may not operate properly. Use the supplied audio/video cable to connect the Network Media Receiver to - Sony VGP-MR200 | Operating Instructions - Page 19
Setup To connect the Network Media Receiver to a TV through a VCR Connect as shown below. To audio/video input Audio/video cable (supplied) To AUDIO/VIDEO connectors l : Signal flow To connect the Network Media Receiver to a TV with component video input Use a component video cable (not supplied) - Sony VGP-MR200 | Operating Instructions - Page 20
To use the digital audio output Make the connections to an amplifier with digital input, as shown below. Optical fiber cable (not supplied) To OPTICAL OUT connector To digital input (optical) l : Signal flow 20 - Sony VGP-MR200 | Operating Instructions - Page 21
with at least one free port must be available. Depending on your system environment, the connection will differ. Also refer to the separate Quick Connection Guide. 21 - Sony VGP-MR200 | Operating Instructions - Page 22
When the computer is connected to the Internet through a network (LAN) cable System environment A LAN port available on ADSL/cable modem with router capability ADSL/cable modem with router capability How to connect Connect the Network Media Receiver to an open LAN port using a network cable. - Sony VGP-MR200 | Operating Instructions - Page 23
Setup System environment C ADSL/cable modem or hub has no router capability v A router with built-in hub is required. ADSL/cable modem or hub without router capability How to connect See "Case 1: Connecting through a router with built-in hub" (page 25, C). Network Media Receiver D Connecting - Sony VGP-MR200 | Operating Instructions - Page 24
address to the computer" (page 27). Network Media Receiver z Hints • To check whether your ADSL/cable modem has router capability, consult the instructions that came with the modem, or contact your ADSL or cable internet provider. • The default setting of the Network Media Receiver is "Automatic - Sony VGP-MR200 | Operating Instructions - Page 25
environment, the connection may be different. For details, contact the technical support department of your Internet provider. 2 Use a router with built-in hub that supports 100BASE-TX. All the networked equipment must support 100BASE-TX for optimum playback experience. Notes • When a router with - Sony VGP-MR200 | Operating Instructions - Page 26
100BASE-TX for optimum playback experience. Notes • Use a router with a built-in hub (or stand-alone hub) that supports 100BASE-TX. • Use network cables that support 100BASE-TX. • The default setting of the Network Media Receiver is "Automatic assignment (using router)". Depending on your system - Sony VGP-MR200 | Operating Instructions - Page 27
Case 3: Network connector of computer is free (system environments E, F) Setup Crossover cable (supplied) To NETWORK connector To NETWORK connector Computer Network Media Receiver Note When connecting the Network Media Receiver and the computer as shown above, the following settings must be - Sony VGP-MR200 | Operating Instructions - Page 28
5 Click the "General" tab, select "Internet Protocol (TCP/IP)", and click "Properties". The "Internet Protocol (TCP/IP) Properties" window appears. 6 Select "Use the following IP address" and enter the following address in the "IP Address" and "Subnet Mask" fields: When multiple computers are - Sony VGP-MR200 | Operating Instructions - Page 29
Setup 4 Connect power 1 Connect the AC adapter to the Network Media Receiver. AC adapter (supplied) To DC IN 5.2V input connector 2 Connect the power cord to the AC adapter, and plug it into an AC outlet. About 20 seconds after you connect the power, the standby indicator lights up in red. - Sony VGP-MR200 | Operating Instructions - Page 30
5 Configure wireless LAN settings Use the screens displayed on your TV to configure the wireless LAN settings. If you are connecting the Network Media Receiver to your computer through a network cable, skip this procedure, and go to "6 Change the settings of the Network Media Receiver to match the - Sony VGP-MR200 | Operating Instructions - Page 31
the settings appropriate to your wireless network. A software keyboard appears on the screen to enable you to enter the SSID and Key Phrase. For instructions on using the software keyboard, refer to "Using the software keyboard" on page 32. 3 Use the V/v/B/b buttons to select "OK", and press the - Sony VGP-MR200 | Operating Instructions - Page 32
Using the software keyboard The software keyboard appears on the screen whenever SSID or Key Phrase is selected on the "Wireless LAN Configurations" screen. Use this display to input a character string as follows. 1 Select the input mode. Use the V/v/B/b buttons to select "Number", "abc", "ABC", or - Sony VGP-MR200 | Operating Instructions - Page 33
Setup 6 Change the settings of the Network Media Receiver to match the network connection The factory default setting of the Network Media Receiver is "Automatic assignment (using router)". Depending on your system environment, this setting may have to be changed. If a router is being used, there - Sony VGP-MR200 | Operating Instructions - Page 34
"Automatic assignment (using router)". If the environment does not include a router, select "Automatic assignment (not using router)". 3 If you have selected "Manual assignment", use the V/v/B/b buttons to select "OK", and press the SELECT button. Then use the number buttons to enter the IP address - Sony VGP-MR200 | Operating Instructions - Page 35
Media console. For details on making settings, refer to the VAIO Media online help. For computers other than VAIO Setup methods vary for different computers. For details on your setup method, refer to the instruction manuals that came with your computer or with the media content server software you - Sony VGP-MR200 | Operating Instructions - Page 36
other than DLNA ServerB ServerC ServerD 1/5 SELECT :Select OPTIONS :System Settings Content list c page 41 Music Server - VAIO 1 Cruise, first day - Blowing in the wind Cool Summer Baby Baby 2 Surfer Style Just To Let You Know Prelude Love Ballad Sunny Day Trip To The Moon I Just Want To Be With - Sony VGP-MR200 | Operating Instructions - Page 37
day 00:10:00 / 01:00:15 :Toggle Film Roll High Quality L + R OPTIONS :Options Music Music Server - VAIO 1 Cool Summer Ready Steady Cool Summer 0:12:34 / 5:67:89 Cool Summer Baby Baby 2 Surfer Style Just To Let You Know Prelude Love Ballad Sunny Day Trip To The Moon I Just Want To Be - Sony VGP-MR200 | Operating Instructions - Page 38
standby indicator changes to green, and the "Select a server..." screen appears on the TV. "Select a server..." screen Select a server••• ServerA-VAIO MediaServer other than DLNA ServerB ServerC ServerD 1/5 SELECT :Select OPTIONS :System Settings For details on using the "Select a server..." screen - Sony VGP-MR200 | Operating Instructions - Page 39
on your network. "Select a server..." screen The names of computers that can be connected are displayed. Select a server••• ServerA-VAIO MediaServer other than DLNA ServerB ServerC ServerD 1/5 SELECT :Select OPTIONS :System Settings Icon Current status of computer Available for connection - Sony VGP-MR200 | Operating Instructions - Page 40
• The network is not ready c Check whether all cables are plugged properly into the network connectors. If a hub or router is used, check whether the hub or router is receiving power. z Hints • If a computer on the network configured to share media content does not appear on the "Select a server..." - Sony VGP-MR200 | Operating Instructions - Page 41
To remove a server from the list If a server is turned off or becomes unavailable after the Network Media Receiver was turned on, an icon indicating that the server is not available appears next to the server name on the "Select a server..." screen. You can remove such a server from the list by - Sony VGP-MR200 | Operating Instructions - Page 42
the two modes. List Content items are shown as a list. Each line of the list shows one item along with relevant information. Select a server••• ServerA-VAIO MediaServer other than DLNA ServerB ServerC ServerD 1/5 SELECT :Select OPTIONS :System Settings 42 - Sony VGP-MR200 | Operating Instructions - Page 43
Thumbnails Content items are shown as thumbnails. Up to nine thumbnails along with information, can be shown on one screen. Music Server - VAIO 1 Italy vacation SELECT :Select RETURN :Return OPTIONS :Options 11/27 z Hint You can also change the display format from the OPTIONS menu: 1. Press the - Sony VGP-MR200 | Operating Instructions - Page 44
a video file in the content list and press the SELECT button, the video playback screen appears, and the video file begins to play. Video Server - VAIO 1 Cruise, first day Playback mode icon 00:10:00 / 01:00:15 :Toggle Film Roll High Quality L + R OPTIONS :Options z Hints • If you select the - Sony VGP-MR200 | Operating Instructions - Page 45
in miniaturized form as a simulated film roll, making it easy to find a desired scene. This function is available only when you are connecting to a VAIO computer. 1 Press the V button during playback or pause. The film roll display appears. Cursor :Move SELECT :Play :Toggle Film Roll 2 Use the - Sony VGP-MR200 | Operating Instructions - Page 46
file begins to play. Album jacket image Artist name Name of song playing Playback status Music Server - VAIO 1 Cool Summer Ready Steady Cool Summer 0:12:34 / 5:67:89 Cool Summer Baby Baby 2 Surfer Style Just To Let You Know Prelude Love Ballad Sunny Day Trip To The Moon I Just Want To Be - Sony VGP-MR200 | Operating Instructions - Page 47
Operation To repeat a single track or a folder of tracks You can repeat either a single track or all tracks in a specific folder. 1 Press the OPTIONS button during playback or pause. The OPTIONS menu appears. 2 Use the V/v buttons to select "Repeat", and press the SELECT button. A submenu appears. - Sony VGP-MR200 | Operating Instructions - Page 48
of all photos in the current folder, starting with the current photo, select a photo from the content list, and press the PLAY button. Photo Server - VAIO 1 Soccer tournament 34 / 67 :Pause OPTIONS :Options 10 sec ALL 48 - Sony VGP-MR200 | Operating Instructions - Page 49
To display only one photo Use the V/v buttons to select the photo, and press the SELECT button or the PLAY button. The display method differs, depending on which button is pressed. Button Photo display method SELECT Show this photo only PLAY Start slide show z Hint Press the PLAY button while - Sony VGP-MR200 | Operating Instructions - Page 50
Adding background music to a slide show Music stored on the computer can be added to a slide show as background music (BGM). Note To use this function, at least one track or folder must have been selected for BGM (page 48). 1 Press the OPTIONS button while a slide show is playing. The OPTIONS menu - Sony VGP-MR200 | Operating Instructions - Page 51
Operation Changing the slide show settings You can change the interval for the slide show and have a slide show play repeatedly. 1 Press the OPTIONS button during display of a single photo or during a slide show. The OPTIONS menu appears. 2 Use the V/v buttons to select the item to set, and press - Sony VGP-MR200 | Operating Instructions - Page 52
Advanced Features How to get the most out of your Network Media Receiver Having the computer start up automatically You can have your computer start up automatically when the Network Media Receiver establishes a connection. (The computer will not start up when the Network Media Receiver is turned on - Sony VGP-MR200 | Operating Instructions - Page 53
to walk over to the computer to turn it off. Without this setting, shutting down the computer will require additional steps performed at the computer. A VAIO computer is set up by default to go into Standby automatically after several minutes of non-use. 1 On the computer, click the "Start" on the - Sony VGP-MR200 | Operating Instructions - Page 54
Changing the settings of the Network Media Receiver The settings of the Network Media Receiver can be changed using the "System Settings" screen. To bring up the "System Settings" screen 1 Display the "Select a server..." screen. • If the Network Media Receiver is not turned on, the "Select a server - Sony VGP-MR200 | Operating Instructions - Page 55
Help" (page 63) to update your Network Media Receiver to the latest version and download any problem-solving firmware updates. For information on firmware update procedures, refer to the instructions that accompany the downloaded tools. To get the most out of this product, periodically visit the - Sony VGP-MR200 | Operating Instructions - Page 56
To return the Network Media Receiver to the default settings When you perform the steps described below, the following settings are reset to the default settings: • Network Type • Wireless LAN Configurations • IP address • Playback preference (page 57) • Music repeat and shuffle settings • Slide - Sony VGP-MR200 | Operating Instructions - Page 57
environment. • "High quality mode" When files are played in their original format, picture and sound quality is maintained, but picture breakup and other problems may occur on a lower-speed network. 3 Use the V/v buttons to select "OK", and press the SELECT button. To change the display language To - Sony VGP-MR200 | Operating Instructions - Page 58
About the Standby, STATUS and WIRELESS indicators Standby indicator When you plug in the power cord of the Network Media Receiver, the unit automatically initializes itself and performs a hardware diagnosis routine. (This takes about 20 seconds.) When these steps are completed successfully, the - Sony VGP-MR200 | Operating Instructions - Page 59
Meaning of STATUS and WIRELESS indicators during hardware diagnosis In the interval from when the power cord is connected until the standby indicator lights up, the STATUS and WIRELESS indicators show the progress of the hardware diagnosis routine, as follows: STATUS WIRELESS Meaning Off Off - Sony VGP-MR200 | Operating Instructions - Page 60
Before inserting a disc, make sure that the label is properly attached. In no event will Sony Corporation be liable for any damage or media loss caused by improper labels. Carefully follow the instructions of any label printing software and label products. Use of such products occurs entirely at the - Sony VGP-MR200 | Operating Instructions - Page 61
sure that the label is properly fixed on the disc surface before using the disc. Sony assumes no liability for any malfunction of your drive or damage to the media caused by improper labeling. Please thoroughly read instruction notes of your label software and label sheets. • Do not store discs in - Sony VGP-MR200 | Operating Instructions - Page 62
215 × 33.5 × 145.5 mm (w/h/d) (8.5 × 1.4 × 5.8 inches) (excluding protruding parts) Mass Approx. 800 g (28.3 oz) Supported equipment • VAIO computer with VAIO Media Version 4.1 or later or VAIO Media Server Version 4.1 or later (preinstalled or upgraded) • Computer with DLNA HNv1 compliant software - Sony VGP-MR200 | Operating Instructions - Page 63
from Sony and on troubleshooting tips for your Network Media Receiver. Sony support options Sony provides several support options for your Network Media Receiver. When you have questions about your Network Media Receiver or the software, refer to the following: ❑ This guide explains how to use - Sony VGP-MR200 | Operating Instructions - Page 64
Troubleshooting Power Power does not come on c Check whether the power cord is correctly plugged into the AC outlet. When you connect the AC adapter to - Sony VGP-MR200 | Operating Instructions - Page 65
Troubleshooting Computer does not come on (does not start up from Standby or Hibernate mode) c Check whether the computer is correctly configured (page 35). c Check whether - Sony VGP-MR200 | Operating Instructions - Page 66
span of time) may not be sufficient. Check the following items: • Does the network cable support 10BASE-T/100BASE-TX? • Does the hub or router support 10BASE-T/100BASE-TX? • Does the wireless LAN access point support IEEE 802.11b or IEEE 802.11g? c The bandwidth of a wireless LAN changes according - Sony VGP-MR200 | Operating Instructions - Page 67
Troubleshooting Connection, registration I cannot connect to a computer c Check whether properly operating. Restart the computer, and start the server software again. If you are using VAIO Media, refer to the VAIO Media Help. c If you cannot connect to the computer after turning on the Network Media - Sony VGP-MR200 | Operating Instructions - Page 68
27) • Are the hub and router receiving power? (For details, see the manual of the respective device.) • Was the router turned on before the Network Media software as appropriate for your computer. If you are using VAIO Media, refer to the VAIO Media Help. c For video-related functions to be available - Sony VGP-MR200 | Operating Instructions - Page 69
http://www.sony.net/ © 2005 Sony Corporation A-CCD-100-11 (1)
-
 1
1 -
 2
2 -
 3
3 -
 4
4 -
 5
5 -
 6
6 -
 7
7 -
8
-
9
-
10
-
11
-
12
-
13
-
14
-
15
-
16
-
17
-
18
-
19
-
20
-
21
-
22
-
23
-
24
-
25
-
26
-
27
-
28
-
29
-
30
-
31
-
32
-
33
-
34
-
35
-
36
-
37
-
38
-
39
-
40
-
41
-
42
-
43
-
44
-
45
-
46
-
47
-
48
-
49
-
50
-
51
-
52
-
53
-
54
-
55
-
56
-
57
-
58
-
59
-
60
-
61
-
62
-
63
-
64
-
65
-
66
-
67
-
68
-
69
 |
 |

Network Media Receiver
VGP-MR200U/E
Operating Instructions