Sony VPLHS3 Operating Instructions - Page 38
Replacing the Air Filter
 |
UPC - 027242628793
View all Sony VPLHS3 manuals
Add to My Manuals
Save this manual to your list of manuals |
Page 38 highlights
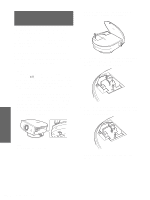
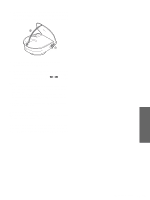
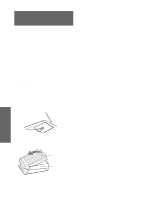
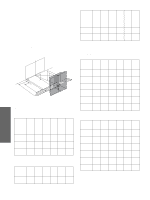
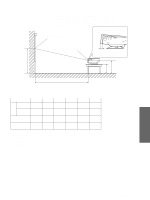
Replacing the Air Filter The air filter should be replaced periodically. When "Please replace the filter." appears on the screen, replace the air filter immediately. Notes • Replacing the air filter is very important to maintain the high efficiency of the projector and to prevent a malfunction. When the replacement message appears on the screen, replace the air filter without delay. • When removing the air filter from the projector, be careful that no dust or object gets into the inside of the projector. • Before replacing the air filter, turn off the projector and unplug the power cord. 1 Hold down the adjuster lock lever, slide it to the right, raise the rear of the projector, then return the adjuster lock lever. While keeping the screw on the bottom of the projector turned inward with a coin or a slotted screwdriver, open the projector cover with your hand. Note Be sure that the projector is stable. 2 Push the filter lock knob to remove the filter cover. 4 Insert the new air filter into the filter holder with the white surface up, put the holder face down, then replace it into the projector. 5 Replace the filter cover. 6 While pushing the projector cover toward you by holding both sides of the cover on the lens side, close the cover until it clicks. Others 3 Remove the air filter from the filter holder by holding the tab on the air filter. Air filter Filter holder 38 GB Replacing the Air Filter
-
 1
1 -
2
-
3
-
4
-
5
-
6
-
7
-
8
-
9
-
10
-
11
-
12
-
13
-
14
-
15
-
16
-
17
-
18
-
19
-
20
-
21
-
22
-
23
-
24
-
25
-
26
-
27
-
28
-
29
-
30
-
31
-
32
-
 33
33 -
 34
34 -
 35
35 -
 36
36 -
 37
37 -
 38
38 -
 39
39 -
 40
40 -
 41
41 -
 42
42 -
 43
43 -
44
-
45
-
46
-
47
-
48
-
49
-
50
-
51
-
52
-
53
-
54
-
55
-
56
-
57
-
58
-
59
-
60
-
61
-
62
-
63
-
64
-
65
-
66
-
67
-
68
-
69
-
70
-
71
-
72
-
73
-
74
-
75
-
76
-
77
-
78
-
79
-
80
-
81
-
82
-
83
-
84
-
85
-
86
-
87
-
88
-
89
-
90
-
91
-
92
-
93
-
94
-
95
-
96
-
97
-
98
-
99
-
100
-
101
-
102
-
103
-
104
-
105
-
106
-
107
-
108
-
109
-
110
-
111
-
112
-
113
-
114
-
115
-
116
-
117
-
118
-
119
-
120
-
121
-
122
-
123
-
124
-
125
-
126
-
127
-
128
-
129
-
130
-
131
-
132
-
133
-
134
-
135
-
136
-
137
-
138
-
139
-
140
-
141
-
142
-
143
-
144
-
145
-
146
-
147
-
148
 |
 |
