Sub-Zero 601F 600 Series & 430 Panel Specifications - Page 9
Handle Hardware, Side Panels
 |
View all Sub-Zero 601F manuals
Add to My Manuals
Save this manual to your list of manuals |
Page 9 highlights
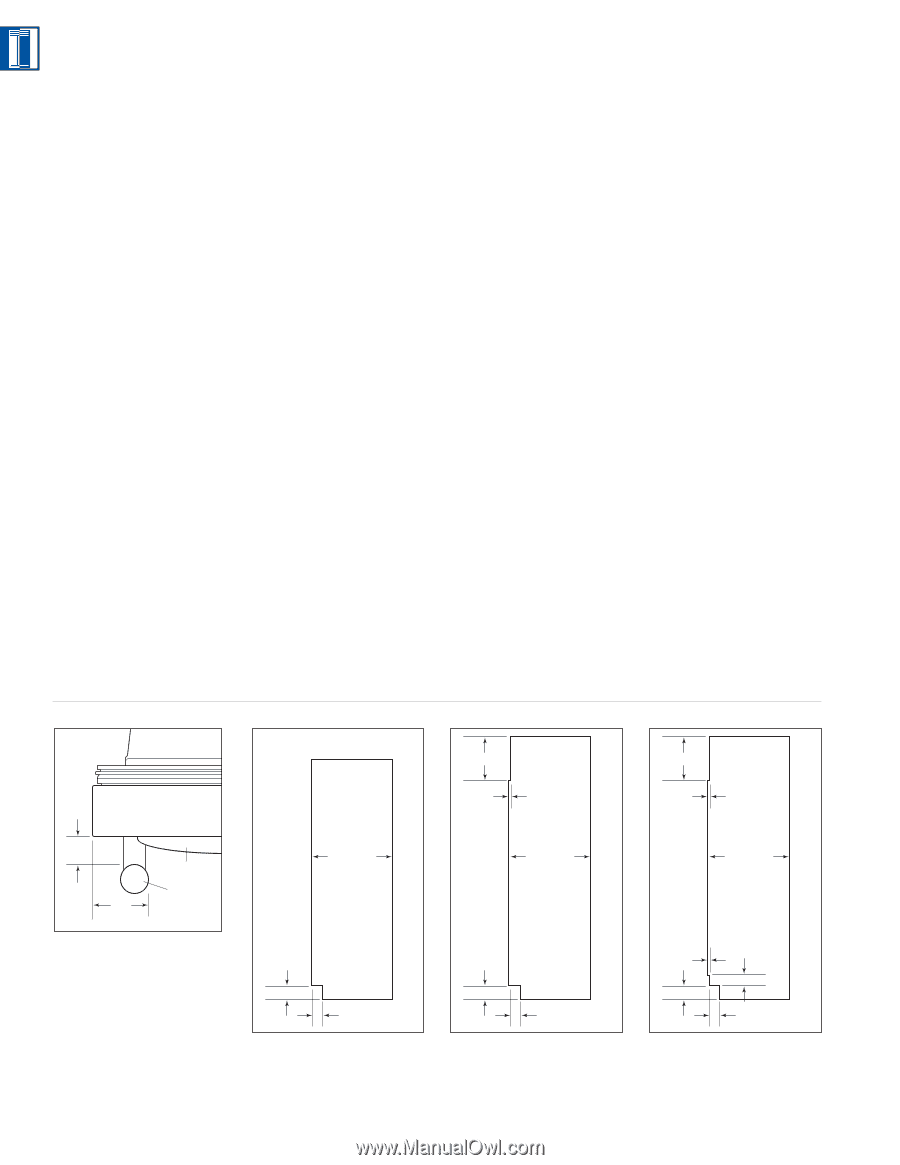
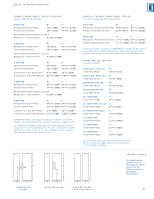
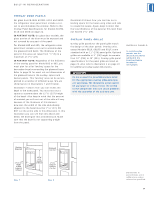
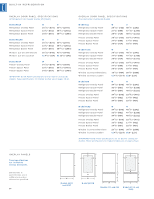
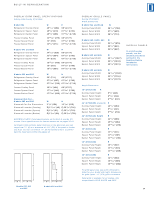
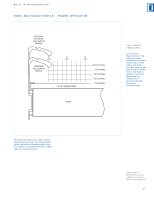
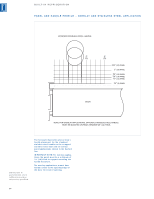
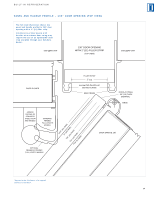
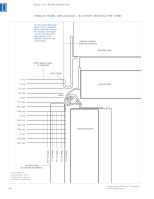
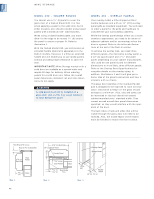
BUILT-IN REFRIGERATION ACCESSORIES Optional accessories are available through your Sub-Zero dealer. To obtain local dealer information, visit the Showroom Locator section of our website, subzero.com. HANDLE HARDWARE Overlay models come without handle hardware. The beauty of this design is that you can match the surrounding cabinet hardware. You or the cabinet manufacturer must provide handle hardware to match the overall decorating scheme. The handle hardware must be installed before installing the panel assembly. Use larger D-style handles. If screws with thick heads are used, the screws will need to be countersunk into the door before the panel is put into place. IMPORTANT NOTE: Sub-Zero does not recommend using single pull knobs on any of its BuiltIn models. For overlay Models 685 and 695, mounting placement of the refrigerator door handle must assure proper access to the glasswell and adequate clearance under the handle. Illustration 9 shows placement of the refrigerator door handle in relationship to the glasswell bezel on stainless steel models. Optional stainless steel handles are available in a variety of diameters and lengths, as are handles to match the color and style of Wolf ovens. Contact your Sub-Zero dealer for specifics. Refer to the full-scale illustrations at the end of this section for handle hardware considerations. SIDE PANELS Side panels can be used with the framed, overlay and stainless steel design applications. When planning for side panels with the installation of a Built-In model, you need to be aware of space configuration to achieve a pleasing fit. Depending on the exact panel you are using with your unit, the height of the panel will vary. Cut-outs around the toe kick and grille area are required if a 1/4" (6) thick panel will be inserted into the main frame channel. The panel will need to be 24" (610) deep. If a 3/8" (10) thick panel is used, the panel will abut the main frame and should be 23 7/8" (606) deep. Refer to illustrations 10-12 below for placement of toe kick and grille area cut-outs for your specific model. These dimensions do not apply to Models 648PRO and 648PROG. The toe kick area may or may not be cut out depending on the look you want to achieve. IMPORTANT NOTE: The use of side panels may change the width of your rough opening. 1" (25) 2" (51) Illus. 9 Glasswell Profile Handle Profile 26 237/8" (606) BEHIND FRAME 4" (102) 3" (76) Illus. 10-Models 601R, 601RG and 601F 131/4" (337) 1/4" (6) 237/8" (606) BEHIND FRAME 131/4" (337) 1/4" (6) 237/8" (606) BEHIND FRAME 4" (102) 3" (76) Illus. 11-Models 611, 611G, 650 and 650G 1/4" (6) 4" (102) 3" (76) 3" (76) Illus. 12-Models 661, 642, 632, 685 and 695
-
 1
1 -
2
-
3
-
 4
4 -
 5
5 -
 6
6 -
 7
7 -
 8
8 -
 9
9 -
 10
10 -
 11
11 -
 12
12 -
 13
13 -
 14
14 -
15
-
16
-
17
-
18
 |
 |