TASCAM DM-24 Application-Specific Documents DM-24 with MX2424
TASCAM DM-24 Manual
 |
View all TASCAM DM-24 manuals
Add to My Manuals
Save this manual to your list of manuals |
TASCAM DM-24 manual content summary:
- TASCAM DM-24 | Application-Specific Documents DM-24 with MX2424 - Page 1
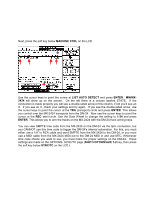
the DM-24 to the MX-2424 will be required. TASCAM has two 9-Pin cables available in our Cable Up catalog: CU/9pin5 (5 meters $38.50) CU/9pin10 (10 meters $49.20) MENU 340 on the MX-2424 needs to be changed from RC-2424 to P2 in. On the Machine control page of the DM-24 (SHIFT - TASCAM DM-24 | Application-Specific Documents DM-24 with MX2424 - Page 2
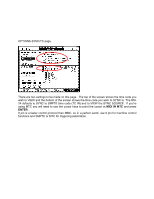
at LIST AUTO DETECT and press ENTER. MM/MX2424 will show up on the screen. On the left there is a column labeled STATE. If the connection is made TRA (transport) circle and press ENTER. This allows you control over the MX-2424 transports from the DM-24. Now use the cursor keys to point the cursor at - TASCAM DM-24 | Application-Specific Documents DM-24 with MX2424 - Page 3
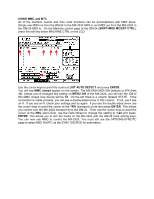
settings to be made on this page. The top of the screen shows the time code you wish to VIEW and the bottom of the screen shows the time code you wish to SYNC to. The DM24 defaults MIDI IN MTC and press ENTER. 9 pin is a faster control protocol than MMC, so in a perfect world, use 9 pin for machine - TASCAM DM-24 | Application-Specific Documents DM-24 with MX2424 - Page 4
to the DM-24 MIDI in. On the Machine control page of the DM-24 (SHIFT+MIDI MC/EXT CTRL), press the soft key below MACHINE CTRL on the LCD. Use the cursor keys to point the cursor at LIST AUTO DETECT and press ENTER. You will see MMC closed appear on the screen. The MX
-
 1
1 -
 2
2 -
 3
3 -
 4
4
 |
 |
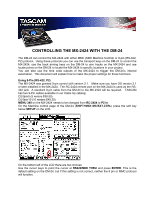
CONTROLLING THE MX-2424 WITH THE DM-24
The DM-24 can control the MX-2424 with either MMC (MIDI Machine Control) or 9-pin (RS-422,
P2) protocol.
Using these protocols you can use the transport keys on the DM-24 to control the
MX-2424, use the track arming keys on the DM-24 to arm tracks on the MX-2424 and use
locate points on the DM-24 to locate the MX-2424 to specific locations in your project.
You can also use the time code outputs of the MX-2424 to trigger the DM-24’s internal
automation.
This document will explain how to make the proper settings for these functions.
Using 9-Pin (RS-422, P2)
The MX-2424 was granted 9-pin control with version 2.1.
Make sure you have OS version 2.1
or later installed in the MX-2424.
The RC-2424 remote port on the MX-2424 is used as the RS-
422 jack.
A standard 9-pin cable from the DM-24 to the MX-2424 will be required.
TASCAM
has two 9-Pin cables available in our Cable Up catalog:
CU/9pin5 (5 meters $38.50)
CU/9pin10 (10 meters $49.20)
MENU 340
on the MX-2424 needs to be changed from
RC-2424
to
P2 in
.
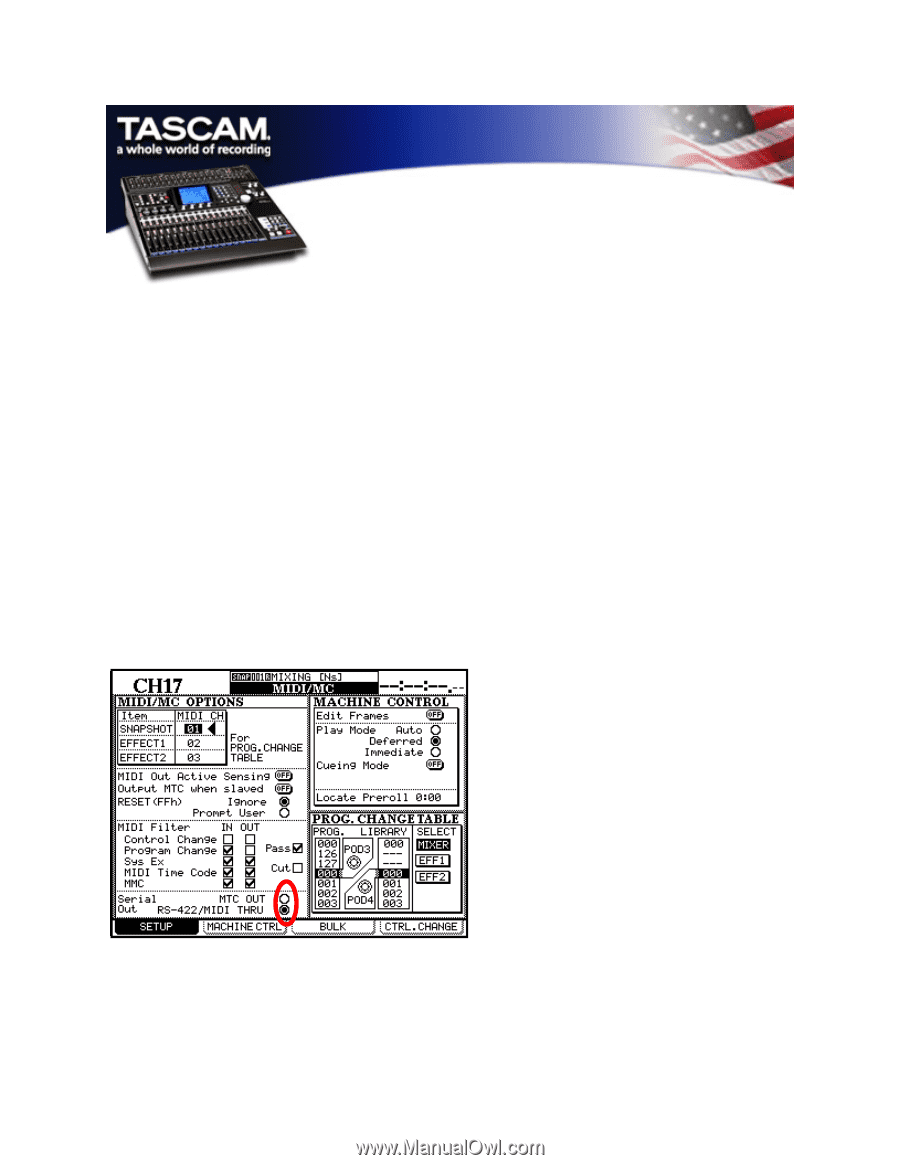
On the Machine control page of the DM-24 (
SHIFT+MIDI MC/EXT.CTRL
) press the soft key
below
SETUP
on the LCD.
On the bottom left of the LCD there are two choices:
Use the cursor keys to point the cursor at
RS422/MIDI THRU
and press
ENTER
. This is the
default setting on the DM-24, but if this setting is not correct, neither the 9 pin or MMC protocol
will function.