TP-Link TL-MR3620 TL-MR3620EU V1 User Guide
TP-Link TL-MR3620 Manual
 |
View all TP-Link TL-MR3620 manuals
Add to My Manuals
Save this manual to your list of manuals |
TP-Link TL-MR3620 manual content summary:
- TP-Link TL-MR3620 | TL-MR3620EU V1 User Guide - Page 1
User Guide AC1350 3G/4G Wireless Dual Band Router TL-MR3620 REV1.0.0 1910012185 - TP-Link TL-MR3620 | TL-MR3620EU V1 User Guide - Page 2
Connect the Hardware 7 2. 2. 2.Connect Your Computer to the Router 8 Chapter 3. Log In to Your Router 10 Chapter 4. Set Up Internet Connection 12 4. 1. Use Quick Setup Wizard 13 4. 2. Set Up IPv6 Tunnel 13 4. 2. 1.Use the Public IPv6 Tunnel Service-6to4 13 4. 2. 2.Specify the 6rd Tunnel with - TP-Link TL-MR3620 | TL-MR3620EU V1 User Guide - Page 3
from Cyber Attacks 39 9. 2. Service Filtering 40 9. 3. Access Wireless Function 61 Chapter 13.Manage the Router 63 13. 1. Set Up System Time 64 13. 2. Change Operation Mode 65 13. 3. Test the Network Connectivity 65 13. 4. Upgrade the Firmware 65 13. 4. 1.Online Upgrade 66 13. 4. 2.Manual - TP-Link TL-MR3620 | TL-MR3620EU V1 User Guide - Page 4
13. 9. Remote Management 70 13. 10. System Log 70 13. 11. Monitor the Internet Traffic Statistics 72 13. 12. CWMP Settings 73 13. 13. SNMP Settings 75 FAQ...77 - TP-Link TL-MR3620 | TL-MR3620EU V1 User Guide - Page 5
utility can be found at Download Center at http://www.tp-link.com/support. The Quick Installation Guide can be found where you find this guide or inside the package of the router. Specifications can be found on the product page at http://www.tp-link.com. A Technical Support Forum is provided for you - TP-Link TL-MR3620 | TL-MR3620EU V1 User Guide - Page 6
Chapter 1 Get to Know About Your Router This chapter introduces what the router can do and shows its appearance. It contains the following sections: • Product Overview • Panel Layout - TP-Link TL-MR3620 | TL-MR3620EU V1 User Guide - Page 7
to your wired devices. Moreover, it is simple and convenient to set up and use the TP-Link router due to its intuitive web interface and the powerful Tether app. 1. 2. Panel Layout 1. 2. 1. The Front Panel The router's LEDs (view from left to right) are located on the front. You can check the - TP-Link TL-MR3620 | TL-MR3620EU V1 User Guide - Page 8
Off On Flashing Off On/Off Flashing Indication The 5GHz wireless band is enabled. The 5GHz wireless band is disabled. Internet service is available. The router's Internet port is connected, but the internet service is not available. The router's Internet port is unplugged. At least one powered-on - TP-Link TL-MR3620 | TL-MR3620EU V1 User Guide - Page 9
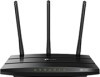
. Power Port For connecting the router to a power socket via the provided power adapter. Wi-Fi Button Press and hold the WiFi button for about 2 seconds to turn on or off the wireless function of your router. Antennas Used for wireless operation and data transmit. Upright them for the best - TP-Link TL-MR3620 | TL-MR3620EU V1 User Guide - Page 10
Chapter 2 Connect the Hardware This chapter contains the following sections: • Position Your Router • Connect Your Router - TP-Link TL-MR3620 | TL-MR3620EU V1 User Guide - Page 11
devices, cordless phones and microwaves. 2. 2. Connect Your Router 2. 2. 1. Connect the Hardware Plug and Play via 3G/4G USB Modem Router Power Adapter 1 3G/4G USB Modem 2 1. Connect the power adapter to the router and turn on the router. 2. Plug in a 3G/4G USB modem with a SIM/UIM card. 7 - TP-Link TL-MR3620 | TL-MR3620EU V1 User Guide - Page 12
via an Ethernet cable. 3. Turn on the modem and then wait about 2 minutes for it to restart. 4. Connect the power adapter to the router and turn on the router. 5. Verify that the following LEDs are solid on to confirm the hardware is connected correctly. Power On 2.4GHz On 5GHz On Internet On - TP-Link TL-MR3620 | TL-MR3620EU V1 User Guide - Page 13
make sure the wireless function is enabled and is configured with the appropriate encryption before configuring the WPS. 1 ) Tap the WPS icon on the device's screen. Here we take an Android phone for instance. 2 ) Within two minutes, press the WPS button on your router. WLAN On TP-Link MyHome David - TP-Link TL-MR3620 | TL-MR3620EU V1 User Guide - Page 14
Chapter 3 Log In to Your Router - TP-Link TL-MR3620 | TL-MR3620EU V1 User Guide - Page 15
or UNIX OS with a Web browser, such as Microsoft Internet Explorer, Mozilla Firefox or Apple Safari. Follow the steps below to log in to your router. 1. Set up the TCP/IP Protocol in Obtain an IP address automatically mode on your computer. 2. Visit http://tplinkwifi.net, and create a login password - TP-Link TL-MR3620 | TL-MR3620EU V1 User Guide - Page 16
Chapter 4 Set Up Internet Connection This chapter introduces how to connect your router to the internet. The router is equipped with a web-based Quick Setup wizard. It has many ISP information built in, automates many of the steps and verifies that those steps - TP-Link TL-MR3620 | TL-MR3620EU V1 User Guide - Page 17
instructions to complete the configuration. Note: The router can be configured with a primary WAN/3G/4G connection and a 3G/4G USB modem/WAN connection as a backup solution to ensure "always on" internet. In this case, select 3G/4G Router Mode with Ewan Backup or Wireless Router Mode with 3G/4G - TP-Link TL-MR3620 | TL-MR3620EU V1 User Guide - Page 18
to: How can I do that? Specify the 6rd tunnel with the parameters provided by my 6rd tunnel service provider. 1. Visit http://tplinkwifi.net, and log in with the passwod you set for the router. 2. Go to Advanced > Network > IPv6 Tunnel. 3. Tick the check box, select 6rd as the tunneling mechanism - TP-Link TL-MR3620 | TL-MR3620EU V1 User Guide - Page 19
is similar to that of 6rd tunnel. If you are provided with an IPv6-only WAN connection and have signed up for DS-Lite tunnel service, specify the DS-Lite tunnel by referring to the steps above. 15 - TP-Link TL-MR3620 | TL-MR3620EU V1 User Guide - Page 20
Chapter 5 Guest Network This function allows you to provide Wi-Fi access for guests without disclosing your main network. When you have guests in your house, apartment, or workplace, you can create a guest network for them. In addition, you can customize guest network options to ensure network - TP-Link TL-MR3620 | TL-MR3620EU V1 User Guide - Page 21
Network checkbox of 2.4GHz Wireless or 5GHz Wireless network. 2 ) Customize the SSID. Don't select Hide SSID unless you want your guests to manually input the SSID for guest , and log in with the password you set for the router. 2. Go to Advanced > Guest Network. Locate the Settings section. 3. Customize - TP-Link TL-MR3620 | TL-MR3620EU V1 User Guide - Page 22
and Ping. • Allow Guests to Access My Local Network Tick this checkbox if you want to allow the wireless clients on your guest network to communicate with the devices connected to your router's LAN ports or main network via methods such as network neighbors and Ping. • Allow Guests to Access My - TP-Link TL-MR3620 | TL-MR3620EU V1 User Guide - Page 23
ports to share files, media and a printer from the USB storage devices over your home network locally, or remotely through the internet. The router supports USB external flash drives, hard drives and USB printers. It contains the following sections: • Access the USB Storage Device • Media Sharing - TP-Link TL-MR3620 | TL-MR3620EU V1 User Guide - Page 24
Locally Insert your USB storage device into the router's USB port and then refer to the following table to access files stored on your USB storage device. ¾¾ Method 1: Go to Computer > Network, then click the Network Server Name (TL-MR3620 by default) in the Computer section. Note: Operations - TP-Link TL-MR3620 | TL-MR3620EU V1 User Guide - Page 25
Chapter 6 USB Settings ¾¾ Method 2: Open the Windows Explorer (or go to Computer) and type the server address \\tplinkwifi.net or ftp://tplinkwifi.net in the address bar, then press Enter. Windows computer 1 ) Select Go > Connect to Server. 2 ) Type the server address smb://tplinkwifi.net. 3 ) - TP-Link TL-MR3620 | TL-MR3620EU V1 User Guide - Page 26
. Follow the steps below to configure remote access settings. 1. Visit http://tplinkwifi.net, and log in with the password you set for the router. 2. Go to Advanced > USB Sharing > USB Storage Device. 3. Tick the FTP(via Internet) checkbox, and then click Save. 4. Refer to the following table - TP-Link TL-MR3620 | TL-MR3620EU V1 User Guide - Page 27
can resume broken file transfers. Use a third-party app for network files management. Tips: Click Set Up a Dynamic DNS Service Account to learn how to set up a domain name for you router. 6. 1. 3. Customize Access Settings By default, all the network clients can access all folders on your USB disk - TP-Link TL-MR3620 | TL-MR3620EU V1 User Guide - Page 28
Chapter 6 USB Settings 2. Now you can access the USB disk by visiting \\MyShare (for Windows) or smb://MyShare (for Mac). ¾¾ To only share specific content: 1. Focus on the Folder Sharing section. Click the button to disable Share All, then click Add to add a new sharing folder. 2. Select the - TP-Link TL-MR3620 | TL-MR3620EU V1 User Guide - Page 29
on the USB disk directly from DLNA-supported devices. Click Media Sharing to learn more. 4. Click OK. Tips: The router can share 32 volumes at most. You the Windows username. Otherwise, Windows credential mechanism may cause the following problems: • If the sharing password is also the same as the - TP-Link TL-MR3620 | TL-MR3620EU V1 User Guide - Page 30
, such as your computer, tablet and PS2/3/4. 1. When your USB disk is inseted into the router, your DLNA-supported devices (such as your computer and pad) connected to the router can detect and play the media files on the USB disks. 2. Refer to the following table for detailed instructions. 26 - TP-Link TL-MR3620 | TL-MR3620EU V1 User Guide - Page 31
USB LED becomes solid on. 3. Install the TP-Link USB Printer Controller Utility TP-Link USB Printer Controller Utility helps you access the shared printer. Download and Install the utility on each computer that needs printer service. 1 ) Visit http://www.tp-link.com/app/usb/. 2 ) Click PC Utility - TP-Link TL-MR3620 | TL-MR3620EU V1 User Guide - Page 32
Printer Controller Setup (for Windows users) or TP-Link UDS Printer Controller Installer (for Mac users) to install the utility. 4. Access the Printer You should set the shared printer as Auto-Connect Printer on every computer that needs printer service. 1 ) Double-click the icon on your desktop - TP-Link TL-MR3620 | TL-MR3620EU V1 User Guide - Page 33
Chapter 6 USB Settings Mac 4 ) Select the printer you share, then click Apply. Windows Mac 29 - TP-Link TL-MR3620 | TL-MR3620EU V1 User Guide - Page 34
Server also allows different clients to share the scan feature of MFPs (Multi-Function Printers). To scan with TP-Link USB Printer Controller, right-click the printer and select Network Scanner. Then, a scanning window will pop up. Finish the scanning process by following on-screen instructions. 30 - TP-Link TL-MR3620 | TL-MR3620EU V1 User Guide - Page 35
Chapter 7 Parental Controls This function allows you to block inappropriate, explicit and malicious websites, and control access to specified websites at specified time. - TP-Link TL-MR3620 | TL-MR3620EU V1 User Guide - Page 36
devices (e.g. a computer or a tablet) to access only www.tp-link.com and Wikipedia.org from 18:00 (6PM) to 22: , and log in with the password you set for the router. 2. Go to Advanced > Parental Controls and enable Parental Device Name and MAC Address manually. 4. Click the icon to set the internet Access - TP-Link TL-MR3620 | TL-MR3620EU V1 User Guide - Page 37
Chapter 7 Parental Controls 5. Enter a Description for the entry, tick the Enable This Entry checkbox, and then click OK. 6. Select Whitelist as the restriction policy. Tips: • With Blacklist selected, the controlled devices cannot access any websites containing the specified keywords during the - TP-Link TL-MR3620 | TL-MR3620EU V1 User Guide - Page 38
Chapter 7 Parental Controls Done! Now you can control your children's internet access as needed. 34 - TP-Link TL-MR3620 | TL-MR3620EU V1 User Guide - Page 39
Chapter 8 Bandwidth Control This chapter introduces how to set bandwidth limits minimize the impact caused when the connection is under heavy load. It contains the following sections: • Set Upstream and Downstream Bandwidth • Controlling Rules - TP-Link TL-MR3620 | TL-MR3620EU V1 User Guide - Page 40
Bandwidth Control 8. 1. Set Upstream and Downstream Bandwidth 1. Visit http://tplinkwifi.net, and log in with the password you set for the router. 2. Go to Advanced > Bandwidth Control. 3. Enable Bandwidth Control and enter the Total Upstream Bandwidth and Total Downstream Bandwidth. 4. Click Save - TP-Link TL-MR3620 | TL-MR3620EU V1 User Guide - Page 41
devices that you want to apply Bandwidth Control to. • Port Range: Enter the Port range of the protocols. • Protocal: Select the protocols of services that you want to control. • Priority: Select priority from 1 to 5. 1 means the highest priority. • Upstream/Downstream: Enter the minimun and maxmium - TP-Link TL-MR3620 | TL-MR3620EU V1 User Guide - Page 42
Chapter 9 Network Security This chapter guides you on how to protect your home network from cyber attacks and unauthorized users by implementing these three network security functions. You can protect your home network against DoS (Denial of Service) attacks from flooding your network with server - TP-Link TL-MR3620 | TL-MR3620EU V1 User Guide - Page 43
Attacks The SPI (Stateful Packet Inspection) Firewall and DoS (Denial of Service) Protection protect the router from cyber attacks. The SPI Firewall can prevent cyber attacks and validate the traffic that is passing through the router based on the protocol. This function is enabled by default, and - TP-Link TL-MR3620 | TL-MR3620EU V1 User Guide - Page 44
you set for the router. 2. Go to Advanced > Security > Service Filtering. 3. Enable Service Filtering. 4. Click Add. 5. Select a service type from the drop- devices to access your network (via wired or wireless) based on a list of blocked devices (Blacklist) or a list of allowed devices (Whitelist - TP-Link TL-MR3620 | TL-MR3620EU V1 User Guide - Page 45
? Network Security Block or allow specific client devices to access my network (via wired or wireless). 1. Visit http://tplinkwifi.net, and log in with the password you set for the router. 2. Go to Advanced > Security > Access Control. 3. Enable Access Control. 4. Select the access mode to either - TP-Link TL-MR3620 | TL-MR3620EU V1 User Guide - Page 46
block or allow specific client devices to access your network (via wired or wireless) using the Blacklist or Whitelist. 9. 4. IP & MAC Binding IP & . 1. Visit http://tplinkwifi.net, and log in with the password you set for the router. 2. Go to Advanced > Security > IP & MAC Binding. 3. Enable IP & - TP-Link TL-MR3620 | TL-MR3620EU V1 User Guide - Page 47
rule for all devices or a separate one for certain devices. 1. Visit http://tplinkwifi.net, and log in with the password you set for the router. 2. Go to Advanced > Security > Yandex DNS. 3. Enable Yandex DNS. Select Disable, Basic, Safe or Child for the Enable Yandex DNS for all devices. Note - TP-Link TL-MR3620 | TL-MR3620EU V1 User Guide - Page 48
Chapter 9 Network Security 2. Click Scan to find a connected device you want to apply this rule to. You can also maunally enter the MAC address of the device if it's currently disconnected from the router. 3. Select a Control Mode and enter a description for this rule. 4. Click Save. 44 - TP-Link TL-MR3620 | TL-MR3620EU V1 User Guide - Page 49
the problem that an external host cannot initiatively communicate with a specified device on the local network. With the forwarding feature the router can on the local network, thus realizing some special functions. The TP-Link router supports four forwarding rules. If two or more rules are set, - TP-Link TL-MR3620 | TL-MR3620EU V1 User Guide - Page 50
.168.1.100. 2. Visit http://tplinkwifi.net, and log in with the password you set for the router. 3. Go to Advanced > NAT Forwarding > Virtual Servers. 4. Click Add. Click View Existing Services and select HTTP. The External Port, Internal Port and Protocol will be automatically filled in. Enter the - TP-Link TL-MR3620 | TL-MR3620EU V1 User Guide - Page 51
you want to use is not in the Service Type, you can enter the corresponding parameters manually. You should verify the port number that the service needs. • You can add multiple virtual server rules if you want to provide several services in a router. Please note that the External Port should not - TP-Link TL-MR3620 | TL-MR3620EU V1 User Guide - Page 52
• The triggering ports can not be overlapped. • If the application you need is not listed in the Existing Applications list, please enter the parameters manually. You should verify the external ports the application uses first and enter them into External Port field according to the format the page - TP-Link TL-MR3620 | TL-MR3620EU V1 User Guide - Page 53
login normally but cannot join a team with other players. To solve this problem, set your PC as a DMZ host with all ports open. 1. Assign a 2. Visit http://tplinkwifi.net, and log in with the password you set for the router. 3. Go to Advanced > NAT Forwarding > DMZ and select Enable DMZ. 4. - TP-Link TL-MR3620 | TL-MR3620EU V1 User Guide - Page 54
Chapter 10 NAT Forwarding Tips: • UPnP is enabled by default in this router. • Only the application supporting UPnP protocol can use this feature. • UPnP feature needs the support of operating system (e.g. Windows Vista/ Windows 7/ Windows 8, etc. Some of operating system need to install the UPnP - TP-Link TL-MR3620 | TL-MR3620EU V1 User Guide - Page 55
Chapter 11 VPN The VPN (Virtual Private Networking) feature allows you to access your home network in a secured way through internet when you are out of home. - TP-Link TL-MR3620 | TL-MR3620EU V1 User Guide - Page 56
VPN With IPSec VPN, you can access the network securely when out of home. To use the VPN Service, you need to configure Dynamic DNS Service or assign a static IP address for the router's WAN port. And the System Time should be synchronized with the internet. 1. Visit http://tplinkwifi.net, and log - TP-Link TL-MR3620 | TL-MR3620EU V1 User Guide - Page 57
the IP address of the remote LAN. • IP Subnet Mask: Enter the subnet mask of the remote LAN. • Key Exchange Method: Select Auto (IKE) or Manual to be used to authenticate IPSec peers. • Authentication Method: Select Pre-Shared Key (recommended). • Pre-Shared Key: Create a pre-shared key to be used - TP-Link TL-MR3620 | TL-MR3620EU V1 User Guide - Page 58
guides you on how to configure advanced network features. It contains the following sections: • Change the LAN Settings • Specify DHCP Server Settings • Set Up a Dynamic DNS Service Account • Create Static Routes • Specify Wireless Settings • Use WPS for Wireless Connection • Schedule Your Wireless - TP-Link TL-MR3620 | TL-MR3620EU V1 User Guide - Page 59
or your network requires a specific IP subnet, you can change it. 1. Visit http://tplinkwifi.net, and log in with the password you set for the router. 2. Go to Advanced > Network > LAN Settings. 3. Type in a new IP Address appropriate to your needs. And leave the Subnet Mask as the default settings - TP-Link TL-MR3620 | TL-MR3620EU V1 User Guide - Page 60
other parameters if the ISP offers. The Default Gateway is automatically filled in and is the same as the LAN IP address of the router. 4. Click Save. ¾¾ To reserve an IP address for a specified client device: 1. Click Add in the Address Reservation section. 2. Click Scan to find a connected device - TP-Link TL-MR3620 | TL-MR3620EU V1 User Guide - Page 61
Create Static Routes Static routing is a form of routing that is configured manually by a network administrator or a user by adding entries into a routing table. The manually-configured routing information guides the router in forwarding data packets to the specific destination. I want to: Visit - TP-Link TL-MR3620 | TL-MR3620EU V1 User Guide - Page 62
that you want to assign to a static route. This IP address cannot be on the same subnet with the WAN IP or LAN IP of Router A. In the example, the IP address of the company network is the destination IP address, so here enter 172.30.30.1. Subnet Mask: Determines the - TP-Link TL-MR3620 | TL-MR3620EU V1 User Guide - Page 63
successfully. Done! Open a web browser on your PC. Enter the company server's IP address to visit the company network. 12. 5. Specify Wireless Settings The router's wireless network name (SSID) and password, and security option are preset in the factory. The preset SSID and password can be found - TP-Link TL-MR3620 | TL-MR3620EU V1 User Guide - Page 64
wireless networks on your wireless device and you need to manually join the network. ¾¾ To change the security option: 1. Go to Advanced > Wireless > Wireless tplinkwifi.net, and log in with the password you set for the router. 2. Go to Advanced > Wireless > WPS. 12. 6. 1. Use the WPS Wizard for Wi- - TP-Link TL-MR3620 | TL-MR3620EU V1 User Guide - Page 65
) is an eight-character identification number preset to each router. WPS supported devices can connect to your router with the PIN. The default PIN is printed on the label of the router. 12. 7. Schedule Your Wireless Function The wireless network can be automatically off at a specific time when - TP-Link TL-MR3620 | TL-MR3620EU V1 User Guide - Page 66
1. Visit http://tplinkwifi.net, and log in with the password you set for the router. 2. Go to Advanced > Wireless > Wireless Schedule. 3. Enable Wireless Schedule. 4. Click Add to set the wireless off time. Specfiy the time period and days whenthe wireless network will be off. 5. Click Save. 62 - TP-Link TL-MR3620 | TL-MR3620EU V1 User Guide - Page 67
the configuration for managing and maintaining your router. Some features are only supported by a certain mode. It contains the following sections: • Set Up System Time • Change Operation Mode • Test the Network Connectivity • Upgrade the Firmware • Backup and Restore Configuration Settings • Auto - TP-Link TL-MR3620 | TL-MR3620EU V1 User Guide - Page 68
will be used for other time-based functions like Parental Controls. 1. Visit http://tplinkwifi.net, and log in with the password you set for the router. 2. Go to Advanced > System Tools > Time Settings. ¾¾ To get time from the PC : 1. Click Get from PC. 2. Click Save. ¾¾ To get time from the - TP-Link TL-MR3620 | TL-MR3620EU V1 User Guide - Page 69
better network experience for users. We will inform you throught the web management page if there's any update firmware available for your router. Also, the latest firmware will be released at the TP-Link official website www.tp-link.com, and you can download it from the Support page for free. 65 - TP-Link TL-MR3620 | TL-MR3620EU V1 User Guide - Page 70
reboot to complete. Tips: If there's a new and important firmware update for your router, you will see the notification (similar as shown below) for the router. You will see the Firmware Upgrade page. 13. 4. 2. Manual Upgrade 1. Download the latest firmware file for the router from www.tp-link.com. - TP-Link TL-MR3620 | TL-MR3620EU V1 User Guide - Page 71
13 Manage the Router 3. Go to Advanced > System Tools > Firmware Upgrade. 4. Focus on the Device Information section. Make sure the downloaded firmware file is matched with the Hardware Version. 5. Focus on the Local Upgrade section. Click Browse to locate the downloaded new firmware file, and - TP-Link TL-MR3620 | TL-MR3620EU V1 User Guide - Page 72
Chapter 13 Note: During the restoring process, do not turn off or reset the router. ¾¾ To reset the router to factory default settings: 1. Click Factory Restore to reset the router. Manage the Router 2. Wait a few minutes for the resetting and rebooting. Note: • During the resetting process, do - TP-Link TL-MR3620 | TL-MR3620EU V1 User Guide - Page 73
. 4. Keep the Port for HTTP and Port for HTTPS as the default settings. 5. If you only want to allow one specific device to manage the router, enter the IP Address or MAC Address of the device in the IP/MAC Address field. 6. Click Save. Note: If a warning pops up when you - TP-Link TL-MR3620 | TL-MR3620EU V1 User Guide - Page 74
address remotely, click Trust (or a similar option) to continue. 13. 10. System Log When the router does not work normally, you can save the system log and send it to the technical support for troubleshooting. ¾¾ To save the system log locally: 1. Visit http://tplinkwifi.net, and log in the password - TP-Link TL-MR3620 | TL-MR3620EU V1 User Guide - Page 75
Chapter 13 3. Choose the type and level of the system logs as needed. 4. Click Save Log to save the system logs to a local disk. Manage the Router 71 - TP-Link TL-MR3620 | TL-MR3620EU V1 User Guide - Page 76
days, allowing you to monitor the volume of internet traffic statistics. 1. Visit http://tplinkwifi.net, and log in with the password you set for the router. 2. Go to Advanced > System Tools > Traffic Monitor. 3. Toggle on Traffic Monitor. You can monitor the traffic usage of a device in the past 10 - TP-Link TL-MR3620 | TL-MR3620EU V1 User Guide - Page 77
Chapter 13 Manage the Router 13. 12. CWMP Settings The router supports CWMP (CPE WAN Management Protocol), also called TR-069. This collects information, performs diagnostics and configures the devices automatically via ACS (Auto-Configuration Server). 1. Visit - TP-Link TL-MR3620 | TL-MR3620EU V1 User Guide - Page 78
Chapter 13 Manage the Router • CWMP: Toggle On to enable the CWMP (CPE WAN Management Protocol) : Enter the username/password for the ACS server to log in to the router. • Path: Enter the path for the ACS server to log in to the router. • Port: Enter the port that connects to the ACS server. • - TP-Link TL-MR3620 | TL-MR3620EU V1 User Guide - Page 79
Chapter 13 Manage the Router • Get RPC methods: Click to get the methods to support CWMP. Click Save to make the settings responses to the SNMP manager, and sending traps when an event occurs. So a router contains SNMP "agent" software can be monitored and/or controlled by SNMP Manager using - TP-Link TL-MR3620 | TL-MR3620EU V1 User Guide - Page 80
• Write Community: Displays the default write community string that protects the router from unauthorized changes. • System Name: Displays the administratively-assigned name for this managed device. • System Description: Displays the textual description of the managed device. This - TP-Link TL-MR3620 | TL-MR3620EU V1 User Guide - Page 81
the internet once the router is reset, and please mark down your new password for future use. Q3. What should I do if I can't access the internet via the 3G/4G USB modem? • Go to our website at www.tp-link.com, click Support > Compatibility List > TL-MR3620 and make sure that your 3G/4G USB modem is - TP-Link TL-MR3620 | TL-MR3620EU V1 User Guide - Page 82
4 ) Click LAN settings and deselect the following three options and click OK. 5 ) Go to Advanced > Restore advanced settings, click OK to save the settings. 78 - TP-Link TL-MR3620 | TL-MR3620EU V1 User Guide - Page 83
to factory default settings and try again. If login still fails, please contact the technical support. Note: You'll need to reconfigure the router to surf the internet once the router is reset. Q5. What should I do if I cann't access the internet even though the configuration is finished? 1. Visit - TP-Link TL-MR3620 | TL-MR3620EU V1 User Guide - Page 84
on your modem first, and wait about 2 minutes until it gets a solid cable or internet light. 3 ) Power on the router. 4 ) Wait another 1 or 2 minutes and check the internet access. • Reset the router to factory default settings and reconfigure the router. • Upgrade the firmware of the router. 80 - TP-Link TL-MR3620 | TL-MR3620EU V1 User Guide - Page 85
. 1 ) Visit http://tplinkwifi.net, and log in with the password you set for the router. 2 ) Go to Advanced > Network > Internet (or EWAN Settings) and focus on the address to the router. • The MAC addresses of a computer in wired connection and wireless connection are different. • Modify the LAN - TP-Link TL-MR3620 | TL-MR3620EU V1 User Guide - Page 86
Note: Most TP-Link routers use 192.168.0.1/192.168.1.1 as their default LAN IP address, which may conflict with the IP range of your existing ADSL modem/router. If so, the router is not able to communicate with your modem and you can't access the internet. To resolve this problem, we need to change - TP-Link TL-MR3620 | TL-MR3620EU V1 User Guide - Page 87
the modem and the router again. • Please upgrade the firmware of the router. If you've tried every method above but still cannot access the internet, please contact the technical support. Q6. What should I do if I cann't find my wireless network or I cannot connect the wireless network? If you fail - TP-Link TL-MR3620 | TL-MR3620EU V1 User Guide - Page 88
to Automatic, click on Start button and make sure the Service status is Started. And then click OK. If you can find other wireless network except your own, please follow the steps below: • Check the WLAN LED indicator on your wireless router/modem. • Make sure your computer/device is still in the - TP-Link TL-MR3620 | TL-MR3620EU V1 User Guide - Page 89
• Check the wireless signal strength of your network. If it is weak (1~3 bars), please move the router closer and try again. • Change the wireless Channel of the router to 1, 6 or 11 to reduce interference from other networks. • Re-install or update the driver for your wireless adapter of the - TP-Link TL-MR3620 | TL-MR3620EU V1 User Guide - Page 90
COPYRIGHT & TRADEMARKS Specifications are subject to change without notice. is a registered trademark of TP-Link Technologies Co., Ltd. Other brands and product names are trademarks or registered trademarks of their respective holders. No part of the specifications may be reproduced - TP-Link TL-MR3620 | TL-MR3620EU V1 User Guide - Page 91
2472MHz(20dBm) 5180MHz-5240MHz(23dBm) EU declaration of conformity TP-Link hereby declares that the device is in compliance with the /65/EU. The original EU declaration of conformity may be found at http://www.tp-link.com/en/ce. RF Exposure Information This device meets the EU requirements (2014/53 - TP-Link TL-MR3620 | TL-MR3620EU V1 User Guide - Page 92
Avertissement: Le dispositif fonctionnant dans la bande 5150-5250 MHz est réservé uniquement pour une utilisation à l'intérieur afin de réduire les risques de brouillage préjudiciable aux systèmes de satellites mobiles utilisant les mêmes canaux; Radiation Exposure Statement: This equipment complies - TP-Link TL-MR3620 | TL-MR3620EU V1 User Guide - Page 93
damaged charger or USB cable to charge the device. • Do not use any other chargers than those recommended • Do not use the device where wireless devices are not allowed. • Adapter shall be installed near the equipment and shall be easily accessible. • Use only power supplies which are provided by
-
 1
1 -
 2
2 -
 3
3 -
 4
4 -
 5
5 -
 6
6 -
 7
7 -
8
-
9
-
10
-
11
-
12
-
13
-
14
-
15
-
16
-
17
-
18
-
19
-
20
-
21
-
22
-
23
-
24
-
25
-
26
-
27
-
28
-
29
-
30
-
31
-
32
-
33
-
34
-
35
-
36
-
37
-
38
-
39
-
40
-
41
-
42
-
43
-
44
-
45
-
46
-
47
-
48
-
49
-
50
-
51
-
52
-
53
-
54
-
55
-
56
-
57
-
58
-
59
-
60
-
61
-
62
-
63
-
64
-
65
-
66
-
67
-
68
-
69
-
70
-
71
-
72
-
73
-
74
-
75
-
76
-
77
-
78
-
79
-
80
-
81
-
82
-
83
-
84
-
85
-
86
-
87
-
88
-
89
-
90
-
91
-
92
-
93
 |
 |

REV1.0.0
1910012185
User Guide
AC1350 3G/4G Wireless Dual Band Router
TL-MR3620