TP-Link TL-POE170S TL-POE170SUN V1 Installation Guide
TP-Link TL-POE170S Manual
 |
View all TP-Link TL-POE170S manuals
Add to My Manuals
Save this manual to your list of manuals |
TP-Link TL-POE170S manual content summary:
- TP-Link TL-POE170S | TL-POE170SUN V1 Installation Guide - Page 1
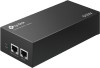
PoE Injector Note: For simplicity, we will take TL-POE160S for example in this Guide. Connection LED Explanation PWR On: Power on Off: Power off PoE (Only for TL-POE170S) On: Normal power supply Off: No powered device connected Flashing: - TP-Link TL-POE170S | TL-POE170SUN V1 Installation Guide - Page 2
attempt to disassemble, repair, or modify the device. If you need service, please contact us. Do not use any other chargers than those support and other information, please visit https://www.tp-link.com/support, or simply scan the QR code. If you have any suggestions or needs on the product guides - TP-Link TL-POE170S | TL-POE170SUN V1 Installation Guide - Page 3
radiate radio frequency energy and, if not installed and used in accordance with the instruction manual, may cause harmful interference to radio communications. Operation of this equipment in a residential marking (level VI) Polarity of output terminals Class II equipment Caution Operator's manual
-
 1
1 -
 2
2 -
 3
3
 |
 |

Installation Guide
Note:
1. The PoE Injector supplies steady power and data connectivity to a powered device such as PoE IP Camera, PoE AP and PoE IP Phone through an Ethernet cable.
2. For TL-POE170S, plug the product into the wall outlets with earthing connection through the power supply cord.
PoE Injector
Connection
IP Camera
AP
IP Phone
Powered Device (PD)
PWR
PWR+DATA OUT
DATA IN
Ethernet Device
(switch, router, etc.)
PoE+ Injector
Note:
For simplicity, we will take TL-POE160S for example in this Guide.
LED Explanation
On:
Power on
Off:
Power off
PWR
On:
Normal power supply
Off:
No powered device connected
Flashing:
Abnormal power supply
PoE
(Only for TL-POE170S)
© 2021 TP-Link
7106509317
REV1.1.0