TP-Link TL-PS310U Quick Installation Guide
TP-Link TL-PS310U Manual
 |
UPC - 845973031060
View all TP-Link TL-PS310U manuals
Add to My Manuals
Save this manual to your list of manuals |
TP-Link TL-PS310U manual content summary:
- TP-Link TL-PS310U | Quick Installation Guide - Page 1
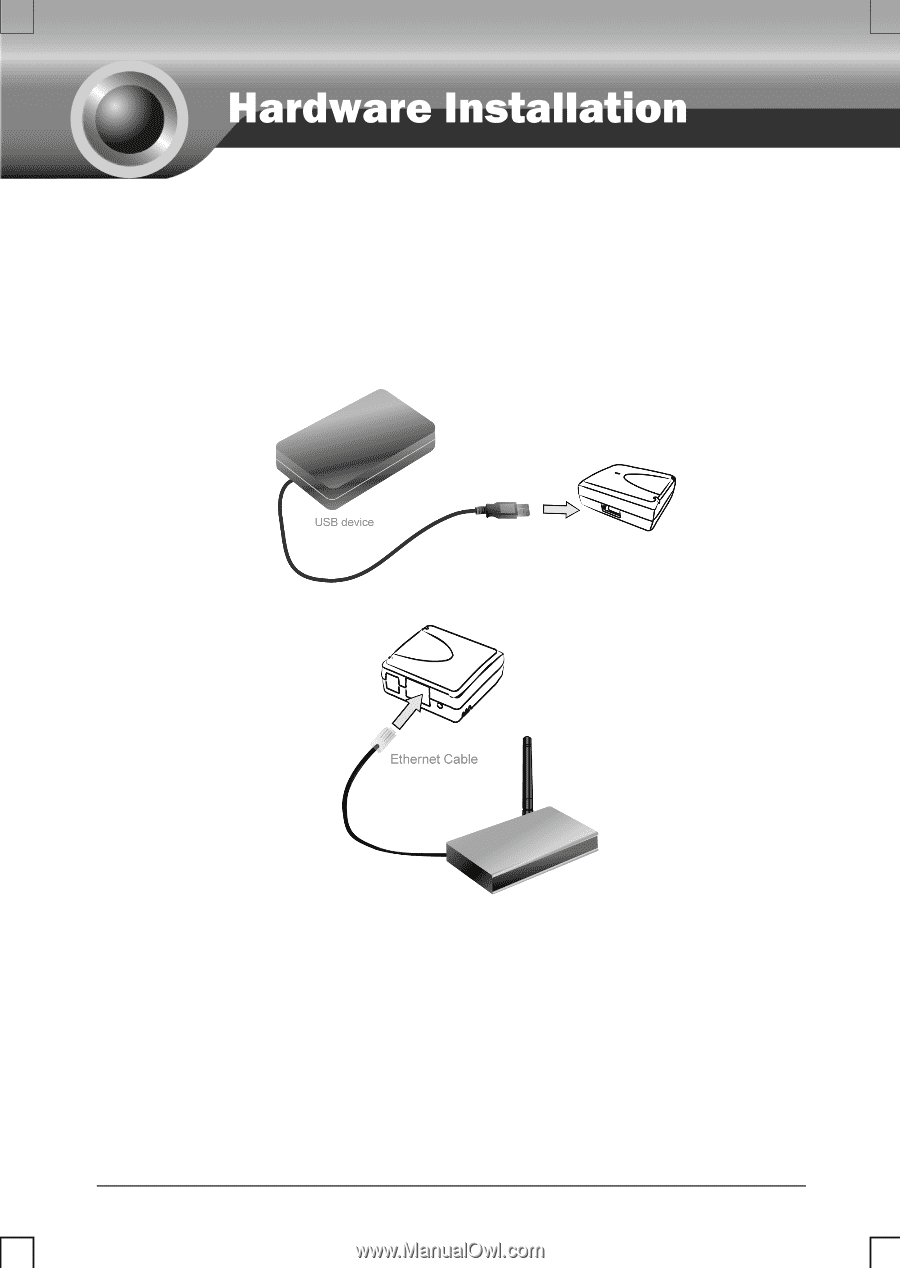
start, you should prepare the following items ¾ Windows 2000/XP/Vista/7 computer with print server setup CD ¾ One USB device with USB port Hardware Installation 1. Turn off the USB device's power. 2. Connect your USB device to the TL-PS310U. 3. Connect the TL-PS310U to the router or switch/HUB with - TP-Link TL-PS310U | Quick Installation Guide - Page 2
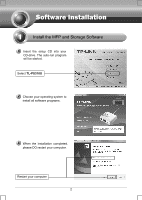
Insert the setup CD into your CD-drive. The auto-run program will be started. Select TL-PS310U Choose your operating system to install all software programs. When the installation completed, please DO restart your computer. Restart your computer 2 - TP-Link TL-PS310U | Quick Installation Guide - Page 3
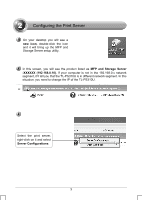
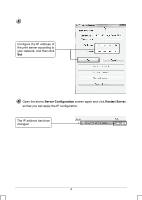
see the product listed as MFP and Storage Server -XXXXXX (192.168.0.10). If your computer is not in the 192.168.0.x network segment, it'll tell you that the TL-PS310U is in different network segment. In this situation, you need to change the IP of the TL-PS310U. Select the print server, right-click - TP-Link TL-PS310U | Quick Installation Guide - Page 4
Configure the IP address of the print server according to your network. And then click Set Open the above Server Configuration screen again and click Restart Server, so that you can apply the IP configuration. The IP address has been changed 4 - TP-Link TL-PS310U | Quick Installation Guide - Page 5
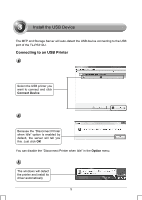
The MFP and Storage Server will auto-detect the USB device connecting to the USB port of the TL-PS310U. Connecting to an USB Printer Select the USB printer you want to connect and click Connect Device Because the "Disconnect Printer when Idle" option is enabled by default, the server will tell you - TP-Link TL-PS310U | Quick Installation Guide - Page 6
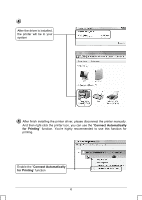
After the driver is installed, the printer will be in your system After finish installing the printer driver, please disconnect the printer manually. And then right-click the printer icon, you can use the "Connect Automatically for Printing" function. You're highly recommended to use this function - TP-Link TL-PS310U | Quick Installation Guide - Page 7
Connecting to an USB Drive It's the same as you connect the printer on the MFP and Storage Server. Select the USB drive you want to connect and click Connect Device After the driver is installed, the Removable Disk will be in your system If you connect the USB devices all the time, other users can't - TP-Link TL-PS310U | Quick Installation Guide - Page 8
Disconnect manually Select the USB device and click "Disconnect Device" Disconnect when Idle On the top menu, click Options, the "Disconnect Storage Device When Idle" and "Disconnect Printer When Idle" are on the list 8 - TP-Link TL-PS310U | Quick Installation Guide - Page 9
Technical Support „ For more troubleshooting help, go to: www.tp-link.com/support/faq.asp „ To download the latest Firmware, Driver, Utility and User Guide, go to: www.tp-link.com/support/download.asp „ For all other technical support, please contact us by using the following details: Global Tel
-
 1
1 -
 2
2 -
 3
3 -
 4
4 -
 5
5 -
 6
6 -
 7
7 -
8
-
9
 |
 |
1
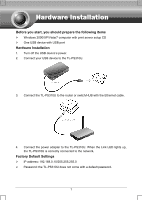
Before you start, you should prepare the following items
¾
Windows 2000/XP/Vista/7 computer with print server setup CD
¾
One USB device with USB port
Hardware Installation
1.
Turn off the USB device’s power.
2.
Connect your USB device to the TL-PS310U.
3.
Connect the TL-PS310U to the router or switch/HUB with the Ethernet cable.
4.
Connect the power adapter to the TL-PS310U. When the Link LED lights up,
the TL-PS310U is correctly connected to the network.
Factory Default Settings
¾
IP address: 192.168.0.10/255.255.255.0
¾
Password: the TL-PS310U does not come with a default password.