TP-Link TL-WA5110G User Guide - Page 55
Domain Filtering entry
 |
UPC - 845973051327
View all TP-Link TL-WA5110G manuals
Add to My Manuals
Save this manual to your list of manuals |
Page 55 highlights
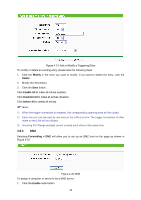
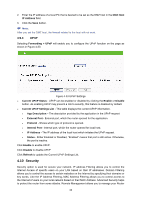
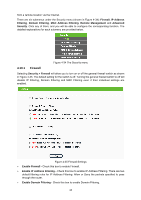
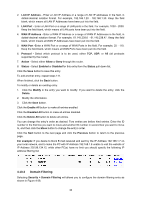
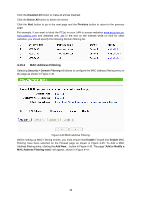
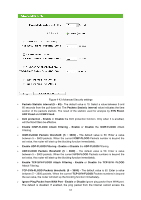
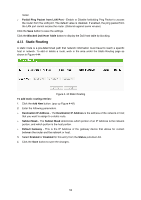
Figure 4-38 Domain Filtering Before adding a Domain Filtering entry, you must ensure that Enable Firewall and Enable Domain Filtering have been selected on the Firewall page as shown in Figure 4-35. To Add a Domain filtering entry, click the Add New... button in Figure 4-38. The page "Add or Modify a Domain Filtering entry" will appear, shown in Figure 4-39. Figure 4-39 Add or Modify a Domain Filtering entry To add or modify a Domain Filtering entry, follow these instructions: 1. Effective Time - Enter a range of time in HHMM format specifying the time for the entry to take effect. For example, if you enter: 0803 - 1705, than the entry will take effect from 08:03 to 17:05. 2. Domain Name - Type the domain or key word as desired in the field. A blank in the domain field means all websites on the Internet. For example: www.xxyy.com.cn, .net. 3. Status - Select Enabled or Disabled for this entry on the Status pull-down list. 4. Click the Save button to save this entry. To modify or delete an existing entry: 1. Click the Modify in the entry you want to modify. If you want to delete the entry, click the Delete button. 2. Modify the information. 3. Click the Save button. Click the Enabled All button to make all entries enabled. 47
-
 1
1 -
2
-
3
-
4
-
5
-
6
-
7
-
8
-
9
-
10
-
11
-
12
-
13
-
14
-
15
-
16
-
17
-
18
-
19
-
20
-
21
-
22
-
23
-
24
-
25
-
26
-
27
-
28
-
29
-
30
-
31
-
32
-
33
-
34
-
35
-
36
-
37
-
38
-
39
-
40
-
41
-
42
-
43
-
44
-
45
-
46
-
47
-
48
-
49
-
 50
50 -
 51
51 -
 52
52 -
 53
53 -
 54
54 -
 55
55 -
 56
56 -
 57
57 -
 58
58 -
 59
59 -
 60
60 -
61
-
62
-
63
-
64
-
65
-
66
-
67
-
68
-
69
-
70
-
71
-
72
-
73
-
74
-
75
-
76
-
77
-
78
-
79
-
80
-
81
-
82
-
83
-
84
-
85
-
86
-
87
-
88
-
89
-
90
-
91
-
92
-
93
-
94
-
95
-
96
-
97
-
98
-
99
-
100
-
101
-
102
-
103
-
104
-
105
-
106
-
107
-
108
-
109
 |
 |
