TRENDnet TE-CF100 Manual
TRENDnet TE-CF100 Manual
 |
View all TRENDnet TE-CF100 manuals
Add to My Manuals
Save this manual to your list of manuals |
TRENDnet TE-CF100 manual content summary:
- TRENDnet TE-CF100 | Manual - Page 1
Compact Flash Size 10/100 Fast Ethernet LAN Card For Both Notebook PC and Windows CE-based PDA / Palm PC Users Guide Doc. No.:101802-01 - TRENDnet TE-CF100 | Manual - Page 2
installation. This equipment generates, uses and can radiate radio frequency energy, and if not installed and used in accordance with the instructions, may cause harmful interference to radio communications. However, there is no guarantee that interference will not occur in a particular installation - TRENDnet TE-CF100 | Manual - Page 3
6 SOFTWARE INSTALLATION For Notebook PC 8 Installation for Windows 95 8 Installation for Windows 98 8 Installation for Window ME 11 Installation for Windows 2000 12 Installation for Windows XP 15 Installation for Windows NT 4.0 17 Novell Netware 3.x/4.x 19 MS LAN Manager 23 Packet Driver - TRENDnet TE-CF100 | Manual - Page 4
Installation for IBM OS/2 Warp 31 INTERNET ACCESS 33 Setup Pocket PC 2002 PDA 33 Appendix A. SPECIFICATIONS 39 Network Interface Specifications 39 Host Interface and Physical Specifications.. 39 Operating Systems 40 Power Requirements 40 General Specification 40 - TRENDnet TE-CF100 | Manual - Page 5
II PC Card socket • Drivers and utilities provided with this product • PCMCIA release 2.1 compliant Card Services and Socket Services. For Windows CE-based PDA/Palm PC: • One Type I CompactFlash Slot supporting IO functionality. • Windows CE 2.0 or newer version • Windows CE Service Disk • CF+ and - TRENDnet TE-CF100 | Manual - Page 6
Microsoft LAN Manager Packet Driver Applications Microsoft Windows for Workgroups 3.11 Microsoft Windows 3.1 Microsoft Windows NT 4.0 Windows 98 Windows 2000 Windows ME Windows XP Lantastic 6.0 IBM OS/2 Warp Version 3 For Windows CE-based PDA/Palm PC: Software Compatibility Windows CE 2.0 or newer - TRENDnet TE-CF100 | Manual - Page 7
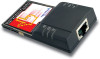
Parts Names COL LED TX LED RX LED CompactFlash-sized 10/100 Fast Ethernet LAN card with Direct Port RJ-45 port Full/Half 100/10 LED Link CompactFlash PC Card adapter - 3 - - TRENDnet TE-CF100 | Manual - Page 8
the CompactFlash Fast Ethernet LAN Card together with our CompactFlash PC Card Adapter in this manual. Connecting to a PDA/Palm PC 1. Insert the CompactFlash Size 10/100 Fast Ethernet LAN Card into Windows CEbased PDA/Palm PC by aligning the Compact Card with wide connector toward the CompactFlash - TRENDnet TE-CF100 | Manual - Page 9
as shown below. Notebook Connecting to the Network 1. Connect unshielded twisted pair (UTP) cable to the RJ-45 connector before loading any network driver. For operation in the 10Mbps (10Base-T) Ethernet network, Category 3, 4 or 5 unshielded twisted pair (UTP) cable could be used to connect between - TRENDnet TE-CF100 | Manual - Page 10
SOFTWARE INSTALLATION FOR PDA/PALM PC WITH WINDOWS CE 2.0 1.Establish a connection between the PDA/Palm PC with the Host PC, typically your Host PC running Windows98/2000/ME/XP/NT4.0. 2.Install "ActiveSync" connection from the WinCE Services CD to your desktop PC. For more information, - TRENDnet TE-CF100 | Manual - Page 11
the procedure described above and setup the Compact Card correctly, you may use the pocket Internet Explore to browse the internet. Note: Host PC's running Windows 95 OSR2 cannot active sync after entering suspend mode. If the machine goes into suspend, it will need to be reset in order to active - TRENDnet TE-CF100 | Manual - Page 12
SOFTWARE INSTALLATION FOR NOTEBOOK PC Installation for Windows 95 The installation procedures for the network driver may vary slightly depending on the version of Windows 3. Follow the on-screen instruction to proceed. If Windows asks you to supply your original Windows 95 installation or setup files - TRENDnet TE-CF100 | Manual - Page 13
2. Insert the device driver diskette into your floppy drive. When Windows prompts you What do you want Windows to do? Select Search for the best driver for your device. (Recommended). Click Next. 3. Follow the on-screen instruction to proceed. - 9 - - TRENDnet TE-CF100 | Manual - Page 14
the following dialog box, direct your system to copy the requested files from the floppy root directory, i.e. A:\. Press OK. 6. If you are asked to insert Windows 98 CDROM in the selective drive, please do so to have Windows copy all the necessary files to your system. . When the following - TRENDnet TE-CF100 | Manual - Page 15
7. Click Yes to restart your computer. Installation for Window ME 1. Once the PC Card is well connected to your computer, Windows ME will automatically detect the new device. Select Specify the Location of the driver... and click Next. - 11 - - TRENDnet TE-CF100 | Manual - Page 16
the floppy disk drive on your system. 3. Windows will copy the appropriate driver to your system. If Windows ME asks you to supply your original Windows ME installation CD-ROM, load it on the CDROM drive. Click Finish to complete the software installation. 4. Reboot your computer to activate the - TRENDnet TE-CF100 | Manual - Page 17
2. When Windows prompt you a FOUND NEW HARDWARE WIZARD dialog box, select Search for the ... and press Next. 3. Windows will prompt an FOUND NEW HARDWARE WIZARD dialog box. In this time, select Floppy disk drives and insert the driver diskette. Press Next. When asked - 13 - - TRENDnet TE-CF100 | Manual - Page 18
for the original Windows 2000 CD/disks please follow the on-screen instruction. 4. Wait for a while until Windows has found the appropriate driver. 5. Click Yes to continue. 6. Click Finish. The PC Card driver installation is successfully completed. - 14 - - TRENDnet TE-CF100 | Manual - Page 19
the new device. Installation for Windows XP 1. Once the device is well connected, Windows will detect the new device and prompt you to insert the network device driver. Insert the device Driver Disk into the floppy disk drive of your system. Click Install the software automatically (Recommended) and - TRENDnet TE-CF100 | Manual - Page 20
will start searching for the appropriate driver for this hardware. Select any drivers named as PCMCIA Fast Ethernet Card, and click Next. 3. Windows will start searching for the appropriate driver for the installation. When the screen appears as below, click Continue Anyway to proceed. - 16 - - TRENDnet TE-CF100 | Manual - Page 21
4. Wait while Windows copies the appropriate driver to your system. 5. Click Finish. The software installation for this network device is now completed. Installation for Windows NT 4.0 This section describes the installation for Windows NT under the condition that Windows - 17 - - TRENDnet TE-CF100 | Manual - Page 22
Windows NT. 3. Click Start Settings Control Panel. Double-click on the Network icon. 4. When the Network window driver disk into drive A. 5. When asked to supply the path to the disk, type a:\ and click OK. 6. Windows Windows NT will copy necessary files to your computer. 8. When the Network window - TRENDnet TE-CF100 | Manual - Page 23
9. After your bindings, settings, and services are set, click on the Close button. Choose to restart your computer. After Windows NT restarts, be sure to log in. Insert the driver diskette into the floppy drive and set the current drive to the floppy drive. Then run INSTALL to install the real mode - TRENDnet TE-CF100 | Manual - Page 24
computer to make your Netware connection. Manual Installation 1. Copy the files LE100ODI.COM LANEN.EXE from the path \ENABLER in the driver diskette into the Netware client directory containing Novell's the server. 3. Follow Novell's instructions on using ODI programs. You can substitute the LE100ODI. COM - TRENDnet TE-CF100 | Manual - Page 25
; IPX Protocol Stack Module provided by Novell >NETx ; Shell Support Module provided by Novell >LOGIN Novell Client Installation 1. Run the NetWare backup copies. 3. When the following message appears "Install support for MS Windows? (Y/N)", answer accordingly and provide a path if necessary. - TRENDnet TE-CF100 | Manual - Page 26
installation procedure to completion. Upon completion, a new NET.CFG file will be created in your DOS directory. Typically, this file contains the following lines: Link Driver LE100ODI #FRAME Ethernet_802.3 FRAME Ethernet_802.2 : 12. Copy the file LANEN.EXE from the directory \ENABLER in the - TRENDnet TE-CF100 | Manual - Page 27
=ENGLISH --Set NetWare 4.X to English language LSL --Link Support Layer Module provided by Novell LE100ODI --Hardware Specific Module IPXODI TXT on the installation diskette in the \NDIS2 directory. Before installing the drivers, make sure that the Microsoft LAN Manager has been installed in the - TRENDnet TE-CF100 | Manual - Page 28
2. Run INSTALL.EXE from root directory of driver diskette. 3. Select Microsoft LAN Manager item on the menu and go back to step 4. 6. Installation program starts to copy related files from driver diskette to the destination directory and modifies CONFIG.SYS and PROTOCOL.INI under user's agreement. - TRENDnet TE-CF100 | Manual - Page 29
= 6 NCBS = 12 BINDINGS = "LE100NDS_NIF" LANABASE = 0 [LE100NDS_NIF] ; protocol.ini session for LAN driver. IOADDRESS = 0x320 INTERRUPT = 11 DRIVERNAME = LE100NDS$ Packet Driver 1. Run INSTALL.EXE from the root directory of the driver diskette. 2. Select Packet Driver item on the menu screen. - 25 - - TRENDnet TE-CF100 | Manual - Page 30
the destination directory and modifies AUTOEXEC.BAT under user's agreement. 6. Reboot your computer to load the driver. Windows for Workgroups 3.11 NDIS3 Driver for Workgroups 1. Run Windows for Workgroups and click Network Setup in Network group. 2. In Network Settings dialog box, click "Networks - TRENDnet TE-CF100 | Manual - Page 31
the Enhanced mode NDIS3 for... string and press OK. 8. Follow the on-screen instructions to complete the installation and exit Windows 9. Run INSTALL.EXE from root directory of driver diskette. 10. Select Windows for Workgroup in the Network Operating System screen. 11. If current settings are - TRENDnet TE-CF100 | Manual - Page 32
OK. 7. Select the Real mode NDIS2 for.... string and press OK. 8. Follow Windows instructions to complete the installation and exit Windows. 9. Run INSTALL.EXE from root directory of driver diskette. 10. Select Windows for Workgroups in Network Operating System screen. 11. If current settings are - TRENDnet TE-CF100 | Manual - Page 33
the destination directory and modifies AUTOEXEC.BAT under user's agreement. 15. Please reboot the computer to have the driver take effect. ODI Driver for Workgroups 1. Run Windows for Workgroups and click Network Setup icon in Network group. 2. In Network Setup dialog box, click Networks... button - TRENDnet TE-CF100 | Manual - Page 34
floppy drive and press OK. 8. Select the Netware ODI Driver .... string and press OK. 9. Follow Windows instructions to complete the installation and exit Windows. 10. Run INSTALL.EXE from root directory of driver diskette. 11. Select Windows for Workgroups in Network Operating System screen. 12. If - TRENDnet TE-CF100 | Manual - Page 35
of OS/2 Warp has been enabled already, jump to portion B for driver installation; otherwise follow the instructions in the following to install the PCMCIA Service. Enabling PCMCIA Service of OS/2 Warp 1. In the OS/2 Desktop group, double-click on the OS/2 System icon. 2. Double-click on the System - TRENDnet TE-CF100 | Manual - Page 36
. 3. Select the LAN adapters and protocols option. 4. Click on the Configure button. 5. Select the Other adapters ... option. 6. Insert the driver diskette and type the driver path: A:\OS2\NDIS2. Click OK 7. Select PCMCIA Ethernet Adapter, and then click on the Add button. 8. Select IBM OS/2 NETBIOS - TRENDnet TE-CF100 | Manual - Page 37
INTERNET ACCESS Setup Pocket PC 2002 PDA 1. Install the driver and network adapter according to the installation guide. 2. Power on PDA. 3. Go to "Start" "Settings". 4. Tap "Connections". 5. Tap "Network Adapters". 6. Tap "CompactFlash Size 10/100 Fast Ethernet" to highlight it. 7. Tap "Properties". - TRENDnet TE-CF100 | Manual - Page 38
8. If you have a DHCP Server on the network, tap the radio button "Use server-assigned IP address". If you need to input fixed IP for the adapter, tap on the radio button "Use specific IP address", key in the IP address, subnet mask, default gateway, tap on "Name Servers", input the DNS, Alternative - TRENDnet TE-CF100 | Manual - Page 39
Alternative WINS. Note: DNS addresses are normally provided by ISP. If you are not using WINS, please leave the filed blank. 9. Tap "Ok". 10. Tap "Ok" on the pop-up warning screen. - 35 - - TRENDnet TE-CF100 | Manual - Page 40
11. Remove the card and reinsert it to the PDA. 12. Go to "Start" "Settings". 13. Tap on "Connections". 14. Tap in "Connections". - 36 - - TRENDnet TE-CF100 | Manual - Page 41
15. At the first entry "When needed, automatically connect to the Internet using these settings:", click on the dropdown menu and select "My connection", and tap on "Modify" below it. 16. Tap on "Proxy settings", tab on "This network connects to Internet'. - 37 - - TRENDnet TE-CF100 | Manual - Page 42
17. Tap "ok". 18. Back to the "Connections" screen, on the last entry, tap on the dropdown menu and select "The Internet". 19. Tap "Ok". 20. Open the browser and see if you can open web pages. - 38 - - TRENDnet TE-CF100 | Manual - Page 43
APPENDIX A. SPECIFICATIONS Network Interface Specifications IEEE 802.3 for 10BaseT IEEE 802.3u for 100BaseTX Data Rate 10/100 Mbps1 Host Interface and Physical Specifications For Notebook PC: (accessory adapter) PCMCIA 2.0/2.1 and PC Card Standard compliant. Type II PC Card 5.39" x 2.128" x 0.197" ( - TRENDnet TE-CF100 | Manual - Page 44
Operating Systems Novell Netware 3.x, 4.x Microsoft LAN Manager Packet Driver Applications Microsoft Windows for Workgroups 3.11 Windows 3.1 Microsoft Windows NT 4.0 Windows 98 Windows 2000 Windows ME Windows XP Windows CE 2.0 or newer Lantastic 6.0 IBM OS/2 Warp Version 3 Power Requirements Normal
-
 1
1 -
 2
2 -
 3
3 -
 4
4 -
 5
5 -
 6
6 -
 7
7 -
8
-
9
-
10
-
11
-
12
-
13
-
14
-
15
-
16
-
17
-
18
-
19
-
20
-
21
-
22
-
23
-
24
-
25
-
26
-
27
-
28
-
29
-
30
-
31
-
32
-
33
-
34
-
35
-
36
-
37
-
38
-
39
-
40
-
41
-
42
-
43
-
44
 |
 |

Doc. No.:101802-01
Compact Flash Size
10/100 Fast Ethernet
LAN Card
For Both Notebook PC and
Windows CE-based PDA / Palm PC
Users Guide