TRENDnet TEW-P1PG Quick Installation Guide
TRENDnet TEW-P1PG - Wireless Parallel Print Server Manual
 |
UPC - 710931502657
View all TRENDnet TEW-P1PG manuals
Add to My Manuals
Save this manual to your list of manuals |
TRENDnet TEW-P1PG manual content summary:
- TRENDnet TEW-P1PG | Quick Installation Guide - Page 1
TEW-P1PG 1 port Parallel Wireless G Print Server Quick Installation Guide Guide d'installation rapide du serveur d'impression G sans fil à 1 port parallèle Wireless-G-Druckserver mit 1 Parallelport Kurzanleitung zur Installation Guía de instalación rápida del servidor de impresora inalámbrico G con - TRENDnet TEW-P1PG | Quick Installation Guide - Page 2
Table of Contents English ...1 1. Prepare for Installation 1 2. Product Detail 2 3. Hardware Installation 3 4. Configure the Print Server 4 5. Add the Network Printer to your PC 8 6. Configure the Print Server's Wireless 11 Troubleshooting 12 - TRENDnet TEW-P1PG | Quick Installation Guide - Page 3
for purchasing TRENDnet's TEW-P1PG 1 port Parallel Wireless G Print Server. This guide will help you set up your Wireless G Print Server. Following the installations should be quick and easy. If you run into problems, please refer to the Troubleshooting section. If you need further technical support - TRENDnet TEW-P1PG | Quick Installation Guide - Page 4
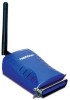
2. Product Detail The Wireless G Print Server has a RJ-45 connector, and one parallel port. It also has three LEDS that indicate power, network activity, and printer activity. RJ-45 Connector Power Adapter Connector Parallel Port 2 English - TRENDnet TEW-P1PG | Quick Installation Guide - Page 5
the Print Server and Printers. 2. Connect the Print Server's printer port to the printers. 3. Connect the RJ45 cable to the LAN port and to your network hub or switch. 4. Plug the AC power adapter into the power connector on the back of the Print Server. 5. Power on the printer. 2 Your installation - TRENDnet TEW-P1PG | Quick Installation Guide - Page 6
For MAC Users, change your computers IP address to 192.168.0.X (where X is an available number from 1-253), and enter 192.168.0.1 in your web browser to access the Print Server's Web Utility. For Windows Users 1. Insert the TEW-P21G CD-ROM into your computer's CD-ROM drive. 2. Click Install Utility - TRENDnet TEW-P1PG | Quick Installation Guide - Page 7
4. Click Next. 5. Click Yes. 6. Click Finish. 5 English - TRENDnet TEW-P1PG | Quick Installation Guide - Page 8
7. Double-click PS-Utility icon. 8. Click Change IP Address. 9. Type in the IP address that applies to your LAN. Type in the Default Gateway (i.e. your router's local IP address). 6 English - TRENDnet TEW-P1PG | Quick Installation Guide - Page 9
10. Click OK. 11. Click Show Web Setup. 12. Please take note and write down the Server Name and the Printer Name. Wireless Print Server's configuration is now complete. For detail information, please check the User's Guide that's included on the CD-ROM. 7 English - TRENDnet TEW-P1PG | Quick Installation Guide - Page 10
95/98/ME, then make sure that NETBEUI is installed before you follow the instructions below. If you are using Windows 2000/XP, then you can simply add your printer using the instructions below. For TCP/IP Printing instructions, please consult the User's Guide on the CD-ROM for details. 1. For - TRENDnet TEW-P1PG | Quick Installation Guide - Page 11
type the printer's name. Type the server name and the printer name in the following format: . For example, if you connected a USB printer to the USB1 slot, then you would type \\PS4B702E\PS-4B702E-P1 with NO SPACES in between them. Click Next. 7. Click OK. 8. Select the appropriate driver for your - TRENDnet TEW-P1PG | Quick Installation Guide - Page 12
9. Click Yes. Click Next. 10. Click Finish. You have completed adding the printer to your PC. 10 English - TRENDnet TEW-P1PG | Quick Installation Guide - Page 13
the Print Server's Wireless Connection 1. Open the web utility and click Configuration. Click Wireless, and use the pull down menu to select the SSID of an Access Point or Wireless Router that is connected to your network. 2. Scroll down the utility. Click Save. Your wireless configuration - TRENDnet TEW-P1PG | Quick Installation Guide - Page 14
Printer is the SAME as your Access Point or Wireless Router. Also make sure that the format (HEX or ASCII) and the bit encryption (64-bit, 128bit, etc.) is the same. If you have any questions regarding the TEW-P1PG 1 port Parallel Wireless Print Server, please contact Trendware Technical Support - TRENDnet TEW-P1PG | Quick Installation Guide - Page 15
your product online. Go to TRENDware's website at http://www.TRENDNET.com TRENDnet Technical Support US/Canada Support Center European Support Center Contact Telephone: 1(310) 626-6252 Fax: 1(310) 626-6267 Email: [email protected] Tech Support Hours 7:30am - 6:00pm Pacific Standard
-
 1
1 -
 2
2 -
 3
3 -
 4
4 -
 5
5 -
 6
6 -
 7
7 -
8
-
9
-
10
-
11
-
12
-
13
-
14
-
15
 |
 |
