TRENDnet TMR-61U2 Quick Installation Guide
TRENDnet TMR-61U2 Manual
 |
View all TRENDnet TMR-61U2 manuals
Add to My Manuals
Save this manual to your list of manuals |
TRENDnet TMR-61U2 manual content summary:
- TRENDnet TMR-61U2 | Quick Installation Guide - Page 1
TMR-61U2 USB 2.0 Multi-Plus Memory Card Reader/Writer Quick Installation Guide Guide d'installation rapide de Lecteur/enregistreur de carte memoire USB 2.0 Multi-Plus Kurzanleitung zur Installation des USB 2.0 Multi-Plus Speicherkartenleser/-schreibers Guia de instalacion rapida del Lector/escritor - TRENDnet TMR-61U2 | Quick Installation Guide - Page 2
Table of Contents English 1 1. Prepare for Installation 1 2. Product Detail 2 3. Hardware Installation 3 4. Driver Installation 4 5. Verify Installation 9 Troubleshooting 13 - TRENDnet TMR-61U2 | Quick Installation Guide - Page 3
any problems, please refer to the Troubleshooting section. If you need further assistance, please visit www.TRENDNET.com or call technical support by phone. Verify Package Contents Please make sure you have everything in the box: TMR-61U2 Quick Installation Guide NOW Driver CD-ROM USB 2.0 Cable - TRENDnet TMR-61U2 | Quick Installation Guide - Page 4
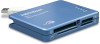
2. Product Detail The USB 2.0 Multi-Plus Memory Card Reader/Writer has 4 slots to put in a CompactFlash, SmartMedia, Memory Stick, SecureDigital or MultiMedia Card. I.J5B 2.0 Multi-Plus and Reader -r -tcv., - TRENDnet TMR-61U2 | Quick Installation Guide - Page 5
3. Hardware Installation 1. Boot up your computer 2. Insert the USB 2.0 Multi-Plus Memory Card Reader/Writer firmly into an available USB slot. • 3 English - TRENDnet TMR-61U2 | Quick Installation Guide - Page 6
does not match what you see on your screen, manually install the drivers by following installation procedure below. 1. Insert the TMR-61U2 Driver CD-ROM into your computers CD-ROM drive 2. Double-click the "My Computer" icon on your Windows desktop. 3. Double-click the "CD-ROM" drive and double - TRENDnet TMR-61U2 | Quick Installation Guide - Page 7
to verify the TMR-61U2 has been installed properly for your windows, go to the Verify Installation section. Windows 98SE After your computer reboots, the "Add New Hardware Wizard" will appear. Windows 98SE will automatically detect the TMR-61U2, and ask you to install the drivers for it. 1. Click - TRENDnet TMR-61U2 | Quick Installation Guide - Page 8
2. Click Next. • teh=imim toryow msc r D.* la of ho dim. weole bad.. oo, unaleot the &kw, ware. < liack y Naxt> I Cancel 3. Check the "CD-ROM drive" box and click "Browse". Max., nuon I- nag crvewn i6 dm" database V.V.."V.,====''""`" r Elmo, el. cltr P SI aoM die 4 r P smiyam, r Floppy - TRENDnet TMR-61U2 | Quick Installation Guide - Page 9
Ep-ige P) Elmo al tE:i El Adobe Anobat Reseal D iVer I I H.D Wnclows 2000 wi,de.se I Ca Printers Celle Panel tI ID Driver _J Mac Windows 2000 --L4 Windows 98 K ll Cancel Cartel 5. Click Next. di erle- wirr17 ,1rchlngeocrogi Its Ivellet. ITo'a-a".:Uck'N'aZa;474,Zrch. r floppy disk... P WROM drm - TRENDnet TMR-61U2 | Quick Installation Guide - Page 10
the aolleexe el* ewe new hamar Ceeee tw:rec < Back Cancel FJPtett,J Cal cancd 8. Restart your computer. Your driver installation is now complete. Note: If you would like to verify the TMR-61U2 has been installed properly for your windows, go to the Verify Installation section. I 8 English I - TRENDnet TMR-61U2 | Quick Installation Guide - Page 11
5. Verify Installation Windows XP 1. Click Start, and then click Control Panel. 2. Double-click the have been installed. 4. Expand the "Universal Serial Bus controllers" heading to verify that the USB Mass Storage Device has been installed. Device Manager DM Woe Jew goes 4.-, omess ;MU DVDICD - TRENDnet TMR-61U2 | Quick Installation Guide - Page 12
Windows 2000 11. Gard USES2 elirsociatassralise IsiSaltast.ls use t¢ciRE rt-A Genesys USB Mess Storage Device NEC PC1 to U Open Host Condole NEC PC Removable Disks should now appear. _3- 3% Floppy (A:) Local Disk (C.) Driver (D:) Local Disk (E: ) Removal* Disk (F;) CA Removable Disk (G:) - TRENDnet TMR-61U2 | Quick Installation Guide - Page 13
Windows ME 1. Click Start, highlight Settings, and click on Control Panel. 2. Double-click the System icon, and click Device Manager tab. 3. Expand the "Storage device" heading to verify that the 4 USB Disks have been installed. 4. Expand the "Universal Serial Bus controllers" heading to verify that - TRENDnet TMR-61U2 | Quick Installation Guide - Page 14
Corbolet NEC LISO Open Float [Moles USB 2,0 PP Hatt Cand USB 2 0RedHub Demce =Men use Poet Hub UM Pod H.6 I OK USB Root Hub USB Root Hub 4. Double-click on My Computer. 4 Removable Disks should now appear. 413,1n01:93100 t) g&Driver 1E) Removable Disk (F:) Removable Disk (G:) Removable - TRENDnet TMR-61U2 | Quick Installation Guide - Page 15
any questions regarding the TMR-61U2 USB 2.0 6-in-1 Memory Card ReaderNVriter, please contact Trendware Technical Support Department. Contact Technical Support Telephone: +1-310-626-6252 Fax: +1-310-626-6267 Website: www.TRENDNET.com E-mail: [email protected] Technical Support Hours 7:00AM - TRENDnet TMR-61U2 | Quick Installation Guide - Page 16
Product Warranty Registration Please take a moment to register your product online. Go to TRENDware's website at http://www.TRENDNET.com TRENDware International, Inc. 3135 Kashiwa Street Torrance, CA 90505 http://www.TRENDNET.com Copyright ©2004. All Rights Reserved. TRENDware International, Inc
-
 1
1 -
 2
2 -
 3
3 -
 4
4 -
 5
5 -
 6
6 -
 7
7 -
8
-
9
-
10
-
11
-
12
-
13
-
14
-
15
-
16
 |
 |

TMR-61
U2
USB
2.0
Multi
-Plus
Memory
Card
Reader/Writer
Quick
Installation
Guide
Guide
d'installation
rapide
de
Lecteur/enregistreur
de
carte
memoire
USB
2.0
Multi
-Plus
Kurzanleitung
zur
Installation
des
USB
2.0
Multi
-Plus
Speicherkartenleser/-schreibers
Guia
de
instalacion
rapida
del
Lector/escritor
de
Tarjeta
de
Memoria
Multi
-Plus
USB
2.0
Version
10.22.04
TREND
n
TRENDware,
USA
Whets
Next
in
Networking
1
Copyright
©2004.
All
Rights
Reserved.
TRENDware
International,
Inc.