TRENDnet TV-IP1319PI Quick Installation Guide
TRENDnet TV-IP1319PI Manual
 |
View all TRENDnet TV-IP1319PI manuals
Add to My Manuals
Save this manual to your list of manuals |
TRENDnet TV-IP1319PI manual content summary:
- TRENDnet TV-IP1319PI | Quick Installation Guide - Page 1
TREilDnET® !kO 4•qO%'W 4*O•..v•'.V..• 0. 12iskt 0'4//10/1 11 Quick Installation Guide TV-IP1318PI /TV-1131319H (V1) - TRENDnet TV-IP1319PI | Quick Installation Guide - Page 2
Table of Contents 1 English 1. Before You Start 2. Hardware Installation and Configuration - TRENDnet TV-IP1319PI | Quick Installation Guide - Page 3
•TV-IP1318PI /TV-IP1319PI •Tons Security Allen Key (TV-IP1319PI only) • Quick Installation Guide •Weather Seal Minimum Requirements •An Android or iOS device •Working internet service and Wi-Fi •Existing POE network • Network cable Free Mobile App: TRENDnet Mira Requirements Supported Operating - TRENDnet TV-IP1319PI | Quick Installation Guide - Page 4
Using a PoE switch Note: • Connect the TV-IP1318PI ITV-IP1319PI to your network using an existing 802.3af/at compliant PoE switch or injector. the RJ-45 connector after the weather seal has been applied. 0-Ring ♦ Flat side TV-IP1318PI TV-IP1319PI 0 () Power PoE Switch 4. Modem Router ftHOH 2 - TRENDnet TV-IP1319PI | Quick Installation Guide - Page 5
IP camera until after you complete the installation steps below. Temporarily place the IP camera near you and connected to a network. 2. Download and Install the TRENDnet Mira app on your mobile device, then open the app. Note: Please connect your mobile device to the Wi-Fi of the same network of - TRENDnet TV-IP1319PI | Quick Installation Guide - Page 6
4. Once you open the app, click the Login button. Note: if you do not have an account please takes the steps necessary to create one. Q Log in 4 - TRENDnet TV-IP1319PI | Quick Installation Guide - Page 7
5. Once you login, click the Add Device button. ,D. .7' a + 0 i 0Rakes" o Add DeViE8 Add Device ,, i i 5 - TRENDnet TV-IP1319PI | Quick Installation Guide - Page 8
6. After clicking Add Device, you will then have to scan the QR Code on the label of the camera with your mobile device. Soon QR Code 0 0 0 • How to oar OR °Ma? 7. Once you scan the QR code you will be asked to press Next. Results TREE OnET TV-1,131,1(xx..) 6 - TRENDnet TV-IP1319PI | Quick Installation Guide - Page 9
8. Please enter the verification code. Default code is TNMira. Please enter the device verification code, e.g.: TNMira. If the device verification code is not set yet, enter the verificaiton code (case sensitive) on the device label. Cancel OK 9. To activate a new device, you will need to create - TRENDnet TV-IP1319PI | Quick Installation Guide - Page 10
10. Adding has been completed, Press Next. Adding Completed 0 Neil 11. Edit Alias of your camera and press Save. After this step you will be taken to the live view of your camera. Edit Alias Slur, Front Door Save - TRENDnet TV-IP1319PI | Quick Installation Guide - Page 11
12. Once added you should see a live image from the camera and you are finished. TV-IP1318P1v1 02-03-2020 Mon 12. • MONT TV-IP1318PI- ME II 9 - TRENDnet TV-IP1319PI | Quick Installation Guide - Page 12
Mounting the camera 1. Place the provided template label on the wall or ceiling. For 1V-IP1318PI 'Gelling Moment] \ For 1V-IP1319PI le Ceiling Mounlini' O Hole Holet) / k Hole Hale 2. Drill holes at each marked position on the template. Make sure the drill bit matches the size of - TRENDnet TV-IP1319PI | Quick Installation Guide - Page 13
4. Insert the screw anchors into the holes, and align the mounting base over them. Then use the provided screws to secure the camera to the mounting surface. e e iia O 4A. (Bullet) Manually adjust your camera to the desired viewing position. 0°- 360° Adjust Nut 0°- 90° tiOS- 360° 11 - TRENDnet TV-IP1319PI | Quick Installation Guide - Page 14
4B. (Dome) Manually adjust your camera to the desired viewing position. When finished, attach the dome cover back on the dome using the Torx security alien key. CI 0°- 355° lilt Adjust (I- 75° 4t1 0°- 355° Screw 12 - TRENDnet TV-IP1319PI | Quick Installation Guide - Page 15
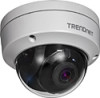
Netherlands TREnDne CE Product Information Model Number: TV-IP1318PI / TV-IP1319PI Product Name: Indoor/Outdoor 8MP 4K H.265 WDR PoE IR Bullet Network Camera Indoor/Outdoor 8MP 4K H.265 WDR POE IR Dome Network Camera Dade Name: TRENDnet TRENDnet hereby declare that the product is in compliance - TRENDnet TV-IP1319PI | Quick Installation Guide - Page 16
www.trendnetc,om/support TRENDnet 20675 Manhattan Place Torrance, CA 90501 USA Product Warranty Registration Please take a moment to register your product online. Go to TRENDnet's website at: www.lrendnet.com/regIster Copyright 2020.All Rights Reserved. TRENDnet. TV-IP1318PI TV-IP1319PI (V1) / 03
-
 1
1 -
 2
2 -
 3
3 -
 4
4 -
 5
5 -
 6
6 -
 7
7 -
8
-
9
-
10
-
11
-
12
-
13
-
14
-
15
-
16
 |
 |
