TRENDnet TV-IP310PI User's Guide
TRENDnet TV-IP310PI Manual
 |
View all TRENDnet TV-IP310PI manuals
Add to My Manuals
Save this manual to your list of manuals |
TRENDnet TV-IP310PI manual content summary:
- TRENDnet TV-IP310PI | User's Guide - Page 1
TV-IP310PI User's Guide © Copyright 2014 TRENDnet. All rights reserved. a - TRENDnet TV-IP310PI | User's Guide - Page 2
TV-IP310PI User's Guide Table of Contents Product Overview 1 Features 1 Package Contents 2 Front View 3 Mounting Holes 3 Connectors 3 Installation Procedure 5 Plan for installation location 5 Viewing angle 5 Weather Conditions 5 Setup Your Camera with CD 6 Hardware Installation 9 Cabling - TRENDnet TV-IP310PI | User's Guide - Page 3
TV-IP310PI User's Guide Video Settings 36 Video Format 36 Display Settings 37 On Screen Display Settings 39 Text Overlay 40 Privacy Mask 40 Video Recording 41 Events 42 Motion Detection 42 Tamper-proof 44 Exception 46 Snapshot 47 Email 48 Network Storage 49 Network Storage 49 Storage - TRENDnet TV-IP310PI | User's Guide - Page 4
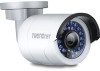
Network Camera, model TV-IP310PI, provides powerful 3 megapixel night vision in complete darkness for up to 30 meters (100 ft.) This ultra-compact camera is outdoor ready with an IP66 weather rated housing. It comes with a free Apple® and Android™ mobile app and complimentary pro-grade software - TRENDnet TV-IP310PI | User's Guide - Page 5
Complimentary pro-grade software to manage up to 32 TRENDnet cameras Product Overview Package Contents TV-IP310PI package includes: • TV-IP310PI • Multi-Language Quick Installation Guide • CD-ROM ( Utility and User's Guide) • Installation hardware Hole Hole TV-IP310PI Ceiling Mount Template - TRENDnet TV-IP310PI | User's Guide - Page 6
TV-IP310PI User's Guide Front View Sun Shield Mounting Holes Sun Shield Grounding Screw Lock Ring Ambient Light Sensor IR LEDs Sun Shield Protect camera lens from direct exposure to the Sun. Reset Button Push and hold the reset button then power on the camera. Keep holding the reset button for - TRENDnet TV-IP310PI | User's Guide - Page 7
TV-IP310PI User's Guide installation should be done by a qualified service person and should conform to all construction and electric regulations and other local codes. © Copyright 2014 TRENDnet to the laser beam. • Do not place the camera in extremely hot, cold temperatures (the operating temperature - TRENDnet TV-IP310PI | User's Guide - Page 8
angle to shoot the image you expect to see. The motion detection area should also be considered when installing the camera. Weather Conditions The TV-IP310PI is a small bullet camera, which fits most installations indoor and out door. The camera can work under a wide range of weather conditions. For - TRENDnet TV-IP310PI | User's Guide - Page 9
TV-IP310PI User's Guide Setup Your Camera with CD 1. Insert the Installation CD-ROM into your computer's CD-ROM drive to initiate the Auto-Run program. Choose your preferred language and then click the Install Camera. Installation 3. Connect a PoE capable network cable to the camera's network - TRENDnet TV-IP310PI | User's Guide - Page 10
TV-IP310PI User's Guide 5. The installation wizard will list cameras found on your network. If only one camera is found, it will be selected by default. If you have more than one camera on the network, please choose the camera you wish to set up by identifying its MAC address. Select the camera and - TRENDnet TV-IP310PI | User's Guide - Page 11
default password: admin and enter the new passwords for a brand new installation*. The password must be between 8 and 16 characters. (Alphanumeric: a-z, A-Z, 0-9 *This camera installation wizard is also good for finding the camera if it was setup with DHCP. The IP address may change dynamically - TRENDnet TV-IP310PI | User's Guide - Page 12
power and data. Poor cable quality may cause unexpected problems. Testing your cable or running a new cable is suggested for new camera installation. Waterproof cap The TV-IP310PI itself is IP66 grade water and dust proof. There is a set of network cable water proof caps that comes with the package - TRENDnet TV-IP310PI | User's Guide - Page 13
Hole TV-IP310PI Ceiling Mount Template Hole Fix the mounting base on the ceiling or the wall with the screws that come with the package. Route the cables to the cable hole. Installation Loosen the lock ring and then adjust the camera position. Tighten the lock ring when you setup the camera - TRENDnet TV-IP310PI | User's Guide - Page 14
.TRENDnet.com/support enter the model number "TVIP310PI" and download the software. If you didn't go through the TV-IP310PI CD installation wizard or you have reset the TV-IP310PI to factory defaults by pressing and holding reset button for over 10 seconds while power on the camera, your TVIP310PI - TRENDnet TV-IP310PI | User's Guide - Page 15
TV-IP310PI User's Guide 3 The camera management page will detect if you installed the camera video streaming plug-in or not. Click the link to download the plug-in from the TV-IP310PI camera. Access your Camera Through the Web Browser 5 Permission request depends on the Internet security settings - TRENDnet TV-IP310PI | User's Guide - Page 16
plug-in. 7 Click Finish to finish the installation. Access your Camera Through the Web Browser 8 Open the browser and login again. 9 (Go to step 11 if you already changed your password with the setup CD). The TV-IP310PI will ask you to change your password from default setting. Please enter the new - TRENDnet TV-IP310PI | User's Guide - Page 17
a home gateway on your network and you plug-in the camera on the same network, then you can find the camera IP address on your home gateway.), and then press Enter. 2 Enter the user name, admin, and the default password, admin, and then click OK. © Copyright 2014 TRENDnet. All rights reserved. 14 - TRENDnet TV-IP310PI | User's Guide - Page 18
TV-IP310PI User's Guide 3 The camera management page will detect if you installed the camera video streaming plug-in or not. Click the link to download the plug-in from the TV-IP310PI camera. Access your Camera Through the Web Browser 5 Go to the Finder and navigate to the Download folder. - TRENDnet TV-IP310PI | User's Guide - Page 19
TV-IP310PI User's Guide 7 Click Continue to install the plug-in. Access your Camera Through the Web Browser 9 Use the default location and click Install. 8 Select a destination to install the plug-in. Then click Continue. 10 Enter your password and click Install Software. © Copyright 2014 - TRENDnet TV-IP310PI | User's Guide - Page 20
Open the browser and login again with the default IP 192.168.10.30 or the IP that was dynamically assigned by your router. 14 Enter the user name, admin, and the default password, admin, and then click OK. 15 Click Trust (You'll have to do this again when your camera changes to a new IP address.) 17 - TRENDnet TV-IP310PI | User's Guide - Page 21
TV-IP310PI User's Guide 16 The TV-IP310PI will ask you to change your password from the default setting. Please enter the new password twice and click OK. The password must be between 8 and 16 characters. (Alphanumeric: a-z, A-Z, 0-9 Access your Camera Through the Web Browser 18 The Live View - TRENDnet TV-IP310PI | User's Guide - Page 22
TV-IP310PI User's Guide Access your Camera Through the Web Browser Live View After you log-in into the camera management page, you'll see the Live View page. Multi-Language Change your preferred language anytime. Snapshot Click this icon to take a video snapshot. Zoom Click once to enable zoom. - TRENDnet TV-IP310PI | User's Guide - Page 23
TV-IP310PI User's Guide Playback You can playback the video recording on the network storage and download the video clip and snapshots to your local computer. (See "Network Storage" on page 49 for how to setup the storage.) Access your Camera Through the Web Browser Time Line There is a play back - TRENDnet TV-IP310PI | User's Guide - Page 24
TV-IP310PI User's Guide Playback Use playback controls to play back the video recording. Click this button to you can choose from: 1/4, 1/2, 1, 2, and 4 times of original speed. Access your Camera Through the Web Browser Slice images from video playback You can take snapshots from playback video or - TRENDnet TV-IP310PI | User's Guide - Page 25
TV-IP310PI User's Guide Download sections of video To save complete video sections or snapshots, you can download the files directly. Click this button to download video sections. Access your Camera Through the Web Browser Download snapshots Click this button to list snapshots to download Check - TRENDnet TV-IP310PI | User's Guide - Page 26
TV-IP310PI User's Guide Log The log of the TV-IP-310PI will be saved on the network storage. You can search the relevant records and save to your local computer. (See "Network Storage" on page 49 for how to setup the storage.) Access your Camera Through the Web Browser Search for logs Click the - TRENDnet TV-IP310PI | User's Guide - Page 27
system time setup in the camera. Keeping this time correct is important for recording, scheduled control and logging accurately. Network Information IP Address: IP address of the TV-IP310PI Subnet Mask: Network range of IP address Default Gateway: The default route going from the TV-IP310PI subnet - TRENDnet TV-IP310PI | User's Guide - Page 28
Configuration Names Camera Name: Name of the camera. The camera name setup here can be discovered by other network camera software and OSD, On Screen Display. The default is the model number: TV-IP310PI Location: Label where you installed this camera Authentication RTSP: TV-IP310PI's video stream - TRENDnet TV-IP310PI | User's Guide - Page 29
TV-IP310PI User's Guide User Accounts You can setup up to 16 user accounts to access the camera's video stream with a web browser or real time video stream (RTSP). Only one administrator account can be setup to configure the TV-IP310PI and cannot be deleted. System Configuration Time Settings The - TRENDnet TV-IP310PI | User's Guide - Page 30
TV-IP310PI User's Guide System Configuration Daylight Savings Setup daylight settings for system time. Manual Time Sync. Device Time: The system time of this camera. Set Time: Click the calendar icon and manually select the date. Check the Sync. with computer time to copy the time from your - TRENDnet TV-IP310PI | User's Guide - Page 31
TV-IP310PI User's Guide Live View Settings Setup daylight settings for system time. Live View Parameters Live View Configure the buffer size for live view video stream. Buffer: With low buffer size setting, you can get real-time video stream, but the video may be stop and go if the network is - TRENDnet TV-IP310PI | User's Guide - Page 32
TV-IP310PI User's Guide Maintenance You can do the camera system maintenance on this page. Reboot Reboot: Click this button to reboot this camera. Reset Reset: Reset all camera parameters, except the IP parameters and user information. Default: Load complete factory default to the camera. © - TRENDnet TV-IP310PI | User's Guide - Page 33
TV-IP310PI User's Guide Network Settings TCP/IP Setup your basic IPv4 and IPv6 network settings on this page. © Copyright 2014 TRENDnet. All rights reserved. Network Settings Network Interface MAC Address: Click this button to reboot this camera. Duplex and Speed: Choose one of the Ethernet duplex - TRENDnet TV-IP310PI | User's Guide - Page 34
TV-IP310PI User's Guide Port You can change the service ports number of TV-IP-310PI or disable RTSP or HTTPS services. Network Settings DDNS Dynamic Domain Name Service, DDNS, allows you to find your camera from the Internet with an easy to remember domain name. Port Numbers HTTP Port: The default - TRENDnet TV-IP310PI | User's Guide - Page 35
TV-IP310PI User's Guide PPPoE Setup PPPoE (ADSL) connection to connect your camera with your ISP, Internet Service Provider. Network Settings SNMP SNMP Settings allows you to assign the contact details, location, community name and trap settings for SNMP. This is a networking management protocol - TRENDnet TV-IP310PI | User's Guide - Page 36
TV-IP310PI User's Guide Network Settings SNMP V1/V2 Enable SNMPv1: Check this box to enable SNMP v1 management. Enable SNMPv2c: Check this box to enable SNMP v2c management. Read SNMP Specify the password for access the SNMP community Community: for read only access Write SNMP Specify the password - TRENDnet TV-IP310PI | User's Guide - Page 37
TV-IP310PI User's Guide 802.1X Setup 802.1X for remote authentication service. Network Settings IP Address Filter Set up a list of clients allow only the clients on the list to access this camera or to reject clients on the list from access this camera. 802.1X Authentication Enable IEEE Check this - TRENDnet TV-IP310PI | User's Guide - Page 38
TV-IP310PI User's Guide QoS, Quality of Service Setup traffic prioritization to help smooth out the video stream. You can set the Differentiated Services Code Point (DSCP) bits on outgoing data streams. The QoS capable network device will forward different data in different priorities. The meaning - TRENDnet TV-IP310PI | User's Guide - Page 39
TV-IP310PI User's Guide . The default is variable rate. Choose the video quality. The default is medium quality. © Copyright 2014 TRENDnet. All rights Default: 4096 I Frame Interval An I Frame is a frame that records a complete picture. Frames between I frames, (P frame or B frame) only records - TRENDnet TV-IP310PI | User's Guide - Page 40
TV-IP310PI User's Guide Display Settings Adjust video image quality, lightness, and color settings here. Brightness: Use the slider or enter a number (0-100) to adjust the image brightness. Default: 50 Contrast: Use the slider or enter a number (0-100) to adjust the image contrast. Default: 50 - TRENDnet TV-IP310PI | User's Guide - Page 41
TV-IP310PI User's Guide Light sensitivities Smart IR: Smart IR can adjust the strength of infra red lights at night depending on the distance of an object to maintain the maximum IR light distance and while maintaining a clear picture when object is close by. Default: On. Exposure Time: Adjust - TRENDnet TV-IP310PI | User's Guide - Page 42
TV-IP310PI User's Guide Image adjustments Back Light Back light compensation: Setup a fixed light source default : 100% Click Reset to reset the display setting changes. © Copyright 2014 TRENDnet. All rights reserved. Video Settings On Screen Display Settings You can display the camera - TRENDnet TV-IP310PI | User's Guide - Page 43
TV-IP310PI User's Guide Text Overlay Display extra information on the screen over the image. non-English characters. Move the red box to position the display positions. Click Save to save the changes. Enable Privacy Check this box to enable privacy masking. Mask: Stop Drawing: Click this button to - TRENDnet TV-IP310PI | User's Guide - Page 44
the changes. © Copyright 2014 TRENDnet. All rights reserved. 1. Select day of the week you wan to edit the schedule. 2. Select All Day or Customized schedule of the day. 3. Set the time period and the event you want to trigger the video recording continuous (always recording) or motion detection - TRENDnet TV-IP310PI | User's Guide - Page 45
TV-IP310PI User's Guide Events Motion Detection Set up how the motion detection event will be triggered and what actions will be triggered. Event Settings Enable Check this box to enable motion detection. Click Save Motion to save the choice. Detection: Enable Check this box to enable motion - TRENDnet TV-IP310PI | User's Guide - Page 46
TV-IP310PI User's Guide Draw Area: Click Draw Area button to start drawing. Click and drag on the area you want to set up the motion detection. You can draw up to 8 different areas. Click Stop Drawing to stop drawing motion detection areas. The red grids represent the detection area. Event Settings - TRENDnet TV-IP310PI | User's Guide - Page 47
TV-IP310PI User's Guide Notification Send Email: Check this box to send an e-mail notification when motion is detected. Network Storage: Check this box to record video to network storage when motion is detected. Upload to FTP: Check this box to send snapshots to an FTP server when motion is detected - TRENDnet TV-IP310PI | User's Guide - Page 48
TV-IP310PI User's Guide Enable Tamper Check this box to enable tamper detection. Click Save Detection: to save the settings. Draw Area: Click Draw Area button to start drawing. Click and drag on the area you want to set up the tamper detection. You can setup only one area for tamper detection. Click - TRENDnet TV-IP310PI | User's Guide - Page 49
TV-IP310PI User's Guide Exception Provides notifications for other system events, set up your notifications here. : Check this box to send an e-mail notification when an exception is detected. Click Save to save the changes. © Copyright 2014 TRENDnet. All rights reserved. Event Settings 46 - TRENDnet TV-IP310PI | User's Guide - Page 50
TV-IP310PI User's Guide Snapshot You can set up your camera to continuously taking snapshots or snapshots when you want to take in a single Number: triggered event. Default: 3 pictures. Click Save to save the changes. Continuous Enable: Check this box to continuous take snapshots. Format - TRENDnet TV-IP310PI | User's Guide - Page 51
TV-IP310PI User's Guide Email Set up email accounts for notifications. Sender Sender: Enter the name to be appeared as the email sender. Sender's Enter sender's email address. Address: SMTP Server: Simple Mail Transportation Protocol Server address, the outgoing email server address. It may be has - TRENDnet TV-IP310PI | User's Guide - Page 52
-IP310PI User's Guide Network Storage Network Storage * Network Storage must be setup before it can be managed. For storage management, please refer to the next section. The TV-IP310PI supports two format of network storage file systems: NFS and CIFS. NFS, Network File System, is natively supported - TRENDnet TV-IP310PI | User's Guide - Page 53
TV-IP310PI User's Guide Storage Management * Network Storage must be setup before it can be managed. For storage setup,please refer to the previous section. FTP Server Network Storage Format: Select a network storage and then click Format to format your network storage. This "format" is similar, - TRENDnet TV-IP310PI | User's Guide - Page 54
your folders with camera name or IP address. Directory: • • Use Camera Name: Use the camera name to organize the saved files. Use Camera IP: Use the camera IP address to organize the saved files. Click Save to save the changes. © Copyright 2014 TRENDnet. All rights reserved. Network Storage 51 - TRENDnet TV-IP310PI | User's Guide - Page 55
TV-IP310PI User's Guide Federal Communication Commission Interference Statement This equipment has been tested and found should be installed and firmware programmed at the factory to match the intended destination. The firmware setting is not accessible by the end user. © Copyright 2014 TRENDnet - TRENDnet TV-IP310PI | User's Guide - Page 56
TV-IP310PI User's Guide Europe - EU Declaration of Conformity This device complies with the essential requirements of the Directive 2004/108/EC and 2006/95/EC. The following test methods have been applied in order to prove presumption of conformity with the essential requirements of the Directive - TRENDnet TV-IP310PI | User's Guide - Page 57
/108/ES a 2006/95/ES. Undertegnede TRENDnet erklærer herved, at følgende udstyr TVIP310PI overholder de væsentlige krav og øvrige relevante krav i direktiv 2004/108/EF og 2006/95/EF. Hiermit erklärt TRENDnet, dass sich das Gerät TV-IP310PI in Übereinstimmung mit den grundlegenden Anforderungen und - TRENDnet TV-IP310PI | User's Guide - Page 58
purchase for their return policies. TRENDnet shall not be responsible for any software, firmware, information, or memory data of customer contained in, stored on, or integrated with any products returned to TRENDnet pursuant to any warranty. There are no user serviceable parts inside the product. Do - TRENDnet TV-IP310PI | User's Guide - Page 59
TV-IP310PI User's Guide Warranty © Copyright 2014 TRENDnet. All rights reserved. 56
-
 1
1 -
 2
2 -
 3
3 -
 4
4 -
 5
5 -
 6
6 -
 7
7 -
8
-
9
-
10
-
11
-
12
-
13
-
14
-
15
-
16
-
17
-
18
-
19
-
20
-
21
-
22
-
23
-
24
-
25
-
26
-
27
-
28
-
29
-
30
-
31
-
32
-
33
-
34
-
35
-
36
-
37
-
38
-
39
-
40
-
41
-
42
-
43
-
44
-
45
-
46
-
47
-
48
-
49
-
50
-
51
-
52
-
53
-
54
-
55
-
56
-
57
-
58
-
59
 |
 |

TV-IP310PI User’s Guide
© Copyright 2014 TRENDnet. All rights reserved.
a