Thermador MEDMCW31WS Installation Instructions
Thermador MEDMCW31WS Manual
 |
View all Thermador MEDMCW31WS manuals
Add to My Manuals
Save this manual to your list of manuals |
Thermador MEDMCW31WS manual content summary:
- Thermador MEDMCW31WS | Installation Instructions - Page 1
Combination Built In Ovens POM301W, PODMC301W, PODMCW31W, MEM301WS, MEDMC301WS, MEDMCW31WS 9 IMPORTANT: This insert is in addition to the Installation Guide and is not a substitute. Read and consult the appliance Installation Guide for important safety messages and additional information regarding - Thermador MEDMCW31WS | Installation Instructions - Page 2
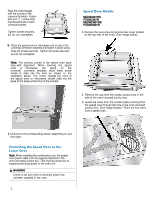
the front of the bracket. Speed Oven Models MEDMC301WS PODMC301W MEDMCW31WS PODMCW31W 1. Remove the oven-mounted the side of the oven-mounted junction box. 3. Guide the wires from the conduit cable (coming from Oven to the Lower Oven Note: When installing the combination unit, the speed oven power - Thermador MEDMCW31WS | Installation Instructions - Page 3
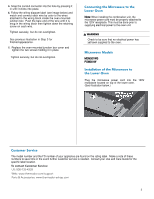
to the oven. Microwave Models MEM301WS POM301W Installation of the Microwave to the Lower Oven Plug service is needed. Consult your Use and Care Guide for the specific label location. To contact Customer Service: US: 800-735-4328 Web: www.thermador.com/support Parts & Accessories: www.thermador - Thermador MEDMCW31WS | Installation Instructions - Page 4
MEDMC301WS, MEDMCW31WS 9 IMPORTANT: Cet encart est un complément au Guide d'installation; il ne le remplace pas. Veuillez lire et consulter le Guide d'installation four inférieur à l'aide des supports de raccordement universels. • Les supports de connexion universels sont interchangeables pour les - Thermador MEDMCW31WS | Installation Instructions - Page 5
-ondes à cuisson rapide ou du four à micro-ondes doit glisser dans la base de la partie inclinée à l'avant du support. Modèles de four à micro-ondes à cuisson rapide MEDMC301WS PODMC301W MEDMCW31WS PODMCW31W 1. Enlevez le couvercle de la boîte de raccordement montée sur le four située sur la partie - Thermador MEDMCW31WS | Installation Instructions - Page 6
coupée. Modèles de fours à micro-ondes MEM301WS POM301W Installation du four à micro-ondes au four inférieur Branchez Guide d'utilisation et d'entretien pour connaître l'emplacement exact de la plaque. Pour communiquer avec le service après-vente : É.-U. : 800-735-4328 URL : www.thermador.com/support - Thermador MEDMCW31WS | Installation Instructions - Page 7
Hornos integrados de funcionamiento combinado Professional y Masterpiece® POM301W, PODMC301W, PODMCW31W, MEM301WS, MEDMC301WS, MEDMCW31WS 9 IMPORTANTE: Este volante adicional no reemplaza la Guía de instalación. Lea y consulte la Guía de Instalación del aparato para ver importantes mensajes de - Thermador MEDMCW31WS | Installation Instructions - Page 8
parte delantera del horno rápido o microondas debe deslizarse por la base del bisel en la parte frontal de la guía. Modelos de hornos rápidos MEDMC301WS PODMC301W MEDMCW31WS PODMCW31W 1. Quitar la tapa de la caja de conexiones montada en el horno que se encuentra en la parte trasera del horno. (Ver - Thermador MEDMCW31WS | Installation Instructions - Page 9
ubicación específica de las etiquetas en su Guía de uso y cuidado. Para comunicarse con servicio al cliente: EE. UU.: 800-735-4328 Web: www.thermador.com/support Piezas y accesorios: Store.thermador.com/us 9 - Thermador MEDMCW31WS | Installation Instructions - Page 10
- Thermador MEDMCW31WS | Installation Instructions - Page 11
- Thermador MEDMCW31WS | Installation Instructions - Page 12
1901 MAIN STREET, SUITE 600 IRVINE, CA 92614 // 1-800-735-4328 // WWW.THERMADOR.COM © 2018 BSH HOME APPLIANCES CORPORATION 8 0 0 1 1 4 0 2 9 5 en-us, es-mx, fr-ca 9 8 1 1 0 7
-
 1
1 -
 2
2 -
 3
3 -
 4
4 -
 5
5 -
 6
6 -
 7
7 -
8
-
9
-
10
-
11
-
12
 |
 |
Installation
Insert
GUIDE
IMPORTANT:
This insert is in addition to the Installation Guide and is not a substitute. Read and consult the appliance
Installation Guide for important safety messages and additional information regarding the use of your new appliance.
Professional and Masterpiece
®
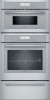
Combination Built In Ovens
POM301W, PODMC301W, PODMCW31W,
MEM301WS, MEDMC301WS, MEDMCW31WS
9
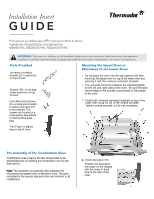
Mounting the Speed Oven or
Microwave to the Lower Oven
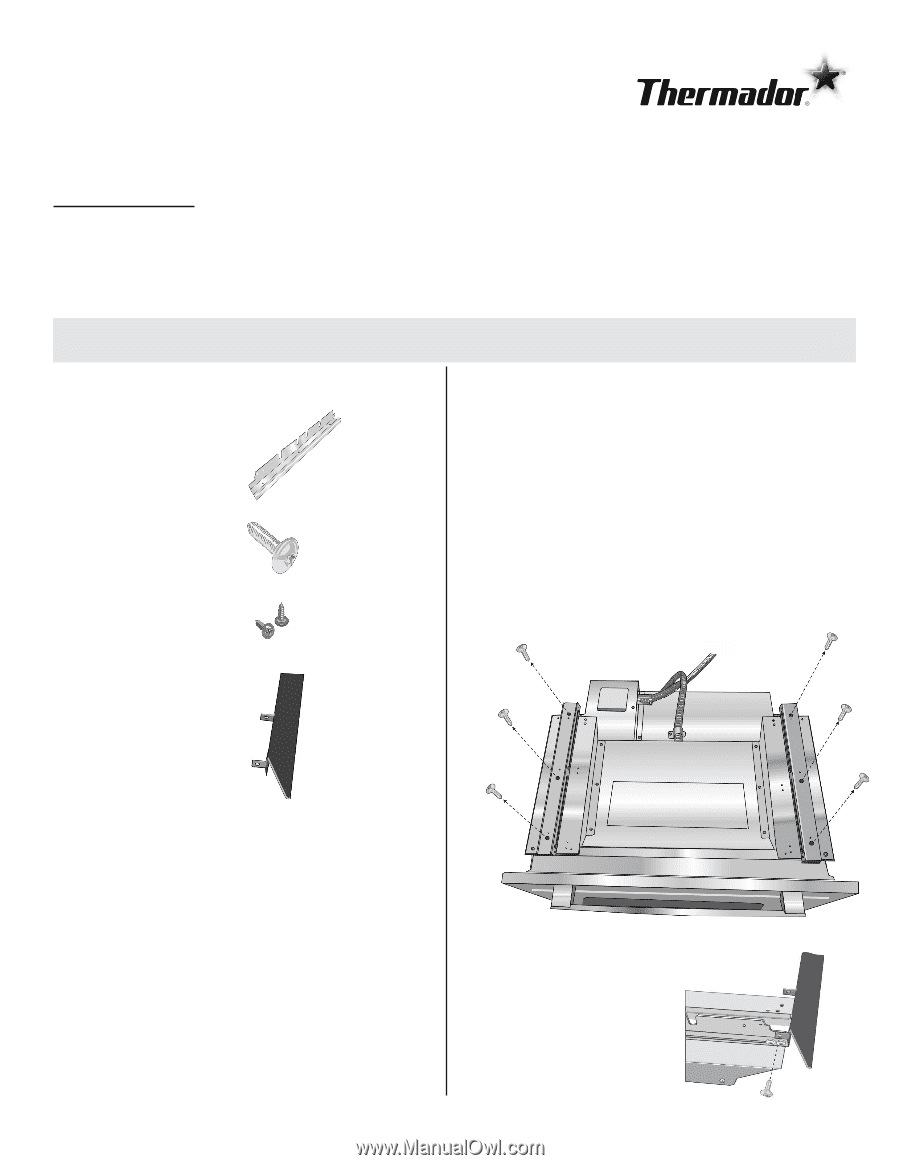
Parts Provided
Universal connector
bracket (2)--in parts box
on top of oven
Screws (16)--in red bag
inside parts box on top
of oven.
Oven Mounting Screws
(8)--screws are included
to secure the oven trim
to the cabinet. The
screws are located in a
small plastic bag affixed
to the literature pack
bag.
Trim Piece--in plastic
bag on top of oven.
Pre-Assembly of the Combination Oven
Combination ovens require the two components to be
assembled prior to installing the combination unit into the
wall cabinet.
Note:
The installation procedures differ between the
microwave and speed oven combination units. The parts
contained in the square tube parts box are common to all
installations.
•
Do not place the oven into the wall cabinet until after
mounting the speed oven on top of the lower oven and
securing it with the universal connector brackets.
•
The universal connector brackets are interchangeable
for the left and right sides of the oven. Be sure the taller
vertical edge of the bracket is positioned to the outside
of the oven.
1.
Install both universal connector brackets on top of the
lower oven using six (6) of the screws provided.
Tighten screws securely, but do not overtighten.
2.
Install decorative trim.
Position the decorative
trim piece so the flanges
with the holes in them
face to the rear of the
oven.